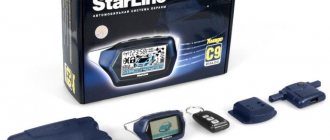
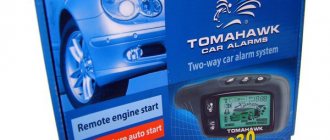
The Starline Twage A9 car alarm is quite old, but is still very popular. Consumers justify their choice with wide functionality and low price.
When purchasing a Starline Twage A9 alarm system, the car owner receives, in addition to the main control unit, a fairly large set of additional elements. The complete set of the device includes:
- central system control processor in a plastic case;
- a signal receiving and transmitting device equipped with a built-in antenna;
- temperature sensor inside the cabin;
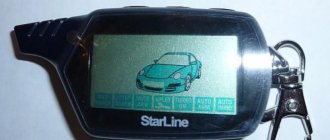
- main control panel in the form of a key fob equipped with a display in a case;
- an additional key fob that does not have a screen and is designed for a shorter remote control distance;
- internal combustion engine temperature sensor;
- shock sensor with two levels of sensitivity;
- LED indicator for visual diagnostics of the alarm system;
- Valet service button;
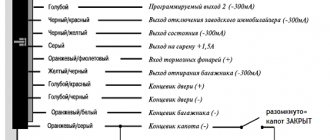
- electrical wiring harnesses;
- button to activate the anti-robbery function;
- limit switches for hood;
- instructions and other technical documentation.
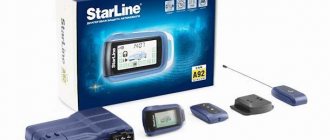
It is possible to purchase and connect additional devices, such as another remote control model W808 with a flip key or auxiliary sensors. How to set the clock on the Starline B9 key fob.
As for the technical parameters of the anti-theft device model StarLine Twage A9, they fully allow for the implementation of both security and service functions declared by the manufacturer:
- frequencies in which key fobs operate - 433.92 MHz;
- range of the main key fob - 600 meters;
- reception radius of the main console pager signal is 1.2 kilometers;
- operating range of the additional remote control is 15 meters;
- the temperature of maintaining the functionality of the key fobs is from -40 to +85 degrees;
- The voltage required for power supply is from 9 to 18 Volts.
It is worth noting that the indicated operating radius of the key fobs is the maximum. It may be shortened if the antenna in the car is installed incorrectly, the weather conditions are not suitable, or something interferes with the radio waves (for example, too dense a building or the location of the transmitter). The parameter is also negatively affected by a gradual decrease in battery charge.
The car owner is required to be especially careful when handling the main unit, since, as you can see from the photo, there is only one printed circuit board with a microprocessor inside.
Mandatory safety precautions when using the di...
Attention
- Image
- Text
ATTENTION !
Mandatory safety precautions for use
functions of remote or automatic engine starting.
It must be remembered that a car is a vehicle of increased danger. Section 12.8. The traffic rules state: “The driver may leave his seat or leave the vehicle if he has taken the necessary measures to prevent the vehicle from moving spontaneously or being used in the absence of the driver.”
Before operating the STARLINE Twage A9 car alarm, carefully read the safety precautions for using the remote or automatic engine start function outlined below. 1. Always park your vehicle in an open, well-ventilated area. 2. Always put the car on the parking brake, which must be in good condition and prevent the car from moving. 3. When leaving the vehicle, be sure to place the automatic transmission control lever in the “PARK” position and the manual transmission shift lever in the neutral position. 4. If your car uses a manual transmission, then before turning on the remote or automatic engine start function, be sure to follow the “soft neutral” procedure for preparing to start the engine. 5. Never start the car engine without the driver present or if anyone is in front of or behind the car. 6. Never give car alarm control key fobs to children or other persons without first reading these instructions. 7. On cars with a manual transmission, it is not recommended to start the engine remotely or automatically if the car is out of sight and the car alarm user is not able to control the engine starting process. 8.
Before you enable the remote or automatic
To start the engine, you must: — make sure that the car is in good condition; — make sure there is a sufficient amount of fuel, oil, coolant, etc.; — set the operating parameters of the interior heater (air conditioner), glass heating and other accessories to the required levels; — set the interior airflow regulator to air circulation, which will allow you to more effectively heat or cool the air in the car.
Alarm setup
After installation, you can start writing software functions using the manufacturer’s manual. To register, use the Valet service button and key fobs. To clear all settings and return to factory settings, also use the service key. To perform part of the function, the car must be opened, while in other cases it must be closed.
How to arm the Starline A9 alarm system
This is only possible if the car’s ignition is turned off and its hood, trunk and doors are closed. The parking brake must also be engaged. The siren will be activated after pressing the first button on the key fob.
The alarm allows you to set the car to silent security mode. In order to turn off the sound of the siren without disabling the alarm, you need to select the icon with the crossed out note with the cursor in the menu and click on it. This will enable silent mode.
How to disarm
You need to press button number one on any of the control panels. Silent shutdown requires clicking the corresponding menu icon with the cursor - the car ceases to be protected completely without sound.
Emergency disarming of the alarm is possible using the Valet key. When the ignition is turned on, without starting the engine, press it four times.
Shock sensor Starline A9
For correct operation, it is important to adjust its sensitivity. To turn on the sensor, you need to use the cursor on the remote control screen to find the icon labeled PASS and press it with the second button. As a result, both levels of the device will work. To disable the first of them, you need to do the same manipulation. Disabling the shockproof gadget completely works in the same way.
How to install autorun
The Starline A9 alarm system has the function of automatically starting a car engine or turbo timer based on an alarm clock, temperature or timer.
You can connect an alarm clock and set it only using the main key fob. To configure this feature:
- enter the alarm clock settings menu by long pressing the button number three;
- press the third key until the alarm icon starts flashing;
- in the lit field for setting the clock, use the first and second keys to set the desired time - the first to increase, and the second to decrease;
- to go to setting the minutes, press the key number three and set them in the same way as the previous indicators;
- go to the alarm clock activation menu by pressing button 3 again;
- turn on with key 1, and turn off with key 2;
- To remember the settings, hold down key three until the beep sounds.
The fact that the alarm clock is turned on is indicated by the presence of an alarm clock icon on the display. To disable auto-start on an alarm clock, you need to briefly press the same key number 3.
In order for the car alarm to work, you must not only set the current time and the alarm time, but also take into account that the system only perceives tens of minutes. That is, with the current time at 9:15 am and the alarm time at 9:20 am, autostart will occur only after 10 minutes, at 9:25.
As for the daily start by timer, its setting is also done through the display of the control panel. In this case, it is possible to set the reheating function every day. For example, if the timer is set to 6 am, then exactly at that hour the next day it will work again. But the repeat mode is automatically disabled if the autostart is unsuccessful. The operating mode is indicated by an icon on the display.
The auto-start mode, based on the readings of the ambient temperature sensor, allows you to select from four values at which the engine turns on: -5, -10, -15 and -20 degrees. Select the desired temperature using the menu displayed on the key fob. The mode operates under the following conditions:
- no more than 12 launches per day;
- the pause between each start should be at least an hour.
If the engine fails to start, the repeat mode is cancelled. The temperature warm-up mode is especially relevant for car models such as VAZ 2112 and 2114 or Toyota Surf 185. Details can be found in the video.
Remote engine start
To start a car with a manual transmission in this way, you must engage program neutral before the main setting.
To activate the remote autostart function, you first need to perform the following steps:
- stopping the car without turning off the engine;
- setting the gear lever to neutral;
- pulling the parking brake lever;
- turning off the ignition and removing the key from the ignition;
While the engine continues to work, within a couple of tens of seconds they get out of the car and by pressing the first button on the control panel they activate the security system. If the turbo timer has not been programmed before, the engine will stop running. The autostart system is installed.
A key fob is used to start the engine remotely. They do this in one of two ways. In the first case, use the cursor to highlight the autostart icon on the display and activate it by pressing button 2. A faster option is to long press button 1.
How to start a car using the Starline A91 key fob
Signs that the automatic winding procedure was successful include:
- melodic sound made by the keychain;
- triple activation of the siren and side headlights;
- additional triple activation of the dimensions and a melodic sound signal from the remote control after starting the engine;
- the corresponding pictogram appears on the LCD display and the time countdown until the end of the internal combustion engine operation.
A total of four consecutive autostarts are allowed. With each subsequent one, the starter cranking time automatically increases. If the engine still does not start, a buzzer is heard and the letters SP appear on the display.
In addition to the standard remote car factory, the car owner can take advantage of such functions as:
- start according to a programmed timer every day;
- plant on a programmable alarm signal;
- Automatic switching on based on outside temperature data.
All of them are described above.
How to increase starter cranking time
The starter cranking time is programmed when the alarm is installed. The first step is to determine the maximum time period during which it will spin. It can be 0.8, 1.2, 1.8 or 3 seconds. Each subsequent attempt will automatically be longer by 0.2 seconds.
Factory reset
Due to problems with the program or incorrect settings, malfunctions of the Starline Twage A9 anti-theft system may occur. In this case, it is recommended to completely reset the functions to factory settings. Why do you need:
- turn on the ignition on the car;
- Press the Valet service button 10 times;
- turn off the ignition and wait for 10 signals from the siren;
- press the Jack key again once;
- After waiting for the siren signal, briefly press button 1 on the key fob.
A sign that the old parameters have been reset will be one short beep. After this, you can disable the settings mode by turning on the ignition and waiting a little. Then you can start introducing new parameters.
Operating and Installation Instructions Thank you for your…
Page 2
- Image
- Text
2
Operating and installation instructions
Thank you for choosing car alarm
StarLine model range with two-way communication
and remote engine start.
Its appearance became possible thanks to the collective
creativity of Russian development engineers,
American specialists in the field of microelectronics
and Taiwanese high-tech manufacturers
automobile security systems.
So that the car alarm system can most effectively
perform their security and service functions,
We recommend that you trust it to be installed on your car.
professional installers.
We hope that the system will not disappoint your expectations,
will give you confidence in the safety of your car
and will significantly increase its comfort
through a variety of service functions.
Revision No. 1 dated 08/01/2004
Photo gallery
Photos of the elements of the Starline A9 anti-theft system are given in this section.
Communicator for signaling control
Microprocessor module Starline A9
Siren of the security complex
Signal antenna adapter
Contents Car alarm operating instructions Comp…
Page 3
- Image
- Text
3
Twage A9
Content
Car alarm operating instructions
Components included in the car alarm kit ……………………………… 4
Technical characteristics of car alarms…………………………………….. 4
Car alarm capabilities …………………………………………………………….. 5
Car alarm control key fobs ………………………………………………….. 7
Car alarm management………………………………………………………………. 16
Protective functions of car alarms ………………………………………………….. 23
Service functions of car alarms …………………………………………………. 27
Starting the engine……………………………………………………………………………….. 35
Recording key fob codes……………………………………………………………………… 41
Programming functions and parameters of car alarm operation………. 42
Instructions for installing car alarms
Recommendations for placement and installation of components …………………………. 45
Recommendations for laying and connecting wires ………………………….. 46
Car alarm connection diagrams ………………………………………………… 50
Timing diagrams of system operation during remote
starting the engine ……………………………………………………………………………… 58
Warranty obligations………………………………………………………………. 59
Specifications
The radio transmitter has an operating frequency of 433.92 MHz.
The communication key fob (equipped with a display) can operate within a radius of 600 m.
The pager receives signals at a distance of 1200 m from the head unit.
The auxiliary control panel has a range of up to 15 m.
A piezoelectric element is used as a type of shock sensor.
The device is intended for active use in the temperature range from -40 to +85°C.
In standby mode, the current consumption is 25 mA.
The power supply voltage at the terminals can be 9-18 V.
The range of the antenna adapter and the main key fob may not be the same. This indicator is influenced by several components:
- building density in the city;
- pager installation location;
- the location of the transmitter and receiver relative to each other;
- car battery voltage indicator;
- presence of power lines;
- weather;
- voltage level of the batteries installed on the switched-on communicator.
Twage a9
Page 7
- Image
- Text
7
Twage A9
Control key fobs
The car alarm performs its functions either automatically or by signals from the key fob when buttons are pressed. Some of the provided functions and some system operating parameters can be changed by programming. The StarLine Twage car alarm has a 3-button control key fob with a liquid crystal display. The purpose of button 1 of the key fob is programmable. The purpose of button 2 of the key fob is selected quickly by moving the cursor on the key fob display using button 3. When executing commands that require reading information from the key fob display, the fluorescent backlight of the display is turned on for a few seconds. When the car alarm executes a key fob command, the corresponding information is displayed on the key fob display and a melodic sound signal is emitted. When the car alarm performs any action, the corresponding information is automatically displayed on the key fob display and is accompanied by sound signals or vibration. If more than one key fob is used to control a car alarm, then the status of the car and the car alarm will be displayed only on the display of the key fob from which the last command was issued. In case of inoperability or loss of the main key fob with two-way communication and LCD display, the system includes an additional 4-button control key fob without feedback. Most of the functions and operating modes of the car alarm can also be activated from this key fob, but further operating instructions are written for the case of using the main key fob with a liquid crystal display.
Malfunctions and repairs of the Starline A9 alarm system
In particular, if the device does not work at all or does not open or close the doors, then the problem may lie in insufficient power. The same applies to the situation when the control panel screen has stopped showing.
If the LED blinks continuously and the letters zzz appear at the bottom of the key fob screen, and the alarm does not allow you to unlock the door or trunk, then most likely the problem is simply that the service mode is turned on. This can be corrected by clicking on the wrench icon on the display - zz will stop lighting and the alarm will work normally.
If the car stalls during autostart and the remote control displays an SP error, then the reason may be either that the settings have gone wrong or that the system (in particular, LEDs) has been installed incorrectly. You can check the first option through software neutral.
Tips for setting the time on the Starline A91 key fob
In addition, the door opening and closing or the shock sensor may not work as expected due to moisture ingress. To eliminate the cause, additional isolation of vulnerable areas is needed.
Purpose of the main key fob buttons
Page 8
- Image
- Text
8
Operating and installation instructions
Button 1
• Programmable command (0.5 sec)
• Remote start and stop of the engine (3 sec) • Activation of the security mode when the engine is running (3 sec) Button 2
• Command corresponding
current cursor position
on the key fob display (0.5 sec) • Unlocking the trunk (3 sec) Button 3
• Controlling the cursor position on the key fob display (0.5 sec)
• Interruption of key fob alert signals (0.5 sec)
• Setting the clock, alarm clock, timer, energy saving mode (3 sec) • Programming button 1 (6 sec) Buttons 1 + 2
• Search mode (0.5 sec) • Panic mode (3 sec)
Buttons 3 + 1
• Select key fob alert mode (0.5 sec)
Buttons 3 + 2
• Quickly set the key fob timer (0.5 sec)
The key fob with LCD display uses an “AAA” 1.5V battery. The operating time of the battery depends on the frequency of use of the key fob, on the frequency of operation of the pager, on the selected alert mode, and on the type of installed battery. The capacities of commercially available batteries may differ several times. Accordingly, the average operating time of one key fob battery can be from 3 to 6 months. When the battery is low, the icon appears on the display
BAT
, which speaks about
need to replace the key fob battery. Replacing the key fob battery should be done in the following order: 1. Open the cover on the back of the key fob and remove the old battery. 2. Briefly press button 1 of the key fob. 3. Install the new battery, observing the correct polarity, and close the cover.
(The correct position of the battery is indicated on the key fob body under the cover). 4. After replacing the battery, adjust the clock and alarm readings. Re-programming of button 1 of the key fob is not required.
Purpose of the main key fob buttons
Button 1 Button 2 Button 3
Replacing Starline A9 with A93
A replacement is only relevant if the first one has stopped working correctly. Especially when it comes to sensors - the fact is that the A9 is no longer produced, so not all parts can be found on sale and most of those on sale have already been used. Replacing with the A93 allows you to acquire one of the newest models in the line, which at the same time retains the best features of its predecessor.
Twage a9, Purpose of additional key fob buttons
Page 9
- Image
- Text
9
Twage A9
Purpose of the additional key fob buttons
Button 1
• Turning the security mode on and off (0.5 sec)
• Control channel No. 3 (3 sec) Button 2
• Starting and stopping the engine (0.5 sec)
• Extending the engine operating time (3 sec) • Activating the security mode when the engine is running (3 sec) Button 3
• Search mode (0.5 sec)
• Unlocking the trunk - channel No. 1 (3 sec) Button 4
• Silent switching on and off
security mode (0.5 sec) • Control channel No. 2 (3 sec) Buttons 1 + 2
• Panic mode (0.5 sec)
Buttons 1 + 3
• Disable shock sensor (0.5 or 3 sec)
Buttons 1 + 4
• Activate service mode (0.5 or 3 sec)
Buttons 2 + 3
• Activate trigger mode temperature (0.5 or 3 sec)
Buttons 2 + 4
• Activate the daily automatic start mode (0.5 or 3 sec)
Buttons 3 + 4
• Activate the anti-theft mode (0.5 or 3 sec)
• Recording a key fob in programming mode (3 sec)
The four-button key fob without feedback uses a CR2032, 3V lithium battery. The operating time of one battery depends on the frequency of use of the key fob and the type of element installed. When the battery is discharged, it must be replaced. Replacing the battery should be done in the following order: 1. Unscrew the screw on the bottom cover of the key fob and open the cover. 2. Remove the old battery and install a new one in its place, observing the polarity. 3. Close the key fob cover and tighten the fastening screw.
2
4
3
1
Alarm programming
The process begins after connecting all elements of the device.
- The first step is to turn on the vehicle's ignition.
- Next, press the Valet service key six times.
- Turn off the ignition again and wait for six siren signals and six blinks of the dashboard LEDs, which will mark the system’s readiness to begin programming.
- All functions are selected through the service button - the number of clicks on it is equal to the number of the desired function. All numbers can be found in the manual table. For each successful press, the siren and LED are activated. The fifth press is indicated by a prolonged siren beep.
- Within ten seconds, press the first or second buttons on the key fob, depending on the programmable function. Each successful press is indicated by a light and sound alarm.
- The values of all functions are recorded sequentially - they proceed to programming the next one only after setting the previous one.
In order for the firmware to remember all the settings, you need to exit the service mode and restart the program. Why turn off the ignition, after which the system exits it automatically after a minute of inactivity. If the exit is successful, the alarm will flash five times.
Returning to neutral is possible by resetting all settings to factory settings.