Disassembling the headlight may be necessary for cleaning, replacing a broken internal element, painting the inside, or installing additional components (for example, angel eyes, LED strips). For most car enthusiasts, the thought of disassembling a headlight can be intimidating. However, this process is not too difficult if you study the information first and do everything correctly. In this article we will figure out how to disassemble the headlight. Most modern headlights have an adhesive connection between the headlight housing and its lens (the transparent part of the headlight). Let's look at ways to disconnect this connection, their advantages and disadvantages, as well as restoring the tightness when putting the headlight back together.
Recommendations
Comments 40
Heat it in the oven, and the glue that holds the reflector comes off and can be separated with a little effort, but I can’t tell you the time and temperature.
Break it, and put a new one on the sealant, everything is good!
Give Andrey Chemaev all the ingredients, he will do a full service for your headlights, they will be as good as new.
Someone seemed to boil them and the glass fell out on its own.
Saw SHURA it is Golden.
In order to preserve the glass, I cut the reflector with a grinder, retreating about 1 cm from the edge of the glass, but I didn’t have time to cut halfway - the glass fell out on its own, and so on both headlights.
thanks for the advice, if a hairdryer doesn’t work, I’ll try that
When I was painting the lenses, I peeled back the iron edging of the headlight and then used a utility knife to cut the sealant in a circle. And carefully cut it with a knife
when I started to bend it on the new Russian headlight, the glass began to crack
It turned out strange for me. In general, go for it, the main thing is not to be afraid and not to think about the bad! Try pouring solvent onto the sealant, it may peel off and then come off
when I started to bend it on the new Russian headlight, the glass began to crack
What if you pour solvent inside the headlight and leave it for another hour?!
What if you pour solvent inside the headlight and leave it for another hour?!
won't the reflector eat it?
Will devour. So he needs to remove the current glass from there
oh, that’s right) something I’m not paying attention to)
warm it up evenly with a hairdryer, be sure to wear gloves so that the glass does not crack, be sure to warm it up evenly and slowly, after a good warm-up, try to carefully pick up the glass with a scalpel, if it doesn’t help, apply brake fluid along the contour and leave it for a couple of days, then repeat the operation.
oh, special thanks for the brake, I'll try it
But in general, maybe there are small L-shaped scalpels in nature, or what are some sales devices to get under the edging? Or is it easier to do this “sharpening” yourself? I also can’t imagine how to get there with a knife.
that was also the idea
But in general, maybe there are small L-shaped scalpels in nature, or what are some sales devices to get under the edging? Or is it easier to do this “sharpening” yourself? I also can’t imagine how to get there with a knife.
Similar L-shaped crap is available in kits for removing glued glass (windshields, etc.)
there's a healthy one, I need a miniature one
you can try making an engine/gearbox dipstick by sharpening and bending the end, they are quite rigid and elastic at the same time (which are made from a strip of metal)
ooooh, good idea! collective intelligence is a good thing.
With collective wisdom, if everyone works hard, they can build a new Mars rover in a couple of months, to the envy of NASA)))
With a hammer New glass costs 50 rubles
All the same, in the process of “carefully peeling off” you will crack or break
The result is the same, but with a hammer it’s faster
Excellent advice to a person who bought headlights for the glass)
Well then, on the contrary, cut off the reflector with a grinder)
With a hammer New glass costs 50 rubles
All the same, in the process of “carefully peeling off” you will crack or break
The result is the same, but with a hammer it’s faster
you completely fell from grace, he bought these glasses for 8000 rubles
well, in vain. On Avito nearby, in Elektrostal, there were new headlights for that money for two months, until I was ready to buy them.
If I'm not mistaken, on old cars the windows were glued with BF type glue, and when it hardened, it became like glass. Can use a drill with a cutter to carefully cut along the glue
Using an engraver, cut off the “rolling” and “cut off” the glass with a stationery knife.
Source: www.drive2.com
how to peel off headlight glass from sealant
#1 OFFLINE baiker022
- Mersovody
- Messages: 700
- Saratov city
- Car: w124 230 1987 102 engine
I want to remove the glass from the headlight in order to restore the coating on the frame, but it sits on the sealant, but it does not respond to some persuasion and actions, please tell me an effective way
Opel corsa joy 1996 1.4 – sold
Hyundai accent 2007 AT5 – sold
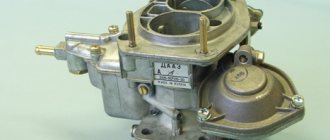
Mercedes w124 E230 102 engine 1987 kejetronic carburetor for 151d under restoration
Start of purchasing spare parts for the transition to January.
VAZ 2106 2002, my temporary podzhopnik – sold
Looking for cloths for the front seats of w 124 with trim code 071
#2 OFFLINE Leonidych
Spare parts and repairs.
- Moscow city
- Car: Mercedes-Benz
no way, or when removing the frame or glass, only broken glass can be separated from the frame
Post edited by Leonidych: December 23, 2010 – 20:40
W124-200D OM601 -1992 was the first.
W124-E250D-1995 is a faithful and reliable friend.
W140-CL500-1998 favorite toy. Repair/spare parts – telephone number 89ОЗ7O8Ч2ОО
#3 OFFLINE archik
- City: M.O. Leninsky district
- Car: w124
I just poured hot water from the tap for about 10 minutes, and then the glass came off easily =))))
W124 300E 86G. 103 2.6l automatic transmission W203 C200 01. M111 2l automatic transmission
#4 OFFLINE highlander
- City: Moscow SEAD Karacharovo
- Car: W124 230E 5 manual transmission 1986
I just poured hot water from the tap for about 10 minutes, and then the glass came off easily =))))
W124 320 (104) manual transmission 86g former 230 (102) - sold. MB Vito 638 (111) 97 manual transmission
#5 OFFLINE new
- City: Vologda
Warm it up with a hairdryer, it should turn out to be neat all over the glass. The main thing is not to rush. I did it myself, it worked
How to disassemble a headlight
In our profession we often have to disassemble car headlights. There may be several reasons for disassembling the headlights: - To eliminate fogging of the headlights. — To clean the headlights from the inside. — Polish the inside of the headlight glass. — For cleaning standard lenses. — To replace standard lenses with new ones, for example, with Optima Bi-Led Professional 3.0 LED modules or with non-original lenses. — For installing xenon or LED lenses in a reflector headlight. — And finally, for headlight repair or tuning.
Important! Before disassembling the headlight, you need to determine the type of glass fastening: - Thermally dismountable headlights (headlights whose glass can be separated by heating the sealant). — Conditionally non-removable headlights on polyurethane (in this case, the headlight glasses “sit” on a polyurethane sealant. Simply heating the headlights will not help here, but we will write about disassembling such headlights a little lower.) — On latches . On some cars, the headlight lenses are held in place with latches without the use of sealant. Taking these headlights apart is the easiest task.
Description of lenses
The lens is the most favorable component for installing a gas discharge lamp. The internal device allows you to accurately collect the light flux and direct it to the right place, providing a clear cut-off line and a clearly defined daw.
Lenses are divided into:
The bi-xenon version comes with a special built-in curtain that covers the light flux in low beams and opens completely in high beams. Thus, one lens is sufficient for installation in a headlight with one module. Classic components are responsible only for high or low beam and are not equipped with a curtain.
disassembling and assembling headlights using thermosealant and rubber glue
Good day, dear motorists! =) Today I will tell you how to independently disassemble the optics of a car to install various devices without damaging it. So, in order to do something, I will make it absolutely clear
1. To dismantle/install the headlight in most cases, you will have to remove the bumper. I won’t tell you how to remove the bumper on each individual car. I can only say that for most cars this operation is standard. You don't have to remove the bumper completely. To do this, you need to unscrew the fasteners from the top in the front (usually under the decorative radiator grille), from the sides (there are fasteners under the lockers that secure the bumper to the wings).
2. Absolutely all headlights have 2 main parts: transparent glass (plastic) and a body (base). All reflectors, fasteners and headlight range control are installed in the housing. The main thing: the glass is placed in a U-shaped horizontal profile, along the entire perimeter. Basically, it is held in place by sealant and latches, but sometimes there are a couple of small screws. After dismantling, carefully inspect the headlight for their presence.
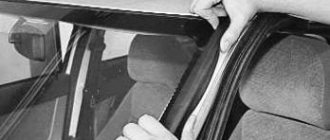
3. All headlights are sealed in two ways: with heat sealant and with rubber glue. It is very simple to find out how the sealing was done; just take a thin flat screwdriver and insert it into the outer joint of the transparent plastic and the headlight housing, and bend it a little. If the headlight is sealed with heat sealant, you will see how this sealant stretches (from dark to light), staining the screwdriver (it can be easily wiped off with solvent). If the screwdriver does not get dirty, and the edge of the socket comes away from the transparent plastic with great force, then it is rubber glue.
4. Disassembling the headlight. Disassembling optics on thermosealant.
Carefully inspect the optics from the rear. See additional fastening the glass to the body - screws. If there are any, unscrew them (usually there are 4, 5 or 6, depending on the manufacturer).
5. You will need a hair dryer. Prepare both headlights for disassembly (see point 4). Turn on the hair dryer at maximum temperature. Place the optic on the back so that the glass is on top. Start heating around the perimeter of where the glass meets the body. We heat it like this for 6-8 minutes. In a circle, moving slowly. Transparent plastic is very durable and heat-resistant, it is difficult to damage it due to temperature (unless you specifically start heating it in one place). When the required time has passed, put the hair dryer aside (remember that its nozzle is metal and very hot, so be careful where and how you put it away). Carefully release the latches. Using a large minus screwdriver, begin to move the glass away from the housing, inserting the screwdriver into the gap between the plastic glass and the headlight housing. If the sealant is heated well, the glass gives in without much effort and comes out with a U-shaped profile. At this moment, the warm sealant stretches, forming fibers. Carefully cut them with a knife. If sealant gets on the reflector, do not rub it immediately. Let it cool, the cold sealant will not smear and can be easily removed. ===================================================== ===================================================== ==============
4.1. Disassembling the headlight using rubber glue. This type of headlight is a different story. To disassemble such optics you need patience and more patience.
We inspect the optics from the rear; if there are screws that secure the glass to the body, we unscrew it.
4.1.2 Take a thin flat screwdriver, 10-15 cm long. 4-5 mm wide.
5.1. We warm up the optics according to point 5.
First we heat it for 6-8 minutes in a circle. This will soften the rubber cement and plastic. Next, we heat sections 7-10 cm long. For each section, 30-50 seconds of intense heating (do not overheat the base plastic, it will become very soft, you will have to wait for it to cool). Immediately after warming up the area, insert a screwdriver into the gap between the base and the transparent glass, begin to bend the edge, simultaneously tearing off the glue (heated glue usually easily comes off one of the surfaces when we bend the edge). We perform this operation as many times as necessary to open the entire perimeter. After this, the headlight will not come apart yet, since it now holds the glue on the inside of the U-shaped profile. In order to completely demotivate the glass, it is necessary to warm up the optics in a circle again for 6-8 minutes. Then, locally, heat 10-12 cm areas for 30-40 seconds. And insert a screwdriver through the bent upper edge of the base (housing) of the headlight, under the plastic glass, between the glass and the lower edge of the headlight housing. Move the inserted screwdriver until the glue cools (usually 3-7 cm at a time). Tape especially carefully at corners. In the process of disassembling the optics, minor cosmetic defects in the edges of the headlight housing are inevitable: when we heat the outer part of the U-shaped profile, we bend it around the entire perimeter. The edge is deformed and becomes wavy. To correct this defect, after removing the glass on both headlights:
Replacement timing and choice of optics
In addition to the difficulties described above, which are familiar to motorists who drive long distances, there are more banal reasons related to the depreciation of the headlight itself. This mechanism does not have a specific shelf life, but the lamps “burn out” over time, and the reflector material and diffuser become unusable.
The last two elements have a shelf life directly related to the material from which they are made and the methods of car care. At the same time, even the best of them are still susceptible to the ingress of dirt associated with depressurization of the headlight structure.
IMPORTANT! If you have working headlights, but you still can’t see anything, visit a good car service center that has a light debugging stand. It may just be necessary to clean the structure and adjust it.
The choice of headlights is extremely important for the convenience of the motorist. To be more precise, it is not the manufacturer itself that is important (although it affects the characteristics of the light), but the identity of the lighting fixtures. If your car has standard headlights, but you decide to replace only one, then find the original ones. You should not take AUTO SVET or BOSCH, which are similar in appearance.
Choice of optics
From a technical point of view, the headlights will be the same, but the manufacturing technology of the optics differs from one company to another, and as a result, you will get two distinctly different headlights. Even if you don't care about the appearance of the car, don't forget about the properties of your eyes.
Human vision and the brain have a number of characteristics, and in this case they will manifest themselves in the fact that a more powerful headlight will create a “twilight zone” instead of a dimmer light. Consequently, there will be no improvement in visibility, and the brain will perceive the “blind spot” almost the same way if it did not exist at all.
Methods for removing headlight glass
#1 Mad_dog
#2 Niko
Message modified: Niko, February 16, 2010 – 15:33. Clarification
#3 WAZ
Mad_dog, I did this in BMW headlights.
I put them in a regular oven and kept them at 130 degrees for 10 minutes, then the sealant softened and I took out the glass (it didn’t matter to me in principle, I just had to save it until the car market to show it and buy a new one. But at the car market it burst into small particles , as it turned out, overheated it.
Therefore, you either buy new glass (and remove the old one using a remover) or heat it for more than 15 minutes. at a temperature of no more than 100 degrees, and they mess around with digging out the sealant.
#4 Mad_dog
#5 Mad_dog
#6 WAZ
One friend said, you, he says, put it in the freezer
The only option is to heat it in the oven, the main thing is not to overheat the glass! (at least it’s not plastic?)
Or boil it in boiling water)) but I was unable to soften the sealant this way.
Added after 33 seconds You can still use a hairdryer. But I haven't tried this option.
#7 Mad_dog
#8 Mad_dog
#9 Niko
What a “dirty” method, but what kind of G2 headlights are these? You can see them with one eye (link to them or photo here).
Another option is to take a screwdriver, select a tip so that it fits clearly between the glass and the side of the headlight, heat the tip over a fire and slowly pick at it. And so on many, many times until all the sealant is removed.
There are a lot of you Kievites, if anyone has a DREMEL, there are small attachments in the kit that can be used to clean out all the sealant in half an hour without damaging anything. These are the attachments to work with.
Message modified: Niko, February 19, 2010 – 17:57. Clarification
#10 Mad_dog
Niko, ok I removed the fastenings, here is the reflector itself and the glass. As you can see, the glass is flush there, you can’t do without heating, it’s unlikely that cutters will help
Added after 21 minutes By the way, you will also need to cut off the saucepan.
What is needed for installation work
To install bi-xenon and classic lenses, you will need to complete the following steps:
- Remove the headlights from the car. This may require a special tool.
- Warm up the light fixtures with a hairdryer, disassemble the module and remove the old sealant.
- Remove the halogen lamp from the reflector and unscrew all fasteners.
- Place the lens into the hole that appears and secure it with the retaining ring on the reverse side.
Installation of lenses in the headlight is carried out in accordance with the side position indicators. Otherwise, the “daw” will be turned the other way around and the beam will shine incorrectly. After installation, you will need to install ignition units in the engine compartment and connect the wires.