Why do you need to make podiums for speakers in a car with your own hands? There are several answers to this question. A podium for dynamic drivers is needed when the car owner plans to change the configuration of the speaker systems. This may include increasing the number of speakers or installing new, more powerful devices that are too large to fit into the old footprint. In addition, by making a podium for the speakers with your own hands, you can choose any direction of the sound flow of the speaker. It can be aimed forward, upward or towards rear seat passengers.
Installation structures for loudspeakers are divided into internal and external. The internal seat is located on the door, front panel or ceiling of the cabin. External podiums are designed to accommodate high-power speakers and have a heavier construction. Speaker mounting locations must meet certain requirements. Structural elements should not impede the free circulation of air inside the acoustic space, otherwise this will create interference when reproducing low frequencies. There should be no “tunnel” in front of the diffuser, which significantly worsens the sound quality.
How to make podiums for speakers with your own hands
Acoustic structures in the car interior perform several functions at once:
- Change the interior style
- Increases the quality of acoustics
- Allows for placement of non-standard loudspeakers
You can make a podium for a speaker with your own hands using different technologies, using easy-to-process materials. To do this work at home, the easiest way is to use multi-layer plywood or other pressed materials made from wood waste. Simple designs for repeating at home can be made from the following components:
- Multilayer plywood
- Metallic profile
- Nylon fabric
- Epoxy resin
- Decorative leather
- Acoustic fabric or mesh
Skeleton decoration
- The fixed rings must be covered with thick fabric. Secure the fabric around the perimeter with a stapler. You can put a small object inside the cut out ring. It is important to stretch the fabric well, which will give the entire structure greater strength later. You can treat the places where the fabric and rings come into contact with Super Glue, which will also have a positive effect on strength;
- saturate the fabric with polyester resin. Please note that the resin only reacts with the hardener after a few minutes. Be sure to follow the proportions. Leave the cards for several hours for the resin to dry;
- After drying, mix a new portion of resin. After pre-wetting the surface of the podium, apply glass mat around the perimeter. The places where the podiums meet the door frame must be sanded. Fiberglass mat, like fiberglass, must be smoothed with a brush. Make sure that there are no air bubbles left on the surface;
- For strength, place one layer of dense glass mat on each side. Wait for each layer to dry completely;
- clean off the lumps of dried resin with sandpaper;
- lay another layer of fiberglass with a density of 150 grams/sq. m. And then another layer with a density of 600 grams/sq. m.
DIY podiums for 13 speakers
Speakers of this size are usually located in the front of the cabin. The basis of the structure is 10 mm plywood. It’s good if there is impregnated material. Such plywood will not delaminate, and the podium will last a long time. First, installation rings of the appropriate diameter and a base are cut out of multi-layer plywood using a jigsaw. Two rings form a hollow cylinder, which will be the seat for the loudspeaker. The rings and the base are not connected coaxially, but so that the speaker system diffuser is directed in the required direction. This is achieved by shifting the vertical guides to the desired angle.
The guides are cut out of the same plywood and fixed with self-tapping screws. To make the connection more durable, a little epoxy resin is added to the connection point. Then the hollow structure must be filled with polyurethane foam. Thick paper rolled into a tube is placed at the speaker installation location. After the polyurethane foam has completely dried, the paper is removed, and the structure is processed with a sharp knife and sandpaper to give it the desired shape. Leatherette is used as a decorative covering. Its color is chosen taking into account the design of the car's interior. The artificial leather covering is glued with glue 88. This work should be done very carefully, since secondary gluing leads to a deterioration in the appearance of the structure. A loudspeaker of this diameter has low power, so no special fastening is required to secure the podium to the installation site.
Modern fashion for car audio
Today, most modern vehicles come with standard speakers. However, lovers of loud music in cars are often not satisfied with their sound, so they buy larger speakers. In this case, a different kind of problem arises - how to install large-sized equipment in the cabin so that, on the one hand, it does not disturb passengers, and on the other hand, to create truly clear sound?
One of the common ways to solve the problem is to make podiums for speakers. They can not only improve sound quality, but also take the performance of the speaker system to a whole new level.
DIY podiums for 16 speakers
16 cm loudspeakers can be included in an acoustic system design consisting of two active elements. Podiums for such acoustics are usually installed on the doors of the car. To make podiums for 16 cm speakers with your own hands, you will need multilayer plywood, fiberglass, polyurethane foam and epoxy resin. The technology itself is quite simple, but it will require time to dry the layers of fabric after impregnation with epoxy resin. First, all the elements of the future acoustic system are cut out of multilayer plywood. These are the base, rings for installing speakers and vertical connections. The structure is then assembled into a single whole. Wooden blocks or metal fastening profiles can be used as vertical elements.
Next, the entire structure is filled with polyurethane foam, with the exception of places for installing loudspeakers. Then everything unnecessary is removed from the podium, and its surface is treated with fine sandpaper. For strength, a thin layer of epoxy resin with a hardener is applied to the surface and rubbed into the pores of the mounting foam. This procedure can be repeated several times. The finished podium is finally sanded over a layer of resin. The finished product is finished using artificial leather.
You can make podiums for speakers in doors yourself using another technology. After the frame for installing the speakers is made, the entire structure is covered with thin fabric, which is impregnated with polyester varnish or resin. After complete drying, a thin layer of epoxy resin and fiberglass is applied to the workpiece.
There should be at least three layers of fiberglass with epoxy resin. After the future podium has completely dried, a layer of fiberglass putty is applied to the structure. All excess is cut off, and the surface is brought to condition using coarse and fine sandpaper. To finish the finished product, you can use leatherette or several layers of enamel, which is matched to the tone of the interior trim. Using this technology, you can make podiums for speakers with your own hands for one, two or three speakers.
Where to put the acoustic podium
There are 2 ways to install an acoustic podium: monolithic and framed. Let's consider their features.
A monolithic podium is made using the “wet” method: a cement or concrete screed is constructed over the entire surface of the podium. The frame podium is a frame covered with two layers of plywood.
The advantages of the monolithic method are obvious: the result is a reliable, moisture-resistant podium. This podium is very easy to make and decorate. The disadvantage of a monolithic podium is that it creates too much load and it is impossible to hide communications in it.
The frame podium, on the contrary, is very light and multifunctional. You can even install drawers in it. Since the frame podium is empty inside, there is a need to isolate sound. Therefore, mineral wool or polyethylene must be placed under all supports and between the sheathing. There should be a small gap between the frame podium and the wall to allow the material to expand. And between the wall and the monolithic podium there should be a thick tape to prevent the possibility of concrete cracking.
Preparing to install an acoustic podium
To make an acoustic podium yourself, you don’t need any special skills - you just need to have the desire and be careful. The materials needed to create a podium can be purchased at any hardware store for a very affordable price. An important point is to accurately take measurements and determine the location of the future podium:
- For greater convenience, you need to remove the door panel. If it has a speaker, that should also be removed. The size of the future podium depends on the number of speakers and their sizes, as well as on the area of free space on the door panel.
- Make a template for the podium base from cardboard directly on the door panel, which will later be transferred to the plywood
- Cut a ring (from the same cardboard) to fit the size of the speaker
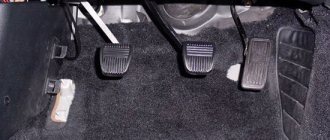
- To accurately determine the final height of the podium, you need to take into account that it does not protrude too much, otherwise it will interfere with the legs of the passengers sitting in front. A large podium makes it possible to install large speakers. The main thing is that it is comfortable and does not spoil the main interior of the car.
- If you want to slightly “recess” the speaker into the podium, make a frame from plywood and glue it along the contour to the main platform
- The correctly chosen design of the future acoustic podium is very important: it improves and makes the overall interior stylish.
DIY podiums for speakers under 20
The speakers with a diameter of 20 cm are large in size and have decent power. Such speaker systems are usually installed on the trunk shelf. In order to make podiums for 20 speakers with your own hands, you need to use thick plywood. First, a base is cut out of it according to the size of the seat. The thickness of the material should be as thick as possible, since high-power speakers and the mounting board can resonate at high power. Rings for acoustics and vertical posts are cut out of the same plywood to provide the necessary tilt.
The loudspeaker mounting areas are covered with thin nylon fabric and impregnated with varnish. The top part is cut out and removed. A layer of epoxy resin and fiberglass is applied to the hardened surface. After applying 3-4 layers and completely drying, the surface is cleaned and sanded. You can cover the finished shelf with any decorative material, upholstery fabric or artificial leather. Some car owners install speaker systems on the ceiling of the car interior. It is not difficult to make podiums for ceiling installation according to the described schemes.
What should a podium look like?
As follows from the above, the podium for the midrange or midbass is not a simple decorative element, but a necessary component of the audio system that affects the sound quality. To effectively perform its task—damping unnecessary vibrations—the podium must be heavy. The heavier the better.
In order for a part to be heavy, it must be made of the appropriate material. But in practice, plywood is most often used, since it is easy to process at home.
Did you know that archaeologists discovered the first archaeological artifact made from a material reminiscent of modern plywood in the territory of Ancient Egypt. The plywood casket dates back to the 15th-16th centuries BC. e.
Plywood is a relatively light material. To increase weight, podiums are made as large as possible. Of course, taking into account the features of the car interior.
When determining dimensions, they focus not only on sound quality, but also make sure that the additional element does not interfere with the operation of the main devices. For example, a speaker installed in a door should not interfere with the use of handles.
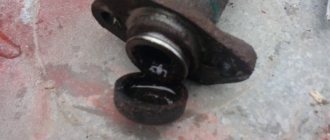
The speaker podium should not be attached to the casing, only to rigid metal elements. Firstly, a weak base does not help dampen vibrations. Secondly, it will not withstand a heavy podium with a speaker.
Internal podium
There are internal and external podiums. The first ones are installed when they want to maintain the factory appearance without changes. For example, when they change a standard speaker to a diffuser that is similar in diameter.
The internal podium is entirely hidden in the internal cavity of the door or ceiling under the trim, which must fit tightly to the speaker. Otherwise, distortion is possible, as the speaker will “play under the casing.”
The outer casing should fit snugly around the speaker mounted on the inner podium
Table: advantages and disadvantages of internal podiums
| Advantages | Flaws |
|
|
External podium
An external or external podium allows you to install any speaker larger or smaller than stock. In addition, the head can be placed either parallel to the plane of the door or at an angle, directed towards the listener. An additional advantage of the external podium is that it presses the skin tightly, reducing vibration.
Table: advantages and disadvantages of external podiums
| Advantages | Flaws |
|
|
The external podium is not just a stand, but a single structure. Its components must be adjusted and fastened tightly, without gaps or cracks. This ensures maximum structural rigidity and prevents sound from escaping under the skin.
The podium components must fit together without gaps or gaps.
Acoustic design elements, including the podium, should not impede the free movement of air through the windows of the speaker basket. Interference may degrade bass performance.
The podium components must not obstruct air flow through the speaker basket windows
When the speaker is deeply recessed into the podium, the diffuser operates through a tunnel, which significantly affects the sound quality with a depth of only 1 cm.
The podium parts should not form a tunnel in front of the diffuser
The sound quality is also worsened by the tunnel being too long on the magnet side of the speaker. It is better to avoid such a design, but if it is necessary, make the opening as wide as possible.
The tunnel on the rear side of the speaker degrades the sound quality
A special feature of external podiums is the need for decorative finishing. If the internal one is hidden under the casing, then the external one is always visible. It should not spoil the appearance.
This problem is usually solved by covering and covering the finished podium with natural or artificial leather. In some cases, when the podium is quite high, before covering it is necessary to sew the cover to the shape of the base, since the material allows tension only within certain limits.
Another method of decorative finishing is painting in a suitable color after puttying and thoroughly cleaning the surface.
Tweeters do not develop much power and are less susceptible to vibration. Therefore, podiums for them are more decorative stands than elements of acoustic design. They are made in the form of overlays on the side pillars or built into the pillar trim panels, oriented, according to the subjective sensations of the listeners, approximately to the center of the cabin.
Adapter podiums from round seats to oval speakers are not fundamentally different from conventional external speakers. The only difficulty is to develop a drawing and install the head in compliance with the requirements stated above.