Modern Lada model
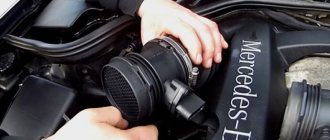
Like any modern foreign car, the Lada Priora has many different sensors installed. The condition of important vehicle systems depends on their correct operation. The problem is that if some sensors fail, the Priora can continue to move. Faults of this kind can lead to increased fuel consumption, unstable engine operation, and increased wear of parts, but the car will drive, and you will only find out about the fault when it means you have to make expensive repairs.
In order not to go into the engine compartment with a multimeter, the Priora has a controller that allows you to check faults using a special tester, a plug-in or built-in on-board computer. In order to diagnose the systems, just press 2 buttons and look at the error codes.
Diagnostics using the built-in BC
To view the error codes, you need to find the daily mileage reset button on the dashboard, press it and, holding it, turn the ignition key. The self-diagnosis mode will turn on. All arrows on the instruments should move from minimum to maximum values and back, and all positions on the LCD display should light up. You need to look: if any position does not light up or the arrow on any device does not move, then you should check the corresponding sensors, their networks or display for malfunctions.
Priora on-board computer
In the same mode, press any button for switching modes of the built-in BC 2 times, after which digital codes may appear on the liquid crystal display:
- 2 - very strong voltage in the BS;
- 3 - errors in the fuel level sensor system in the gas tank;
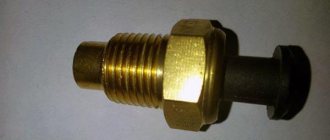
- 4 - error in the coolant temperature sensor system;
- 5 - error in the air temperature sensor system outside the car;
- 6 — motor overheating;
- 7 — emergency low oil pressure;
- 8 - malfunctions in the brake system;
- 9 - battery is low;
- E - error in the data packet stored in the EEPROM.
Many drivers ask how to reset error codes on a Lada Priora. Perhaps their built-in BC is faulty, since a working on-board computer automatically exits the diagnostic mode after 30 seconds if you do not press any control buttons.
What does code P0562 mean?
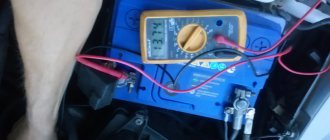
The vehicle's electrical network includes the charging system, which is responsible for maintaining the battery's charge as well as supplying power to the vehicle's electrical system while the engine is running.
On a 12-volt circuit, a fully charged battery should produce a voltage of 12.6 volts or higher, and the voltage should be between 13.7 and 14.7 volts when the engine is running.
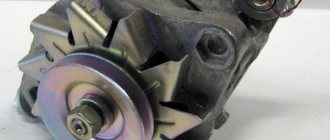
The alternator charges the battery and powers the vehicle's electrical system. If the alternator does not produce the required voltage, the battery's charge is depleted and there is not enough power to operate the vehicle's electrical appliances.
The engine control unit (ECU), and possibly other control units, will set a fault code indicating low voltage. Depending on your vehicle model, the low voltage warning or battery light may come on.
Code P0562 is a Type C trouble code that sets in the ECU after only one failure event, although it does not illuminate the Malfunction Indicator Lamp (MIL) or Check Engine Light.
In most vehicles, the DTC will set when the voltage is less than 11 volts for 15 seconds, and in some cases the DTC will set immediately if the voltage is less than 10 volts.
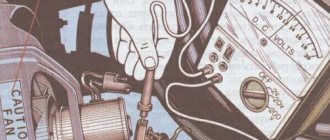
Checking using a connected computer or tester
Driver Information Panel
Checking system malfunctions using connected devices gives more accurate results, but at the same time requires deciphering special codes. For example, the monitor displays code p0441 or p0130 or error p0422. Oh, these car manufacturers, in human language they could write “replace the oxygen sensor” instead of P0130 or “check the canister valve” instead of P0441. But nothing can be done, the Lada Priora is also intended for export, so it is easier to write p0441 in the program than to give explanations in Russian, Kazakh, Arabic, Armenian and 10 other languages. And then attach special tables that indicate the meaning of certain codes. Just look at them and everything will become clear. But these tables are not included with the operating instructions. Either way, you can check them out below.
All fault codes for Lada Priora car systems consist of 5 characters. Here is a breakdown of Prior's errors.
The Latin letter comes first:
- P - error in the electronic systems of the motor;
- C - error in the electronic systems of the chassis;
- B - error in interior electronics;
- U is an error in the joint operation of different systems.
Next comes the number:
- 0 - OBD-2 code;
- 1 - enterprise code;
- 2 - enterprise code;
- 3 - reserve code.
The system indicates an error
The next digit indicates the system in which the malfunction was found:
- 0 — exhaust;
- 1, 2 — fuel and air supply system;
- 3 - ignition;
- 4 - additional control;
- 5 — idle system;
- 6 - ESC;
- 7, 8 - transmission.
The last 2 digits indicate the serial number of the fault.
Error P0562 - System voltage (on-board network) - low
Error P0562 - low voltage on-board network.
Code P0562 is a generic trouble code and applies to all vehicle models since 2000. This is a common error code and we have collected all the information to answer your questions on how to fix it in the fastest and cheapest way.
| Error code | Location of damage | Probable Causes |
| P0562 | Low voltage on-board network | Wiring, bad connections, battery, alternator |
Deciphering faults in the fuel and air systems
- P0030 - the oxygen sensor heater wire to the exhaust gas converter has broken;
- P0031 - the same electrical wire has shorted to ground;
- P0032 - the same wire has shorted to the on-board network (BS);
- P0036 - the wiring of the oxygen sensor heater is broken, after the converter;
- P0037 - the same wiring has shorted to ground;
- P0038 - it has shorted to BS;
- P0102 - weak signal in the mass air flow sensor network;
- P0103 - very strong signal in the network of this device;
- P0112 - weak signal in the air temperature sensor network;
- P0113 - very strong signal in the network of the same device;
- P0116 - antifreeze temperature sensor signal is out of operating range;
- P0117 - poor signal from the antifreeze temperature sensor network;
- P0118 - very strong signal from the antifreeze temperature sensor;
- Car diagnostics
P0122 - poor signal in the throttle position sensor circuit;
- P0123 - very strong signal in the same circuit;
- P0130 - the oxygen sensor before the converter does not work;
- P0131 - weak outgoing signal on the network of this device;
- P0132 - signal too strong on the same network;
- P0133 - slow response to changes in mixture quality in the network of the same device;
- P0134 - oxygen sensor circuit inactive;
- P0136 - the oxygen sensor after the converter is broken;
- P0137 - poor signal in the circuit of this device;
- P0138 - signal too strong in the same circuit;
- P0140 - the same sensor circuit is inactive;
- P0141 - the oxygen sensor heater after the converter is broken;
- P0171 - there is a lot of air in the fuel mixture;
- P0172 - there is a lot of gasoline in the fuel mixture;
- P0201 - injector wire No. 1 is broken;
- P0202 - injector wire No. 2 is broken;
- P0203 - injector wire No. 3 is broken;
- P0204 - injector wire No. 4 is broken;
- P0217 - engine overheated;
- P0230 - failure in the electric fuel pump relay network;
- Here we are looking for an electrical problem that has arisen.
P0261 - the injector circuit of cylinder No. 1 has shorted to ground;
- P0263 - injector driver No. 1 does not work;
- P0264 - the injector circuit of cylinder No. 2 has shorted to ground;
- P0266 - injector driver No. 2 does not work;
- P0267 - injector circuit No. 3 has shorted to ground;
- P0269 - injector driver No. 3 does not work;
- P0270 - injector circuit No. 4 has shorted to ground;
- P0262 - the injector circuit of cylinder No. 1 is shorted to the BS;
- P0265 - injector circuit No. 2 is shorted to BS;
- P0268 - injector circuit No. 3 is shorted to BS;
- P0271 - injector circuit No. 4 is shorted to BS;
- P0272 - injector driver No. 4 does not work.
How to check errors on Priora
Troubleshooting is performed using two methods.
- A simple check involves reading simple codes using the built-in diagnostic equipment. Here you can read single-digit or two-digit encodings indicating the on-board circuit where there is a problem. The downside is mediocre accuracy. The advantages include the simplicity and speed of diagnosis.
- If more detailed information is required, connecting external diagnostic equipment will help you find out the errors. This will require some experience and knowledge.
Malfunctions of auxiliary systems and ignition
- P0300 - no spark in all cylinders;
- P0301 - no spark in cylinder No. 1;
- P0302 - no spark in cylinder No. 2;
- P0303 - no spark in cylinder No. 3;
- P0304 - cylinder No. 4, no spark;
- P0326 - knock sensor readings are outside the permissible limit;
- P0327 - poor signal in the circuit of the same device;
- P0328 - signal too strong in the same circuit;
- P0335 - crankshaft sensor circuit is faulty;
- P0336 - crankshaft sensor readings are outside the permissible limit;
- Camshaft sensor location
P0337 - crankshaft sensor shorted to ground;
- P0338 - the network of the same device is interrupted;
- P0342 - weak signal in the phase sensor network;
- P0343 - the signal in the network of this device is too high;
- P0346 - the readings of the same device are out of the permissible limit;
- P0351 - break in the wiring of the ignition coil of cylinder No. 1;
- P0352 - open circuit of coil No. 2;
- P0353 - break in the wiring of coil No. 3;
- P0354 - open circuit of coil No. 4;
- P0363 - lack of spark and fuel supply in faulty cylinders;
- P0422 - the converter is broken;
- P0441 - incorrect air flow through the canister purge valve;
- P0444 - the canister valve wire is broken;
- P0445 - it has shorted to ground or BS;
- P0480 - open circuit in fan relay wiring;
- P0481 - fault in the same wiring.
Designation of icons on the dashboard of a VAZ 2114 car
On the model with an injector and an 8-valve motor, there are a number of icons that show the driver possible breakdowns or indicate the need for maintenance of individual components of the car.
All three groups of signals are divided by area of responsibility. The full decoding of the symbols from the photo is given below.
Fault icons
The group is responsible for indicating serious failures caused by mechanical failure and requiring urgent intervention. The scrupulousness is justified by the fact that in 99% of cases flashing lamps mean that the car needs urgent repairs. It is most convenient to view the icons in table form.
Failures in the idle speed system (IAC) and ESC
- P0500 - speed sensor is broken.
- P0506 - very low engine speed at idle.
- P0507 - too high speed at idle.
- P0511 - the XX regulator network is faulty.
- P0560 - BS voltage is below the minimum threshold.
- P0562 - very low voltage in the BS.
- P0563 - very high voltage in the BS.
- P0601 - ROM checksum error.
- P0615 - the wires of the additional starter relay are broken.
- P0616 - the same wires are shorted to ground.
- P0617 - they shorted at the BS.
- P0627 - the fuel pump relay wires are broken.
- P0628 - the same wires are shorted to ground.
- P0629 - they shorted it to the BS.
- P0645 - break in the wiring of the air conditioning compressor clutch relay.
- P0646 - the same wiring has shorted to ground.
- P0647 - she shorted to BS.
- P0650 - Malfunction indicator light circuit does not operate.
- P0654 - Tachometer control circuit is faulty.
- P0685 - the main relay electrical wire is broken.
- P0686 - the same electrical wire has shorted to ground.
- P0687 - he shorted it to the BS.
- P0691 - the electrical wiring of the fan control relay is shorted to ground.
- P0692 - the same wiring has shorted to the BS.
Note: in cases where the computer displays error codes that indicate a break in the electrical wiring of a device, before troubleshooting the problem and purchasing spare parts, you must first see if the electrical wiring plug has come out of the connector of the corresponding device. Such incidents happened. Testers and computers are, of course, good, but nothing can replace the eyes of a car enthusiast. Good luck with the repair.
We recommend reading:
- If the Priora engine stalls when cold
- Lada Priora: modernization to the limit of its capabilities
- Removing malfunctions of power window buttons on Priora
- Troubleshooting the Priora mass air flow sensor
- Cigarette lighter fuse on Priora
- Racks and their installation on the Priora
Standard sensor and ABS unit - article number and price
The anti-lock braking system operates the rear and front wheels. It contains several brackets, brackets, and other fasteners that ensure accurate operation of the ABS and hydraulic unit damper (article 11180353832400, price - about 30 rubles). But only three items are considered the main ones in ABS:
ABS control unit (“brain”) - article number 11180353801001, cost - about 10,000 rubles; Front wheel speed sensor - catalog number 11180353835000, cost - about 1,000 rubles; Rear wheel sensor - catalog number 11180353837000, cost - 1000-1200 rubles. Often, to solve the problem, you only need to buy an anti-lock sensor from Priora, so the scale of financial costs is not as huge as it seems at first.
Priora: why the check is blinking or on - the main reasons
“Check Engine” is translated from English as “Check the engine.” On different cars, on the dashboard there is either such an inscription, or simply “Check”, or an engine icon. On the Priora, it is the yellow icon that lights up, resembling an engine in shape. “Check” lights up in two cases:
- Checking the functionality of the sensors. When you turn on the ignition, all the icons on the dashboard light up, indicating that there is a signal from the ECU and the system is ready to operate. After 2-3 seconds of turning on the ignition, the icon will go out.
- Malfunction of the engine operating system. There are several important aspects. Firstly, the ECU does not receive data about all breakdowns: it cannot technically record any mechanical damage. Secondly, the appearance of this icon may be erroneous. But you shouldn’t trust the opinion “it’s all for nothing” - a problem with the engine can grow like a snowball and cost a pretty penny if you ignore it. Regardless of whether the “check” on the Priora is on or flashing, the problem needs to be solved.
https://www.youtube.com/watch?v=YObsWXcZEJQ
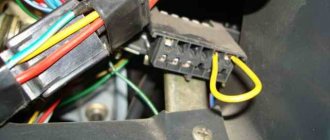
The diagnostic connector will help you “talk” to the electronic control unit and find out why the check light is on. Well, before you start diagnosing, check out the list of the most common Priora “errors”:
- Low Oil Level – Low oil levels ultimately lead to increased engine wear. If the oil level turns out to be normal when checked, then it needs to be replaced and the integrity of all Priora components checked. Faulty fuel pump or fuel filter. You can’t always “hear” this, but diagnostics, replacing the filter, and checking the fuel pump will “cure” the breakdown.
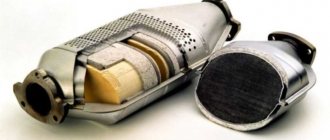
- An error in the operation of the exhaust gas system - this is not something to joke about - it is better to start repairs as soon as possible.
- The ignition coil does not produce a spark / the catalytic converter is unstable.
- Wiring problems - high voltage wires can give an erroneous signal to the ECU - "Check" will light up on the dashboard.
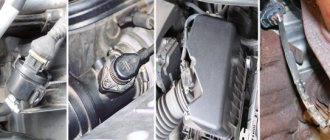
- Malfunction of sensors - unfortunately, they very often fail. The “Check” lights up due to the fault of the mass air flow sensor (MAF), two oxygen sensors (after the fuel afterburner and in the exhaust manifold), a crankshaft sensor and a camshaft sensor. In frosty weather, the “Check” can light up because three are activated first cylinder, and then, during normal startup, does not disappear. This is due to the fact that soot particles remain on the contacts - they disappear after a few days.
- False sensor activation due to high humidity
- The engine starts running when cold and the check light comes on.
The reasons for the “Check” fire on a Priora (16 valves), as we see from the list, can be serious. There is no need to panic: when the “Check” light comes on, you need to immediately reach for the diagnostic connector. It’s funny, but earlier diagnostics were carried out in the service with special software, but today any error code can be displayed on your smartphone, deciphering it using a mobile reading device.
If this causes the spark plugs to flood, you will see the “check” blinking. Low-quality gasoline can be sold at any gas station; experienced car enthusiasts advise carrying a couple of candles with them. Sometimes the “Check” light comes on due to gasoline and the engine stalls. If he continues to work intermittently, things will be bad.
“Check” should light up when the ignition is turned on. A malfunction is also considered to be the case when the check light does not light up when the ignition is turned on, that is, the ECU does not send a system check report stating that “the system is ready for operation” - there is a problem in the wiring. You need to get rid of the chek icon not so as to “hide all the problems”, but so that the process of processing the fuel mixture occurs in order. Otherwise, you will have to seriously repair the car.
If the check light is on, then there are two solutions to the problem: fix it, or reset it. The engine icon that lights up is evidence that the ECU has received information about some kind of malfunction in the engine and is informing the driver about it. All errors remain in the computer's memory, so in order to get rid of them without repair, they need to be reset or erased. You can reset a check by following these steps:
- Turn off the engine, secure the car, and open the hood;
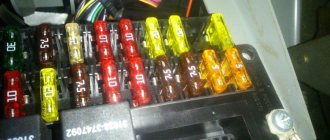
- Find the fuse box, in the yellow group, remove F1 (30 Amperes) and wait about 20-30 seconds;
- Put the fuse back and close the hood. Start the engine and check if the signal disappears.
About notOshibka.Ru
Consent to the processing of personal data
I hereby confirm and give my voluntary consent to the website neoshibka.ru (Internet address https://neoshibka.ru/) in accordance with Article 9 of the Federal Law of July 27, 2006 N 152-FZ “On Personal Data” for processing and the use of my personal data specified during the registration process, commenting, or when filling out any other contact form on this site, with or without the use of automation tools, including collection, recording, systematization, accumulation, storage, clarification (updating, changing ), extraction, use, transfer (distribution, provision, access), depersonalization, blocking, deletion, destruction of personal data in order to collect statistics and improve the services provided by the site. The processing of personal data is also carried out for the purposes of my information notification (distribution of information, if desired, there is an unsubscribe function) and for conducting analytics and statistics.
I am aware that:
- This consent to the processing of my personal data specified during registration on the Site, sent (filled out) using the Site, is valid for 20 (twenty) years from the date of registration on the Site;
- Consent can be withdrawn by me based on a written statement in any form;
- Providing personal data of third parties without their consent entails liability in accordance with the current legislation of the Russian Federation.
Check Engine (translated as Check Engine) is an indicator located on the dashboard, well known to all owners of modern cars. Sometimes it is simply called Check or MIL (Malfunction Indicator Lamp).
This light comes on when any problem occurs in the car's engine. In this case, car manufacturers recommend urgently contacting a service station (service station). At the service station, a special device is connected to the car's diagnostic connector - a scanner, with which they read the fault code (error code) registered by the car's self-diagnosis system, indicating the cause of the malfunction, or an On-Board Diagnostic Computer is installed in the car thanks to which you can read the error code ( see the transcript in the instructions), or view an already decrypted error (modern on-board computers decrypt the error on their own).
The easiest way to check the error is whether it is real or just a malfunction in the system. You need to do the following:
1. Remove the terminal from the battery for 10-15 minutes.
2. Put on the terminal and check whether the Check Engine light is on or not.