Handbrake failure is a problem that owners of VAZ 2110 cars often have to face. This problem can be solved by replacing the cables on your own, but not every car enthusiast knows this. We will tell you how to replace the handbrake cable with your own hands in this article.
- 5.1 Video: how to change the handbrake cable mechanism on a ten
Causes of malfunction of the handbrake cable on the VAZ 2110
Parking brake cable for VAZ 2110
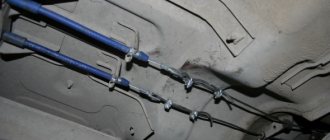
The basis of the parking brake is a cable through which the force applied by the driver is transmitted from the lever to the rear brake system. The load on this structural element cannot be called large, so the cable breaks quite rarely. Most often he just jumps off.
This can happen for the following reasons:
- The rear brake pads are badly worn, causing the cable to sag.
- The brake pads themselves are completely worn out (if the car is equipped with this type of brake).
- The cable ends gradually became chafed by the too-long bolts on the wheels, which ultimately led to them slipping off.
- In addition, the handbrake cable may break due to too sharp braking, or it may jump out simply by catching on some foreign object on the road.
Repair manual
To quickly carry out repairs, you will need the help of a partner. This will significantly save time that will have to be spent on repairs.
Further point by point:
- Step one - remove the VAZ 2110 from the parking brake (we lower the handbrake all the way to the floor - the system for holding the car in place must be turned off);
- Step two - remove the wheel brake drum;
- Step three. Getting to the equalizer is quite difficult. The technician will need to remove the muffler from the suspension cushion and remove the resonator from the rear cushion. We lower the exhaust pipe downwards;
- Step four. To do this, you will have to crawl under the VAZ 2110 - the adjusting nut and locknut are located here. We unscrew them and remove the equalizer from the rod;
- Step five. Remove the cable end from the control;
- Step six. On the body of the VAZ 2110 there is a bracket where the tip of the cable sheath is installed;
- Step seven. The manufacturer secured the cable with brackets - they need to be bent to the sides;
- Step eight. Remove the rear brake pad and disconnect the end of the handbrake cable;
- Step nine. We move on to the rear axle beam and loosen the nuts with which the manufacturer secured the handbrake. Remove the cable from the device holder.
Remove the muffler from the suspension cushions and the resonator from the rear cushion. Lower the exhaust system down
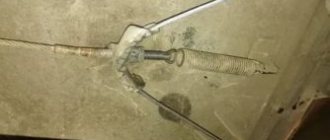
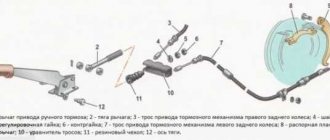
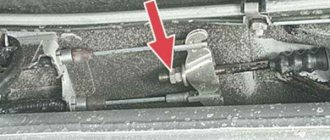
From the bottom of the car, unscrew the locknut 1 and the adjusting nut 2 of the parking brake and remove the equalizer 4 from the rod 3
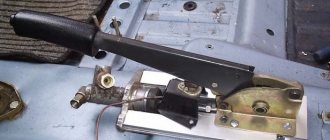
Remove the cable end from the equalizer
Remove the end of the cable sheath from the bracket on the body
Bend the two brackets securing each cable
After removing the rear brake pad, disconnect the cable end from the lever
Loosen the nut securing the cable holder on the rear axle beam and remove the cable from the holder
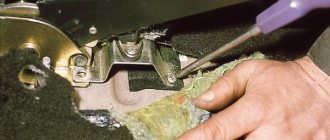
Remove the cable from the bracket on the body
Remove the cable from the brake shield. Install the cable in the reverse order of removal. Please note that the cables are installed crosswise in the bracket. After installation, adjust the parking brake
Actually, this stage can be called the halfway passed. Now the car owner must install a new handbrake cable using the steps above (proceed in reverse order).
The main design feature of the VAZ 2110 is that the cables in the bracket are mounted crosswise.
Also, after installing the product in place and assembling the VAZ 2110 in the reverse order, the parking brake system will require adjustment to restore traction - this is important for the further comfortable operation of the car.
Important points
- It is best to use two people to disconnect the tip from the brake pads. One person should carefully press the brake rocker with a large screwdriver (or a thin pry bar), the second at this moment will be able to freely loosen the lock nut, after which the cable can be pulled out of the holder without risking injury to your hands.
- As soon as the cable is removed, its attachment points should be thoroughly cleaned of rust and dirt. The best way to do this is with a wire brush. Those places in the brake shield where the cable passes must be wiped with solvent.
- If too much rust has accumulated in the through passages of the cable, you should use concentrated acetic acid, as it corrodes rust well. You only need to work with it wearing gloves to avoid chemical burns.
- Before installing the brake drum, be sure to check the condition of the pads. If the spacers on the pads are very worn (and most likely this will be the case), they need to be replaced with new ones. A set of such strips can be purchased at any auto store.
Video: how to change the handbrake cable mechanism on a ten
Adjustment
Adjustment takes a few simple steps:
- We put the car on a jack so that the rear wheels can be easily rotated by hand;
- We bring the repaired handbrake to the locked position;
- We arm ourselves with two keys at “13” and find the adjusting bolt and nut of the parking brake;
- Tighten the tension adjustment nut. Pull until the wheels are completely blocked;
- Tighten the locknut;
- We check the quality of work of the repaired unit
Parking brake cable and features of its operation
The main element of the parking brake drive is a cable, which, although iron, has its own resource. The cable operates in rather difficult conditions, constantly in dust and dirt, water and salt, so its service life may not be as high as we would like. Over time, the cable stretches. This is the main reason for the replacement - changing the length of the cable may not allow the wheels to lock, although the brake handle may be raised to its maximum height. Here, adjustment can help for some time, which boils down, in principle, to shortening the cable.
The mechanism cannot shorten the cable indefinitely, and the cable itself cannot always withstand the load and begins to burst, from vein to vein, gradually decreasing in diameter. And so on until its cross section becomes critical and it simply breaks.
Checking the rear brake system
Replacing parking brake cables on a VAZ 2110
So:
- The car is installed on an overpass or in a garage in an inspection hole. Anti-roll bars are placed under the front wheels. The rear part is raised with jacks and reliable supports are installed. The lever goes all the way down.
- The rear drums are removed and checked for wear. They will not allow a lot of wear and tear. The rear brake pads are checked; their thickness should be more than 2/3 of the new pads. The condition of the cable is inspected from below; it should not have any abrasions or broken strands.
Note. Broken strands impede the movement of the cable in the sheath; the condition of the tips is checked.
- Wear and tear of the parking brake system occurs during the operation of any vehicle.
Mechanical wear of the handbrake
The principle of operation of the handbrake on all cars with drum-type rear brakes is simple, although it has some nuances from model to model. But at ten everything is simple. Using the parking brake handle, the driver sets in motion a cable, which at both ends is engaged with the lever mechanism for activating the hand brake in the brake drums. On the caliper disc, the cable engages with the drive lever, which spreads the pads, thereby blocking the rear wheels.
During the operation of the car, the brake pads wear out, and since the mechanical handbrake drive does not automatically adjust the cable stroke depending on the wear of the pads, the cable tension has to be adjusted manually. This is not such a problem, the only thing that complicates adjustment is constant dirt and rust on the adjusting connections.
Malfunctions and their symptoms
Determining that a cable needs adjustment or replacement is quite simple. Signs of a faulty mechanism appear as follows:
- The handbrake is pressed effortlessly - the cable is loose, you need to tighten it.
- The mechanism does not respond to pressing the lever - the drive is torn or flew out, or the reason may be the wear of the rear pads.
- If the handbrake is stuck, the drive is damaged and needs to be replaced.
Important! The parking brake needs to be checked at least once every 30 thousand kilometers. The handbrake must always be applied.
Having taken out the main element, you can visually determine its condition. Replacement is required in the following cases:
- Up to 2% are damaged or torn.
- The cable moves with difficulty even after applying lubricant.
- The drive tips have grooves.
Rear drum brake wear
The reason for incorrect operation of the handbrake can be not only the cable; it, as a rule, holds on until the last and replacing the VAZ 2110 handbrake cable can be carried out extremely rarely, depending on what role the driver assigns to the handbrake. According to the rules, as they teach in driving schools, the handbrake is generally almost the driver’s main assistant in critical situations. If anything happens, pull the handbrake. Like a parachute. But in fact, it is much more efficient and easier to use the brake rather than the handbrake while driving and when starting off in difficult conditions, although this requires experience and skill.
Be that as it may, the wear of the brake pads also greatly affects the operation of the handbrake, and if the brake system implements adjustment of the gap between the drum and the shoe, then you have to deal with the handbrake yourself. It needs to be adjusted from time to time. According to experience and according to the instructions of the same VAZ, the handbrake should completely block the wheels in three clicks. If more, the cable needs to be replaced or adjusted.
Modernization
Many modern owners modernize their cars and install so-called hydraulic handbrake here. As a lyrical digression, we note that in this case it is necessary to replace the rear brakes with disc brakes without fail.
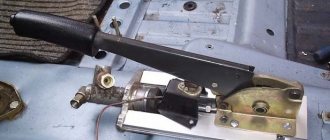
Very serious design changes are required - such as installing a hydraulic system in the parking brake. No cables are used here - the parking brake lever is connected to the master cylinder.
After the driver lifts the lever, the brake fluid in the system presses on the cylinders. Most often, hydraulic systems can be found on sports cars - after all, such a brake holds much better.
The main advantages that the hydro system gives:
- Full confidence that the hydraulic handbrake will work;
- There is no need to tighten the cable.
- It is quite difficult to bleed the brakes when replacing the standard cable system and installing a hydraulic handbrake;
- The hydraulic handbrake holds the car for several hours, after which the pressure in the system drops and the car can start moving.
Replacement results
After assembly, you should check that the cable has been replaced correctly.
To do this you need:
- Raise the rear of the car using a jack, or drive it into a viewing hole;
- Lower the lever all the way down;
- Loosen the lock nut and tighten the adjusting nut until the cable is tensioned;
- Check the clicks, the norm is from 2 to 5;
- For reliability, tighten the lock nut, holding the adjusting nut from turning.
We check the operation of the handbrake: put the car on the handbrake and rotate the wheels. The rotation should be uniform and without friction.
To be more confident, choose a steep hill (with an approximate slope of at least 25%) and put the car on the handbrake. Costs? This means the replacement was done correctly.
