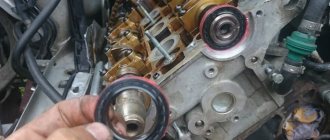
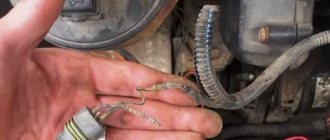
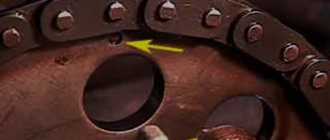
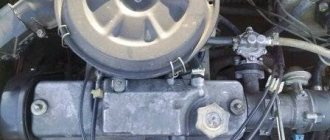
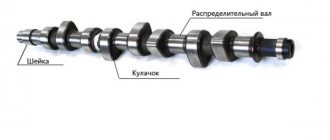
Thanks to the camshaft of the VAZ 2114, the intake and exhaust strokes of the internal combustion engine are synchronized. The camshaft is driven by rotation of the crankshaft, which, in turn, rotates through the movement of the crankshaft. The most important structural part of the camshaft is the so-called “cams”. The cams are directly responsible for the process of opening/closing valves.
Thanks to the cams, the valve timing of the engine is regulated. On all cars, the camshaft is located in the RBC (cylinder block camber). The VAZ 2114 is equipped with a cast iron camshaft, the design of which can be seen in the screenshot below. The standard eight-valve engines of the Samara-2 family have one camshaft installed.
"VAZ" camshafts have an average resource potential: 90 - 100 tkm. At this point, a major overhaul of the internal combustion engine is usually carried out.
Purpose of the camshaft
The camshaft is a moving element located inside the cylinder head and is responsible for the operation of the valves (their opening and closing). Thanks to it, the intake and exhaust strokes are controlled and, as a result, the entire operation of the engine is synchronized.
The camshaft itself is connected by a drive to the crankshaft, but rotates twice as slow as it. The cams mounted on the camshaft alternately act on the intake and exhaust valves, bringing them either open or closed.
At the same time, the VAZ 2114 8-valve camshaft has one significant drawback - it does not provide the car engine with good “throttle response” at low speeds (less than 3,000 rpm). This is caused by the shape of its cams, leading to “stretching” of the working phases.
The solution to such a problem can be either regrinding (it is worth remembering that for camshafts of domestic cars it practically does not help) or installing a special camshaft (we will talk about this a little later).
Camshaft replacement
You can find out that it’s time to replace the camshaft 2114 with a new one by two signs - either a corresponding error began to appear during a computer check, or a characteristic knock appeared when the engine was running. Be that as it may, you can replace the camshaft yourself if necessary.
To do this you will need the following tools:
- set of keys;
- screwdrivers;
- torque wrench.
In addition, you will also need a bottle of sealant.
Dismantling
The shaft replacement process itself must be performed as follows:
- Remove the camshaft pulley.
- Remove the pulley key from the camshaft groove.
- Unscrew the nut securing the rear timing belt cover.
- Unscrew the nuts holding the bracket together.
- Loosen the screws on the crankcase ventilation system hoses.
- Remove the hoses.
- Unscrew the nuts securing the valve cover.
- Remove the valve cover.
- Remove the gasket.
- Unscrew the nuts and bolts, and then remove the plug.
- Unscrew the nuts securing the shaft bearing housing.
- Remove the camshaft cover.
- Remove the rear timing belt cover.
- Remove the camshaft.
- Remove the camshaft oil seal.
- Clean all surfaces of the cylinder head from any remaining oil and sealant.
At this point, dismantling the old camshaft can be considered complete.
The nuts securing the camshaft bearing housing should be unscrewed in stages, in several circles. This is necessary in order to reduce the impact of the springs on it.
Installation
Once the old camshaft is removed, you can begin installing the new one.
It is done in the following order:
- Lubricate the cams and shaft journals with fresh grease.
- Place the camshaft in the cylinder head supports (at the same time, make sure that the cams of the first cylinder are facing upwards).
- Apply sealant to all surfaces of the block head that come into contact with the bearings.
- Install the bearing housing.
- Tighten 10 nuts of the bearing housing (they should be tightened in the same way as they were unscrewed - in several circles). In this case, you should not apply much force - you just need to wait until the case touches the cylinder head, after which you should stop tightening.
- Tighten all nuts with a force of 2.2 kgf/m (for this you will need a torque wrench).
- Remove any sealant that has leaked through the joint.
- Install the oil seal.
- Install the timing pulley and belt.
- Rotate the crankshaft (this should be done clockwise) so that the marks on the camshaft pulley and the timing cover match.
- Rotate the crankshaft 50 degrees.
- Using a feeler gauge, measure the gaps around camshaft cams 1 and 3. For intake valves it should be 0.2 mm, and for exhaust valves - 0.35 mm. The permissible deviation from the specified values is no more than 0.05 mm.
Once the clearances around all valves have been checked, the camshaft installation can be considered complete.
How to change the rear oil seal
Changing the rear oil seal will be a little more difficult, but this does not mean that a car enthusiast cannot cope with such a task on his own. The most important thing is to follow the instructions, and every car enthusiast can do the job no worse than a professional:
- The negative terminal of the battery must be disconnected from the power supply.
- The flywheel is dismantled. Before removing the flywheel, you need to mark its original location, taking into account the location of the crankshaft.
- The rear clutch housing shield is removed from the bushings.
- The fasteners that secure the oil seal are unscrewed; there should be 8 fasteners.
- The holder is removed.
- Next, you need to carefully remove the seal that has become unusable from the holder.
- Using a mandrel with a diameter of 99 mm, the new oil seal must be pressed into place of the one just removed, making sure that the working edge of the element is directed inside the holder.
- You will definitely have to replace the holder gasket, even if the appearance of the old one seems quite normal.
- To ensure reliable installation of the gasket, it is recommended to use a thick consistency lubricant.
- Before installing the oil seal, its working surface should be treated with engine oil; the same procedure should be done with the crankshaft flange.
- It will be much easier to insert the holder of the working edge of the new oil seal onto the crankshaft flange using a wooden tool, for example, a stick of the appropriate size. But metal products are strictly not recommended for this event.
- After making sure that all elements are installed correctly, you can begin fixing the holder and engine crankcase.
- Next, the clutch housing protective shield, flywheel and gearbox are installed in their original place.
Special camshafts
As was said at the beginning of the article, not all drivers are satisfied with the “native” camshafts installed on VAZ cars. They do not provide sufficient torque (and, as a result, “throttle response”) at low speeds. This problem can be solved in two ways - by regrinding the cams of the existing camshaft or by installing a new, special one.
It is highly not recommended to grind a camshaft from a VAZ car due to the low efficiency of such an operation and the large number of special shafts that can be easily purchased at car dealerships.
Among such shafts, two directly opposite options can be distinguished - sports and tuning, as well as a large number of intermediate modifications between them.
The sports camshaft delivers an increased volume of mixture into the cylinder during operation due to higher valve lift, and its cams have a rounded, smooth profile. This ensures “wider” operating phases and good throttle response at all speeds.
How to remove and install the camshaft on a VAZ 2113, 2114, 2115
Thanks to the camshaft of the VAZ 2114, the intake and exhaust strokes of the internal combustion engine are synchronized. The camshaft is driven by rotation of the crankshaft, which, in turn, rotates through the movement of the crankshaft. The most important structural part of the camshaft is the so-called “cams”. The cams are directly responsible for the process of opening/closing valves.
Thanks to the cams, the valve timing of the engine is regulated. On all cars, the camshaft is located in the RBC (cylinder block camber). The VAZ 2114 is equipped with a cast iron camshaft, the design of which can be seen in the screenshot below. The standard eight-valve engines of the Samara-2 family have one camshaft installed.
"VAZ" camshafts have an average resource potential: 90 - 100 tkm. At this point, a major overhaul of the internal combustion engine is usually carried out.
Replacing the VAZ 2114 camshaft sensor in 4 simple steps: find out where it is located
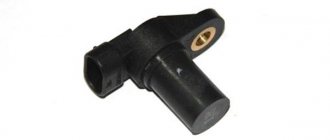
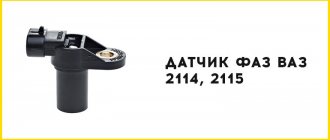
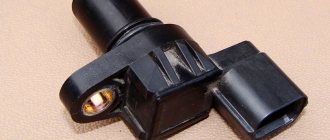
The VAZ 2114 camshaft sensor is one of the most important measuring instruments of the fourteenth, which, through a pulse signal, transmits information about the current engine operating cycle to the car’s brains. Based on the information received, the electronics adjusts the timing of supply and ignition of the fuel mixture in the engine cylinders.
A normally functioning DF is the key to the correct functioning of the engine, which achieves the optimal ratio of the amount of fuel consumed and the power of the power unit.
From this article you will learn the main causes of DF malfunction and how the failure of the device affects the operation of the car. The technology for replacing the DF on the VAZ 2114 will also be examined in detail.
Features of the VAZ 2114 phase sensor
Causes and symptoms of malfunction
You can determine that the phase sensor on a VAZ 2114 has failed by the following malfunctions in the vehicle:
- Gasoline consumption has increased significantly;
- The acceleration dynamics of the fourteenth have worsened, and dips are observed in the engine’s idle speed;
- The engine idles;
- Errors No. 0343 and 0340 are displayed on the on-board computer screen, which indicate that the DF is faulty and the ECU is operating in emergency mode.
The reason why the phase sensor failed can be determined only after dismantling and visual inspection of the device, in some cases - after diagnosing it. As a rule, the main causes of DF failure are as follows:
- A short circuit has occurred on the internal DF circuit;
- Mechanical damage to the device mounting ears, due to which the housing has shifted in the mounting socket;
- The toothed disk on the pulse signal converter has broken;
- The DF was damaged due to the increased temperature of the engine.
If the device breaks down, the ECU starts working solely on the readings of the crankshaft sensor. In this mode of operation, it is impossible to carry out phased fuel injection, as a result of which the brains of the fourteenth switch the engine to twin injection, which results in excessive consumption of gasoline and deterioration in acceleration dynamics.
Repairing the device in most cases is not advisable, since a DF that has once failed is unlikely to work normally in the future.
Fortunately, the cost of the DF is low - the price of a new device is 400-600 rubles, depending on the manufacturer (prices are also relevant for sensors on the VAZ 2115).
Checking functionality
If typical signs of DF failure occur, or if errors 0343 or 0340 are displayed on the on-board computer of the fourteenth, it is necessary to check the functionality of the DF. This is done using a conventional multimeter.
Fourteeners with 16 and 8 valve engines have different DFs, so the specifics of checking them will be slightly different.
How to check the camshaft sensor VAZ 2114 8v:
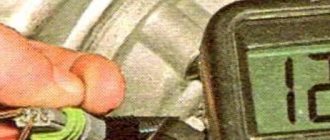
- On the first tester probe we set the voltage to 13.5 Volts and connect it to contact “E” on the DF, on the second probe, which must be connected to contact “B” - 0.9 V;
- Having closed the contacts, we bring a metal screwdriver to the end of the sensor. If the DF is working, you will see on the tester screen that the voltage of contact “B” has dropped to 0.4 Volts. If this does not happen, the DF is broken;
How to check the camshaft sensor VAZ 2114 16v:
- We set the following voltage on the multimeter: contact “E” - 13.5 Volts, “B” - 0.4 Volts;
- We close the contacts and insert a screwdriver into the hole on the phase sensor. If the device is working properly, the voltage at pin “B” will increase to 0.9 Volts.
A multimeter is a standard device for checking the performance of any sensor
We replace the phase sensor
Having determined that the DF is faulty, you can begin to replace it. The process is easy enough that you will only need a ratchet wrench with a 10 mm head to do all the work yourself.
First, let's figure out where the VAZ 2114 phase sensor is located. It is located on the right side of the engine compartment, near the air filter. It is secured to the cylinder block body with one screw.
Replacement of the VAZ 2114 phase sensor is carried out in the following sequence:
- Open the hood and disconnect the power terminals from the fourteenth battery;
- Disconnect the wire block from the DF;
- Using a 10mm wrench, unscrew the screw fixing the sensor on the cylinder block;
- We remove the DF from the mounting socket.
After dismantling the old device, inspect it visually; perhaps the cause of its malfunction is metal dust magnetized on the DF body. If found, wipe the device with a cloth and reinstall it. If it does not come to life and the on-board computer continues to generate errors, the sensor needs to be replaced.
The new camshaft position sensor of the VAZ 2114 is installed in a similar way. As you can see, the work here only takes 10-15 minutes (replacing the VAZ 2115 phase sensor is carried out using the same method).
Important: when installing the DF into the mounting socket to seal the fixation, it is prohibited to use any sealing agents, since the device is located in an environment with a constantly changing temperature regime, in which the sealant will simply melt and bring you a bunch of additional troubles with the engine.
There are often cases when, even after installing a new DF, errors 0350 or 0343 continue to be displayed on the on-board computer of the fourteenth.
There are two possible scenarios for the development of events. You may have come across a faulty DF (even salespeople in auto stores say that if for 10 domestically produced phase sensors there are 5 workers, without manufacturing defects, this is already good).
Checking the functionality after replacement is carried out using a multimeter, as described in the previous section of the article. If the tester data corresponds to the indicators of a fully working sensor, then the problem is not with it. Errors 0350 and 0343, indicating a faulty DF, can also occur due to a timing belt that is stretched or has slipped by 1-2 teeth, or a loose crankshaft gear.
autovaz-2114.ru
Typical camshaft malfunctions, their symptoms
The main reasons why the described part may break:
- The cams wear out: a knocking noise appears when the engine starts. When wear reaches an extreme stage, sounds can be heard while the car is moving;
- The camshaft is deformed: the malfunction is also characterized by extraneous noise during operation of the power unit;
- The camshaft bearings wear out;
- Shaft elements break.
The breakdowns described above lead to disruption of the fuel supply due to desynchronization of the camshaft and cylinder valves. In some cases, a part malfunction is caused by the use of low-quality motor oil with a large amount of impurities or a small amount of oil in the engine.
Crankshaft oil seal
Today we will talk in more detail about the crankshaft oil seal, a spare part that is designed to seal (seal - approx.) connections in this moving part of the engine, as well as prevent engine oil from leaking. Below, we will describe in detail how to replace this element as quickly as possible.
Signs of crankshaft oil seal failure
The very first and main sign of failure of the crankshaft oil seal is considered to be the loss of its tightness.
Oil leak due to leaky crankshaft oil seal
And if in the case of oil seals on other engine elements it doesn’t look so bad, then if there is a malfunction on the crankshaft, oil can leak from the system in liters per 1000 kilometers.
Main causes of wear
- Wear and tear due to natural reasons due to expiration of service life.
- Incorrect installation of the oil seal in advance can cause cracks on its surface.
- Mechanical damage.
- The material is not original, made in violation of production technologies.
Please note that with an increase in oil consumption, due to leaks of the crankshaft oil seal, traces of oil will certainly be observed under the car; they are clearly visible and will not leave any owner unnoticed.
>
Also think about the presence of oil seal leaks and slight slipping of the clutch. This effect can be observed due to oil getting on the clutch disc and basket located near the gearbox.
New camshaft for 2114
Replacing the VAZ 2114 8-valve camshaft is one of the stages of engine overhaul. Online stores offer many options for the design of the part, including so-called “sports camshafts,” which supposedly promise a significant increase in power. But we will focus on the standard part with catalog number 21110100601000. This part is sold in most major online stores. Price range: 2100-2600 rubles.
Dimensional characteristics of the standard part:
- Length: 46 cm;
- Width: 4.5 cm;
- Height: 4.5 cm;
- Weight: 2.45 kg.
The appearance of the new camshaft can be seen in the figure below.
Steps to replace the camshaft on Lada 2114
We warn you that the actions described below imply interference with key vehicle systems. Ignoring the proposed algorithm and accompanying recommendations will lead to irreversible consequences - in particular, to the failure of the internal combustion engine. If you are not confident in your abilities, then it is better to seek qualified help from professional auto mechanics. The material presented below is aimed at experienced car enthusiasts who understand the structure of a car.
To replace the VAZ 2114 camshaft seals or the camshaft itself, the car owner will need:
- A set of wrenches: spanners, open-end wrenches, socket heads - everything will be used;
- Containers for fasteners and chalk parts;
- Screwdriver Set;
- Sealant;
- Dynamometer wrench (picture below).
Repair algorithm:
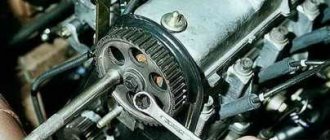
- We dismantle the camshaft pulley;
- We remove the pulley key from the camshaft groove;
- Unscrew the nut securing the gas distribution system;
- Remove the nuts securing the bracket to the cable;
- We dismantle the crankcase gas exhaust hoses, having first loosened the clamps;
- We dismantle the engine valve cover by unscrewing the nuts;
- Remove the gasket under the cover;
- Unscrew the bolts and nuts and then remove the plug;
- The camshaft bearing housing nuts are unscrewed. Under no circumstances should you unscrew the nut right away - they need to be loosened gradually in order to avoid breaking the fasteners and reduce the tension of the springs. We do this: slightly loosen one nut and move on to another. And we continue like this until we unscrew all ten pieces.
- We remove the camshaft housing and remove the timing belt drive cover from the cylinder head;
- Remove the camshaft;
- Remove the camshaft oil seal;
- Before installing a new part, we clean the shaft cavity from carbon deposits, lubricant and sealant residues. You also need to clean the contacting elements of the cylinder head and bearings;
- Apply fresh lubricant to the camshaft supports and “cams”;
- We place the shaft in the cylinder head supports. The cams of the 1st cylinder should be directed upward;
- Apply fresh sealant to the contact points between the cylinder head and bearings;
- We place the cylinder head housing cover and tighten the nuts in several circles, gradually increasing the tension of the springs and the fit of the bearings to the cylinder head;
- The final degree of tightening of the nuts should not exceed 2.2 kg/cm;
- We wipe off any excess sealant and install the oil seal;
- Install the belt drive and toothed pulley;
- Rotate the crankshaft clockwise until the installation marks on the crankshaft pulley and the rear timing belt drive cover coincide;
- Rotate the crankshaft so that the camshaft pulley “steps” approximately 2-3 teeth;
- We measure the gaps of the 1st and 3rd cams. The clearance for the intake valves is 0.2 mm, for the exhaust valves - 0.35 mm.
- Replacement of the camshaft on the “fourteenth” is completed.
Of course, to perform the described manipulations, dismantling the internal combustion engine is required. Carry out work in a dry and well-lit garage. After replacing the camshaft, be sure to fill the engine with new oil. The lubricant must be new, regardless of the timing of the previous replacement.
If after the work the engine began to run smoother, fuel consumption returned to normal, and extraneous noise and vibration disappeared, then the repair complex was completed successfully. If used carefully, the new camshaft will last at least 80,000 km.
If you still have questions about the procedure for replacing the camshaft VAZ 2114 8 valves, then check out the useful thematic video
The camshaft is an extremely reliable and, one might say, practically indestructible part. It has a very long service life, and emergency breakdowns are extremely rare. However, many car enthusiasts are still interested in how to replace the camshaft of a VAZ 2114 if necessary. We’ll talk about how to do this, as well as what types of camshafts there are, today.
DF cost
The cost of a phase sensor today fluctuates around 300 rubles, the price is insignificant, so there will be no special costs when installing a new unit.
Here's how to change the VAZ 2114 phase sensor without much expense in a short period of time. Now certain engine operating cycles will be strict and uninterrupted. Have a good trip and pleasant fellow travelers!
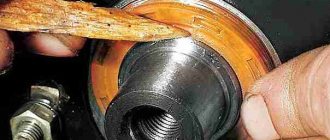
It is not uncommon for owners of an 8 valve VAZ 2114 to have to replace the camshaft oil seal. This need arises when oil leaks are detected through this element.
Camshaft gear
Camshaft replacement
You can find out that it’s time to replace the camshaft 2114 with a new one by two signs - either a corresponding error began to appear during a computer check, or a characteristic knock appeared when the engine was running. Be that as it may, you can replace the camshaft yourself if necessary.
To do this you will need the following tools:
- set of keys;
- screwdrivers;
- torque wrench.
Torque wrench
In addition, you will also need a bottle of sealant.
Dismantling
The shaft replacement process itself must be performed as follows:
- Remove the camshaft pulley.
- Remove the pulley key from the camshaft groove.
- Unscrew the nut securing the rear timing belt cover.
- Unscrew the nuts holding the bracket together.
- Loosen the screws on the crankcase ventilation system hoses.
- Remove the hoses.
- Unscrew the nuts securing the valve cover.
- Remove the valve cover.
- Remove the gasket.
- Unscrew the nuts and bolts, and then remove the plug.
- Unscrew the nuts securing the shaft bearing housing.
- Remove the camshaft cover.
- Remove the rear timing belt cover.
- Remove the camshaft.
- Remove the camshaft oil seal.
- Clean all surfaces of the cylinder head from any remaining oil and sealant.
At this point, dismantling the old camshaft can be considered complete.
Removed camshaft VAZ 2114
The nuts securing the camshaft bearing housing should be unscrewed in stages, in several circles. This is necessary in order to reduce the impact of the springs on it.
Installation
Once the old camshaft is removed, you can begin installing the new one.
It is done in the following order:
- Lubricate the cams and shaft journals with fresh grease.
- Place the camshaft in the cylinder head supports (at the same time, make sure that the cams of the first cylinder are facing upwards).
- Apply sealant to all surfaces of the block head that come into contact with the bearings.
- Install the bearing housing.
- Tighten 10 nuts of the bearing housing (they should be tightened in the same way as they were unscrewed - in several circles). In this case, you should not apply much force - you just need to wait until the case touches the cylinder head, after which you should stop tightening.
- Tighten all nuts with a force of 2.2 kgf/m (for this you will need a torque wrench).
- Remove any sealant that has leaked through the joint.
- Install the oil seal.
- Install the timing pulley and belt.
- Rotate the crankshaft (this should be done clockwise) so that the marks on the camshaft pulley and the timing cover match.
- Rotate the crankshaft 50 degrees.
- Using a feeler gauge, measure the gaps around camshaft cams 1 and 3. For intake valves it should be 0.2 mm, and for exhaust valves - 0.35 mm. The permissible deviation from the specified values is no more than 0.05 mm.
Installing a VAZ 2114 camshaft
After the clearances around all valves have been checked, the installation of the camshaft can be considered complete.
Valve cover replacement process
So, in order to replace the valve cover gasket on a car, you will need certain tools. What exactly is needed? Let's consider this question: a ratchet with an extension, a 10-mm socket, a screwdriver with a Phillips head.
Now that everything is ready, we buy a new gasket from the list recommended below and we can get to work.
Let's consider the sequential stage of performing replacement operations:
- Loosen the clamps and remove the hoses shown below.
- After removing the locking plate, disconnect the accelerator cable.
- Unscrew the mounting bolts securing the accelerator cable bracket to the receiver.
- Unscrew the nuts securing the valve cover.
Special camshafts
As was said at the beginning of the article, not all drivers are satisfied with the “native” camshafts installed on VAZ cars. They do not provide sufficient torque (and, as a result, “throttle response”) at low speeds. This problem can be solved in two ways - by regrinding the cams of the existing camshaft or by installing a new, special one.
Tuning and sports camshafts
It is highly not recommended to grind a camshaft from a VAZ car due to the low efficiency of such an operation and the large number of special shafts that can be easily purchased at car dealerships.
Among such shafts, two directly opposite options can be distinguished - sports and tuning, as well as a large number of intermediate modifications between them.
The sports camshaft delivers an increased volume of mixture into the cylinder during operation due to higher valve lift, and its cams have a rounded, smooth profile. This ensures “wider” operating phases and good throttle response at all speeds.
Nuzhdin camshaft for VAZ 2114
In turn, tuning camshafts are distinguished by an increased base diameter and a “sharper” cam profile. They provide the vehicle with quiet, uninterrupted engine operation at all, even critically low, speeds. In addition, the use of such a shaft makes it possible to “push back” the limit of the onset of detonation at low rotational speeds.
It is also worth noting that the use of tuning camshafts can reduce fuel consumption, exhaust toxicity, and also slightly increase the overall service life of the engine before major repairs.
To summarize, it is worth noting that replacing a camshaft is not the most difficult operation and can be performed by any experienced motorist. But when to carry it out - in case of severe wear of the “native” shaft or when replacing it with a special camshaft - everyone decides for themselves.
Published March 24, 2019
Instructions with photos and video materials for anyone who is faced with the need to replace the camshaft on VAZ 2114, 13, 15 cars
Withdrawal procedure
- Removing the timing belt
- Unscrew the nut and bolt of the upper fastening of the rear timing belt cover
- Removing the cylinder head cover
- On engines with phased fuel injection, disconnect the wiring harness connector from the camshaft position sensor
- Disconnect the wiring harness from the coolant temperature sensor
- Using a 10 mm socket wrench, unscrew the bolt and two nuts securing the plug. A rubber sealing ring is installed under the plug mounting bolt. Replace the damaged o-ring.
- We remove the plug. On an engine with a camshaft position sensor, the plug can only be removed if the pin (1) is located opposite the slot (2).
- Remove the sealing ring of the plug. The O-ring must be replaced if it is damaged or if oil is leaking from under the plug.
- Using a 13 mm socket wrench, evenly (in several steps) unscrew the ten nuts securing the two bearing housings.
- Remove the front bearing housing.
- Remove the rear bearing housing.
- Remove the camshaft from the cylinder head by slightly pulling the rear timing belt cover.
- Remove the oil seal from the camshaft.
Camshaft installation:
- Lubricate the camshaft journals with clean engine oil.
- Place the camshaft in the cylinder head with the pin facing up.
- Before installing the bearing housings, apply a thin layer of sealant to the mating surface of the block head in the areas of the front oil seal and plug.
- Evenly, in several steps, tighten the nuts of the bearing housings until the housings come into contact with the cylinder head (following the sequence indicated in the photo). Then tighten the nuts to a torque of 18.4–22.6 N m (1.9–2.3 kgf m).
- Pressing in a new camshaft oil seal
- Before installing the plug, put an O-ring on it.
- Further assembly is carried out in the reverse order of removal.
Step-by-step dismantling
Let's look at how to change the engine oil seal of a VAZ 2114 with an 8-valve engine.
The work order is as follows:
- Place the car on a level surface, support the rear wheel with stops. Set the gearshift lever to the neutral position, remove the front right wheel and engine protection. You can remove part of the fender liner for easy access to the front engine cover.
- Under the hood, unscrew the bolts securing the timing belt protective cover. Loosen the generator and remove the generator drive belt.
- Set the valve timing marks on the camshaft and crankshaft. To do this, rotate the crankshaft with a socket wrench until the arrows on the pulleys align with the special ebbs on the body. This corresponds to the position of the first piston at TDC.
- Before removing the timing belt, loosen the tension roller and unscrew the bolts securing the upper and lower sprocket. Inspect the belt for damage and traces of oil. Change if necessary.
- Drain the oil from the engine and unscrew the pan. It is secured with 16 10mm wrench bolts. Remove the clogged oil receiver and clean thoroughly.
- Using a 24mm socket, unscrew the pulley mounting nut, to do this, secure the crankshaft itself. Under the pulley there is an oil pump, into the cover of which the front engine oil seal is pressed. It is secured with six 10mm bolts.
- Remove the oil seal from the seat using a flat screwdriver or carefully press it out with a socket of a suitable size.
Video on the topic:
Hi all! Any extraneous knocks or sounds when the car is operating should alert the driver. Regardless of the nature and origin, there should not be any unnecessary sounds during normal operation of the machine. Today I propose to talk about how the camshaft knocks, whether it can knock, why this happens and what to do in this situation.
The job of the camshaft or simply the camshaft is to control the opening and closing of the internal combustion engine valves. With its help, engine strokes are synchronized. As you know, valve knocking is also possible. We have already talked about them.
You should find out why such symptoms occur, what actions the car owner needs to take, and what consequences you should be prepared for if you do nothing.
A little about the camshaft
Fortunately for many, the camshaft is not one of the components that are positioned as capricious, often and quickly failing. The resource largely depends on the quality of the part and operating conditions.
The camshaft has a life limit. Uninterrupted operation can last from 50 to 150 thousand kilometers. These are fairly average indicators, since each situation is still individual. Active work is already underway to remove this element from the engine design. Moreover, experts say that in the future the camshaft may completely cease to be part of the engine. It will be replaced by electromagnetic actuators.
It is difficult to say how effective and realistic this will be in the near future. Plus, some skeptics doubt the correctness of the transition from a mechanical part to a computer-controlled actuator.
Can the camshaft make a knocking noise?
Many people have encountered crankshaft knocking in their lifetime. But not all drivers know how and when exactly the camshaft knocks.
It's all about the sounds. They are really very similar to each other. This appears the same on different cars:
- for VAZ 2106;
- Niva has 8 valves;
- VAZ 2107;
- VAZ 2109;
- on Priora;
- VAZ 2110;
- VAZ 2114;
- for Daewoo Nexia;
- for Subaru Forester, etc.
But what should a car owner do when he hears a sound, but cannot understand what exactly is knocking? Is it the crankshaft or the camshaft?!
Here you just need to listen and observe the behavior of the car and specifically the engine. Sometimes this makes it quickly clear where the source of extraneous sound is, and which unit needs to be prepared for repair.
The key role is played by the fact whether you hear sounds when it is cold or when it is hot.
You will be able to hear sounds from the camshaft only when the internal combustion engine is cold, when the engine starts and the lubricant has had time to leave the rubbing elements. After starting, the oil will gradually lubricate them, causing the knocking noise to disappear.
- The camshaft makes so-called dull sounds;
- Noises appear precisely when the engine is cold, when the engine starts;
- Initially the crankshaft sounds similar;
- As it gains speed, the faulty crankshaft acquires a louder sound;
- In fact, the camshaft is dull and the crankshaft is sonorous;
- An increase in speed will help to accurately determine;
- If you still can’t identify it by sound, you will have to carry out diagnostics.
Based on these points, you will be able to independently diagnose the nature and source of the malfunction without any problems, and then begin the appropriate actions to eliminate them.
When is it time to change the camshaft
Emergency intervention in the operation of the VAZ 2114 8 cl camshaft is necessary in the event of any obvious malfunctions. Signs may be different, for example, a knocking sound is heard when the engine is running or problems with the seals. You need to check what’s wrong in such a situation immediately, either yourself or at a service station.
If you determine that the problem is in the seals, then 10 minutes will be enough for you to make a replacement. The oil seals are located in easily accessible places and installing a new one does not require dismantling large systems and components. If you don’t know which one you need to replace, you can check this simply by looking at which one is already installed.
New oil seal
A more complex malfunction may occur if you hear a knocking sound in the engine. This malfunction may not progress, that is, the knocking does not increase, while the readings of all sensors are normal. Some drivers take this calmly; they are not bothered by this state of affairs and continue to use the vehicle without paying attention to it. But the solution is simple: if your engine knocks, it means that the axial play of the camshaft has increased. In this case, you can put a washer between the camshaft and the cover and there is a high probability that the knocking will stop. A fairly simple way out of this situation.
Washer installation location
Some cars are equipped with camshaft position sensors, whose task is to signal in case of malfunction or malfunction of the system. But sometimes sensors fail and may need to be replaced. It is inexpensive and the price of such a sensor on the market does not exceed $10, and you can find out which one to buy from the car’s instructions. Installing such a sensor is simple, so there is no point in stopping there.
What to do
Drivers had to deal with the fact that occasionally after the start an incomprehensible knocking sound began to appear, but when accelerating and warming up the engine it disappeared. As we have already figured out, most likely the camshaft on the engine has failed.
Now another question. What to do in such a situation? If it is the camshaft that starts knocking, you should be prepared to spend a considerable amount of money. But this is not a 100% probability, since sometimes hydraulic compensators begin to knock, or knocking noises are made by worn gears and bearings. Not all situations solve the problem by replacing the entire camshaft. If you suspect a knocking noise from this unit, it is better to immediately go for diagnostics. Due diligence can help you find out where the source of the problem is and what needs to be done about it.
It’s definitely not worth delaying diagnostics. If the compensators fail, and the problem was in them, then the chain reaction will lead to the breakdown of the shaft itself. And these are completely different expenses. So it would definitely be a good idea to check the hydraulic compensators.
You can drive a car without hydraulic compensators with a knock from the camshaft for more than 50 thousand km, but then you will probably have to completely change the engine or carry out major repairs.
As you can see, delaying the check is definitely not in your interests.
