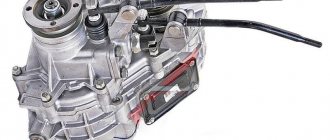
Removing the axle shaft and replacing the oil seal
We hang and remove the rear wheel. Remove the rear brake pads (see Replacing the rear brake pads).
Using a 17mm spanner, unscrew the four nuts on the bolts securing the axle shaft to the beam flange.
Use a slotted screwdriver to bend the locking plates of the axle shaft mounting bolts...
...and remove the bolts.
We fix the wheel with the reverse side on the axle shaft by tightening three nuts several turns.
Holding the wheel, we move it with a jerk...
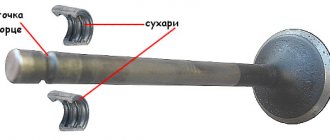
...and remove the axle shaft assembly with the bearing mounting plate, bearing and locking ring.
We take out the rubber sealing ring of the beam flange.
We insert two bolts into the holes of the brake shield and the rear axle beam so that the shield does not hang on the brake pipe.
We pry off the oil seal using sliding pliers...
Using a tool head of a suitable size with an extension (or a piece of pipe), we press in a new oil seal.
If the axle shaft is deformed, its splines are worn out, or the bearing is worn out, we replace the axle shaft with a new one complete with bearing and locking ring (it is not recommended to replace the bearing or locking ring yourself). Install the axle shaft in reverse order. Check the oil level in the rear axle and add if necessary.
How to replace the drive gear seal of the front axle VAZ-21213
We disconnect the driveshaft from the front axle gearbox (article – “Removing the driveshaft”).
We remove the housings of the internal hinges of the front wheel drives from engagement with the gears of the front axle reducer drives.
Using a dynamometer, we turn the drive gear clockwise by the flange mounting nut and determine the moment of its resistance to rotation.
We insert bolts into the flange holes and screw nuts onto them in order to create a stop.
Use a spanner wrench or a 24mm socket to unscrew the flange nut, holding it from turning with a suitable mounting blade
There is a washer under the nut, remove it
Remove the flange from the drive gear
If there is particular difficulty, you can compress it with a puller
Use a screwdriver to pry off the seal
Lubricate the working surface of the oil seal and press it in with a suitable head or piece of pipe.
Install the flange and washer on the drive gear.
Holding the flange, we tighten the nut of its fastening to a torque of 118-255 Nm (12-26 kgf.m), periodically checking the moment of resistance to rotation of the drive gear (by turning the gear clockwise with a dynamometer).
If the initially measured moment of resistance to rotation was not lower than 59.0 Nm (6 kgf m), then the new moment should be 9.8–19.6 Nm (1–2 kgf m) greater than this value.
If the initial torque was less than 59.0 Nm (6 kgf m), then tighten the flange mounting nut until a torque resistance to rotation of 59.0–88.0 Nm (6–9 kgf m) is reached, without exceeding the tightening torque 118–255 Nm (12–26 kgf.m).
If, when tightening the nut, the moment of resistance to rotation of the drive gear exceeds 88.0 Nm (9 kgf m), which indicates an excessive preload of the bearings, replace the gearbox spacer and carry out the adjustment again.
We carry out further assembly and installation of units in the reverse order.
According to the catalog, the main gear drive gear oil seal is No. 2121-2302052
Source
Three ways to drain gasoline
In other cases, when it is necessary to drain some of the gasoline, for example, for roadside assistance, refueling a blowtorch or kerosene stove, you can use one of three methods:
- Draining gasoline through the filler neck.
- Removing fuel through the drain hole in the tank.
- Drain using a standard fuel pump.
Depending on the amount of fuel that needs to be removed from the tank, we choose one of three methods.
Through the neck
Draining gasoline through the filler neck.
Despite the fact that this method is quite troublesome, it can be used when you need to drain all or almost all of the gasoline.
It is important to remember that under no circumstances should you drain the tank (if it is clean and does not require flushing). The fact is that the gas pump, located inside the gas tank, uses gasoline both as a lubricant and as a coolant.
In old VAZ models, as in most carburetor cars, the tank was located right next to the filler neck. Therefore, it was easiest to pour gasoline with a hose. In the Niva Chevrolet, the tank is located about a meter from the neck, and the filler pipe has a rather complicated configuration. That is why to pump out fuel you will need a hose at least one and a half meters long, or even more.
Replacing front gearbox seals 2121
We disconnect the driveshaft from the front axle gearbox (article – “Removing the driveshaft”)
We remove the housings of the internal hinges of the front wheel drives from engagement with the gears of the front axle reducer drives.
Using a dynamometer, we turn the drive gear clockwise by the flange mounting nut and determine the moment of its resistance to rotation.
We insert bolts into the holes in the flange and screw nuts onto them to create a stop.
Use a spanner wrench or a 24mm socket to unscrew the flange nut, holding it from turning with a suitable mounting blade
There is a washer under the nut, remove it
Remove the flange from the drive gear
If there is particular difficulty, you can compress it with a puller
Use a screwdriver to pry off the seal
Lubricate the working surface of the oil seal and press it in with a suitable head or piece of pipe.
Install the flange and washer on the drive gear. Holding the flange, we tighten the nut of its fastening to a torque of 118–255 Nm (12–26 kgf.m), periodically checking the moment of resistance to rotation of the drive gear (by turning the gear clockwise with a dynamometer).
If the initially measured moment of resistance to rotation was not lower than 59.0 N·cm (6 kgf·cm), then the new moment should be greater than this value by 9.8–19.6 Nm (1–2 kgf·m).
If the initial moment was less than 59.0 N·cm (6 kgf·cm), then tighten the flange mounting nut until a torque resistance to rotation of 59.0–88.0 N·m (6–9 kgf·m) is reached, without exceeding tightening torque 118–255 Nm (12–26 kgf.m).
If, when tightening the nut, the moment of resistance to rotation of the drive gear exceeds 88.0 Ncm (9 kgfm), which indicates an excessive preload of the bearings, replace the gearbox spacer and make the adjustment again.
We carry out further assembly and installation of units in the reverse order.
Replacing the clutch, not without consequences (93460). — Lada 4×4 5D, 1.7 l., 1998 on DRIVE2
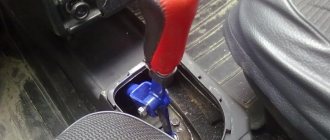
I can’t say that the clutch ended unexpectedly, the first bells were already there, but as usual, at the wrong time. On Friday morning, after being on duty, Ivan’s car had to be towed due to dozens of his cars being temporarily incapacitated. It didn’t seem like there was much of a load, the vehicle was not torn apart. In general, during the day the clutch completely ran out. On Saturday I drove the SEVEN for my shift, fortunately my family didn’t have to go anywhere. After scouring the Internet and talking with experienced drivers about possible damage, either the plug broke off or the spider broke off. The same Internet said that you can replace the plug without removing the box, which was a little reassuring. Sunday morning, I went to the store, bought a fork and its boot (140 rubles). In the garage
Compare the height of the baskets
The height of the baskets turned out to be approximately the same, due to the bending of the petals. The release valves are the same, both with and without the spider; they used to tell me that without the spider the bearing is thicker. I started the assembly by replacing the fork, since I bought a new one
At the same time, I decided to make an inspection of the CV joint, the boot of which had long been torn (since the purchase of the Niva). With grief, they halved the CV joint, as I had never dealt with them before.
Work order
- Raise the car using a jack or lift, remove the wheels and unscrew the 2 nuts and remove the drum.
- Unscrew the 4 nuts at the rear of each axle shaft. There is no need to remove the springs if you do not plan to replace them.
- We take the axle shaft with our hands and pull it towards ourselves. As a rule, the part is removed without unnecessary effort. Along the way, you can assess the condition of the bearings.
- Using Goebbels or any other suitable tool, we grab the part of interest and remove it. Significant physical force may need to be used if sticking occurs.
- We “press” the new spare part into place of the old one using a chisel and a hammer. Exercise reasonable caution, because you did not buy a new part in order to damage it during installation.
- Carefully install the axle shaft into place. Make sure that it does not catch other nodes, the likelihood of damaging them at this stage is quite high.
- Place the bolts into the bridge stocking, having first bent the clamps and tighten the nuts that were unscrewed at the beginning, after which you can return the bolt clamps to their original position.
- Put on the drum.
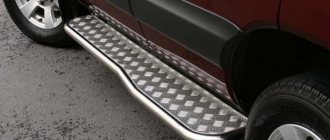
Appearance
The car has the same design as its three-door modification. The body has simple and clumsy shapes. At the front there is a regular black grille and round halogen headlights. At the top are side lights and turn signals. The bumper is made of metal. On the sides there is a wide black molding with a huge inscription “VAZ-2131”. The mirrors are black, without turn signal indicators or electrical adjustments. This car comes with stamped 16-inch wheels from the factory. Separately stands out, which is called “Urban”. This car has a slightly different, more modern and pleasant design. Essentially, the body design remains the same. The only changes are the bumpers, which have now become plastic, and the radiator grille, which has received a more stylish look (there is a photo of the model in our article).
The mirrors on the Niva were also changed. By default, the car is equipped with alloy wheels. Otherwise there are no differences. This is the same Niva, built on the basis of a three-door car, which, in turn, was released back in the 70s.
Does this car have any problems with the body? Some say that due to the elongated base on the Niva, it breaks the power elements of the body, like the frame on the Gazelle. But in practice no one has proven this, and these statements are only arguments. As for the quality of painting, this is really the weak point of the Niva. Although, compared to the UAZ, this car does not chip and rot so quickly. The metal itself is poorly processed at the factory, so after purchase it is recommended to apply additional Movil (or anticorrosive).
NIVA oil seals
1. NIVA gearbox seals:
-Oil seal for the input shaft of the gearbox (gearbox) NIVA-2121, -21213, -21214, -2131, -2123:
Catalogue number: 2101-1701043
oil seal dimensions: 28x47x8mm
- Seal of the secondary shaft of the gearbox (shank) VAZ-2121, -21213, -21214, -2131, -2123:
Catalogue number: 2101-1701210
oil seal dimensions: 32x56x11mm
2 . NIVA front axle oil seals:
-Oil seal for the front axle gearbox NIVA- 2121,-21213,-21214,- 2123,-2120
catalog number: 2121-2302052
-Drive seal -2121,-21213,-21214,-2131,-2123, universal (without direction)
Catalog number: 2123-2303120 / 121 2 pcs.
seal dimensions: 57.15 x 40 x 9mm
But it is better to install seals with a notch (left, right):
Left drive oil seal -2121,-21213,-21214,- 2123
Catalog number: 21213-2301035 1 piece.
Oil seal dimensions: 57.15 x 40 x 9mm
Right drive oil seal -2121,-21213,-21214,-2123
Catalog number: 21213-2301034 1 piece.
Oil seal dimensions: 57.15 x 40 x 9mm
3. Transfer Case Seals 3pcs:
2 identical oil seals are installed on the valve:
catalog number: 2101-2402052-01 (this is the rear axle gearbox seal on the VAZ-2101 and NIVA-2121 of right rotation),
one is installed on the drive shaft of the RK:
(in the lower diagram), the second is on the front shaft of the RK differential (see the upper diagram - highlighted in red)
Dimensions of these seals in mm: 35.8 x 68 x 10(12) 2 pcs.
Design
It would seem that a lot of time has passed since the debut of the three-door. However, in 1993, the designers decided not to change the appearance of the car. Thus, the new model 2131 was born in the guise of the still old Niva 2121. The reader can see what the extended modification looks like in the photo below.
The 5-door Niva is a car that has the same design as the three-door. At the front there is a classic black grille and round headlights. At the top there is a rectangular block with dimensions and turn signals. The hood, like on classic Zhiguli cars, opens away from the driver. By default, the car is equipped with 16-inch iron wheels. The only differences in design are a couple of doors with “Zhiguli” handles. Otherwise, the car is identical to model 2121.
The size of the oil seals on the Niva transfer case
1. NIVA gearbox seals:
-Oil seal for the input shaft of the gearbox (gearbox) NIVA-2121, -21213, -21214, -2131, -2123:
Catalogue number: 2101-1701043
oil seal dimensions: 28x47x8mm
- Seal of the secondary shaft of the gearbox (shank) VAZ-2121, -21213, -21214, -2131, -2123:
Catalogue number: 2101-1701210
oil seal dimensions: 32x56x11mm
2 . NIVA front axle oil seals:
-Oil seal for the front axle gearbox NIVA- 2121,-21213,-21214,- 2123,-2120
catalog number: 2121-2302052
-Drive seal -2121,-21213,-21214,-2131,-2123, universal (without direction)
Catalog number: 2123-2303120 / 121 2 pcs.
seal dimensions: 57.15 x 40 x 9mm
But it is better to install seals with a notch (left, right):
Left drive oil seal -2121,-21213,-21214,- 2123
Catalog number: 21213-2301035 1 piece.
Oil seal dimensions: 57.15 x 40 x 9mm
Right drive oil seal -2121,-21213,-21214,-2123
Catalog number: 21213-2301034 1 piece.
Oil seal dimensions: 57.15 x 40 x 9mm
3. Transfer Case Seals 3pcs:
2 identical oil seals are installed on the valve:
catalog number: 2101-2402052-01 (this is the rear axle gearbox seal on the VAZ-2101 and NIVA-2121 of right rotation),
one is installed on the drive shaft of the RK:
(in the lower diagram), the second is on the front shaft of the RK differential (see the upper diagram - highlighted in red)
Dimensions of these seals in mm: 35.8 x 68 x 10(12) 2 pcs.
An oil seal is installed on the rear shaft of the RK differential - this is the 3rd oil seal (highlighted in blue in the top diagram)
with catalog number: 2121-2302052 left rotation 1 pc.
Dimensions in mm: 35.8 x 68 x 11(12)
4. Rear axle gear oil seal :
catalog number: 2101-2402052-01 (rear axle gearbox VAZ-2101) 1 pc.
5. Axle shaft seals for Chevy NIVA-2123:
Seals for VAZ-2110 drives of right and left rotation are installed
catalog numbers of oil seals: 2110-2301034 right - 1 piece
gland dimensions in mm: 57 x 35 x 9
In the photo: VAZ-2123 axle seals (BRT) red-left, black-right.
The arrow on the oil seal indicates the direction of rotation of the shaft (when the vehicle is moving forward).
Good day! Here comes the first renovation. While installing the thresholds, I noticed that the transfer case and the front axle were wet (it flashed in my head: replacing the seals). I’m sitting, reading a book on repairs and at the same time looking in the catalog what spare parts I need to buy. According to the catalog, there are two oil seals on the differential transfer case. I have a question, which oil seal to take if on the front shaft side the oil seal numbers are 2101-2402052-01 and 2123-1802120 and on the rear shaft side the oil seal numbers are 2121-2302052 and 2123-1802216? There are two numbers for one seal. In addition to the seals, I will also change two M16x1.5 self-locking nuts.
Salon
Inside, the car looks the same as the three-door Niva. The front panel was borrowed from the Zhiguli (five). The instrument panel is from a VAZ of the Samara-2 family. The steering wheel is the same as on the “Classic”. The column has no adjustments, and the steering wheel itself does not have a comfortable grip - they say in the reviews.
Also alarming in the cabin is the abundance of transmission levers. There are three of them here. The first is responsible for the gearbox, and the other two are responsible for the transfer case and locking. Nearby there is also a 12-volt cigarette lighter and a small niche for small items. The standard glove box is also small in size. The seats are soft, without much lateral support. There is no armrest here. There are also no airbags. But there are belts with pretensioners and a system for securing child seats.
If we talk about the level of equipment of the VAZ Niva-2131, it is quite poor. All adjustments here are mechanical; there are no heated seats or air conditioning. There are no acoustics or electric windows. Moreover, the VAZ Niva-2131 was produced in this configuration until the release of the updated Urban version. The latter, for an additional fee, can be equipped with air conditioning, heated seats and mirrors, as well as electric windows. But again, there are no standard acoustics here.
The second row is designed for three people. There is much more space for them here than in the three-door.
Replacing the drive gear seal of the front axle VAZ-21213, 21214
We disconnect the driveshaft from the front axle gearbox (article – “Removing the driveshaft”).
We remove the housings of the internal hinges of the front wheel drives from engagement with the gears of the front axle reducer drives.
Using a dynamometer, we turn the drive gear clockwise by the flange mounting nut and determine the moment of its resistance to rotation.
We insert bolts into the flange holes and screw nuts onto them in order to create a stop.
Use a spanner wrench or a 24mm socket to unscrew the flange nut, holding it from turning with a suitable mounting blade
Chevrolet Niva
Chevrolet Niva is a Russian all-wheel drive SUV jointly produced by AvtoVAZ and the American General Motors. It went into mass production in 2002, and in 2009 it underwent a noticeable restyling. So far, only the first generation of this off-road vehicle can be seen on sale, although for many years there has been talk of launching a second one.
Fuel consumption for the Chevrolet Niva differs depending on the engine modification; below is the consumption in mixed mode for each of the existing modifications:
Chevrolet Niva 2002-2009:
All modifications run on AI-92 gasoline.
Chevrolet Niva 2009 – our days (restyling):
What is the fuel consumption of the Chevrolet Niva in different road conditions? According to the passport data, in the urban cycle the normal consumption is 14.1 liters per “hundred”, and on a free highway – only 8.8 liters. But according to reviews from owners, it is unlikely to meet 8.8 liters on the highway: more realistic figures are 9-10 liters of gasoline.
Advice on how to remove drives without dismantling the Niva front gearbox
- To dismantle the drives, it is necessary to unscrew the fastenings of the gearbox (in this case, some kind of stop is placed under it).
- Then the steering knuckles are released. To do this, simply unscrew the shock absorber mount from the lower arm and the lower ball joint.
- To relieve the load, jack up the lower suspension arm.
- Unscrew the hub nut and remove the centering ring. The nut is too tight, so we use a wrench extension (for example, a metal pipe).
- We move the steering knuckle to the side. The drive can then move freely.
- To ensure free movement of the drive during removal, the gearbox must be moved back slightly.
- We remove the drive, being careful not to damage the anthers. If the boot is torn, it must be replaced.
- The procedure for removing the right and left CV joint drives is similar.
Before dismantling, it is necessary to mechanically remove dirt from the inside of the steering knuckles and from the bottom of the car above the work area. The best option is to wash the bottom with a high-pressure apparatus one day before carrying out work.
International NIVA Club
Forums
| Photo gallery | NIVA-SHOP | Files | Video |
- List of forumsAuto - EquipmentTechnical section Lada 4x4 NivaTransmission
- Search
- Links
- Unanswered topics
- Active topics
- Search
Additional holes
An additional window is cut under the drain plug to drain the oil. You can drill holes in any place convenient for you, without bothering with the accuracy of the markings. Car enthusiasts also make technological windows to drain the water formed between the sidewalls of the channel and the dirt that gets there. The protection is enhanced by corners that are attached to the box support and the frontal part of the entire device. This design will protect the transfer case from all kinds of impacts on stumps, ditches and other obstacles that can lead to deformation of the subframe.
Also interesting: Official dealers of LADA Niva Travel in Togliatti - Official LADA website
Deciphering codes, checking devices
https://www.youtube.com/watch?v=3C757Ur_C8k
Mistake No. 2. Overvoltage.
Error No. 3. An error has been detected in the fuel sensor level; it occurs if the circuit is broken.
Error No. 4. Coolant temperature sensor error.
Error No. 5. The outside temperature sensor has failed.
Error No. 6. The motor has overheated. This happens if the engine overheating alarm is triggered.
Mistake No. 7. Oil pressure is in poor condition. Happens if the alert bell is triggered.
Mistake No. 8. Problems with the brakes. Happens if the alert bell is triggered.
Mistake #9: The battery is dead. Happens when the alert bell is triggered.
To reset all types of errors, press and hold the reset button until all data on the display is cleared.
Testing of devices and their combinations is carried out in accordance with technical specifications using special equipment (pulse generator, from a stable power source, etc.).
If a short circuit suddenly occurs in existing devices (less than 40-50 Ohms), the maximum temperature indication must prevail.
The devices operate from an electronic module, which receives signals from various sensors. The tachometer and speedometer are powered by stepper electric motors. The electrical instrument cluster cannot be repaired. The daily mileage of the car can be set on the 0 key, which is located on the right. The meter and its readings are saved when the battery is disconnected. That's all. Good luck!
- We have collected a huge selection of videos about repair, tuning and maintenance of VAZ cars
- Share photos and rate photos of other users
Also interesting: Timing marks Niva Chevrolet: how to set marks, crankshaft, chains, setting ignition by marks, installing camshaft Chevy Niva injector
Design modification.
To strengthen the subframe and reduce the profile height (up to 2 times), it is possible to additionally equip the side shelves of the channel with 4 corners at the level of the hole under the transfer case, followed by cutting off the sidewalls to the corner flange.
Finer tuning is provided by connecting the spar and subframe through couplings/bushings.
What is the essence of this system
Kalina's automatic fault diagnosis system includes several devices.
The display displays information that is processed by all devices. To prevent car owners from having to independently service their cars, manufacturers do not try to talk about the location of the devices and their decoding. It should also be borne in mind that the information received from the automatic diagnostic system is processed by the on-board computer, which simplifies the repair of the automotive unit, since the owners have the opportunity to visually find out where the defect is detected.
Since the Lada Kalina does not have an on-board computer, the owner will only be able to visually familiarize himself with the code number, and he will have to guess the location of the breakdown on his own. In order to avoid mistakes when repairing your car, experts recommend knowing each code by heart in order to promptly eliminate any type of malfunction.
Connection features
The first thing you should arm yourself with is a high-quality wiring diagram for the Niva 21213. It is shown in the photo below. Firstly, such a diagram is useful for maintenance, and secondly, with its help it is easy to determine the location for connecting the wiring harness.
Factory color scheme of electrical equipment VAZ 21213
The second important point is the frequency of use of the chandelier:
- Constantly, including traffic in urban environments;
- Only when driving outside urban and suburban highways (off-road). And here a proven diagram is absolutely necessary for an off-road vehicle.
The chandelier control output can be connected to a standard switch
The most preferable is the removable option, which provides for quick installation and dismantling of the chandelier, as well as its safe connection to the standard electrical wiring. The video in the article clearly demonstrates this process. Connection instructions are presented above.
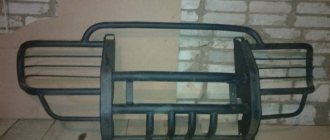
But what you should pay attention to is the adjustment of the light flux. The fact is that when driving off-road, the hood of a car is often covered with dirt, which in the dark glares in the headlights, blinding the driver.
Therefore, there are 2 options:
- Install a special sun visor above the windshield;
- Move the chandelier back so that the edge of the light stream does not fall on the hood of the car.
Proper installation of the chandelier prevents glare
Standard tool:
• Calipers and ruler;
An alternative tuning option is permissible using not corners, but a square profile with a section of 60x30 or 40x25.
There are ideas of placing the RC and the checkpoint on the same “frame”.