The VAZ 2107 clutch is designed to connect the engine crankshaft and the gearbox input shaft with the possibility of briefly stopping the transmission of torque. The reasons for its failure can be very diverse. However, all of them can be easily diagnosed and eliminated on their own.
- Reasons for replacing and adjusting the VAZ 2107 clutch
Replacing the clutch - Clutch adjustment
- Clutch slipping
- Tools and materials
Video: do-it-yourself adjustment of the VAZ 2107 hydraulic clutch
The design of the VAZ 2107 clutch mechanism
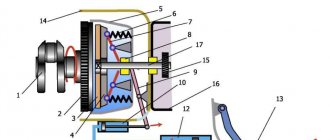
The seven uses a wet clutch mechanism. It consists of:
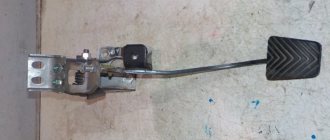
- directly the pedal, brought into the salon;
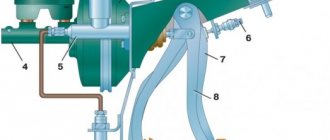
- master cylinder;
- pressure pipes;
- working cylinder;
- clutch fork;
- release bearing;
- clutch basket and disc.
Some car enthusiasts modify the mechanism by discarding the hydraulics and installing a dry drive. The process is justified by the greater accuracy of the modification and the absence of the need for frequent maintenance.
Basic faults
The slave cylinder has several rubber seals, which often become unusable or become oily, causing the car’s clutch to “slip.” Replacing old seals with new ones will require using a lift or inspection hole, since the main cylinder is located in an inconvenient place.
It is advisable not to touch the flare nut, otherwise additional adjustment will be required later. In order to replace the gaskets without removing the master cylinder, certain skills and experience are required.
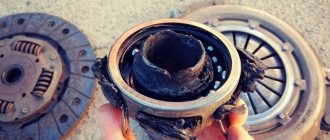
Another cause of clutch malfunction may be wear of the release bearing.
To replace it, you will have to dismantle the gearbox. Brake disc linings wear out just as often, which is easy to notice by the characteristic noise when the pedal is released. And the most common problem with a clutch malfunction is air getting into the system. Air can be removed by bleeding.
How does the clutch drive work?
The principle of operation of the mechanism is as follows.
- The driver presses the pedal.
- The piston of the master cylinder pumps pressure into the system, excess fluid goes into the expansion tank.
- The contents of the system move along the lines and enter the working cylinder.
- The piston of the working part pushes the fork and opens the bearing.
- The clutch disc moves away from the basket and the engine is disconnected from the gearbox.
Replacing the master and slave cylinders
The clutch has become soft: causes and repairs
The master cylinder creates pressure in the hydraulic system, transmitting force from the pedal pusher to the working cylinder rod. It lasts a long time, and the repair kit often requires replacement, rather than the cylinder itself. The slave cylinder serves to transmit force to the clutch fork pusher. Hydraulic fluid from the master cylinder presses against the piston in the slave cylinder and operates the fork.
Their malfunctions are manifested by dips or tight movement of the clutch pedal, difficult operation of the gearbox (gears are switched with a crunching sound, vibration). Visually, a problem with the main or working cylinder can be seen by fluid leaks.
The clutch cylinder is replaced if the “mirror” of the cylinder or its other elements are damaged, which happens quite rarely. Replacement parts wear out much more often, and then you can simply install a new repair kit.
Replacing the master cylinder, video
The master cylinder is located next to the brake booster, below the brake reservoir. Its dismantling is done in the following order:
- Pump out the liquid from the cylinder expansion tank (with a rubber bulb or a syringe with a hose);
- When there is no liquid left in the expansion tank, remove it from the cylinder (disconnect the rubber fasteners);
- Unscrew the nut that secures the pipeline to the cylinder, hose pipeline to the side;
- Loosen the clamp that secures the hose to the cylinder and remove the hose;
- Unscrew the nuts that secure the cylinder, remove it, and pour out the remaining liquid.
After dismantling, you need to inspect the cylinder for wear of metal parts and rubber gaskets. If necessary, replace the repair kit or install a new cylinder. Installation is done in reverse order.
Replacing the working cylinder, video.
The slave cylinder is located next to the gearbox, on the clutch housing. It can be accessed both from below and from the engine compartment. Dismantling procedure:
- Loosen the nut that secures the hose to the cylinder. Do not remove the nut completely, do not disconnect the hose;
- Use pliers to remove the tension spring;
- Using pliers, straighten and remove the restrictive cotter pin from the pusher;
- Remove the bolts that secure the cylinder to the clutch housing;
- Remove the bracket that was attached to the cylinder with these bolts and to which the tension spring was attached;
- Remove the cylinder by sliding the pusher out of the hole in the clutch fork;
- Now you can completely unscrew the nut and remove the hose from the cylinder. As with the master cylinder, installation is done in the reverse order.
Drive problems are often caused by poor-quality hydraulic fluid.
When working, pay attention to its color and consistency. Often wear products accumulate in the liquid and they begin to act as an abrasive.
When to adjust the clutch drive
The standard adjustment procedure is required as routine maintenance or emergency repairs. Usually the reason for performing the operation is such problems.
- Gear shift violation - positions are engaged with knocking, crackling or extraneous sounds.
- The clutch switch response threshold has been violated. A dip of 25 to 35 mm is considered optimal.
- Increased fuel consumption. If the mechanism is faulty, excess gasoline consumption can be up to 20% of the reference value.
- Knocking out positions. During acceleration of the vehicle, the gears “fly out”.
- Dissonance when revving the engine. When you press the gas pedal, the internal combustion engine spins up, and the car lags behind.
- Clutch lever failures, this also includes an increase or absence of operating play in the system.
- Early or late operation of the mechanism when the pedal is pressed.
Diagnosis of clutch faults VAZ 2107
There are a number of breakdowns that indicate that the car requires urgent repairs.
Clutch slipping
This occurs during sudden acceleration. The engine steadily picks up speed, but the car is “late” in accelerating. The process may also be accompanied by jerking, jerking and extraneous noise.
The situation greatly wears out the friction disc and negatively affects fuel consumption.
Clutch leads
This is caused by improper adjustment or airing of the system. The friction linings do not move completely away from the basket and gears are difficult to engage.
Jerks when starting and changing gears
It requires pumping and adjustment of the mechanism, when the car jerks when you put it in gear. The disc may slip at the start or rapid acceleration due to its wear.
Noise when clutch is disengaged
When the car vibrates slightly and an extraneous sound comes out when the pedal is fully depressed, the clutch basket and clutch disc do not completely separate.
This occurs when the device settings fail.
Noise when clutch engaged
The cause and consequences are the same as above.
Pedal failure and lack of clutch
Here the matter is more serious. The pedal can only fail if the mechanism is severely damaged. In 90% of cases, the cause is hidden in the head cylinder or basket. Operating a car with such a problem is strictly prohibited.
The clutch disengages, but the pedal does not return to its original position
This malfunction is often solved in a trivially simple way - the return spring may fly off or burst. The hydraulic system in the VAZ 2107 is a design where there are no return devices, except for mechanical parts.
Everything is solved by replacing the damaged element.
Tight grip
Some car enthusiasts complain that the clutch pedal is pressed extremely hard. In addition to the hydraulic system, movement difficulties are caused by souring of the moving joints and jamming of the release bearing. To fix the problem, you must completely disassemble the entire system.
The clutch disengages at the beginning or end of the pedal stroke
In this case, everything is quite simple - the system requires adjustment. The procedure is primitive and is completed in 20-30 minutes. The only caveat is that you will need an assistant.
Step-by-step instruction
Now we will analyze the whole process step by step. Stock up on a caliper or at least a ruler in advance.
- Open the hood and disconnect the negative terminal on the battery. Now we need to remove the air filter, which hides the components we need
- We remove the mass air flow sensor connector, the adsorber coupler, the rubber supports and tilt the VF housing to the side
- Our clutch fork is located next to the crankcase. On some cars on the secondary market you can also find a sensor moved there by the driver
- Using a tool, say, pliers, we pull the tip towards ourselves in order to free up more space for work
- We take a caliper and measure the distance from the leash to the fork. According to Grant's technical documentation, it should be exactly 27 millimeters
- We adjust the leash according to the thread if the distance does not match
- Then we press the pedal a couple of times, look at the result, and repeat the setting
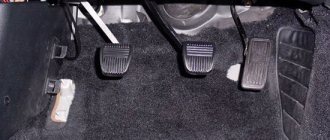
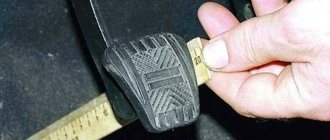
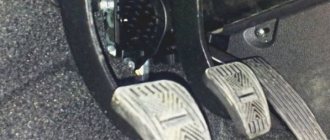
- Next is the travel of the pedal itself. It should be 14.6 centimeters (+ – centimeter). As already said, it is better if it is flush with the brake
- If even after several adjustments the pedal does not fall into place, then it would be logical to deal with the unit itself
How to finally adjust the clutch on a VAZ 2107
After all manipulations, it is necessary to check the functionality of the system. To do this, you need to start the engine and let it warm up. Then, with the engine running, you need to depress the clutch and, without accelerating, engage the rear rocker position. In this case, the presence of extraneous sounds and rattles is not allowed. The position is turned on easily - without additional effort.
Next, you can start moving at first speed and then increase the position to maximum (5). When driving, the presence of extraneous sounds or grinding noises is strictly unacceptable; the pedal is pressed evenly, without dips or jerks.
The last stage is acceleration at each gearbox speed, while the set of engine speeds fully corresponds to the acceleration of the car. If there is dissonance, the clutch disc slips and recalibration is required.
Possible reasons for clutch pedal failure
The clutch pedal is depressed when depressed and does not return
This problem can be easily solved in stationary conditions either at a service station or with your own hands in the garage. To replace or repair the main clutch or control valve in the garage, you must have repair kits for the clutch slave and master cylinders.
Reasons for failure and non-return of the clutch pedal of VAZ2106 and VAZ2107:
- a break in the clutch cable where the tip touched. This problem is not easy to fix on your own. You can, of course, carry a spare cable with you just in case, but cases are different and it is not realistic to provide for everything;
- the spring that performs the function of returning the pedal to its original position may burst or fly off. If the spring has flown off, then it is enough to put it back in place, and if it has burst, then, as in the case of a cable break, you must either tow the car or try to get to the garage or service station under your own power.
How to drive a VAZ2106 or VAZ2107 without a clutch? We'll talk about this below:
Why and how to bleed the clutch on a VAZ 2107 in your garage
The reason for bleeding the clutch is air in the hydraulic system. Air bubbles tend to shrink, which reduces the performance of the device. It’s easy to bleed the clutch in a VAZ 2107 at home. To do this, it is enough to have a set of primitive tools and a little patience.
Motorists prefer to do their own repairs because the procedure is expensive, and performing the entire process on your own is not difficult.
Preparing to bleed the clutch system
To bleed the line and do it correctly, preparation must be done.
- Drive the car onto a viewing hole, overpass or lift, where you secure it.
- Clean the expansion tank cap and fitting from dirt. Garbage entering the system is unacceptable.
Stages of the clutch bleeding process
The procedure is performed in a certain sequence.
- The protective cap is removed from the fitting and the hose is put on it.
- The second end of the tube is lowered into a bottle with TJ previously poured into it.
- Brake fluid is also poured into the expansion tank to the maximum mark.
- Next, the assistant gets into the car and presses the pedal several times; during the last push, you should press the lever to the floor and hold it.
- After this, use wrench No. 8 to unscrew the fitting on the working cylinder and the waste with air bubbles is squeezed out into the bottle. After the pressure has dropped (the pedal has failed), the valve must be closed.
- The procedure is repeated until the air is completely removed from the system.
Other causes of squeaking
If everything is perfect in the calculations, but the unpleasant sound does not leave you behind, then you need to look for other culprits:
- Plastic pedal bushing. It can “get used” to the bracket and make squeaks. Everything is quite simple here, we are looking for the attachment point, it is probably loose. Let's pull it up. Then be sure to repeat the procedure with the cable
- Tip lead. You will notice this at the first stage. If it squeaks, then it needs to be changed. Fortunately, there are plenty of such parts on sale, and the replacement process itself is not difficult. Unscrewed the old one and screwed on the new one. Then again measure and adjust according to the instructions above
- Loss of input shaft lubrication. This is already a problem with the box itself. Here the solution is clear: lubricant.
Source
Clutch check
To check the clutch bleeding, just follow a simple sequence.
- Raise the handbrake all the way.
- Depress the clutch and start the engine.
- Try to change gears, but no extraneous sounds or blockages should appear.
- Engage a random gear and smoothly release the pedal.
- Approximately halfway through the stroke, the engine should begin to twitch and stall. This indicates proper operation of the coupling device.
What to do if the gear shift mechanism does not work?
If the clutch pedal fails on a road with heavy traffic, you should not be nervous, but act calmly with a “cool head” and get to the nearest parking spot, or even better, to a garage or service station. To do this, you can use a tug, tow truck, or drive yourself.
How to drive independently if the clutch system breaks down?
You can use the following tips from proven car enthusiasts:
You can also drive to the repair site with a VAZ2106 or VAZ2107 car without a clutch, engaging second gear in the same way when starting to drive. Only in this case it is necessary to take into account some important nuances:
- the car should be either on a horizontal section or on a downhill slope, but not uphill. If the car goes uphill, then this method will not work; Before you start driving, you need to warm up the engine;
- Since the car will move in a lower gear no higher than second, you should carefully think through the route so that you do not have to stop at intersections, giving way or at traffic lights. If possible, take the main road and pull at the green light to avoid getting caught;
- it is necessary to check: whether the alarm system is turned on;
- It is important to remember that other road users do not know about your problem, so you need to maneuver less. If you don’t have time, it’s better to stop the car and then do this procedure again;
- when you don’t have confidence in your abilities, the optimal solution would be to call a tow truck or tug.
In VAZ cars with a rear-wheel drive wheel pair, the clutch mechanism is a separate hydromechanical unit that interacts between the power plants and the transmission.
Important Tips and Recommendations
Experienced drivers and mechanics recommend following simple rules to extend the life of the device.
- Do not overpress the pedal. This causes the disc to heat up and can cause it to wear out quickly.
- Use only high-quality brake fluid.
- Check the functionality of the device in a timely manner.
- If extraneous sounds or plugging occur, it is necessary to diagnose the mechanism.
Tools and materials
In order to cope with the operations of adjusting the transmission on a VAZ 2107 with dignity and quality, the driver will need the following tools:
- set of wrenches;
- bottle with hydraulic fluid;
- flat-head screwdriver;
- container for draining waste liquid;
- a small amount of rags;
- ruler or tape measure.
A similar set is probably present in every person who, to one degree or another, has encountered procedures for repairing various vehicles.
