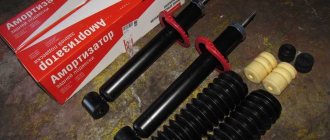
Hello everyone. I’ll probably now raise a topic that worries almost all owners of cars of the 9th family, namely the knocking of the rear pillars.
Like everyone else, I was annoyed by the knocking noise of the rear struts when driving on gravel, or on any uneven road, even with new struts. Having studied a lot of automotive literature, as well as visually, the following became clear:
The shock strut rod is secured in the cup using 2 rubber bands (donuts), an iron bushing, a washer and a nut.
The knocking appears due to the fact that when the rod is tightened, the donuts do not compress, and the washer rests against the bushing, which is why it begins to “flatten”, and as a result we get a nasty knock.
After purchasing new donuts and bushings, the following became clear: the bushing is very long, which is why it prevents the donuts from sealing the rod.
To do this you need to shorten the bushing slightly.
As a result we get the following:
Well, then let’s put everything back together
Insert a new donut
But here is a small nuance. We put the old one on top of the new bagel
And we’ll get this whole thing going. By the way, you’ll have to work hard, it may not work out right away :D...
We do the same with the other side and forget about the knocking of the rear pillars.
Thanks to all. I will be glad that this article is useful to someone_)).
Recommendations
Comments 40
A friend’s racks were strumming on the 10k, I didn’t have anything strumming or strumming on either the 8k or 9k, the bagels in general are God knows how old they are, I chose which ones were livelier from the 9k and from the 15k of the donor as I reassembled them. and the bushings were the same, they were the same from both cars and on par with bagels, it seems to me that the issue of the adequacy of spare parts sellers who sell xs is very relevant here
I came across your post just in time) Otherwise I don’t know what to do, my ass is rattling like hell... I’ll do some magic) And write it in the notes)
To do this, do you need to remove the stand or is it enough to unscrew the top and do it?
if the bushing is not flattened, then you can get it from above
interesting idea. I also started to decide this way, but I haven’t decided yet. And it was like this: a set of SS20 racks and their branded donuts. For several years everything was fine. Then the right side rattled. The SS20 bagels on the right have been trampled together living with the tough comfort of the SS20. I simply replaced them with standard donuts, and machined the bushing 1mm lower than the standard one. It got better, but some sound remained. Over the winter I was tired of the frozen comfort from ss20, so in the spring I installed regular sazz oil. The one on the left is generally super and there are just standard parts there. On small bumps on the right the knock became less, on large ones a little more than with the SS20. I suspect that this bushing has play and hits the washer along the rod. The idea is to place a washer and tighten metal to metal. In general, if it improves, I’ll write back.
try to shorten the bushing. By the way, I was so quick to look, I’ve never come across any information about how long this bushing should be, in my opinion they used to be shorter than what they sell now
ok, I'll try. I took the dimensions from the original bushings. The modern ones did not impress me so much that I sharpened 1 piece for replacement during repairs, because... relatives were temporarily unavailable. After some time I’ll look into the issue, and then I’ll take the dimensions. Am I correct in thinking that the bushing can be changed from above without removing the strut?
Of course it is possible if it is not flattened.
ok, I'll try. I took the dimensions from the original bushings. The modern ones did not impress me so much that I sharpened 1 piece for replacement during repairs, because... relatives were temporarily unavailable. After some time I’ll look into the issue, and then I’ll take the dimensions. Am I correct in thinking that the bushing can be changed from above without removing the strut?
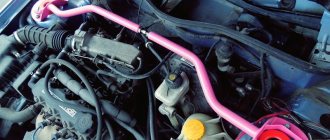
Rear suspension design
In order to determine what could be knocking in the suspension, you should know what this element of the car consists of.
- Guide structure.
- Twisted coil springs.
- Shock absorbers.
- Rubber bushings and mounting cups.
A sound in the rear suspension may appear when one of the above elements fails. At the same time, we note that if there is a constant knocking, it is imperative to carry out diagnostics of the suspension. If working with a car causes many problems, then you can entrust the diagnostics to specialists from a car service center. Note that the rear suspension has a very simple design and you can dismantle the worn part yourself.
Possible causes not related to suspension
Before determining what might be knocking, you should make sure that there is a problem with the suspension. Often, a knock may appear due to a minor malfunction of another element, but with strong vibration on the road, it seems that the problem is with the chassis elements. Possible causes of knocking include the following:
- The exhaust pipe in most cases becomes the cause of the knocking, as its fastening wears out over time.
- poorly secured items in the cabin or luggage compartment. You need to check the contents of the trunk, especially the mounting of the spare wheel. If during the first inspection no obvious problems are identified, we proceed to diagnosing the suspension.
Can new shock absorbers make knocking noises?
New shock absorbers rarely knock. However, with a decrease in the price segment of spare parts, a similar phenomenon is observed more and more often. The appearance of knocking in new racks is usually associated with two reasons:
- factory defect;
- unqualified installation.
Installation errors or defects undetected during installation in more than half of the cases cause extraneous sounds in the suspension.
IMPORTANT! If a knocking noise appears after replacing the shock absorbers, do not wait until it goes away on its own. Most likely, the problem will not go away over time. But the likelihood that mating parts will be damaged due to play in the chassis will increase.
Diagnostics of suspension guides
Many cars have a similar rear suspension design, which makes diagnostics and dismantling easier. The differences can only be in the principle of fastening and the type of installed parts. During the diagnosis you should:
- We check the force of the beam, if there are levers. As a rule, due to severe wear, cracks appear, which cause deformation.
- If the hinges are too worn, they can also cause a knocking noise from the rear. Cracks may appear on the hinges, which cause their deformation.
The threaded connection of the flanges used when attaching the guide elements can also cause a problem. The flanges can be repaired, but it is recommended to install new ones. The check is carried out on an overpass or pit, since problems are determined visually or using force (that is, you need to strongly loosen the guide elements with your hands). This will require good lighting. Therefore, it is recommended to carry out work in the garage.
Spring problem
Although springs are very durable, they can also wear out over time under certain operating conditions. Often, spring wear manifests itself in a slightly different way: the car wobbles at high speed, strong rocking, or a sagging rear end. However, when looking for something that may be knocking, you can conduct a visual inspection and pay attention to the following points:
- Do the turns have any defects?
- Are the rubber pads intact?
In most cases, springs lose their elasticity due to long service life or when exposed to heavy loads (for example, a passenger car has been used for a long time to transport a heavy load). The appearance of defects in the turns indicates poor quality of the metal used in manufacturing, a manufacturing defect, or severe wear. If everything is in order, we carry out further inspection.
Shock absorbers: a common problem caused by rough roads.
Shock absorbers can be considered the most vulnerable structural element. They are designed to absorb impacts when overcoming broken sections of the road. You can determine shock absorber wear as follows:
- Visually - if a clear oil leak appears, as indicated by oil stains, this structural element must be replaced or repaired.
- Completely disassemble the shock absorber. To do this it is necessary to dismantle them. There are rubber bushings inside the shock absorber that often fail. The problem with shock absorbers manifests itself when overcoming bumps. There may also be poor vehicle stability when driving at high speed. It is worth considering that the method is only suitable for serviced shock absorbers.
We pump original oil shock absorbers of Lada Priora
These bleeding methods are suitable for most shock absorber struts installed on domestic cars, including the VAZ 2107.
Doing the work manually is not easy, but it is possible. Please note that the front shock absorbers on the Priora are not replaceable and those from other models, especially the VAZ 2110, are not suitable, they have different springs.
There are two methods of pumping, without turning over and with turning over the shock absorber strut.
But there are general recommendations that must be followed in all cases.
- When pumping, the shock absorber should be in a vertical position, and if tilted, then no more than a few seconds;
- Bleeding must be carried out immediately before installation on the car;
- Do not use a tool that can damage the product (gas wrench, hammer, pliers), hydraulics is a delicate matter, remember this;
- Do not allow the rod to rotate in the stand itself around its axis;
- Apply efforts smoothly, without jerking;
- An already pumped shock absorber must be in a vertical position at all times.
Method 1
Place the shock absorber strut on a level place with the lug facing down.
The task is to fully extend the rod when pumping at least 10 times and return it back, thereby ensuring that the liquid (oil) evenly fills the working space.
It is difficult to pull the rod out by hand, so they come up with different devices.
In our case, you can take a 30mm adjustable wrench with a hole in the handle whose diameter just allows you to use the tool as a lever.
Place the key on the rod so that the threads do not touch and take it to the break.
Do not sharply, using even force, pull it out until it stops.
We return it back smoothly, without any jerks.
The latter should go down easier than up, the ideal case is when the lowering occurs under its own weight. But if the rod does not fall without influence on it, this is not scary.
We repeat the steps cyclically at least 10 times, pay attention to possible jerks when retracting and pulling the stand, extraneous sounds and gurgling.
Their presence is allowed at the beginning and middle of the procedure, but at the end of pumping they should not be present. If necessary, increase cycles to 15–20 times.
The rear suspension struts on Priora are interchangeable; the rear strut from VAZ 2110, 2111, 2112, Lada Samara, Granta, Kalina will fit here.
Using the same wrench to 30 we pump up the rear shock absorber.
Please note that the rear strut does not come with a nut, which increases the likelihood of thread damage.
Temporarily screw in any nut or bleed with extreme caution.
Insert a rod (or a large screwdriver) into the hole at the bottom to hold the stand with your feet.
After pumping, the shock absorbers can be installed in the garage with your own hands, but since this is quite labor-intensive work, many people prefer to do it at a service station.
To prevent the devices from turning over to a horizontal position, they can be placed in factory boxes, twisting the latter with tape.
Method 2
The oil shock absorber is pumped according to the following algorithm:
- The rack rod must be positioned so that it is extended to 75% of its length;
- Turn the shock absorber over with the rod down and rest the latter on the floor;
- Applying even force, press the rod until 4-6 cm remains to the rack body. Wait 5-6 seconds.
- Turn the device over, wait 5-6 seconds again, and pull the rod out to 75% of its length. Break – 2-3 seconds.
- Press the rod in again.
Carry out the operation 6 to 10 times, and on the third and sixth repetitions, try to move the rod with sudden efforts, which in any case should move smoothly. If not, the procedure continues.
Other reasons
If diagnostics have been started and no obvious problems have been identified, you can pay attention to the following:
- A brake caliper is an element of the brake system, which, when the pedal is pressed under the influence of the created pressure in the brake hydraulic system (mechanical and electronic are quite rare), compresses the wearing pads. In some cases, misalignment is possible, due to which the pads will wear unevenly and a knock may appear during braking. You can check the caliper visually, as it should also have no defects.
- The hub or bearings are a common problem that leads to humming and knocking noises while driving. To check, the brake disc or drum must be removed. If installed bearings are severely damaged during dismantling, they spill out or have defects that can be identified visually. The bearing mounting method is pressing. That is why, when it gets wedged, the hub can wear out, as evidenced by the bearing turning. You can determine problems with the hub or bearings without dismantling work, for which you need to slightly rock the wheel to the side.
- Another sign is a loose wheel. Wheel rims need to be balanced.
Diagnostics of the vehicle elements listed above in this paragraph should be carried out periodically, since their failure will lead to brake failure or loss of controllability (there are known cases when the hub bursts due to severe overheating, as a result of which the wheel can jam at speed).
Consequences of ignoring a knock
Any extraneous sounds that appear while driving must be identified without delay, as their presence may indicate a serious malfunction. In this case, let’s look at the consequences of knocking in the rear suspension:
- If problems arise in the guides and are not resolved in a timely manner, in addition to material costs, controllability may deteriorate; in some cases, this malfunction leads to a situation where the suspension is secured only by a spring and a shock absorber. The result is wear and tear of all elements, creating an emergency situation.
- If the spring is damaged, the car sways on uneven roads. In addition, the spring does not limit the movement of the shock absorber. The result of spring wear is terrible stability of the car on the road and damage to other suspension elements.
- Failure of shock absorbers is accompanied by a constant knocking sound. As a result, severe wear occurs on the fastening elements, as well as the shock absorbers themselves. In this case, controllability deteriorates significantly, and strong roll is possible when turning at high speed.
In most cases, a knock in the rear suspension is detected almost immediately, as it occurs while overcoming a bump or pothole on the road. As a rule, suspension elements fail after their service life has expired. If you replace parts in a timely manner, you can avoid road accidents and serious material costs.
When the front and rear shock absorber struts need to be checked
Typical malfunctions of this unit are known to everyone:
- Depressurization of the rod seal. Leads to oil leakage from the strut. It can leak at any time. Characteristics change until complete loss of performance.
- The rod moves too freely in the pipe. In fact, the shock absorber strut turns into a guide for the suspension spring. The malfunction is related to the internal valves.
- Play during compression or rebound. Associated with production in the rod or cylinder. The consequences are similar to broken valves. The shock absorber does not perform its function in the car, it knocks, rattles and makes other unpleasant sounds, which is why driving in such a car becomes uncomfortable and dangerous.
- External damage - dents on the body, cracks in the eyelet. They affect the chassis as a whole and can lead to more serious damage.
If any malfunction is detected, it is necessary to remove the strut and free it from the spring. Dismantling is carried out in the garage, without the use of special tools.
Sometimes owners of foreign cars, noticing that their struts have leaked, turn to a service station for diagnostics, where they will test them on a stand.