Jabot is the name given to the special cladding on the VAZ 2110 for the windshield. It can be of several types, new and old. After some time, the attachment points may burst, so there is a need to replace the frill 2110. Today, the frill of the old model is very difficult to find and many people wonder whether it is possible to install a frill on a new model VAZ 2110?
Old style overlay - differences
The frill trim of the new generation of Priora cars is enthusiastically appreciated by drivers, which replaced the old part. There are significant advantages to this:
The new form factor features added stiffening ribs to prevent deformation during temperature fluctuations. To ensure that the seal fits as tightly as possible to the body, additional fasteners were added, which are located close to each other. The air intake honeycomb has a different structure so as not to allow leaves to pass through, but at the same time take in a sufficient volume of air.
Is it possible to make a replacement?
The old model of the VAZ 2110 cladding has a big drawback: the wiper arms wear out.
This can be eliminated by filing the friction point or simply replacing the frill with a new VAZ 2110 model. That is, from here we can conclude that the old and new type of frill are easily interchangeable with each other. And all the fastenings do not need to be redone, but when installing a new model, it happens that gaps appear between the windshield and the rubber. But all this can be easily removed with a file.
But there are several reasons for this:
- The frill is of poor quality.
- Discrepancy in body geometry.
But before installation, you need to purchase special plugs for attaching the wipers and a hose for the washer.
Now it’s worth considering the processes for replacing both the old and new frill models.
Fighting bloating Priora frill
| All owners of LADA Priora have noticed that in hot weather the frill (wind lining) of the car swells from the sun. Soon this case was recognized as a warranty case and they offered to replace the frill with a new one. However, after replacement, the problem repeats again, and the pad becomes a consumable. Let's look at all the ways to combat this disease. |
The reason for the swelling of the Priora frill is the poor quality of the plastic. The cracks that appear as a result of swelling do not look aesthetically pleasing, and also contribute to even greater penetration of water under the lining (water still seeps under the lining in its normal state). It is not clear whether excess moisture will affect the operation of the micromotor gearbox or the wiper motor, but it is recommended to eliminate the gaps in the frill as soon as possible. AvtoVAZ’s response to the problem with the Priora frill :
On cars of the LADA PRIORA family, there is a discrepancy in the form of warping of the wind window frame linings det. 2170-8212734/735/730 (hereinafter referred to as the overlay).
If warping of the linings is detected on cars during pre-sale preparation, as well as when contacting owners of cars under warranty, the discrepancy should be eliminated by replacing the linings and applying double-sided adhesive tape (form “3M”, 6 mm wide) to the linings of the wind window frame in the following technological sequence:
- degrease the glass surfaces and linings in places where they are glued;
- In the place where the tape is glued, apply primer type 4297 to the surface of the lining;
- glue the adhesive tape onto the overlay according to Figure 1; the tape should not protrude beyond the overlay;
- before installing the trim on the car body, remove the protective film by 20-30 mm, tighten the screws securing the trim, then remove the protective film completely;
- tighten the screws securing the lining in the sequence indicated in Figure 1, roll the gluing area with a force of 0.5+ 0.1 kgf.
Even before the official response from AvtoVAZ, craftsmen tried to solve the problem with swelling of the frill in various ways, including using sealant or double-sided tape. This solution is temporary, so other methods have been proposed to combat this problem:
The bulges on the reverse side do not have stiffening ribs, so the first method is to strengthen the frill . This can be done with any suitable material, for example, epoxy resin. On the back side of the removed cover, where the stiffening ribs go, pour epoxy glue (pre-mixed with hardener). This is quite enough for the lining to become more rigid and the swelling to not reoccur, but if you wish, you can further strengthen the structure by placing metal plates (from a children’s mechanical construction set) before pouring the glue.
Another method is based on
modifying the frill fastening .
We press the places of swelling with screws close to the glass. For aesthetics, use black screws with a thin head. The main thing is not to forget to lubricate the drilled holes and screws well with thick polymer mastic. And also, don’t hit the windshield with a self-tapping screw, which is very close. By the way, self-tapping screws can be replaced with plastic clips. The easiest method to combat bloating is hand molding . The point is to evenly heat the swollen parts of the lining and straighten them in the opposite direction. In this case, it is important not to overheat the plastic and not bend it too much. After installing the frill in place, the elastic band should fit snugly against the windshield.
Now you can buy Priora frills from different manufacturers, for example:
- 2170-5206064/65 (Chelyabinsk);
- 2170-8212730/35 (Syzran).
Some also have low-quality plastic, and the other half are generally crooked, so the problem is still relevant. Some try to fight not the consequences, but the cause, covering the frill from the sun with homemade covers on a hot day.
They say that the new Priors are equipped with the same linings, but they are glued with mastic along the entire length from the factory. By the way, the frill can be modified and a protective mesh installed. How did you deal with the problem of the windshield swelling?
Photo source:
- Frill deformation
Keywords:
- jabot priors
Removing the trim and lining of the wind window VAZ-2110
Removing the windshield trim and trim
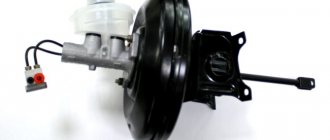
We remove the windshield trim and trim to provide access to the windshield wiper arms and drive, heater, and vacuum brake booster.
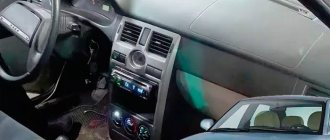
In the photographs, the hood has been removed for clarity, although work can be done without dismantling it.
Using a 10″ socket, unscrew the two nuts along the edges of the windshield frame trim.
Using a Phillips screwdriver, unscrew the five fastening screws.
Use a screwdriver to pry up the fasteners at the back...
...and, lifting the windshield frame trim, disconnect the tubes from the windshield washer jets.
Using a 10" wrench, unscrew the nuts securing the windshield wiper arms and remove the arms by shaking them.
Using a Phillips screwdriver, unscrew the ten screws securing the windshield window frame trim.
We pry up and remove the plugs...
...under which we unscrew four more screws.
We pry the lock in the center and remove the windshield window frame trim.
Using a Phillips screwdriver, unscrew the six screws securing the engine compartment upholstery to the casing.
Disconnect the clamp securing the hoses to the upholstery of the engine compartment.
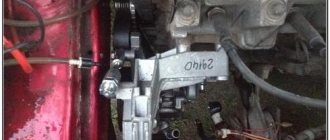
We remove the hoses and wires from the electro-pneumatic valve. Using a 10″ socket, unscrew the nut of the heat shield of the steering rack, which presses the upholstery of the engine compartment.
Using a Phillips screwdriver, unscrew the self-tapping screw connecting the right and left parts of the engine compartment upholstery.
Remove the right side of the engine compartment trim.
Using a Phillips screwdriver, unscrew the self-tapping screw securing the left part of the upholstery to the body near the expansion tank...
...and remove it.
Replacing the old type frill
- In order to replace the frill with a VAZ 2110, you should prepare the following tools: a wrench with a size 10 head and a flat and Phillips screwdriver.
- Next, you can remove the cladding; to do this, unscrew the nuts on it from the edges, using a wrench with a head.
- Then take a Phillips screwdriver and unscrew all the screws on the surface of the frill.
- Also, use a screwdriver to remove the latches on the back.
- After this, carefully disconnect the tubes from the windshield washers and you can remove the upper part of the lining.
- Then remove the leads on the wipers and unscrew them with a key.
- It is also worth checking all the places under the installed plugs; screws are usually located there.
- The windshield cover has a lock in the center; it can be removed carefully.
- And to gain full access, you need to unscrew another part of the frill, the sound insulation and the casing itself.
- Then you can install the frill back on the VAZ 2110, but only the procedure is carried out in the reverse order.
How to remove the trim and trim of the windshield of a VAZ-2110
Page 1 of 2
Remove the windshield trim and lining to provide access to the windshield wiper arms and drive, heater, and vacuum brake booster.
The hood has been removed for clarity, although work can be done without dismantling it.
1. Using a 10mm socket, unscrew the two nuts along the edges of the windshield frame trim.
2. Using a Phillips screwdriver, unscrew the five fastening screws.
3. Use a screwdriver to pry up the latches in the back
4. Lifting the windshield frame trim, disconnect the tubes from the windshield washer jets.
5. Remove the lining.
6. Using a 10mm wrench, unscrew the nuts securing the windshield wiper arms and remove the arms by shaking them.
7. Using a Phillips screwdriver, unscrew the ten screws securing the windshield window frame trim.
8. Pry up and remove the plugs
9. ...under which we unscrew four more screws.
10. Pry up the latch in the center and remove the wind window frame trim.
If the wiper rubs against the frill trim, then you can do one of two things:
- 1) It is necessary to drill 5 mm holes along the edges of the cover. After this, secure the overlay using a metal bracket approximately 15 mm wide. Press the resulting structure on top with an elastic band. The result is practical and beautiful: the wiper does not scrape against the frill, and the trim itself does not dangle.
- 2) Heat the plastic of the wiper arm with a hairdryer and bend it in place - this will prevent the wiper arm from rubbing against the frill.
If the lining on the frill dangles and rattles, then it is best to use a sealant for window and door frames - it needs to be glued at the point of contact between the lining and the frill on the underside of the latter. This way we will prevent the lining from rocking and the rattling will stop.
source
Question.
Car: VAZ-2112, manufactured 10.2002, the frill looks like an old model (plastic, goes in continuation of the hood). You can see how the left wiper touches the plastic frill and lifts it a little. At high speeds, the wiper generally hits the plastic, making an unpleasant sound. Please advise what to do? I don't want to cut the plastic, it will be noticeable.
Lex83, Moscow, Central Administrative District Answer 1.
Unfortunately, there is nothing you can do here. Design feature of the old frill. But the old frill has a plus - the glass will not fog up in the rain.
Exodus, Moscow. VAO. Answer 2.
What if you unscrew the wiper and move it one notch higher????
Juno Answer 3.
Well, for 1.5 years now it has been touching me and knocking at speed, and I cut out a small hole, it still knocks, if I cut out the hole even more, the wiper will fly off the glass and onto the pillar. Rearranging the wiper doesn't do anything. It does not lie horizontally on the glass. There are no adjustments either. In short, leave it alone, removing the wiper drive assembly and using a sledgehammer to change the wiper stroke still won’t work. In general, I noticed that the movement of the wipers looks different for different 10-current ones. Some swing more, others have less. And there the mechanics are pressurized and unregulated. In my upright position, the driver's seat reaches the strut at speed, but for others it doesn't reach 7 cm. Well, what can you do here?...
DEN_103, Kiev Answer 4.
I've seen so many people with an old frill, they all just have a small triangle/semicircle cut into the frill in the place where the wiper knocks on the frill. In general, business for 5 minutes.
GENA, Tomsk Answer 5.
I also have 2000 21102. The left wiper also affects it. Over time, the wiper itself and the frill in the place where it touched were worn out. Now, at high speed, the wiper almost reaches the seal and a knock is heard, but I have forgotten about it. You can't do anything.
Locky, Kazan Answer 6.
I also suffered for about six months. One of the wipers also touched. Then I found a smart serviceman at the service station - I took a key for 12 or 14, in my opinion, unscrewed a couple of screws that secure some kind of boot under the hood to the Jabot - I climbed in there with the key. After 2 minutes, I pulled out my hand with the key and screwed everything back on. I tried it and it really helped. Since then I have been happy!
Rusfatman, 64 rus Saratov Answer 7.
Apparently, in the old frill there are bolts securing the frill to the body under the top of the frill. He loosened them, moved the frill and twisted them for just two minutes. We (a new type of frill) have these bolts in direct visibility, under the plugs.
GENA, Tomsk Answer 8.
It was also a pity to cut at first - then I got sick of it. I cut out a triangle for the wiper and everything is ok! To prevent it from flying out, move it a little lower. Or the frill acts as an “original” limiter. Check the play (in general, the windshield wiper mechanism itself gives play over the years) and the fit of the wiper on the windshield wiper (may be spinning) There are already a lot of tips here - try something in order, it should work. SMU, Moscow
Tuning frill vaz 2110
- To the beginning of the forum
- Forum Rules
- Old design
- FAQ
- Search
- Users
Last summer I made an improvement to the frill (model 2004), which cured it from fogging in the rain.
I didn’t write right away, because... I had to try it out and make sure it worked. It is now clear that the result is positive. Modernization consists of 3 steps: 1. Glue the mesh on top. The mesh eliminates the accumulation of mountains of leaves and all sorts of ever souring tops on the filter (instead of a filter I have a beautiful lady’s stocking). The mesh “for plastic windows”, gray, is sold in any hardware store, cut into pieces and glued around the perimeter with a regular glue gun. It holds up well, nothing came off during winter use, snow is easily shaken off, and less stuff gets inside. It looks great too: the color is 1 in 1, standing next to the car nothing is noticeable at all unless you look closely.
2. Additional water drainage. On the right side of the photo you can see a rectangular narrow hole for draining water from the 2004 frill. Two such holes are not enough for normal drainage of water in the rain, and they are constantly clogged with something, so next to them, 3 more holes are made with a drill with a diameter of 5-6 mm on each side. This eliminates large volumes of water from entering from the windshield into the frill housings through the ventilation holes.
3. Drainage of water from the frill itself. If we turn the frill over, we will see a decent-sized box screwed down from below, inside of which the washer nozzles are mounted. According to the designers, all the water that gets inside this box flows through a single drain hole. Wherever you think. Into the air intake housing directly onto the cabin filter. We seal this hole, and instead drill 7 holes with a diameter of 8-10 mm, evenly along the outer edge of the box. We're putting everything back together.
All. Telling about how you traveled before makes the chickens laugh. If it was raining outside, I steered with one hand, and in the other I had a scraper, which I ran across the glass every 2 seconds, really dreaming about the wipers from the inside. Whatever I did to solve this problem. Now nothing is sweating.
Source
Jabot of a new type
The part from Priora 2 even fits a pre-restyling car - the installation locations remain the same, and the additional fasteners work as hooks, so installing the linings is quite simple.
The new sample part consists of several components:
- Water reflective shield. Catalog number: 2170-8119054 – 300 rubles.
- Left part of the part. Catalog number: 2170-8212735 – 800 rub.
- Right pad. Catalog number: 2170-8212734 – 800 rubles.
- Mounting sleeve. Catalog number 1118-8212778 – 20 rub.
Jabot “High with mesh” on VAZ 2170-71-72 Priora
Installation:
The frill is fixed to the external heater intake using self-tapping screws. After installing the frill, you will receive the following advantages: less dirt and leaves will clog and better streamlining.
Applicability:
VAZ 2170, 2171, 2172 Priora.
Attention! When placing an order, indicate the color you need. '>
Tuning frill vaz 2110
18 customers chose this product
Tuning-3 wind window frill with mesh to change the appearance of the car.
Note! When ordering, please indicate the color of your car. Over time, the car's paint changes color (fades). When manufacturing parts in body color, it is impossible to select a color remotely. Therefore, the color of new parts may differ slightly from the color of the car body.
Set: 1 frill, 1 mesh
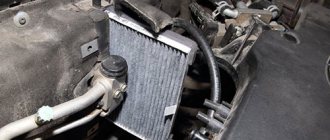
Article number and cost of the original cabin filter for the VAZ 2112 and its analogues
The cabin filter used depends on the year of manufacture of the vehicle. Until 2003, the VAZ 2112 was equipped with a cleaner with article number 2110812202003. Its price ranges from 250 to 350 rubles. Finding this consumable is very difficult. The low popularity of the filter has led to the fact that it is not available for retail sale. For replacement, car owners usually purchase analogues. The best alternative options are Nevsky Filter NF6001 and Ekofil EKO-04.01. Their cost ranges from 180 to 250 rubles.
The seat often does not correspond to the filter size. This applies to both the original and its analogues. As a result, after installing the cabin filter, significant gaps form around the consumable. A significant air leak occurs through them, making the installation of a filter element pointless.
To combat the gap between the filter element and the seat, car owners use foam plastic or foam rubber. The consumable is glued along the contour. A homemade sealing frame eliminates air leaks, which prevents dust and foreign odors from entering the cabin.
After 2003, a new filter element began to be installed on the VAZ 2112 with a 16-valve engine. Its article number is 21110812202183. The cost of such a consumable is 300-400 rubles. Please note that old and new filters are not interchangeable.
In addition to the original filter element, its analogues are available for sale, produced by third-party manufacturers. Many of them have very decent quality and attractive prices. The table below presents the best alternatives to the original cabin filter.
Table - Analogues of the original new cabin filter
| Firm | Article number | Approximate cost, ruble |
| Shafer | SAK658 | 280-355 |
| Bosch | 1987432435 | 740-890 |
| TSN | 21118122012 | 110-135 |
| A.G. | AG5010 | 210-250 |
| WIX | WP9398 | 350-430 |
Basic faults
The frill trim of the VAZ-2170 is characterized by one unpleasant malfunction. Over time, due to temperature changes and the sun, gaps appear between the frill and the windshield. This happens to owners of pre-restyling Priors - the old-style linings were not equipped with additional fasteners, so a gap between them and the glass appeared quite quickly.
In many cases, the spare part has to be changed as soon as it swells. Otherwise, the consequences may be negative. When water gets under the seal, there is a risk of accelerating corrosion. Water gets on metal parts and slowly destroys them - this applies to ordinary clamps and entire units.
Before purchasing a part, make sure that the part number for the Priora car matches the part you need. The mounting locations for the pre-restyling and restyled windshield parts are the same, so no significant modifications will have to be made. Troubleshooting is only possible by replacing the windshield seals.
Jabot from Priors on VAZ 2110
Of course, you can install a frill from a Priora on a VAZ 2110. But it is worth remembering that the Priora is significantly different from the tenth generation, and some difficulties may arise when replacing such a lining. It will not depend on what type of frill is installed, but still, if the VAZ 2110 was produced before 2003, then you will have to trim the studs a little. All this is necessary in order to install frills from the Priora on the VAZ 2110, since the Priora does not have them. It is also worth remembering that the windshield washers on the Prior are located a little differently, unlike the tenth generation. That is why it is necessary to make additional holes in the frill or change the injectors and install them from a Niva Chevrolet car.
Priora's frill has its advantages and disadvantages. And first of all, it is worth considering the advantages:
- When installing such a frill, it will be possible to easily replace the air filter.
- Low cost of overlay.
But even with such significant advantages, there are also disadvantages:
- Since the cost is not high, the quality of the plastic will be too low.
- When replacing, it is necessary to replace the washer nozzles or move them.
Removal and installation of trim and lining of the wind window VAZ 2110, VAZ 2111, VAZ 2112
Window trim and trim, power windows, repairs and replacement.
Facing and lining of the wind window photo, Glazing of the car VAZ 2110, VAZ 2111, VAZ 2112
We remove the windshield trim and trim to provide access to the windshield wiper arms and drive, heater, and vacuum brake booster.
In the photographs, the hood has been removed for clarity, although work can be done without dismantling it.
Using a 10mm socket, unscrew the two nuts along the edges of the windshield frame trim.
Using a Phillips screwdriver, unscrew the five fastening screws.
Use a screwdriver to pry up the fasteners at the back...
...and, lifting the lining of the windshield frame of the VAZ 2110, we disconnect the tubes from the windshield washer jets.
We remove the lining.
Using a 10mm wrench, unscrew the nuts securing the windshield wiper arms and remove the arms by shaking them.
Using a Phillips screwdriver, unscrew the ten screws securing the VAZ 2111 wind window frame trim.
We pry up and remove the plugs...
...under which we unscrew four more screws.
We pry the lock in the center and remove the windshield window frame trim.
Using a Phillips screwdriver, unscrew the six screws securing the upholstery of the VAZ 2112 engine compartment to the casing.
We remove the casing.
We disconnect the clamp securing the hoses to the upholstery of the VAZ 2110 engine compartment.
We remove the hoses and wires from the electro-pneumatic valve of the VAZ 2112.
Using a 10mm socket, unscrew the nut of the heat shield of the steering rack, which presses the upholstery of the engine compartment.
Using a Phillips screwdriver, unscrew the self-tapping screw connecting the right and left parts of the engine compartment upholstery.
We remove the right part of the upholstery of the engine compartment of the VAZ 2111.
Using a Phillips screwdriver, unscrew the self-tapping screw securing the left part of the upholstery to the body of the VAZ 2111 near the expansion tank...
...and remove it.
Replacing rear view mirrors Removal and installation of rear view mirror VAZ 2110, VAZ 2111, VAZ 2112 |
Replacing the window lift mechanism Removal and installation of door glass and window regulator VAZ 2110, VAZ 2111, VAZ 2112 Window trim and trim Removal and installation of trim and lining of the wind window VAZ 2110, VAZ 2111, VAZ 2112 |
| Replacement of glued body glass Removal and installation of glued glass body of VAZ 2110, VAZ 2111, VAZ 2112 |
Windshield replacement Removal and installation of windshield VAZ 2110, VAZ 2111, VAZ 2112 |
heater, do-it-yourself body replacement, interior inspection and maintenance, care and operation of window lifts, repair and replacement
Replacement: removal and installation of the trim (frill) on the Priora
In order to remove the cover, you need to prepare the following tools:
- Head wrench “13”,
- Phillips screwdriver, flat screwdriver,
- Marker.
Follow these steps to remove the windshield seals from the Priora:
- Tighten the handbrake, remove the negative terminal from the battery.
- Using a marker, mark the points on the windshield opposite which the windshield wiper motors are located.
- Lift the hood.
- Hook the decorative cap of the electric motor with a screwdriver and remove it. Using a socket wrench, remove the nut that holds the wiper arms in place. Remove the washer from the recess and remove the lever along with the wiper.
- Next, unscrew two self-tapping screws securing the consumables from the sides, and then four self-tapping screws located in the center. Remove the screw plugs by prying them off with a flat-head screwdriver.
- Next, unscrew three more self-tapping screws on the side, remove the right and then the left part of the windshield trim.
There will be nothing new in the process of installing an old-style seal: you must perform all the steps in the reverse order. However, if you want to install a frill from a restyled VAZ-2170 onto a pre-restyled one, perform the installation following the following algorithm:
- Place the bushings in place.
- Attach the water-reflective shield to the seal so that the honeycombs match.
- Check that the fastening hooks provide a sufficiently tight fit to close the body. If necessary, adjust the size of the hooks by cutting off part of the sealant.
- Separate the excess part of the part if the car is equipped with air conditioning.
After installation, check if there is a gap between the spare part and the glass. If there is a gap, this means that it can quickly grow with temperature fluctuations. It should seem that the windshield seal is “tight” so as not to allow any leaves from the trees or a drop of water to pass through. A loose position will render the presence of the part useless.
Removing the trim and lining of the wind window VAZ 2110 2111 2112
In the photographs, the hood has been removed for clarity, although work can be done without dismantling it.
|
Using a Phillips screwdriver, unscrew the five fastening screws.
Use a screwdriver to pry up the fasteners at the back...
...and, lifting the windshield frame trim, disconnect the tubes from the windshield washer jets.
Using a 10mm wrench, unscrew the nuts securing the windshield wiper arms and remove the arms by shaking them.
Using a Phillips screwdriver, unscrew the ten screws securing the windshield window frame trim.
We pry up and remove the plugs...
...under which we unscrew four more screws.
We pry the lock in the center and remove the windshield window frame trim.
Using a Phillips screwdriver, unscrew the six screws securing the engine compartment upholstery to the casing.
Disconnect the clamp securing the hoses to the upholstery of the engine compartment.
Remove the hoses and wires from the electro-pneumatic valve.
Using a 10mm socket, unscrew the nut of the heat shield of the steering rack, which presses the upholstery of the engine compartment.
Using a Phillips screwdriver, unscrew the self-tapping screw connecting the right and left parts of the engine compartment upholstery.
Remove the right side of the engine compartment trim.
Using a Phillips screwdriver, unscrew the self-tapping screw securing the left part of the upholstery to the body near the expansion tank...