01/26/2022 10,839 VAZ 2105
Author: Ivan Baranov
The dashboard informs the driver about the current state of the car. The article discusses the instrument panel of the VAZ 2105, its typical faults, and provides instructions for removing and repairing, as well as tuning the device.
[Hide]
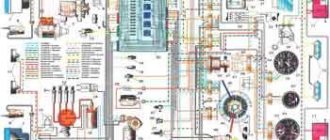
Model 2105 Instrument Panel - Removing and Replacing Bulbs
Location of lamps on the instrument panel:
1 — speedometer illumination lamp (AMH 12-3-1 (T3W); 2 — signaling unit (A 12-1.2 (W1.2W); 3 — battery charge indicator lamp (AMH 12- 3-1 (T3W); 4 — instrument cluster illumination lamp (AMH 12-3-1 (T3W); 5 — insufficient oil pressure warning lamp (AMH 12-3-1 (T3W); 6 — fuel reserve warning lamp (AMH 12-3-1 (T3W); 7 — voltmeter backlight lamp (AMH 12-3-1 (T3W); 8 — control lamp for turning on the external lighting (AMH 12-3-1 (T3W); 9 — control lamp for turning on the direction indicators (AMH 12-3-1 (T3W); 10 - high beam indicator lamp (AMH 12-3-1 (T3W)
Removal
1. We prepare the car for operations (see “Preparing the car for maintenance and repair”).
2. Disconnect the wire from the negative terminal of the battery (see “Battery - removal and installation”).
3. Using a thin screwdriver, remove the two plugs for the screws securing the shield.
4. Using a Phillips screwdriver, unscrew the two screws.
5. Disconnect the wires from the fan switch terminals. The top wire is blue-black, the middle wire is yellow-blue, and the bottom wire is red.
Advice. To avoid injury from the protruding plugs of the switch when disconnecting the speedometer drive cable, we recommend removing the switch by squeezing its latches.
6. Moving the instrument panel as far as possible to the left, unscrew the knurled nut securing the speedometer cable by hand and disconnect the cable.
7. Disconnect the three colored connectors of the instrument panel wiring harness (red, green and white) from the instrument panel wiring harness.
8. Moving to the right, remove the instrument panel.
Replacing warning lamps
1. Remove the lamp socket from the housing.
2. By pressing and turning counterclockwise, remove the lamp from the socket and install a new one.
Replacing the backlight lamps of the speedometer and voltmeter instrument cluster
1. Using a screwdriver, remove the lamp socket from the lamp body.
2. By pressing and turning counterclockwise, remove the lamp from the socket.
Replacing indicator lamps
1. Having turned the lamp socket 90° until its protrusion coincides with the slot in the board, remove the lamp socket from the hole in the board.
2. Replace the lamp together with the socket.
Replacing the cigarette lighter socket lamp
We replace the cigarette lighter socket lamp with the instrument panel removed.
1. Squeezing the walls of the lamp housing, disconnect it together with the lamp from the cigarette lighter housing.
2. Remove the lamp socket from the housing.
3. By pressing and turning counterclockwise, replace the lamp.
Installation
Installation of all removed parts is carried out in reverse order.
Pinout of the dashboard of VAZ2110, 2111, 2112
- fuel reserve warning lamp;
- dashboard lighting lamps;
- right repeater indicator lamp;
- left repeater indicator lamp;
- VAZ plug block;
- coolant temperature sensor;
- indicator lamp for external lighting;
- carburetor air damper warning lamp;
- oil pressure warning lamp;
- handbrake indicator lamp;
- battery charge indicator lamp;
- VAZ tachometer;
- indicator light “CHECK ENGINE”;
- speedometer dashboard;
- brake fluid level warning lamp;
- hazard warning lamp;
- high beam indicator lamp;
- fuel level indicator.
| White block (X1) | Red block (X2) | ||
| 1 | Housing (weight) | 1 | To terminal “W” of the fuel level indicator sensor |
| 2 | Tachometer (low voltage input from ECU) | 2 | Fuse F19 + 12V power supply |
| 3 | Tachometer (high voltage input from coil) | 3 | Housing (weight) |
| 4 | Const +12V from battery (via 6th fuse) | 4 | Instrument lighting switch |
| 5 | Coolant temperature sensor. | 5 | Turn signal RIGHT |
| 6 | Fuse F1 (side light) | 6 | Turn signal LEFT |
| 7 | Throttle valve (“choke”) | 7 | Brake fluid level |
| 8 | Check Engine Light | 8 | To the trip computer |
| 9 | Fuse F19 + 12V power supply | 9 | Speed sensor |
| 10 | Fuse F19 + 12V power supply | 10 | Terminal “T” fuel gauge |
| 11 | Parking brake, terminal “VK” | 11 | Fuse F3 (high beam) |
| 12 | Generator output “D” | 12 | Hazard switch |
| 13 | Oil pressure sensor | 13 | To terminal “50” of the ignition switch |
Interior tuning
Replacing a VAZ 2101 torpedo with a VAZ 2105
Currently, the VAZ 2101 car is more than 30 years old.
This model was the first produced by the Volzhsky Automobile Plant, and at that time impressed many car enthusiasts with its ultra-modern design. And now 2101 remains a relevant model, which still travels along Russian roads. And numerous “clones” of 2101 (three rubles, fives, sixes and sevens) provide enormous opportunities for tuning. First of all, let's pay attention to the instrument panel 2101. To the modern eye, it is somewhat outdated and is only suitable for retro cars. However, if you replace it with a panel of younger car models, the 2101 will look quite modern. Now in stores you can find panels 2106, 2105, 2107, each of them has its own advantages and disadvantages.
Panel 2106 looks just as archaic and, moreover, does not have a particularly high-quality heating system. Its only advantage is the presence of a tachometer. But in panel 2105 there is no tachometer, but it has a modern heater that allows you to blow on the windshield and side windows. The shape of this panel is the most successful of all the others. The 2107 panel has the best heating system, as it has a central air duct. It also has a tachometer.
Of the listed panels, you can install any one of your choice in 2101, but the most convenient is still 2105. Almost no one uses the heating system: most people install a radio there. The lack of a tachometer is compensated by its excellent tuning shape. Devices 2106 allow a person with imagination to assemble anything.
Before proceeding directly to tuning, cover the seats with something to prevent them from getting dirty. To remove the instrument panel, first remove the dashboard and glove compartment shelf, then unscrew the 4 nuts securing it to the engine compartment. After this, remove the steering column. To do this, you need to unscrew it from the pedal assembly and steering gear. Lastly, remove the pedal assembly and the lower heater casing.
Assemble the heater as indicated in its instructions. If you can’t purchase an air damper 2105 (it is not sold separately, and not everyone wants to buy a complete heater), leave the “penny” one.
Assembling the heater housing should not cause you any difficulties. The only difficulty may be an excessively sharp bend in the control cables, which will arise due to the use of the 01 upper housing. In order to solve this problem, you need to change the order of controlling the heater as follows: the top handle is the heater faucet, the middle handle is the air flow, the bottom handle is the heater air damper. Drill holes in the windshield heated air duct and pass the heater choke cable through them. Use cable seal to seal.
Installing a legal air vent will not cause any difficulties. And in order to install the left one you will need to remove the steering column and pedal assembly.
Remove all unnecessary parts from the instrument panel so that they do not interfere with your installation. Please note that you will have to attach the center panel fasteners to the U-shaped bracket and not to the usual fastening points. The right mount can be attached to the engine shield.
Before you start working with electrical wiring, decide where in the cabin the radio receiver will be located, as well as the control keys. You may have to extend the wires in some cases. It will be much easier for you to work if you draw up a connection diagram in advance.
Replacing the instrument panel on a VAZ 2104, VAZ 2107
Welcome! Instrument panel - many people confuse the instrument panel with the torpedo itself, so in order for you to further understand what this means, let us explain: The instrument panel is part of the torpedo. The panel contains the instruments themselves, as well as various kinds of switches and displays that are responsible for indicating the vehicle speed (Speedometer), a display that is responsible for indicating the level of fuel remaining in the tank, and various other things.
Pinout of the dashboard of VAZ2105, 2106, 2107
Old panel (with oil pressure gauge)
In addition to the presence of an oil pressure indicator, it is worth noting that this instrument panel does not have an air damper indicator lamp (choke), and the emergency oil pressure lamp is located next to the pressure indicator. Because of this, it contains lamps for low brake fluid levels and fog lamps.
White 6-terminal block X1:
- Gasoline level sensor
- Turn signal indicator lamp
- Battery charge sensor (voltmeter -)
- Gasoline level warning lamp
- Overall plus (+)
- Battery charge sensor (voltmeter +)
White 8 terminal block X2:
- Fog lamp warning lamp
- High beam warning lamp
- Dimensions indicator lamp
- Empty
- Battery charge indicator lamp
- Brake fluid level warning lamp
- Empty
- Parking brake warning lamp
Orange 6-terminal block X3:
- General minus (-)
- Tachometer VAZ
- Instrument lighting
- Oil pressure sensor
- Oil pressure warning lamp
- Coolant temperature sensor
New instrument panel (with econometer)
Here, everything is the other way around - there is no oil pressure indicator (instead there is an econometer), instead of a brake fluid level lamp there is a suction lamp (or an engine management system lamp on injectors), and instead of a fog lamp lamp there is an oil pressure lamp.
White 6-terminal block X1:
- Gasoline level sensor
- Turn signal indicator lamp
- Battery charge sensor (voltmeter -)
- Gasoline level warning lamp
- Overall plus (+)
- Battery charge sensor (voltmeter +)
White 8 terminal block X2:
- Dimensions indicator lamp
- High beam warning lamp
- Oil pressure warning lamp
- Empty, but there is a terminal in the wiring that goes to the brake fluid level sensor
- Battery charge indicator lamp
- Indicator lamp for the air damper (choke) or engine control unit for injectors
- Empty
- Parking brake warning lamp (handbrake)
Orange 6-terminal block X3:
- General minus (-)
- Tachometer (if this contact is empty, then the tachometer is on pin #4)
- Instrument lighting
- Empty, and if not empty - to the tachometer
- Empty
- Coolant temperature sensor
Second connection diagram option
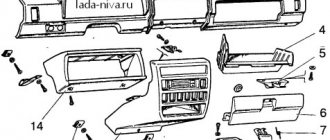
How to remove the panel of a VAZ 2105
Tuning enthusiasts make their own beard to place on this panel:
- watch;
- multimedia devices (radio, radio, etc.);
- knobs for adjusting the level of illumination of the dashboard;
- switch block for fan, fog lights, external lighting;
- pocket for small items;
- USB sockets for charging gadgets
- part of a car's control devices.
Before taking measurements for the manufacture of the center console, it is necessary to remove decorative trims from the existing part and anything that will interfere with the installation of the new part. In order not to be mistaken with the dimensions, you must first make blanks from cardboard and try them on.
Materials and tools
Console tuning usually consists of making a new VAZ 2107 beard, on which mounting locations for switches, indicators, control devices and other equipment are pre-provisioned. The most affordable material for making your own beard is plywood. The thickness must be at least 6 mm, otherwise it will not be possible to achieve the required rigidity of the product. For finishing, artificial leather is most often used, matched to the color of the interior elements, or, more recently, carbon fiber of a suitable color.
Sometimes tuning the beard of a VAZ 2107 is accompanied by a comprehensive redesign of the interior design with the replacement of finishing materials for the door trim and trim of the front panel with carbon fiber or leatherette. To make a tuned VAZ 2107 beard, in addition to finishing materials, the following devices and tools are needed:
- jigsaw;
- electric drill or cordless screwdriver;
- “grinder” (angle grinder);
- locksmith corner;
- pencil;
- ruler (roulette);
- glue gun (tube of glue);
- furniture stapler (for fastening leatherette).
The new console (beard) is installed in place of the standard one, which should be dismantled to free up space and take the measurements necessary to create the workpiece drawings.
Making your own beard
A beard is a complex structure; it is made of flat parts. To make them you need to make patterns; it is best to make them from cardboard. It is necessary to achieve high precision of the console parts; rigid cardboard is quite suitable for this. If you are not confident in your skills, first make a mock-up of the console from cardboard. This will allow you to make sure that the drawings are made correctly and to estimate how the new beard will fit into the installation site.
After making the pattern, mark the details of the beard and cut them out of plywood with a jigsaw. All parts are connected using glue and screws. The latter will allow you to fix the console elements until the glue sets. This is the most reliable and easiest way to connect beard parts.
After the beard frame is ready, it is covered with carbon fiber, leatherette or fabric. For their fastening, finishing materials, furniture stapler and glue.
After the glue has dried, all that remains is to install the new console in place of the standard one. Attach switches and devices and secure.
Tuning beard VAZ 2107: Video
How to dismantle the instrument panel: step-by-step instructions
First of all, you need to open the hood of the car and remove the negative terminal from the battery in order to de-energize our dashboard. After this, the work is performed in the following sequence:
- unscrew the dashboard shelf and the glove compartment body using a special screwdriver;
- turn off the power to the light bulbs that illuminate the interior of the glove compartment in your car;
- We very carefully remove the additional dashboard along with the clock and other devices. To do this, you will need to pry the part with a screwdriver and pull it out of the special grooves;
- turn off the cigarette lighter and warning lamps by removing the corresponding wires located behind the additional panel;
- we remove the switches located in the immediate vicinity of the gearbox lever and disconnect them from the on-board network;
- We unscrew the screws that you will immediately see under the switches and the bolts intended for fixing the main console of the torpedo. After this, you can freely remove it without fear of damaging the wires;
- remove the steering column cover;
- remove the heating system cover together with the air duct deflectors;
- dismantle the heater control unit;
- unscrew the last nuts holding the torpedo. For this purpose you need to use a key of 10.
After this, you can dismantle the instrument panel in the car without any problems. Using this approach, you do not have to worry about accidentally breaking any parts or breaking wires, since they are all removed before unscrewing the fixing nuts. Assembling the torpedo is carried out in the reverse order and can be done even without experience. The most important thing is to carry out all the work as carefully as possible and not skip any of the steps described above.
Removing the car dashboard
- Using a Phillips screwdriver, remove the three screws that secure the center console;
- remove the cover, the protrusion located at the bottom, remove the protrusion from the bracket;
- Using a nozzle, unscrew the five screws located in the console on the right and remove the screen;
- Disconnect the terminal with the (-) sign from the battery. If there is a radio receiver, you need to remove it, remove the plug from the shield;
- Disconnect the wires coming from the cigarette lighter, remove the cartridge;
- Using a narrow screwdriver, remove the handle from the levers;
- pull the handle towards the heating and fan switch;
- unscrew the two screws above the panel and the two located under it using a screwdriver;
- unscrew the screw located behind the panel;
- Also unscrew the two self-tapping screws securing the cover;
- disconnect the harness and wire connectors. To avoid confusion when installing the panels, you should mark the order in which they are connected;
- unscrew the fastening bolts;
- unscrew the two self-tapping screws, those that secure the bottom bracket using an 8 key;
- unscrew the self-tapping screw securing the light guide and remove it;
- Also unscrew the screws securing the heating unit;
- remove lamp sockets;
- after removing the external parts, remove the decorative insert;
- unscrew all nuts with a 21 key;
- hydrocorrector, remove its lamp;
- Unscrew the screws that are attached to the cross member on the left.
- Finally, the panel itself is removed. The panel is assembled accordingly in the reverse order.
In general, the repair work is quite doable even with your own hands, but before starting dismantling work, you need at least a pinout mapped on paper, otherwise it will be difficult: you will need to “trace” every wire and every connection that is on the “path” from devices to the power button.
How to remove the instrument panel on a VAZ 2107? This will come in handy sooner or later
There comes a time when this needs to be done, but you don’t know how to remove the instrument panel on a VAZ 2107.
There can be many reasons for this, such as replacing a burnt-out instrument light bulb, one or more instruments not working, the speedometer cable needs to be replaced, and many other similar issues. It should be a shame for the owner to contact a car service center to change a burnt out light bulb. Even novice drivers can do this. Almost all men periodically have to work with a screwdriver and other tools with complex household appliances or other devices. If this works out, then you can safely begin dismantling the “tidy” from your seven.
Content
- Features of the “tidy” on the seven
- What is needed for withdrawal?
- Removal and installation procedure
Features of the “tidy” on the seven
This unit in the car interior is designed to provide various information to the driver during the operation of the car. It informs about the speed of movement, shows the distance traveled by the car, and signals the occurrence of malfunctions in the main components and assemblies of the car. Unlike the “tidy” of previous models, it not only has a changed appearance, but is also endowed with a wider range of control and alarm functions.
So, a voltmeter has been added to its composition, showing the voltage of the vehicle’s on-board network, and an econometer, which helps to continue driving in the most economical mode. For models with an injection engine, the instrument panel contains a power unit health indicator. The designers changed the mounting of the signal lamps. If in older models wires were connected to each of them, then in this model they are absent.
What is needed for withdrawal?
The removal process for this model is somewhat different from other cars. For example, on a VAZ 2106, to remove it you need to release the latches, after which it can be easily removed from its installation location. All that remains is to remove the wiring and disconnect the speedometer cable to completely remove the panel. For a model like the VAZ 2105, the principle is completely different. Its installation in the socket is secured with mounting screws.
“Seven” has a completely different panel compared to its predecessors, which differs not only in appearance, but also in the way it is installed. No special tools are required for removal and installation. A standard set of slotted and Phillips screwdrivers is quite sufficient. This is quite enough to perform this operation.
Removal and installation procedure
Before starting removal work, it is necessary to turn off the power to the car. To do this, simply disconnect the negative terminal from the battery. For some, it is enough to turn off the ground, while others simply remove the terminal. The following order will be:
- Removal will be hampered by the control knobs for the interior ventilation and the coolant supply valve to the heater radiator. In this case, a screwdriver comes to the rescue;
- The next step is to release the daily mileage reset handle. It is located on the right side of the dashboard near the hazard warning switch. You need to unscrew the fastening nut, remove it along with the washer and push it inside the panel;
- On the right side of the “tidy” in the area of the heating and ventilation control levers, there is a plug that needs to be removed. A thin slotted screwdriver does this well. There is a self-tapping screw under the plug that needs to be unscrewed;
- After this, you need to lightly pull the right side of the panel towards you. It is not yet possible to pull it out any further. This is prevented by the speedometer cable, econometer hose and wires;
- The speedometer cable is secured with a knurled nut, which can be unscrewed without much effort. The only problem that can “spoil” the image of a repairman is the presence of grease on the speedometer cable sheath. Therefore, it is better to perform this operation with gloves. It is best to dismantle the cable from the right side of the panel or from above; this will not be possible in other places;
- Next, you need to remove the hose that supplies vacuum pressure to the econometer. It attaches without clamps, you just need to pull it towards you. Some effort may be required;
- This is not the end of the removal procedure; the shield is held in place by wires. They are combined into multi-colored plastic connectors. When releasing them, remember how they were located, so that later when assembling they are correctly installed in place.
After this, the shield can be easily removed outside for repairs, tuning or other work. The installation operation is performed in the reverse order of removal. You just need to be careful about installing the connectors with wires in their places.
As can be seen from the above, there are no problems when dismantling the “tidy”. We hope that any reader who reads this article will understand how to remove the instrument panel on a VAZ 2107. As in any matter when working with complex mechanisms, you should not rush in order to avoid “accidental” breakdowns or damage.
How to remove a panel on a VAZ 2107
We independently remove the dashboard of a VAZ 2107
For a novice car enthusiast, removing the dashboard may not seem like a very difficult task. But this impression is deceptive. Before the VAZ 2107 instrument panel is completely removed, you will have to do a lot of manipulations, which we will tell the reader about in this article.
The most common reasons for dismantling
- One or more devices have failed.
- The panel joints began to creak while driving, and the car owner decided to glue them from the inside to eliminate this annoying creak.
- Several light bulbs on the panel burned out.
- The speedometer cable has become unusable and needs urgent replacement.
Required Tools
How to remove the dashboard and dashboard of a VAZ 2107
- The car hood is opened and the negative terminal is removed from the battery.
- Using a screwdriver, unscrew and remove the dashboard shelf and the glove compartment housing.
- Now the two terminals from which the glove compartment light bulbs are powered are disconnected.
- The additional instrument panel is carefully pryed with a flat screwdriver at the lower right edge, its latches are removed from the grooves, after which it is removed along with all the instruments.
- Behind this panel there are connectors from which the instrument lighting, clock, warning lamps and cigarette lighter are powered. All this is disconnected.
- Using a flat-head screwdriver, pry up and pull out all the switches located next to the gearshift lever. The switch connectors are disconnected.
- There are two screws under the switches. They are unscrewed with a Phillips screwdriver.
Possible reasons for dismantling the shield
In what cases is it necessary to remove the dashboard of a VAZ 2107 car? There may be several reasons for this:
- panel tuning;
- replacing burnt out light bulbs;
- repair of individual devices that have failed.
VAZ 2107 is a legendary car, which hundreds of thousands of car enthusiasts have repaired independently.
How to modernize a VAZ 2105, give it some zest and functionality using the instrument panel?
The dashboard informs the driver about the current state of the car. The article discusses the instrument panel of the VAZ 2105, its typical faults, and provides instructions for removing and repairing, as well as tuning the device.
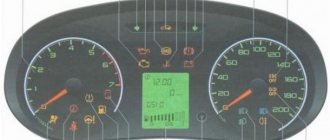
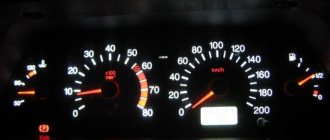
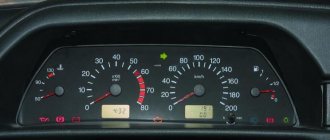
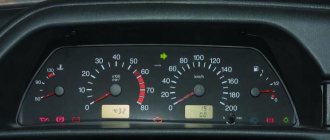
Description and location of indicators and instruments on the panel
In order to fully use the information that the dashboard provides, you need to know the location and purpose of its instruments and indicators, and their characteristics. The instruction manual provides a description of the device. A standard panel consists of a set of measuring and control instruments, as well as alarms.
Instrument panel VAZ 2105
The dashboard typically contains the following components:
- speedometer – speed indicator with trip meter;
- coolant temperature and fuel level indicators;
- indicator lights for battery charge, oil level, fuel reserve;
- control lamps, turning on side lights, high beams, direction indicators;
- voltmeter;
- signaling unit;
- switches for heated rear window, rear fog lights;
- switches for exterior lighting and electric heater fan.
When installing an on-board computer, it becomes possible to monitor more than 20 parameters that allow you to control the operation of components and systems of the machine. The information is reflected on the display (the author of the video is RusLan 404).
Possible faults
Dismantling and repair of the device may be required for the following malfunctions:
- The control panel backlight does not light up. You should check the condition of the wiring, contacts, and the serviceability of fuses.
- Not a single sensor or indicator works, and the warning lights do not light up. First of all, you should check the fuse in the mounting block and replace it if it is burned out.
- If the indicator arrows jerk in different directions, the cause is most often poor ground contact.
- Malfunctions may be related to the operation of the dashboard itself. It is necessary to dismantle the shield and carry out diagnostics.
- Sometimes the functionality of the device is caused by a malfunction of the cigarette lighter. The instrument panel does not work or does not function correctly.
- The functionality of the control panel sometimes disappears after tuning.
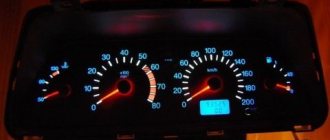
Tuning with LED lighting
Installation and repair instructions
Dismantling the control panel may be required for repairs, tuning the panel, replacing sensors, etc. The procedure is simple and can be performed at home.
Tools and materials
To disassemble and repair the dashboard, you must prepare the following tools and materials:
- a set of keys;
- Screwdriver Set;
- diagnostic tester;
- new sensors and parts needed for replacement;
- elements for tuning.
It is better to buy originals to avoid fakes.
Improved and updated console design
The dashboard is a car control part that is constantly in sight of the driver and passengers. First of all, the owners of the VAZ “five” strive to change the design of it, since it is simple, budgetary and visual. Tuning can be different: this includes installed lighting for the instrument console, and overlays on the instruments, and a modified dashboard as a whole. It all depends on the imagination and financial capabilities of the owner.
| Methods | Materials | Result |
| Modern industry offers tuning using ready-made special kits. | It includes instrument panels, dials for sensors, lighting components, terminals for connections, and wiring. | The “tidy” modified in this way looks stylish and modern, especially if the car’s interior is modernized accordingly. This is a rather expensive option for car interior design. |
| There is a more budget-friendly way: spectacular lighting of the “five” torpedo. | For this you will need LEDs of different colors. | By choosing a variety of colors and lighting schemes, the owner will make his car come to life. This tuning will be especially effective at night. The control console lighting comes in different types and can be used to create a unique design. |
| Changing the texture or color of the console looks more technically difficult. | The style of the interior should be combined with the selected texture and color. | It is worth taking a balanced approach to the decision to modernize in this way, so this option is not always convincing and successful. |
Easy-to-do-it-yourself tuning using instrument overlays will allow you to radically change the standard to modernity, especially if you use LED backlighting. To do this, you will need diodes of different colors (to suit the owner’s taste), trims, arrows for instruments (they can be borrowed from imported cars).