The light bulbs that are located on the instrument panel tend to fail. There is nothing wrong with this, but if this happens while the car is moving, any unpleasant situations may arise. Replacing the light bulbs in the dashboard of a VAZ 2114 is far from the easiest task, but if you follow the tips presented below, anyone can cope with this task. So how to change the light bulbs on the instrument panel of a VAZ 2114?
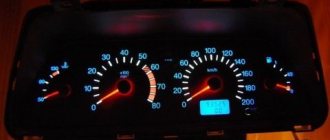
Light bulbs on the panel of vases
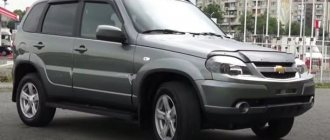
The VAZ 2114 has many positive qualities, but many car enthusiasts have serious problems with the dashboard of this car. It is not of sufficient quality, so many panel elements fail over time. How to change light bulbs that need urgent replacement? What tools might be required for this? The answer to these and other questions can be found below.
Features of the functioning of light bulbs on the dashboard
The VAZ dashboard is needed to inform the car enthusiast about any processes occurring in the car. This means that using the dashboard you can monitor the status of the car, as well as monitor your driving. In addition, it is the dashboard that is needed in order to diagnose certain malfunctions. All this means that the lights on the panel do not light up just like that, but for some specific reason.
One of the most common causes of light bulb failure is prolonged use. Another reason is problems with contacts. Almost any car part requires replacement after a certain period of time. Light bulbs are no exception. And some problems may require the help of an electrician.
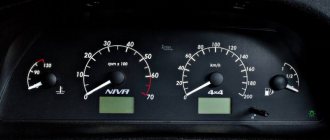
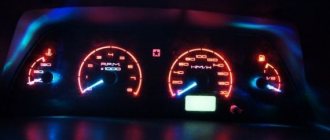
Dashboard
Replacing the backlight
In analysis
To improve the quality of your dashboard lighting, it is advisable to install new LEDs in place of the old ones. They provide excellent illumination, consume minimal energy, and guarantee a high level of data reading.
- Buy a set of LED lamps, having previously calculated the number of devices needed for each sensor.
- After removing the block, install the resistors and lamps in specially designated places on the VAZ 2114 - in the sockets. To dismantle the cartridges, they are carefully unscrewed counterclockwise. New sockets are installed in their place and light bulbs are inserted. Respect the polarity and position the LED heads. They will have to be carefully ground off.
- Connect the power and check how the new backlight works.
- Reassemble step by step. Be sure to route the wiring to the board and carefully secure it to it. This way, the backlight components will not interfere with the reassembly process.
- Make sure the instrument panel arrows are positioned correctly. When trying to quickly complete a job, they often become deformed and bent.
- The backlight structure is fixed with screws.
- The power for the LEDs is connected to the power supply for the light bulbs, the arrows are put on and set to zero.
- Using the on-board computer, check the operation of each sensor and device. If the IDs are functioning correctly, return the instrument panel to its original condition. That is, assemble the entire assembly.
Loading …
What you need to replace a light bulb yourself
In any modern automotive market you can find a lot of light bulbs for the panel. Moreover, they have a huge number of differences from each other, so each driver can choose a light bulb to suit his taste.
LED bulbs for VAZ 2114 panel
Cheap models of light bulbs have average characteristics, and modernized light bulbs can completely give the instrument panel a different appearance. When choosing a light bulb for the instrument panel of a VAZ 2114, it is best to give preference to standard light bulbs. They are the most durable and reliable.
Some experienced craftsmen even replace standard light bulbs with LEDs, but the cost of LEDs is significantly higher than cheap models of light bulbs for the VAZ 2114.
Tips for motorists
If on a VAZ-2114 car on the instrument panel none of the indicators installed on it work (speedometer, odometer, tachometer, fuel level and coolant temperature indicators), then the first thing the driver will have to do is check the integrity of fuse F3, which is located in the mounting block. If it has burned out, then before replacing it, you need to find the reason why it burned out, otherwise the newly installed new fuse will have the same fate as the previous one. Most often, fuses burn as a result of a short circuit.
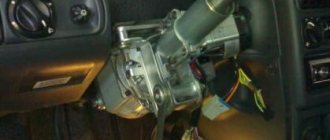
Even if the fuse is intact, then do not be lazy to take it out and check the condition of the contacts. There are cases when the contacts oxidize, and the electrical circuit in this place is interrupted. After making sure that the fuse is intact, the next step is to check the ignition relay, which is located inside the car to the left of the steering column. It is attached to a pin upside down. In the block where this relay is inserted, you can try to short-circuit the power wires using a jumper. If the instrument panel comes to life, the ignition relay will have to be replaced.
If the ignition relay is working properly, there are only two possible reasons for the instrument panel not working: the ignition switch and the mounting block. Before installing the ignition relay on the VAZ-2109 car, the lock contacts burned quite often, and they had to be cleaned by disconnecting the contact group from the lock itself. After changes were made to the principle of supplying voltage to the ignition switch, its contacts began to burn very rarely, but the likelihood of this phenomenon still remained. On the mounting block, in its board, tracks may burn out; in order to see this, the mounting block will have to be removed from the car.
In addition to the reasons listed above, which can lead to failure of the instrument panel, it is also necessary to check the reliability of fastening the ground wire.
Hello! Today, on the 14th, I changed the main lighting bulbs in the cabin and after that the instrument readings stopped showing readings of revolutions, speed, fuel level and fluid temperature... I replaced the F3 fuse as written on your website and everything began to show. But the lights still don’t light up in the cabin. Thank you!
the person clearly explained the problem +1 to him. I also accidentally shorted the interior lighting contacts.....
The car starts, but the instruments do not respond! + Turn signals and wipers do not work. The relay and front are normal. Give me some advice ;)
I had the same thing! did you find the reason?
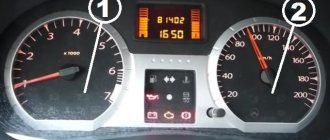
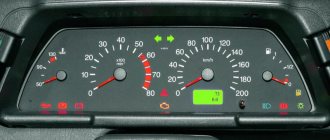
On every car, there is such a thing as: an instrument panel. It helps the driver determine the current speed of movement, the number of kilometers traveled, the speed of rotation of the crankshaft, and on more modern models, the level of necessary fluids and the condition of some systems. On a VAZ 2114 car, the instrument panel includes four dial indicators, twelve indicator lights, and two small screens.
For better visibility of the signs, especially at night, a backlight is installed that illuminates the entire shield. As practice shows, the instruments on the dashboard, including the backlight, break down quite rarely, but still, what should you do if this suddenly happens to your VAZ 2114?
How to change light bulbs on the instrument panel of a VAZ 2114
In order to make a replacement, you need:
- One screwdriver for a cross.
- Several new light bulbs.
At the very beginning you need to remove the decorative trim. It is held on by special fasteners, so a screwdriver is needed here. It is with its help that you can do everything you need.
Removing the decorative trim
The key condition that must be observed when replacing a light bulb is accuracy.
To remove the decorative trim, you need to detach it from the very bottom edge. When this is done, you need to pull the edge towards you. After this you need to start working on the top edge.
When the decorative overlay is finished, the most difficult stage of the work begins.
- At the very beginning, you need to disconnect the wire that is directed to the cigarette lighter.
- Now you need to unscrew the screws on the dashboard trim. They are located both at the top of the lining and at the bottom.
- Once this task is completed, you can begin the removal process. This will require some effort.
- The time has come for the wires. All wires must be disconnected. This applies to wires from both the emergency lights and the clock, etc.
- One of the most difficult steps is the process of removing the panel. In order to do this as quickly as possible, you need to unscrew all the screws. The fact is that the dashboard is held on by self-tapping screws.
- The last step is to remove the bulb sockets that are faulty. For accurate removal, you will need to turn the cartridges counterclockwise. When this is done, you need to replace the faulty lamps with new ones. After this, all that remains is to install the instrument panel.
VAZ 2114 panel disassembly diagram
Procedure for installing new light bulbs
- If there are faults in a particular lamp, the first step is to unscrew the non-working socket where it was located.
- Unscrew it counterclockwise, being careful.
We carefully remove the socket with the light bulb.
- When the socket is in your hand, carefully remove the lamp so as not to break it.
- Next, we insert new lamps or LEDs in its place, strictly observing the polarity.
The LED light bulb is ready for installation.
Please note that the shape of LED lamps is square, and since it differs from ordinary light bulbs, the excess simply needs to be sanded off.
- After all the new lamps are installed in place, we check their functionality by connecting the wire block to the instrument panel without first fixing it.
- When everything is checked and working, you can reassemble everything in reverse order, remembering to tighten each bolt securely.
Diode lamps shine brighter and better.
An alternative method for replacing a light bulb in the dashboard of a VAZ 2114
You can disassemble the instrument panel of the VAZ 2114 using another method.
- First you need to unscrew 3 screws. After this, you need to dismantle the lining;
- the next step requires removing the screen;
- now it's time to disconnect the wiring harness that is needed for the cigarette lighter;
- you will also need to remove the handle from the lever;
- Now the electric fan fasteners are removed;
- Unscrew the bolts of the steering block bracket;
- dismantling cartridges;
- Now it's time to unfasten the hydrocorrector lamp. A 21 key may be required here;
- All that remains is to remove the screws located both below and above.
Removed panel of VAZ 2114
Main conclusions
The backlight replacement process takes some time. The whole difficulty of the procedure lies in disassembling the front panel. The following conditions must be met:
- remove the casing from handles, sliders and other elements;
- pull the panel towards you, unscrew the screen and disconnect the terminal blocks from it.
- remove the handle from the gear shift lever;
The rest of the operations are simple, quick and without surprises. When reassembling, it is impossible to make a mistake; the threaded pads are made differently and cannot be confused. Express your thoughts on replacing light bulbs in the ordered VAZ 2114 in the comments.
Features of replacing a light bulb in the instrument panel of a VAZ 2114
There are 13 lamps in the dashboard, but not all of them can be replaced. Unfortunately, only 8 bulbs can be replaced.
Before you begin the process of replacing the lamp, you need to clean the contacts in case there are any traces of oxidation on them. Sometimes it is not the lamp that needs to be changed, but only its socket.
Before you buy new lamps for the panel, you need to calculate the total number of devices that are needed for the sensors.
Don't forget about checking. If the new lamps do not work, this means that the replacement was not carried out correctly. It is possible that the reason is that the new light bulb has some kind of defect.
Dashboard side mounting screws
If the light does not light, then the cause of the malfunction may be a malfunction of the contacts. This is a pretty serious problem. It may require the help of a qualified electrician to resolve it as quickly as possible.
Another relevant tip concerns current trends. Some car owners are not looking for standard light bulbs for their VAZ, but modernized ones. You need to be aware that retrofitted light bulbs may have some significant defects. Ultimately, this can lead to damage to the instrument panel. In order to reduce the likelihood of such an unpleasant scenario, it is best to give preference to standard lamps for model 2114.
Solution
The stores offer several options for light sources for replacing lamps in the instrument cluster:
- traditional incandescent lamps,
- LED in a plastic socket,
- SMD LED is a more expensive and reliable option, a super-bright diode.
The number of backlight and control lamps is up to 19 pieces. It varies slightly depending on the design of the instrument cluster and the modification of the vehicle. Many car owners choose LEDs due to lower energy consumption and longer service life. This backlight is brighter and gives an interesting bluish color instead of the standard green. But due to the design of the diode, the brightness control of the instrument illumination will not work, always turning it on at full power. On a long road trip at night, this can be distracting and irritating to the eyes. But in any case, the choice of light sources is yours.
If you are going to install LEDs, it is recommended to first check them with a tester for the absence of a short circuit.
Wiring
If the cause of the malfunction lies here, then most likely the wire has broken. You can check this by ringing each of them with a multimeter, since a break in even the smallest one will cause the backlight to stop working.
Also, do not exclude the possibility of oxidation of the wires, but in this case all indicators will fail. To fix this problem, the wiring harness on the fuse box and light panel is unfastened. Then the contact group is cleaned and everything is mounted back. Again, after installation, you should check whether the dashboard functions.
Why do light bulbs fail?
Before changing incandescent bulbs, you need to understand what caused the dashboard to fail. The reasons why the backlight stops working may be:
- burnt out incandescent lamps or LEDs stop working;
- oxidation of connectors;
- defects and short circuits in the electrical circuit;
- fuse box failure;
- deformation of the common contact board;
- failure of the dimensions system;
- no negative battery.
Burnt fuse
80% of cases when the backlight turns off is due to a blown fuse. It is located in a safety block installed under the steering column of the car. Usually the fuse indicated in the documentation as F10 is lit.
In the block, the fuse is located on the right and is designated as F10. It is responsible for the dashboard illumination, the operation of the side lights and the license plate lighting. On early VAZ 2114 models, fuse F10 was brown or red.
On early VAZ 2114 models, F10 fuses were brown; later cars began to have green fuses. It is not difficult to understand that the fuse has blown. It's enough just to inspect it. The housing of a blown fuse may be slightly blackened or melted, and the conductor inside the housing may be severed. The faulty fuse is replaced with a new one. Typically this solves the problem.
Reasons why the PP stopped working
In fact, there are not so many of them and the most common are:
- The easiest one is poor contact between the panel and the electronic control unit. The problem is solved by replacing the plug or simply cleaning the contacts.
- A breakdown in the instrument panel itself or malfunctions. To solve the problem, all connectors are reconnected, taking into account the correct connection diagram.
- Malfunctions of the tachometer, speedometer, fuel level controller. In this case, the cause is mechanical or electrical. To troubleshoot problems, replace regulators or check the operation of fuses.
- The illumination of the VAZ-1215 software stopped working. In this situation, it is necessary to find out the cause of the problem.
It is unlikely that a simultaneous failure will occur in the operation of the sensors on which the operation of the PP directly depends. If we take into account that they do not work directly with devices, but through an ECU (electronic control unit), then, accordingly, malfunctions will lead to the PP stopping working. In addition, it is worth noting that the engine will also stop working.
There are situations when all devices on the panel stop working simultaneously. In this case, the car driver must check the condition of fuse F16, which has a power of 16 A.
To check, you must turn on the hazard signal or turn signal. If they don't work, it means the fuse has blown. Therefore, we can conclude that a short circuit has occurred. To fix the problem, check the electrical circuit.
However, it also happens that the fuse is intact and in working condition, but the instrument panel on a VAZ-2115 car stops working. Here the reason is much more difficult to find out. The solution to the problem is to remove the instrument panel and check whether voltage is flowing from this fuse to the terminals of the white and red blocks. The white block supplies power to the speedometer, tachometer, and temperature gauge. And the red one is the fuel gauge.
If, as a result of checking, the terminals show a voltage of +12 V, then this indicates that the PCB does not work as a result of poor contact of the wire that goes to the ground of the car. If the +12 V voltage is not reflected at the terminals, then it is necessary to disassemble the mounting block and look for the cause of the problem.