VAZ offers Kalina-2 cars with two interior trim options. The first is used in luxury trim levels (where a media center is installed), the second is an integral part of the “Norma” and “Standard” trim levels. We will talk about what methods exist for dismantling the climate control module panel and the radio panel. Moreover, one of the considered options is suitable for the “Lux” configuration, the other – for more affordable versions (Norma, Standard). The dismantling methods in the two indicated cases are noticeably different. Let's start looking.
Removing the instrument panel assembly with heater
Using a high 10mm head, unscrew the nut securing the heater to the front panel.
We take out the cabin filter (see “Replacing the filter element of the ventilation and heating system”). Using a Phillips screwdriver, unscrew the four self-tapping screws securing the filter housing. We unscrew the nuts securing the steering column and lower the column to the floor (see “Removing the electric power steering column”). Disconnect the wire ends from the brake light switch (see “Removing the brake light switch”). Remove the floor tunnel lining (see “Removing the floor tunnel lining”).
We disconnect the seven wiring harness blocks behind the relay and fuse box.
Using a 13mm socket, unscrew the bolts securing the console brackets to the floor tunnel on both sides.
Removing the rear seats of a viburnum
- Lift the rear seat cushion by the strap, unscrew one nut securing each hinge to the floor with a 10mm socket.
- Remove Kalina's sofa cushion.
- Unscrew the 2 nuts securing the backrest brackets to the floor on the left and right sides using a 13mm socket.
- Fold the backrest, unscrew the 2 bolts securing the backrest brackets on the left and right sides.
- Remove the back of the sofa.
Installation of the left side of the backrest and seat cushion of the Kalina is carried out in the reverse order.
Let's sum it up
In addition to the irresistible desire of LADA Kalina owners to defeat the “crickets” in the panel, there is another reason for removing the structure, this also applies to the removal of the torpedo. This is a noble goal of tuning, especially since now many people know how to disassemble the instrument panel.
The domestic manufacturer has deprived the LADA Kalina of a chic design and quality of panel material with a variety of lights and electronic gadgets. The diehard owners did not give up here either, and boldly installed fashionable instrument panels with a neon glow into the standard design, repainted individual components, installed lighting (including for the feet), and also performed a great variety of modern “tricks.” The main thing is to achieve a good fit of the parts and the panel will thank the owner with a soothing silence.
Operation algorithm
Started:
The front door seal will need to be bent and pulled towards you very carefully; The decorated plastic casing must be removed from the front roof pillar. This is easy to do - just remove the 3 clips that secure the trim; Now you will need to find two screws securing the air vent grilles, as well as the trim in front of the glass. The screws are on both sides, and to unscrew them you will need a shaped screwdriver (preferably with a short handle); Unscrew them and take out the ashtray; After that, putting your hand under the ashtray, pry up the two side plugs with a screwdriver. They are located on both sides of the emergency system key; This is done due to the fact that under the plugs there are two screws that are responsible for fixing the “beard” from below. We pull the lower part towards ourselves, but very carefully. You will also need to disconnect all the chips, not forgetting where they were; We also remove the casing on the steering wheel and dashboard. The latter is held in place by 2 black self-tapping screws; We also unscrew the panel from above, using a 10-mm head. Here the panel is secured with 7 or 9 screws, depending on the specific car; At the windshield, the heater air duct sits on lock washers. It is better not to remove them, as the plastic rods will simply come off. For this reason, we tear them ourselves, and instead of them we install self-tapping screws during assembly; The steering wheel doesn’t need to be removed at all, although the panel comes out with some effort. But in order to reduce time, you can take such an adventure; The time has come to completely remove the torpedo, but we’re not in a hurry yet. We carefully check all areas where the screws holding the panel could remain and unscrew them. We pay special attention to the side parts and niches; Carefully pull out the torpedo. It will come off easily if there is nothing holding it.
Let us note right away that it is easier to remove the panel through the passenger door. As for the method of draining the coolant and removing the stove, everything is done almost the same, except with some nuances.
After soundproofing has been completed, we install the panel in place. Don't forget to first pass the block with wires for the switch. We also insert the glove box light in advance using the appropriate holes.
Thus, the operation can be considered completed. Having learned how to remove a torpedo on Kalina, you can safely take on this work, even without the help of an assistant. On the other hand, an extra pair of hands certainly won't hurt.
Brief description of the control unit
- Temperature regulator.
- Switch for fan operation in several modes.
- Air flow distribution selector.
- The handle that controls the recirculation of cabin air.
- Rear window heating mode switch.
What kind of breakdowns happen?
The regulator (1) does not switch from hot to cold mode and back. The plastic rod has broken or fallen off and should be replaced or replaced. A similar situation occurs with the air flow direction selector (3).
The handle (1) rotates freely with a quiet crackling sound; temperature regulation does not occur. The problem is solved by replacing the block of control knobs. The air supply to the cabin is controlled by an auto switch (2), which has 4 operating modes for the electric fan. The fan speed increases by turning the knob to the right. Doesn't break often. The assembled unit is inexpensive, so we recommend replacing it if serious problems arise.
Removing the console
Now we need to start sequentially disassembling the panel in Kalina into parts. How to disassemble the panel?
- Remove the ashtray: pull it towards you as far as it will go and unscrew the 4 screws that secure it.
- After this you can get to two plugs. They are located on the sides of the emergency lights. Use a flathead screwdriver to pry it off and set it aside.
- We unscrew the screws that are located under the plugs. These fasteners from below hold the console.
- After the two screws are removed, pull the console (shield) towards you, but slowly so as not to break the wiring. We disconnect the wiring, first marking the wires so as not to confuse which is which later.
- Now unscrew the steering wheel cover. It is held in place by 2 bolts, for which a 10mm wrench is useful, and 5 self-tapping screws.
- Next, disconnect the instrument panel cover. There are only 2 screws here.
- The top panel is secured with nuts. There must be at least 7 of them.
- As you can see, the stove air duct is tightly fixed. What to do? You will have to rip off 2 lock washers and unscrew the remaining screws, which, in fact, secure the panel in place. Only self-tapping screws are enough for fastening.
- Next, you can try removing the steering wheel. If it doesn’t work out, you’ll have to work a little harder and find the remaining fasteners. In any case, we look for all the hidden screws and unscrew them to the last.
- Pull the panel towards you. If it gives in, it means everything is unscrewed. If somewhere she doesn’t want to move away, we arm ourselves with a screwdriver and unscrew the hidden fasteners.
- After this you can disconnect it.
That's all the instructions on how to remove the instrument panel in the Lada Kalina.
Tuning the instrument panel is one of the main reasons why a torpedo and its adjacent parts are disassembled. Lada Kalina is not distinguished by its bright design and interesting design. What can you do about it? Install panel lighting.
This solution will help improve the visibility of indicators. In addition, the perception of the interior will change. You can also change the panel to another one or repaint its parts. Such tuning of the instrument panel is a radical measure, but absolutely justified. The plastic the panel is made of is simply terrible.
Rules for choosing an audio system
Before you begin installing the radio on Kalina, you should select it at a car dealership or hardware store. The choice should be approached carefully and carefully. And before going to the store, it is better to decide on your desires and capabilities.
When choosing a radio for your car, you should decide which music media will be used as the main one. This will help you save some money. If, for example, a car owner is sure that he will not need a CD or cassette player, then why should he overpay for a radio with these functions.
For those choosing CD players, there is one minor drawback that manufacturers are trying to combat - the loss of music fragments due to shaking during a trip. But progress does not stand still, and the mechanics are improving. The presence of ISO in the car and, accordingly, in the audio device will simplify the connection. The presence of a USB adapter will allow you to play music from various media.
Pioneer model range
When choosing a car radio, you should pay attention to the power ratings. They have a maximum and minimum threshold. Maximum power is rarely used, except in extreme situations. The choice should be made according to the rated power, that is, the one that is used most often. Manufacturers often indicate only maximum values on packages, so when choosing, you need to carefully study the instructions (passport), and not the box.
Read also: Nissan Teana test drive video
It is also worth paying attention to the control panel. It should be extremely simple and convenient, since it will most often be used while moving. Intricate designs can distract from the road. Convenient and understandable buttons and adjustable backlight brightness will only be beneficial. It is imperative to check the range of perceived frequencies. Since radio stations mainly broadcast in the range from 80 to 110 MHz, it is better that the tuner also has this range.
Pay attention to the number of outputs to the speakers and the resonant frequency, it should be lower.
How to remove a torpedo on a Lada Kalina
Owners of a Lada Kalina car sometimes think about how to remove the dashboard in order to remove unnecessary noise or replace the heater radiator. Today I want to show you detailed photographs of the process of removing the panel with my own hands.
I would like to immediately clarify that I will remove the torpedo without draining the antifreeze (without removing the stove).
How to remove a torpedo on a Lada Kalina with your own hands:
1. Bend the front door seal. We pull carefully.
2. Remove the decor (plastic casing) from the front roof pillar. It is held on by 3 clips. In the photo I have already pasted over the lid.
3. Here are the actual mounting points.
4. Find two self-tapping screws that secure the trim in front of the glass and the air duct grilles, and unscrew them on the right and left sides. Attention!
You will need a Phillips screwdriver with a short handle.
5. Then you can remove the black plastic trim in front of the glass. We carefully pull it towards us. This front cover is attached to these iron clips.
Attention!
When I removed these clips, almost all of them went under the panel. Some were found, the rest were either behind the panel or not all of them were installed at the factory.
6. Now you can remove the side nozzles on the air ducts. There you need to interestingly unscrew the screws. Those who understand it will understand.
7. Now we remove the “beard”.
8. Open the ashtray, unscrew the four screws, and take out the ashtray. Now we pry two side plugs from under the ashtray, which are on opposite sides of the emergency light button.
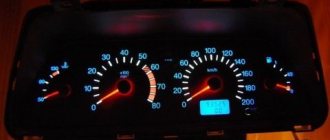
Preparing to replace lamps
Replacing light bulbs in the dashboard of a Lada Kalina is a simple process, so even a driver without experience can cope with such an undertaking. The most difficult thing in this work is to get to the lighting fixtures; this event is carried out not only to replace failed light bulbs, but also if the car owner wants to replace a regular lamp with LED ones.
We recommend: How to check the compression in a car engine with your own hands?
First of all, you should go through the preparatory process, the essence of which is to remove the car panel. After the torpedo is removed, you will need to prepare the following tools:
- a device called a “tester”;
- several screwdrivers;
- new LED or conventional lamps.
Remove the Lada Kalina torpedo Replacing the dashboard diodes of the Lada Kalina Lada Kalina - Replacing the heater radiator (without removing the panel).
Removing the car dashboard
The torpedo mounts are hidden here.
If you are tormented by squeaks while driving and you are thinking about how to disassemble the front panel of a Lada Kalina car, the following instructions will be useful to you.
To dismantle the torpedo you will need the following tools:
- Phillips screwdriver with short handle;
- slotted (minus) screwdriver with a short handle;
- tubular wrench 10;
- marker.
In addition, you will need a bit of patience and accuracy when performing the work.
Algorithm of actions when disassembling and removing a torpedo.
- First you need to bend the rubber seals of the front doors from the A-pillars.
- After this, you need to remove the plastic covers of the front pillars. Each of them is held on by 3 clips. Use a slotted screwdriver as leverage.
- Next, you need to unscrew the screws securing the upper front (in the direction of travel) panel trim. There are 2 of them: one on the right, the other on the left, both are located near the racks.
- After this, you need to remove the upper front trim by carefully pulling it towards you. It is secured not only with self-tapping screws, but also with clips at the front. When removing the panel, try not to lose them.
- Then you need to unscrew all the screws and remove the trim on the side air ducts.
Disassembled torpedo
Now you can begin dismantling the center console.
- First you need to remove the ashtray. To do this, just pull it all the way back (in the direction of travel of the car) and unscrew the 4 screws that secure it to the console.
- Then you need to pry with a screwdriver and pull out the plugs located to the right and left of the alarm button.
- After this, you need to unscrew the 2 screws located under the plugs and securing the center console from below.
- Now you should carefully pull the console towards you and disconnect all the wiring from it, having previously marked with a marker what is attached where. If you don't have a marker, you can take a picture with your phone of which wires go where.
- After dismantling the center console, you need to unscrew 2 bolts and 5 screws and remove the steering column cover.
- Then you need to unscrew 2 screws and remove the outer trim of the instrument cluster.
- Next, you need to unscrew all the instrument panel mounting nuts from above using a 10 mm wrench.
- After this, you need to tear off the lock washers on which the heater air duct is seated, unscrew the remaining screws securing the dashboard, and remove it by pulling it towards you.
During installation, you need to attach the torpedo to the air duct with self-tapping screws.
Return to contents
Disassembling the panel
To dismantle the instrument panel in Kalina, you should arm yourself with a set of high-quality screwdrivers and patience. To work you will need:
- crosshead screwdriver;
- slotted screwdriver;
- 10mm wrench with round head;
- marker or tape to indicate disconnected wires.
Disassembly begins from the sides. How to remove a torpedo? The sequence is:
- The first step is to disconnect the rubber seal that prevents the panel from being removed. Using a flat-head screwdriver, bend it to make room for dismantling.
- Next you need to remove the plastic casing with three clips. It is located on the front pillar of the cover. Again, a flat-head screwdriver will come in handy, which can be used to pry off the socket.
- The next step is to detach the trims in front of the glass. You can unscrew them using a Phillips screwdriver by unscrewing the fasteners on both sides.
- After this you will be able to remove the black trim under the glass. It is secured with iron clips and screws, so there is no need to rush. Slowly pull towards you until it comes loose. It may happen that the clips get stuck under the panel or some of them will be missing altogether.
- We unscrew all the screws that are nearby and remove the covers from the side air ducts.
After removing all the side and side elements, you can begin to dismantle the central part.
Console Kalina2 2DIN (2 parts)
Console Kalina 2 with box, for tape recorder 2 DIN (2 parts) for VAZ 2194 2192 cars
Attention! Adapter frame for 1DIN is not included
for tape recorder 2 DIN (2 parts) weight: 0.83 kg. dimensions:28x28x14 cm
Payment to Sberbank VISA card
The most convenient and profitable payment method for you. Payment can be made through the Sberbank Online system, through a payment terminal (Sberbank ATM), provided that you have a card from this bank. If you are not a client of this bank and you do not have a card, then you can top up your balance at any bank branch through an operator; they will accept cash payment and top up your balance. Commission from 0 to 1%
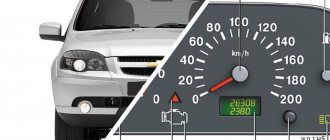
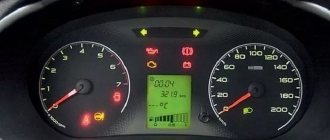
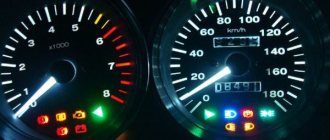
Possible faults
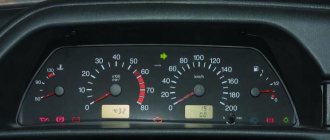
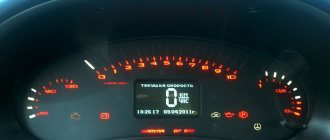
The following malfunctions are possible with the dashboard:
- Fuel level or temperature gauges do not work. The reason may be faulty sensors or damaged wiring.
- When the tank is full, the fuel level needle drops to the zero position.
- The arrow on the fuel level indicator moves abruptly and often drops to the zero position.
- The fuel reserve indicator does not go out.
- If any indicators on the device do not light up, the reason may be burnt out light bulbs, insufficient contact between the light bulb socket and the printed circuit board, oxidation of contacts, broken wires, or a malfunction of the indicator sensor.
- If the speedometer is not working, the reason may be in the flexible drive shaft of the device: the nuts are poorly tightened, a break, mechanical damage, etc. (video author - RasH19).
How to remove the center console on Kalina 2
Today AvtoVAZ offers to purchase Lada Kalina 2 cars with two interior trim options. The first is used in luxury trim levels (where a media center is installed), the second is an integral part of the “Norma” and “Standard” trim levels. We will talk about what methods exist for dismantling the climate control module panel and the radio panel. Moreover, one of the considered options is suitable for the “Lux” configuration, the other – for more affordable versions (Norma, Standard). The dismantling methods in the two indicated cases are noticeably different.
Let us remind you that quite recently we were considering which armrest to choose for the Lada Kalina 2. Now there is a very wide range on the auto market.
How to remove the center console in the Luxury package
Let's say it was decided to dismantle the panels located on the center console. You can see that there are two of them. One is the front panel of the air conditioner, the second protects the radio and contains air duct grilles in its design. These two parts are not connected to each other. However, it will not be possible to remove the radio panel unless you first remove the climate control panel. Below it are metric screws (A, B) that secure the media center shield from below.
The question arises, why are we even talking about how to dismantle the center console, since after this the car can be removed from warranty? Usually the shield is removed to install additional equipment. But connecting any equipment, the use of which has not been agreed upon with the dealer, will void the vehicle warranty. If you haven't changed your mind yet, continue reading.
The climate control shield is held in place by 4 clips, which are located on the bottom and top sides of the part closer to the corners. Having disconnected even two clips (1, 2 or 3, 4), you can try to pull the panel towards you to dismantle it. But if you have no experience working with such a mount, it is better not to try - you may scratch the outer surface of the shield. In fact, all you need to do is use a flathead screwdriver (some people use a thin-bladed knife and a screwdriver).
To dismantle the climate control panel, you do not need to first remove the control knobs located on it, if we are talking about the “Lux” package. The same applies to the “Norma with climate control” package. In all other versions, a stove control unit is used, the design of which does not allow removing the shield without first dismantling the handles. Be careful.
What kinds of mounts are there for radio tape recorders?
Different manufacturers use different types of fasteners:
- Using fixing elements on the side of the device;
- Using elastic latches;
- Using bolts or screws.
With clamps, a frame is used that is inserted into the “shaft”. The side walls of the car radio have special recesses, and there are tongues on the frame.
To dismantle the head unit you need keys. With them you can easily straighten the tabs or bend them. But this type of fastening has a drawback - the frame can become deformed.
The second type of fastening is more reliable - it involves the use of elastic latches. They can be seen on the side and top walls. These latches fit into special seats in the frame, the simplest and most reliable way to mount the radio.
In some car models, in order to ensure reliable fastening of the multimedia system and to eliminate the risk of failure due to vibrations, installation is carried out to the dashboard, or rather to the power elements. The dashboard is held on the pipe using metal corners. Such fasteners are used in premium cars Mazda and Toyota.
The option of installing a radio in this way is considered additional, but car audio installers often remove the corners, and installation is carried out without fixing elements. This option is not reliable.
Single- or double-din radios are mounted in the dashboard tunnel without any additional fixation. It is customary to mount the device on the center console.
The media system is latched with ordinary plastic latches. This is a screwless fitting - you can see this even on the Lacetti.
With this installation, the radio simply hangs and is not able to withstand even minor shock loads. There are holes on the sides of the device, but most motorists do not know what they are for.
It turns out that these holes are made for reliable installation of the device to the dashboard using corners.
This is a factory fastener that complements the standard fastener.
How to trim a beard on viburnum?
We invite you to familiarize yourself with the most important things on the topic: “how to take apart a beard on a viburnum?” with full description and recommendations.
In order to remove the center console (the black trim on the instrument panel) of the Lada Kalina, we will need a Phillips screwdriver and a lot of patience, especially when installing it later, so we will have to be patient.
- The first step is to remove the cassette player, if you have one installed, and disconnect the wires connected to it.
- It is also better to remove the metal insert in which the radio is mounted to make removal easier. After it has been removed, we press on the back side of the plugs, which are located on both sides of the “Hazard Alarm” button.
- And unscrew the two bolts securing the lower part of this lining, which are located under these plugs with a Phillips screwdriver:
- Then you need to remove the three heater adjustment levers, which are marked below in the photo with numbers 1, 2,3. They are easy to remove; just pull them with a little effort.
- Now, disconnect the plug from the hazard warning button:
- After this, you need to slightly pull the lining towards you, starting from the very bottom, overcoming the obstacle of the metal clamps, and pull the lining out of its seat.
- To remove it completely, you need to disconnect all the wires that lead to the lighting bulbs and fan speed control:
After this, it can be easily removed without any problems. But you will have to tinker with the installation of this overlay, well, at least I tinkered for probably 20 minutes until I got everything in place.
| The tunnel (tunnel or beard) of the Kalina floor is dismantled to remove the instrument panel, sound insulation, modifications or tuning of the interior. Removing a beard is not a difficult process and does not require much time. |
You will need : Phillips and flathead screwdrivers.
Remove the handbrake cover by unscrewing the three screws (No. 2) securing the protective handbrake cover (No. 1) using a Phillips screwdriver.
Remove the gear lever handle.
For Lada Kalina 2 with automatic transmission: disconnect the cover (No. 4), unscrew the screw (No. 3) securing the gear lever handle, disconnect the block (No. 1) and remove the handle with the cover (No. 2) using a flat-head and Phillips screwdriver.
Unscrew the screw (No. 1) securing the floor tunnel lining using a Phillips screwdriver.
Remove the floor tunnel lining by removing two screws (No. 1) from the right and left sides using a Phillips screwdriver.
By the way, do you know that on the floor tunnel of Lada Kalina 2 you can
install the armrest
.
Similar materials
- How to remove the seat on Kalina 2 (VAZ 2192, 2194)
- How to remove the ceiling on Kalina 2 (VAZ 2192, 2194)
- How to remove the panel on Kalina 2 (VAZ 2192, 2194)
- How to remove the door trim Kalina 2 (VAZ 2192, 2194)
- How to remove the center console and radio of Lada Kalina 2 (VAZ 2192, 2194)
- How to remove the bumper on Kalina 2 (VAZ 2192, 2194)
- How to remove the glove compartment on Kalina 2 (VAZ 2192, 2194)
- Differences between Lada Kalina 2 (VAZ 2192, 2194) and Kalina (VAZ 1117, 1118 and 1119)
- Multifunction steering wheel for Kalina 2 (VAZ 2192, 2194)
- Car blanket for Kalina 2 (VAZ 2192, 2194)
Rating of 5 voters: 7
Removing the trim from the driver's door
The algorithm for disassembling the driver's door structure is similar, but there are some subtleties of this process:
- First, the plugs are removed from all fasteners. They are pryed off with a screwdriver.
- The panel plastic will be easier to remove if you first unscrew the fragment for adjusting the mirror structures. Unlike the passenger door, the driver's door has one screw. It is located under the plug.
- The opening mechanism is removed last.
- If your car is equipped with electric mirrors with remote control, then to remove the rear view adjustment panel you need to unscrew the screw located at the bottom.
Removing the front door trim of Lada Kalina
How to remove the dashboard and instrument cluster on a VAZ 1117-1119 Kalina car
VAZ 1117 "Kalina" is one of the most popular cars from the domestic manufacturer - AvtoVAZ. In principle, there is nothing surprising in the popularity of the Kalina, because this particular model has become a kind of symbol of the new vector of development of the Russian automobile industry.
But today we will leave aside the production directions of AvtoVAZ and the popularity of the Lada Kalina. Let's talk about the process of removing the instrument cluster from this car, as well as the dashboard (dashboard). As for the need to carry out such measures, everything is simple: firstly, dismantling may be necessary to repair certain faults, and secondly, to modernize standard parts, that is, for tuning. By the way, you can read about tuning the VAZ2117 dashboard here.
Removing the instrument cluster Lada Kalina
Work on removing the instrument panel is carried out in the following sequence:
1. In the engine compartment of the car, disconnect the negative terminal from the battery.
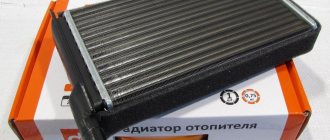
How to choose a new radiator
Before changing the heat exchanger, you need to select a new one. Particular attention should be paid to the material.
Based on this feature, radiators are divided into two types:
- Aluminum. Has lower thermal conductivity. If damaged, it cannot be soldered, but it costs much less. The vast majority of experts advise choosing this one.
- Copper. It is generally accepted that this heat exchanger is better. Its advantages are high thermal conductivity and maintainability. There is only one drawback - the price.
The heat capacity of the model does not play a decisive role; aluminum is more than enough to heat the interior. Maintainability, in modern times, is a dubious advantage; hardly anyone will solder. The quality of the radiators is approximately the same, so there is no point in overpaying for copper.
How to remove the panel on Kalina 2 (VAZ 2192, 2194)
h3 >Removing the Kalina 2 dashboard Required: Disconnect the negative terminal from the battery. For Kalina 2 vehicles with air conditioning, unload the refrigerant from the air conditioning system in accordance with the operating instructions for the service equipment. Prepare a 8-point, 10-point, 13-point, 21-point socket, a Phillips and a flat-head screwdriver.
Unscrew the two bolts (No. 2) securing the thermostatic valve (No. 1) of the air conditioner using a 10" socket.
Unscrew the nut (No. 7) securing the heater using a '10' wrench. Loosen the clamps (No. 4 and No. 6) using the '8' socket. Disconnect the outlet (No. 3) and inlet (No. 5) hoses from the heater radiator. Remove the cabin filter.
Remove the four screws (No. 1) securing the heating and air conditioning system air intake using a Phillips screwdriver.
Remove Kalina's beard 2. Unscrew the bolt (No. 1) securing the parking brake lever, remove the bracket (No. 2) of the handbrake limit switch using a 13-inch socket.
Unscrew the two bolts (No. 2) from the right and left sides that secure the pillar (No. 1) of the instrument panel cross member to the floor tunnel, using a 13-inch socket. Unscrew the nut (No. 3) of the ground wire of the instrument panel harness using a 10mm socket. Under the front seats, unscrew the nut securing the air duct (No. 4) for heating the interior using a 10mm socket. Remove the air duct.
Remove the steering column
Stove radiator design
A car's heater consists of a housing with dampers and a metal radiator with pipes. Two types are installed: copper and aluminum. Each has its own advantages:
- Copper heaters have lower thermal conductivity, they heat up more slowly and also give off heat. Their reliability and maintainability are higher; the radiator can always be soldered.
- Aluminum is valued for its fast heating and good heat dissipation, low price and light weight. But if there is a leak, it is impossible to repair it.
Removing and installing the Kalina instrument panel
- Driver for socket attachment
- 8mm wrench attachment
- High nozzle on the wrench 10 mm
- Knob attachment 13 mm
- Open-end wrench 10 mm
- Torx wrench (asterisk) T-20
- Medium Phillips screwdriver
- Medium flat screwdriver
- Wide 6 liter capacity
Parts and consumables:
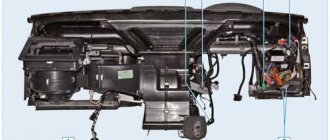
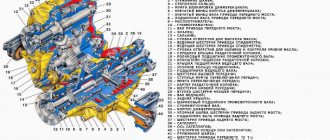
Removing the instrument panel assembly with the heater is performed when it is necessary to replace the heater radiator, remove the heater fan electric motor, and also to remove the heater assembly.
1. Disconnect the wire terminal from the negative terminal of the battery.
Sound insulation of Kalina panel/dashboard
| The disease of Russian cars is rattling, crickets and squeaks, and the LADA Kalina panel is no exception; it is also made of inexpensive plastic, like the rest of the interior elements. Let's figure out how to soundproof Kalina's instrument panel without removing or dismantling it. |
If you decide to make soundproofing for Kalina yourself, then you will have to buy:
- Anti-creak (modelin).
- Vibrating material (for example, STP).
- Plastic clamps.
- Hot-melt gun and hot glue.
- Bitoplast or splen, optional.