4/5 — (74 votes)
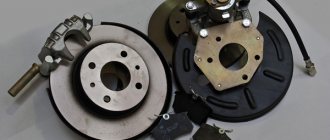
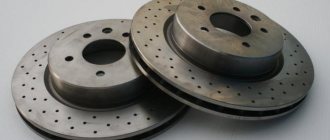
The VAZ 2114 brake drum is installed on the rear wheels of the car. The main job of stopping the car is done by the front disc brakes. They are more efficient, more reliable, and in some cases more durable. Some motorists carry out tuning - install disc brakes on the rear wheels. This significantly improves efficiency, but one inconvenience arises - in order to save money, the driver is forced to give up such an attribute as the handbrake. The fact is that the pads will be controlled not by a cable, but by a liquid. Therefore, it is necessary to include an additional piston in the rear brake circuit, which is driven by a lever. Such difficulties are sometimes scary, but in reality there is nothing difficult.
Replacing the rear brake pads of a VAZ 2109
If you have tightened the handbrake cable at least once, you will have to loosen the tension before replacing it.
This is not as easy to do as we would like. We need an inspection hole or lift because we need to gain access to the center of the car's underbody. This “cunning” design is located behind the muffler (work with a cold car to avoid getting burned). In extreme cases, you will have to dismantle it, but usually keys with an extension cord are enough. When you get to the mechanism, completely unscrew the lock nut and loosen the main nut as much as possible. Remove the wheel and place it under the bottom of the car (for peace of mind). First, the most difficult part awaits us - removing the brake drum. When braking, it constantly heats up and cools down (sometimes sharply if you drive hot into a puddle), so the drum “sticks” very tightly. By standard means, dismantling is provided using two M8 bolts. You immediately need to unscrew the two guides (photo below) and screw the bolts in their place.
Then slowly and one by one screw them in further (do not allow skewing) until the drum leaves its “home” place.
If the threads in the holes are torn and the disk does not give in, then move on to another option
Spray WD-40 on all contact points (especially in the hub area) and begin to firmly but carefully tap the drum with a hammer. Be sure to use a block of wood or board as a spacer to avoid damaging the disc. After the victory, we move on to directly replacing the rear pads
Using a flathead screwdriver or pliers, remove the mounting springs. Start with the top, then the bottom and middle.1 Now you can remove one block and spacer plate without much effort. To release the second block, disconnect the spring in the middle and the handbrake cable clamp. Pad manufacturers rarely supply them with a drive lever, so you have to use the old one. To do this, pull out the locking pin, remove the washer and move the lever to the new block.
Installation occurs in the reverse order and should not cause any difficulties. Checklist for proper assembly:
- Immediately connect the pads with the intermediate strip and the upper spring, and then install them in place.
- The upper part should fit into special grooves on the brake cylinder.
- Fix the lower part in the provided places and tighten it with the lower spring.
- Connect the middle springs (they prevent the pads from moving up and down).
- Don't forget to attach the end of the handbrake cable to the drive.
- Press the brake cylinders using a pry bar (only carefully so as not to crumble the lining).
- Install the brake drum (after unscrewing the bolts if you used the standard removal method).
- Tighten the handbrake cable (the norm is 2 to 5 clicks when turned on)
Stages of independent work
Having carefully studied the following stages of work on replacing the pads, any car owner will understand how to fix this breakdown and continue to operate his car safely, namely the following:
- The car is driven onto a flat surface into a room, preferably with an inspection hole. The important point here is that you need to wait some time for the brake drums to cool down; during driving and constant braking, they heat up and in order to carry out work, they need to cool down.
- Having placed a wheel chock under the front wheel, loosen the wheel mounting bolts with a wheel wrench, jack up the car, and completely dismantle it.
- Having removed the wheel, we proceed to dismantling the brake drum, having first checked whether the car is on the hand brake, otherwise this will cause great difficulty in removing it and can lead to mechanical failure of the part. The drum is attached to the rear hub with two 12 mm bolts, unscrew them, treat the seat with a brush and remove it with a specialized puller. If you don’t have a puller, you can use a hammer and tap it through the piece of wood from the back side, constantly rotating it after each blow.
After removing the drum, it is necessary to loosen the tension on the parking brake cable; this is done on a special adjusting pin located under the bottom of the car, next to the middle part of the muffler.
Having loosened the handbrake cable, we begin to remove the brake pads. First of all, we pull out the fixing pin on the parking brake mechanism pin on the rear block, then press out the fixing spring (the so-called soldier), remove the lower and upper return springs from the bottom of the block, the brake mechanism spacer bar and remove the old, worn pads from their seats brake cylinder.
- Having removed the old pads and carefully inspected the brake cylinder drum for wear, it is necessary to thoroughly clean the protective shield and all seats of new parts from old dirt. Next, we proceed to install new pads; it is advisable to assemble the entire brake mechanism in advance (spacer bar and upper return spring) and then mount everything in its seats. Having carefully installed the new pads, we fix them with a lower spring and soldiers, after which we mount back the brake drum and all previously removed parts. Having completely assembled one side, we proceed to replacing the pads on the second side, performing all the steps again.
- Having changed the pads, we begin to adjust the handbrake, pulling the cables until the lever in the car's interior rises two-thirds up or until four clicks of its ratchet.
Boring brake drums VAZ 2108
— It must be remembered that you can only loosen and tighten wheel bolts with a car that is standing on the ground.
— First you need to remove the drums.
Having established the first gear, support the front wheels with blocks. Lift the rear of the car onto a special support. Now you can remove the wheels.
— Now you need to clean the brake mechanism. But keep in mind that doing this with gasoline is prohibited. Use detergent.
— You will see two guide pins on the drum; unscrew them. Now remove the drums.
— Inspect the internal working surface. Having detected damage to the drum in the form of marks and scratches, it is necessary to measure the diameter and determine the amount of wear. The measuring device is called a caliper.
— The permissible drum diameter can be 201.5 mm. If the diameter exceeds the maximum permissible size, it will need to be replaced on both sides.
— If you find marks on the brake drum, then you need to bore the VAZ 2108 brake drums to such a size that the diameter is 201 mm.
— Boring of VAZ 2108 brake drums is possible with your own hands. Unfold the drum, making the working surface outside. Start the engine. Engage first gear. The wheel will begin to rotate. Apply a sanding knife and sand away any rough edges.
The following video demonstrates the process of turning brake drums.
Hi all! I think you are well aware that the brakes in a car work based on friction. And friction has a destructive effect, gradually erasing the surfaces in contact with each other. Moreover, this does not depend on how durable the material is. It's just a matter of time. Therefore, grooving brake drums will become a very relevant topic for discussion.
Drum mechanisms (DM) of a car brake system are mainly made of durable and wear-resistant materials. But wear and tear still occurs gradually. I think everyone understands that driving a car with worn brakes is extremely dangerous and uncomfortable due to vibrations, whistling, grinding and long braking distances.
It is worth talking about such a concept as flow or boring. Why is it needed, how is it done, is there acceptable wear in the units, and isn’t it better to just install new drums. We have already talked about how to determine brake disc wear. The issue of their correct groove was also discussed. Now it's the turn of the reels.
Grooving brake drums of trucks and cars - malfunctions
For both trucks and cars, there are two ways to restore the brake system:
- replace the brake drums with new ones;
- Grind the brake drums.
The optimal solution in this situation is to buy new drums. But often the cost of replacing parts with new ones is quite high. And with constant use of the car, the additional costs may not be affordable for everyone. The option of boring car drums is cheaper, so it is in great demand among motorists. It is this method of solving this problem that many of our fellow citizens are increasingly resorting to.
To grind or bore - this means that on a special machine or stand, using the grooving method, defects and irregularities are eliminated from the working surface by removing (removing) a layer of metal. Experts sometimes call this process restoration or preventive maintenance.
So how much exactly should you withdraw? For each individual model, the manufacturer sets the minimum allowable thickness. These are precisely the numbers that are normatively acceptable. And you can see them either in the user manual, if the car has standard drums, or in the operating instructions from the manufacturer.
Rear wheel brakes
- Parking brake cable end.
- Drive lever.
- Rear brake pad.
- Drive lever axial pin.
- Brake slave cylinder.
- Upper tension spring.
- Spacer bar.
- Front brake pad.
- Front pad pressure spring.
- Lower tension spring.
- Dirt guard.
Replacing the brake drum
- less than an hour
- 1 person
- 2 points
- —-
- tool
For this operation you will need the following tools and materials: jack, support stand, wheel wrench, wire brush, penetrating fluid, 7 mm wrench, two pry bars.
Note The brake drum must be replaced when the internal diameter reaches or exceeds 201.5 mm.
It is recommended to replace the brake drums on both sides of the vehicle at the same time.
Diameter no more than 201.5 mm
1. Engage first gear and install wheel chocks (or bars of a suitable size) under the front wheels of the car.
How to remove a drum on some cars
So, we found out that the drum element must be replaced in case of wear, deformation and sticking . The general procedure for performing actions when removing this element was described. And now we want to tell you how to remove the drum on VAZ models.
Brake drum removal wrench
VAZ (2101-07)
Replacement of the rear drum element is carried out with the car suspended and the handbrake released. First, remove the wheel on which the element is to be removed. Then, using a wrench/spanner, remove the guide fasteners (pins) that hold the drum and secure the wheels to the hub. After completing these steps, pull out the element body. It should come off fairly easily.
If this does not happen, which happens often, then take a couple of bolts (M8) and screw their holes into which they can easily be screwed. They must be screwed in evenly. As a result, the drum will give in.
Lada (2108-21099)
To remove the rear brake drum elements on these VAZ models, first gear is engaged and stops are installed under the front wheels of the car. The handbrake must be released. Then the wheels are removed, and the brake mechanisms are cleaned of dirt.
After this, the mounting pins are turned out, WD40 is applied to the hub and any traces of dirt/corrosion are removed. Applying light blows with a rubber/polymer hammer, the drum is pulled off the hub. If the element does not give in, then the drums are pressed together using fasteners (M8 pins/bolts).
Lada (2110)
Removing brake drum elements on these models often causes some problems for the car owner. The element is easy to dismantle on a new car, but to remove it on old cars you will need a good-quality hammer, a 7mm deep socket and a ratchet. First, loosen the bolts securing the rear wheel. Then the car is raised using a jack, the fasteners are completely turned out and the wheel is removed.
Brake system repair
Next, the pins are unscrewed from the drum element. But it’s better to do this when the car’s wheels have not yet been removed. The handbrake is applied. Next, on the reverse side, the drum is knocked off the hub with a hammer. If difficulties arise, the studs will help - they are screwed into the corresponding holes, and when they are screwed in evenly, the drum is removed. By the way, the drum is removed in the same way on Korean cars . Sometimes some force will be required, but usually treating the contact area of the drum with WD40 makes it easy to remove. As you can see, dismantling brake drums is not always easy, so the advisability of regular inspection is obvious.
The brake system requires diagnostics after 40,000 km . In this case, there are no problems with removing the drum.
It is important to take into account that if the car owner undertakes to perform the actions described above on his own, then the first place must come first!
Additional recommendations
If you cannot depress the brake cylinders, open the cap of the brake fluid reservoir to reduce the pressure. If the pads wear unevenly, pay attention to the caliper. Most likely it will need repairs. When replacing rear pads, replace all springs as well.
They are inexpensive, but they will protect you from possible failures until the next replacement. The front caliper guides can be lubricated with graphite grease for smoother operation.
Replacing the pads on the front axle will not cause problems even for “dummies” of automotive repair. But from the back it’s not so simple. Assess your strengths and capabilities in advance: can you reach the handbrake cable and cope with a stuck brake drum? If yes, then everything will definitely work out.
Didn't find the information you are looking for? on our forum.
When grooving is required
When restoring effective braking on the rear components when working with your own hands, they usually turn the elements on a lathe, since not all motorists have a stand. Such equipment is available only in a car service center. They can be found in huge quantities in cities such as St. Petersburg, Moscow, Yekaterinburg, as well as smaller towns.
Before sharpening devices, knowing full well that the price for the service is far from small, you need to make sure that there are any malfunctions.
This can be recognized by the following signs:
- During the braking process, strong or light vibrations are observed that were not previously present;
- When the driver presses the brake pedal, an extraneous noise is felt;
- The overall efficiency of the brakes decreases;
- When you press the pedal, the car begins to slide to the sides;
- The car stops as if in jerks;
- There is a beating sensation in the pedal;
- A similar beat is transmitted to the steering wheel;
- The braking distance increases.
The best option is to purchase and install a new kit. But this is quite an expensive pleasure.
Element device
The rear brake drum consists of several parts :
- rotating drum;
- brake shoe;
- spring;
- brake cylinder (one or more).
Removing the drum
When braking, the brake pad rubs against the surface of the hollow drum. To ensure the mobility of the pad, the mechanism contains springs, which, depending on the position of the gas pedal, will be compressed or decompressed. A special cylinder is responsible for the correct operation of the pad and its timely operation, pressing it to the surface of the rotating drum under the pressure of the brake fluid. The entire mechanism is mounted on a shield made by stamping.
But the rear brake drum in some cases has a different device. One of the key elements of the tape structure, as the name implies, is flexible tapes made of metal. During the braking process, the belts are stretched and squeeze the drum tightly. However, this design of the braking system has not been used in cars for a long time.
Replacing brake pads on a VAZ 2115 - step-by-step instructions
1. Place the car on a flat surface, then install wheel chocks under the rear wheels and tighten the handbrake. Before starting disassembly, I recommend treating all threaded connections to be disassembled with WD-40 penetrating fluid, this will make your work easier.
2. We tear off the wheel mounting bolts while the car is not jacked up; when you lift it with a jack, it will be more difficult to tear it off, and besides, there is a possibility of the car falling off the jack during sudden jerks.
3. Next, jack up the side (left or right, whichever is more convenient for you) from which you are going to replace the pads. Install a stop or block that will protect you from sudden failure of the jack or other unforeseen situations.
4. Now completely unscrew the mounting bolts and remove the wheel.
5. Take the brake mechanism and wash it with water and detergent, then let it dry.
6. Let's move on. We release the brake hose from the bracket, which is attached to the shock absorber strut.
7. Using a flathead screwdriver, pry the pads away from the brake rotor.
8. On the lower bolt, bend the locking plate of the caliper guide pin, then unscrew this bolt, holding the pin from turning by its hexagonal part.
9. Lift the brake caliper up and lock it in this position.
10. Take out the old pads. Before replacing the brake pads of the VAZ 2115, it will not be superfluous to measure the thickness of the brake disc at four opposite points using a caliper. The minimum acceptable thickness is: 10.8 mm. If necessary, replace the brake disc.
11
Clean all mechanisms and parts of the brake mechanism, paying special attention to the seats of the brake pads. Difficult movement or accumulation of dirt can cause misalignment and subsequent jamming of the pads, as well as uneven wear.
Make sure that the removed guide pin is in good condition; if necessary, replace it with a new one. If you change the pin, do not forget to lubricate its surface with graphite lubricant before installation.
12. In some situations, it is necessary to press the piston inside the caliper, because when the pads are worn too much, it comes out strongly, which makes it impossible to install new brake pads. When pressing in the piston, be careful not to damage the boot and piston seals. In addition, check the brake fluid level; if it is high, then when the piston is pressed in, fluid may leak out of the expansion tank of the GTZ. This issue is resolved with the help of a syringe, unscrew the cap and pull out a couple of cubes of “brake fluid” with the syringe, and add it back with a squirt.
13. Prepare a new set of brake pads and begin installing them
When installing the pads, pay attention to the location of the pressure springs; the correct position is when they are parallel to the top edge of the pads
14. Return the brake caliper bracket to its place.
15. Install the guide pin bolt and then tighten it. It is advisable, of course, to use a torque wrench for this; the tightening itself is carried out with a torque of 30–40 Nm.
16. Using a screwdriver, bend the locking plate, thereby securing the bolt from possible spontaneous unwinding.
17. Reinstall the wheel and tighten the mounting bolts.
Now we can say that everything is ready! Now all the above operations must be performed in relation to the other side of the car. Before driving, depress the brake pedal several times to return the brake pistons to their operating position. Don't forget to also add brake fluid.
That's all. We check the work in practice, see how the brakes work with new pads. I will say right away that at first the brakes may squeak, this is normal, this is how the pads grind into the brake disc, after a week, or maybe even earlier, the extraneous sounds will disappear.
Which rear pads to choose for replacement?
On average, rear brake pads last from 30 to 50 thousand km. However, their service life depends primarily on the driving style and the quality of the pads themselves. It is clear that cheaper ones will wear out faster. That is why you should not buy too cheap analogues.
I recommend periodically - once every 15-20 thousand km. mileage to carry out diagnostics of the brake system. Check the brake fluid level and the condition of the pads themselves. If the thickness of the working surface of the pad is 2 mm or less, they should be replaced. The pads are replaced in pairs. That is, 4 pieces at once - on the front or rear wheels.
Original Hyundai/KIA 58302 1RA30 pads were installed from the factory. The cost of the kit at the moment is from 2000 rubles. However, in addition to the original, you can also choose cheaper analogues of quite good quality.
- Allied Nippon ADB32023 from 880 rub.
- Avantech AV202 from 1000 rub.
- Bosch 0 986 494 557 from 11,000 rub.
- Ferodo FDB4387W from 1100 rub.
- Frixa FPH17R from 1350 rub.
- LYNXauto BD3620 from 850 rub.
- Sangsin Brake GP1401 from 1250 rub.
- SCT Germany SP629 from 750 rub.
Front brake mechanism
The front brake mechanism consists of:
- disk;
- calipers;
- pad guide;
- two brake pads;
- cylinder;
- guide pin;
- casing.
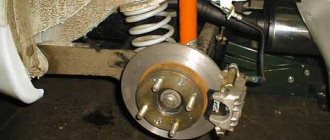
A special feature of the front disc brake on a car is the disc-to-pad gap adjustment, which is done automatically. There is a floating bracket and an indicator that the pad is worn out. The bracket is formed by a caliper and a cylinder. They are fastened together with bolts. The PTCs are pressed by springs to the pad guide. A sealing ring is installed on the cylinder piston; it is this that maintains the required gap between the rubbing surfaces. Brake pads wear out, so the VAZ 2114 needs to periodically replace the front pads.
Aluminum brake drums
Now they are the most advanced. Why? Yes, they simply weigh little, and manufacturers are trying their best to lighten the weight of the car and, in particular, reduce the load on the axle.
Therefore, this material is now being used more and more often, what other advantages are there:
- As I already wrote, this is weight. Aluminum can weigh up to 50% less than the same cast iron version.
- Price. Not to say that they were cheaper just like that, after all, they are non-ferrous metal. But due to the mass, the difference in price is quite significant. About 30% cheaper.
- Cooling. This is really a big plus, we all know that during prolonged braking, say in the city, the discs and drums literally get hot. Aluminum conducts heat well, meaning it heats up quickly and cools down quickly. Therefore, drums made from it perfectly remove heat and cool quickly enough. Also, you can often see ribs on them, for even greater heat dissipation. It is worth noting that the more the drum heats up, the more effective the brakes decrease, and the pads simply begin to “float”. Cooling saves the situation and efficiency is maintained.
- Corrosion and aesthetic appearance. Yes, it should be noted that aluminum practically does not show any signs of rust or other decay. Thus, the outer and inner surfaces always remain clean. It is practical, and also aesthetically pleasing; there is no need to tint or maintain it. This is definitely a plus.
But this system also has disadvantages and they are also significant, let’s take it in order.
- The very first disadvantage is greater wear on the disc. Aluminum is a soft metal and therefore wears out quickly. You will change much more often than your opponent.
- They get very attached. This material sticks very strongly to the place of attachment, and it is not at all easy to remove them.
- Fragility. If you plan to remove them, then you must have special pullers, otherwise there is a high probability of breaking the drum, it is very fragile.
- With strong heating, after falling into a puddle, the geometry can change. What will affect the quality of braking?
Grooving stages
The grooving procedure itself consists of 3 key steps. This is precisely the principle that specialists adhere to, and those who do the work with their own hands rely on it.
- First stage. At the first stage, the initial removal of a layer 0.5 mm thick is carried out. This makes it clear how much the drum material is worn, what its current condition is, and whether there are more serious defects;
- Second phase. Next comes the procedure of smoothing, leveling and subsequent removal of all existing irregularities. About 0.25 mm of the metal layer is removed;
- Third stage. He's the finisher. This involves finishing sanding and removing all remaining small nicks and chips.
Having sharpened the brakes, a smooth working surface remains, and braking efficiency increases significantly.
But this procedure only allows you to get rid of irregularities. If there are geometric errors, the groove will not help at all. Similar phenomena occur if strong temperature changes occur.
Thank you for your attention! Subscribe, leave reviews, ask questions and tell your friends about us!
(1 ratings, average: 5.00 out of 5)
Choosing new pads
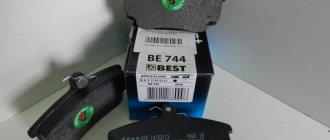
When purchasing new front brake pads, it is important to pay attention to a few key points.
- Quality. Examine the part visually, check the assembly level. Some details even outwardly indicate that they are not worth buying.
- Certificates and packaging. Packaging can often say much more than the part itself. Study it to see if it matches the original. Nowadays, it’s not difficult to find manufacturers’ websites online and study how their products are packaged and certified. Never be afraid to ask sellers for documents for a particular spare part.
- Price. Good pads cannot be cheap.
- Manufacturer.
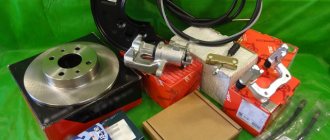
Brake lining kit
As for manufacturers, a certain group of leaders has now formed who produce high-quality brake pads that are suitable just for the VAZ 2114.
- High-quality fibers are used for the linings, which makes the structure more technologically advanced and lighter;
- An anti-noise plate is used to make the pads, preventing squeaks when triggered
- A special groove is provided to prevent contamination;
- The design includes a lining wear sensor
To work on replacing the front brake pads on a VAZ 2114 you will need:
- Balloon wrench;
- Jack;
- A set of keys;
- Support stand;
- Flat screwdriver;
- New brake pads;
- WD40 product.
Now let's proceed directly to the procedure for replacing the pads.
- Place the car on a level surface, place supports under the wheels to prevent the car from moving, and be sure to turn on the handbrake.
- Loosen the fastenings on the rims, lift the car on a jack, and place a support stand. This will prevent the car from falling if the jack accidentally falls off.
- Remove the wheel from the car.
- The brake mechanism must be thoroughly cleaned and all dirt accumulated on it must be removed. If there are traces of oil, use warm water and detergent.
- When cleaning is finished, wait a while to allow all the moisture to dry.
- Under no circumstances should you wash it with gasoline or other caustic substances. This will cause the seals and gaskets to deteriorate and will have to be replaced. And this is not the easiest thing. Don't create problems for yourself.
- Remove the brake hose from the bracket. It is attached to the shock absorber strut.
- Check the level of the brake fluid in the reservoir. If the tank is completely full, use a syringe to remove some of the liquid.
- Using a flathead screwdriver, pry the brake pads away from the brake rotor. For this you will need a viewing window.
- On the other side of the caliper there is a bolt connecting the caliper to the bracket. You will need to bend the locking plate and remove the bolt using a 13mm wrench. At the same time, be sure to hold the pin so that it does not turn. You need to hold the element by the hex head.
- Lift the caliper up and lock it in this position.
- Get rid of the old front brake pads.
- Before replacing, be sure to measure the thickness of the brake disc itself. The working thickness should be 10.8 millimeters or more. If the thickness is less than recommended, you will have to change the disk itself.
- If everything is fine with the disk, proceed to cleaning the seats. This is necessary in order to prevent the slightest distortions and unevenness when installing new brake pads. If this is not done, the decks will be produced unevenly.
- Before installing the caliper, examine the condition of the fastening. In some cases it may require replacement. Even if the condition is good, be sure to lubricate the element.
- Check the stroke of the piston rod. If the stroke is maximum, this indicates wear of the element.
- Return the rod to its place, only carefully. If you do not pump out the brake fluid first, it will begin to flow into the reservoir. Let's hope you followed the replacement sequence.
- Replace the new efficient brake pads, replace the caliper and reassemble the unit in reverse order.
- Carry out a similar procedure with the second wheel. It is strictly forbidden to change the pads on only one of the front brakes. This will cause the system to work unevenly. The pads are always changed on two wheels at the same time, regardless of the degree of wear of one of them.
It is quite possible to replace the front brake pads on a VAZ 2114. Follow the instructions and purchase only high-quality spare parts.
PRINCIPLE OF OPERATION OF THE BRAKE SYSTEM
We consider the operating principle using the example of our hydraulic system with drum brakes:
- By pressing the brake pedal, we transfer the load to the booster, this booster creates additional force through the master cylinder
- In this case, the piston of the master cylinder forces (pumps) fluid through pipelines (pipes and brake hoses) to the wheel cylinders
- This increases the brake fluid pressure in the brake drive.
- From this, the pistons of the wheel cylinders move (press) the brake pads to the drums (or discs, if the brakes are disc)
- Further pressing of the pedal increases fluid pressure and triggers the brakes.
- The mechanisms lead to a slowdown in wheel rotation and the formation of braking forces when the tires come into contact with the road
- The more force we apply to the brake pedal, the more effective the braking is.
- When braking, the brake fluid pressure reaches 10-15 Megapascals
- When braking is completed (and the brake pedal is released), it is moved by the return spring to its initial position
- The piston of the brake master cylinder also returns to its initial position.
- Spring mechanisms (elements) pull back the drum (disc) pads
- In this case, the brake fluid from the wheel cylinders through hoses and pipelines is forced into the reservoir of the master brake cylinder
- Pressure drops in the brake system
Tools
Replacing the rear pads of a VAZ 2112 cannot be done without the necessary tools:
- Two screwdrivers, flat (slotted) and Phillips
- Jack
- Balloon wrench
- Pliers and needle nose pliers (pliers with thin and long jaws)
- Deep head 7 with extension and wrench or ratchet
- A 30 head with a strong wrench may come in handy (if you suddenly fail to remove the brake drum)
- Wire brush
Problems and their causes
Before changing the front brake pads on a VAZ 2114, you should determine what happened to them. There are several telltale signs that your pads are worn out. And their reasons may be different.
We invite you to familiarize yourself with the symptoms and potential causes of their occurrence in the table.
Article on the topic: All about malfunctions and replacing the reverse sensor on a VAZ 2114
| Symptoms of a problem | Causes |
| The brakes do not work effectively |
|
| When braking, the car skids to the side | Friction linings are clogged or oily |
| When braking, vibration occurs and a squeaking sound comes from the wheels. | Oil or other liquid has come into contact with the brake pad linings. |
Before you start replacing the front pads on a VAZ 2114, be sure to make sure that the reason lies in this particular unit. It is not uncommon after replacing the pads that it turns out that the car behaved unstable not because of them. Sometimes the symptoms do not correspond to problems in the brake system at all.
Monitoring the condition of the pads is not difficult. The caliper has a special viewing window. If the friction linings are worn down to 1.5 millimeters or less, they need to be replaced. It is recommended to carry out such monitoring at every seasonal replacement of wheels.
About the advantages and disadvantages
Pros of drum brake
One of the main advantages of this mechanism is its reliable protection from external factors . This type of braking system is ideal for vehicles operating in difficult/extreme environmental conditions. Almost no dust penetrates into the brake pads; they are constantly in conditions of optimal humidity. And this significantly increases the working life of the entire mechanism. In addition, when braking in this design, a smaller amount of thermal energy is released, which allows the use of inexpensive fluids with a low boiling point.
Removing the brake drum
Another advantage of the drum brake system design is the increased braking power due to the diameter or width of the drum. This becomes possible due to the increased contact patch, the contact patch between the drum surface and the block. This is what significantly improves braking performance. At the same time, the rear brake drum, thanks to its design features, is able to increase operating efficiency. When braking, the rotating drum tends to “carry away” the brake pad, turning it.
Disadvantages of a drum brake system
But, despite the obvious advantages , this type of braking system has certain disadvantages:
- lower startup speed compared to disk analogues;
- some difficulties in setting up;
- low stability;
- When the rear brake drum heats up, the pads “stick” and a significant deterioration in braking performance occurs.
In addition, experts do not recommend using the handbrake at subzero temperatures. Cases of pads freezing to the drums often occur. To avoid such situations on modern and expensive cars, this type of braking system is replaced with a disc version. Basically, a brake system with rear drums is found on budget cars and small cars, in which they are placed on the rear wheels. Trucks are also equipped with this braking system.
Removing the brake drum
How can you tell if a drum is bent?
Checking for unevenness can also be done without visiting a workshop. Try the old "grandfather's" way. You will need one more person for this. So let's get started.
- Jack up the rear of the car.
- One person smoothly turns the rear wheel.
- The second one presses the brake pedal lightly.
- If there is ovality on the drum, braking will occur with the pads biting in certain places.
- If everything is fine and braking is smooth, then everything is fine and there is no ovality.
Intense loads combined with strong temperature fluctuations increase the likelihood of destruction of the brake drum structure. Please take note.
If there are any defects, contact a specialist immediately
Malfunctions: causes and symptoms
Since the participation of the rear wheels in braking is much less than that of the front wheels, the motorist does not immediately notice a decrease in the efficiency of their work. In this case, the process of reducing efficiency can last quite a long time.
Failures in the operation of drum brakes are felt when braking sharply - the car stops much more slowly. On many cars, failure of the drum braking system is especially noticeable when driving in reverse. The front brake system, which has become the rear, does not “want” to work effectively, stopping the car.
A leak of working fluid often leads to the shutdown of one or two circuits of the braking system - this provokes a decrease in its efficiency by up to 60%. Air in the hydraulics creates a soft pedal feel. In this case, the brake can only be applied at the end of the stroke.
If the pads are “skewed” or the spring/strut in the drum breaks, the motorist may hear grinding sounds . This leads to jamming and overheating of the drum. In addition, this leads to a decrease in vehicle acceleration and increased fuel consumption. Among the failures, “ovality” of the drum is often encountered.
Features associated with replacing a brake drum
Some of them (relating to annual prevention and the use of proper lubrication) have already been mentioned. Another important point is that if one of the drums wears out and is replaced, the second drum must be replaced (even if it has less wear). This rule is strictly mandatory and has no exceptions.
Brake drum installation
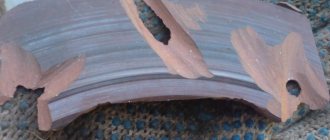
In addition, in case of almost all damage - cracks, chips, grooves, and others - the drum should be replaced; it cannot be repaired. The only case when the situation can be corrected is if there are small bevels (in this case, you can turn the part on a lathe until you get an even round shape). True, after this operation you should check its diameter - if after grooving it exceeds 201.5 mm, then such a drum can no longer be used.
Do-it-yourself replacement of rear struts on a Priora
So, first of all, when the car is still on wheels, we remove the plastic plugs from the pillar cups from the interior side. It is under them that the shock absorber mounts are located.
If you have a special wrench, then use it to unscrew the nut securing the strut from above, holding the rod from turning. If there is no device, then we hold the rod with improvised means.
Once the nut is free to rotate, you can move to the lower shock absorber mount. To do this, remove the rear wheel and apply penetrating lubricant to the threaded connections. We wait a few minutes and unscrew the nut securing the rack from below.
We knock out the bolt if it is soured using a hammer and a punch. When you have dealt with this, you need to completely unscrew the upper fastening nut.
Now you need to pry up the shock absorber and remove it from its seat in the rear beam using a pry bar.
Now you can remove the entire shock absorber assembly, as well as the spring of the Priora rear suspension.
If necessary, we replace the struts with new ones, as well as springs if they are already worn out. The spring can be removed without any problems, after which we remove the boot and reassemble everything in the reverse order with new parts.
Brake drum VAZ 2110 which is better
Dear visitors of the site “Everything about cars”! We will be very grateful for your comments on the video clip “Which VAZ 2110 brake drum is better”; registration is not required for this. We also ask you to let us know if you have any problems playing the video.
Alexey Brun
Everything is clear, thank you. It’s a little dark next time, use a halogen light. But that’s fine.
06.24.2017 — 09:29 Kirill Svirin
Let's have more videos, I'm really looking forward to it, are you taking the VAZ 2110 apart for disassembly that you bought?, let's make a video about it
06/16/2017 — 05:39 I PL
You screw in the studs, take a rubber hammer and hit the drum straight from the end and it immediately flies off, and the thread breaks out twice
05/17/2017 — 21:12 TheSnakeKAA
everything looks great thanks
05/10/2017 — 17:11 Katerina Klevtsova
If you took the turned out pins and screwed them evenly into the other two holes in the drum, then you would not have to knock on it. And there would be no chips on it.
04/15/2017 — 23:31 Katerina Klevtsova
Well, if you knock, it will be through a wooden spacer. And also, it would be nice to say what keys you use. The studs are a key for 7. Unlike the balonnik, not everyone has it.
03/28/2017 — 07:51 Some dude
thank you very much
02/27/2017 — 18:27 Rustam Gabdrakhmanov
old standard aluminum. I removed the drums.. installed cast iron pots.. but unfortunately they don’t have these holes.
02/19/2017 — 14:09 Iska Muxteremov
Malorik
Wheel balancing quality
Boring
We found out how often it is necessary to balance wheels. Now let's look at the issue of the quality of this procedure.
In general, the quality of the work performed depends on the equipment used, the degree of its wear, as well as the experience and professionalism of the car service workers.
Balancing stands can be mobile or stationary. Stationary equipment is used in cases where it is necessary to balance wheel rims removed from a vehicle. On mobile machines you can perform balancing without removing the wheels from the car. It is believed that portable stands are used for finishing work when it is possible to take into account the characteristics of the hub and brake disc. For this reason, testing on mobile equipment is done after performing the procedure on a stationary stand.
Balancing weights are attached outside and inside the disk or only on its inside. The latter option is often preferred in order to maintain the attractive appearance of the rim.
It is important to install weights on the disk next to each other, but take into account their total weight - it should not exceed 60 g. If this value exceeds the maximum permissible, the problem may be due to a defect in the rubber or disk. The positive effect of balancing is achieved only when the identified defects are eliminated
The positive effect of balancing is achieved only when the identified defects are eliminated.
Sometimes the problem lies in the balancing stand itself (for example, the fastening has worn out). Balancing in this case will be much less accurate. The deterioration of the wheel rim fastening occurs due to the deformation of the landing cones, which acquire an elliptical shape. This machine defect is more common than others, and it directly affects the efficiency of the work performed.
Other equipment malfunctions include disrupted operation of the bearings in it. A damaged bearing will create periodic runout, which in turn will negatively affect the operation of the sensors, which will give incorrect information. It is impossible to do balancing on such a machine.
Modern computer-controlled equipment is most effective. It allows you to balance discs using a system of spaced weights and, thanks to modern software, copes even with extremely unbalanced discs.
The calibration of the balancing stand also affects the quality of the procedure. Stands can be calibrated at 1, 5 and 10 g. The most commonly used calibration is 5 g, which gives good results for most popular car models.
An acceptable result is obtained by equipment calibrated at 10 g. Calibration at 1 g is less commonly done. It is needed only in case of frequent vehicle operation at high speeds (more than 200 km/h).
Removing the rear brake drum
Now let's look at the most important thing - how to remove the rear drum on a VAZ 2114, what tools are needed for this and how to then install a new one instead of the old drum.
To begin with, it’s worth saying that it is strongly recommended to remove the rear drums at least once a year (and if more often, even better), even if there is no indirect suspicion of their wear. This is due to the fact that brake drums, which have been standing in place for many years, become very sticky, and they can only be removed by pouring them heavily with VeDeshka and using enormous force (which can result in harm to both the motorist and the car).
That is why, preventive annual dismantling of the drums, their inspection and installation in place is a guarantee that in the future there will be no problems with such an operation.
Treating the drum with WD-40
And so, let's move directly to removing the brake drum.
First, let's collect a set of necessary tools:
- jack;
- wheel wrench (17 or 19 - depends on the installed wheel bolts);
- wrenches 7, 10 or 12 - depending on the size of the guide pin;
- hammer;
- a wooden plank (as a spacer when working with a hammer - so as not to damage the metal parts);
- lubricant like WD-40 or similar in properties.
Regarding the last point, you should immediately make a clarification - you need to use exactly the specified lubricant or as close as possible to it. The use of any other liquids - solvents, kerosene, gasoline and the like - is strictly not recommended. Now let's look at how to remove the rear brake drum on a VAZ 2114.
This should be done according to the following scheme:
- securely stop the car (put the handbrake on and place a shoe under the wheels);
- raise the rear of the car using a jack (roll or bottle);
- remove the wheel;
- thoroughly and generously treat all joints with VeDe-40 type lubricant;
- wait about 5 minutes (so that the lubricant has time to act) and remove all dirt with a rag;
- unscrew the mounting pins;
- carefully apply a series of blows to the edges of the drum (through a spacer or using a rubber/wooden mallet) until it begins to move by hand;
- remove the brake drum.
Removing the brake drum using a hammer
Installing the new drum in its place is done in exactly the same way, but in the reverse order. Also, there is another, often faster and at the same time safer, way to dismantle the old drum (you can also try it in a situation where prolonged hammering did not lead to success and the part did not move from its place).
This should be done as follows:
- fix the car in place and hang it up (all as in the previous method);
- remove the wheel;
- unscrew the two installation bolts from their sockets;
- screw the same bolts into the other mounting sockets of the drum (there are four of them on the drum - two have bolts screwed in, the other two are empty);
- begin to gradually tighten one bolt, then the other, so that their heads always remain parallel to each other (in order to achieve this, you can turn each bolt half a turn in turn).
Removing the brake drum using bolts
Thus, passing through the drum and resting on the reverse side, these bolts, when tightened, will pull it out of place, as a result of which the entire dismantling process will be as safe as possible and will not cause any damage to the car parts.
Troubleshooting methods
Before we talk about ways to remove the rear brake drum if it is stuck, you need to name the reasons why this can happen:
- Heating the brake pad causes the metal that makes up the drum to expand, causing the cover to stick to the body.
- Dirt accumulated between the cover and body.
- Rapid heating of the element during braking, and then sudden cooling (for example, in a puddle of water).
All this leads to sticking of the brake drum. Note that dismantling it is quite difficult. Therefore, experts do not recommend resorting to sharp braking in rainy weather, which is quite difficult to dismantle when replacing the pads. Now let’s talk about the most acceptable ways to remove a stuck drum.
If car service technicians cope with this task almost effortlessly, having sufficient experience and the necessary tools, then an ordinary motorist who decides to do such work on his own needs to stock up on a certain tool. Moreover, for each specific case this tool may be different.
But you will always need WD40, which is used when repairing various vehicles.
Brake drum lubrication
Sledgehammer to help you
Using this method requires reliable fixation of the car. It is better to perform all actions on a lift (a car jack is not able to provide maximum stability to a raised car). In addition, a metal goat designed to support the machine, or an ordinary stump from a large tree, may be suitable for this. Let's move on directly to the sequence of actions when dismantling the brake drum. You will need:
- Remove the wheel.
- Using a wire brush, clean the cavity from any accumulated dirt.
- Spray the surface generously with WD40.
- Gently tap the drum collar at the bottom until it becomes movable. There is no need to strike too hard - this can lead to damage to car parts.
But it is advisable to warn that this method has one significant drawback - not everyone has a sledgehammer and not everyone knows how to handle it. Therefore, it is advisable to consider other options for solving this problem.
Brake drum removed
Extreme way
This method involves absolute fixation of the machine . Before starting work, you should check everything carefully, because if the car comes off, the risk of serious injury increases by almost 100%. Having chosen this option for removing a stuck drum, you will need to perform the following steps:
- Get behind the wheel.
- Turn on the ignition.
- Engage 2nd (3rd) gear and release the clutch.
- Rotate the engine to medium speed.
- Shut down the power unit and remove the drum.
The meaning of this method is to spin the moving part of the axis, and therefore the drum itself, using centrifugal force. In this embodiment, the drum will simply be descaled.
Removing the brake drum
Radical measure
If suddenly the methods described above did not lead to the required result , in addition, the brake system cylinder is jammed, then it is advisable to take radical measures. To complete the work you will need a drill with a drill (diameter size 2-3mm), a medical syringe, and a sledgehammer. Here's what to do if all else fails:
- Make several holes at the junction of the axle shaft and the drum.
- Use a syringe to pour brake fluid into the holes and at the same time gently hit the drum with a sledgehammer.
To simplify operations, use a special removable key (you can buy it or make it yourself). After performing these steps, the stuck drum should come off. But, if you still can’t do this, then you need to visit a car service center. Here the craftsmen will certainly be able to handle the removal of the brake drum. Of course, you will need to pay for the service, but it will be cheaper than buying a new hub or steering knuckle if it breaks.
Poor quality friction lining material
When purchasing a set of new brake pads, pay special attention to their quality. It is unacceptable for the friction lining material to contain solid inclusions
Some manufacturers add metal shavings to the mixture, which increases braking efficiency, but accelerates the destruction of discs and makes them wear unevenly. It is better to avoid purchasing such components.
It should be borne in mind that many companies adapt the composition of the friction lining mixture to the composition of the material from which the discs and drums are made. If so, then it makes the most sense to purchase spare parts manufactured by the same company. This way you will ensure optimal operation of the brake system components, extending their service life.
Disk deformation due to overheating
An unpleasant breakdown that results in the car pulling to the side and the brake pedal pulsating when braking. Among the most likely causes of the problem is too intense braking followed by sudden cooling, for example, getting into a puddle.
The stronger the deformation, the less likely it is to fix the problem by turning the disc. Drums are subject to such damage to a much lesser extent.
Let's start replacing
To replace the rear pads on a VAZ 2112, you need to place your car on a level surface, place “shoes” or other supports under the front wheels, and engage first gear. Then:
- Loosen the rear wheel bolts
- Using a jack, we hang up the rear part of the car body, and instead of a jack we use special supports (chocks or sawhorses, if available)
- Then we finally unscrew the bolts securing the rear wheels and remove the wheels
- Before disassembling the rear brake mechanism, it is necessary to wash it with water and a special detergent, then dry the mechanism thoroughly
Unscrew the pins from the brake drum
- Using a brush, clean the seating surface of the drum, then screw special bolts into the service holes of the drum.
- Screw in the bolts one turn at a time to remove the drum.
- From many years of practice, we know that the drum often sticks tightly to the hub due to the peculiarities of the operating mode
- In this case, it can be removed by tapping it through a wooden block with a hammer (in this case, the blows should be applied alternately and preferably from opposite sides)
- You can try to remove the drum using a flat screwdriver (insert the screwdriver between the edge of the drum and the casing and squeeze it out)
- At the same time, do not forget that the drum is made of aluminum alloy; if handled roughly, it can simply burst; the cost of careless and rough handling will be unexpected
- Having removed the drum, take a ruler or a caliper and measure the thickness of the linings on the brake pads
- The permissible thickness of the overlays is 1.5 millimeters
- When the thickness is slightly more than the maximum permissible thickness, operation of the machine is allowed, but you should not be deluded by this fact
- Just a couple of hundred kilometers of driving on our Russian roads and then the prospect of dismantling the rear brake mechanisms is again on the horizon
- Therefore, if the thickness of the linings approaches the maximum permissible value, it is better to replace them immediately and forget about problems with them for a long time
Use a screwdriver to remove the pressure spring
Then, use pliers (nose-nose pliers) to disconnect the lower return spring
Disconnect the lower brake spring using needle nose pliers
- Now, using a screwdriver, remove the pressure spring from the rear brake pad
- Unscrew the lower part of the brake pad upwards, move it up and disconnect the upper return spring
Disconnect the upper return spring
- Using needle-nose pliers, disconnect the parking (hand) brake cable from the operating lever
- Then remove both pad assemblies from the brake shield
- We disconnect the spacer bar from the pads, then remove the cotter pin and take out the axial pin and washer together
- Remove the parking (hand) brake lever from the brake pad
We take out the cotter pin, shown in the figure with a red arrow, take out the pin and remove the hand brake lever
- When installing new brake pads, it is necessary to recess the pistons of the working brake cylinders
- Now is the time to remember the warnings at the beginning of the article that the liquid may overflow. Check the level, pump out if necessary
- Don't forget to hook the end of the handbrake cable to the lever attached to the block!
- We install the rear pads on a VAZ 2112 in strictly reverse order.
- Considering the fact that after assembling and placing the car on wheels, you should press the brake pedal all the way down several times to return the pads to their working position
- Put on the brake drum, then install the wheel
- Carry out the same actions on the other side, do not lower the wheels to the ground
- Then press the brake pedal several times
- We go down under the car and adjust (pull) the handbrake cable
- By tightening the nut on the cable equalizer, check the tension
- Inside, we lift the handle of our parking brake, count the clicks, if there are more than eight clicks, then tighten the nut a little and check again
- The optimal number of clicks is considered to be from two to seven
- The main thing is to check that when the parking brake lever is raised, the wheels are locked (our wheels are not lowered, so we try to turn them by hand)
- When the handbrake is removed, the wheels should rotate freely, without jamming or friction of the pads. Otherwise, when the car is moving, the drum may jam when heated
That's it, the process is completed, everything seems to have been taken into account, all that remains is to watch the video if something is still not clear.
