How to check the generator on a car without removing it. With and without a multimeter + detailed video
Well, not so long ago I wrote an article about checking the battery with a load fork , actually this happens for two reasons: when the battery is already dying and needs to be checked, and when the battery is new, it also needs to be tested before purchasing.
But is it always the battery? Why might it suddenly fail? It’s one thing if it’s winter and it’s really difficult for him to work, but another thing if it’s summer and he’s not “purr-murr” at all. AND even on the instrument panel, the battery sensor begins to blink occasionally, or is constantly on! In such situations, you should not run headlong for a new battery; first you need to establish the reason why it failed, because in 50% of cases it can be the generator. Moreover, the check is quite easy to do without removing it from the car, let's take a closer look... Indeed, guys, I have a lot of friends who at first ran for a new battery, but later it was discharged to zero. The point is that before purchasing, you MUST check the generator! After all, think for yourself, if it does not recharge the battery (or there is no charge at all), then it will be discharged to zero after a day or two of use, I will say more, it is easy to bring it to a deep discharge , which is very bad even for a new battery, you will lose about 10 at once % capacity, DO YOU NEED IT? Therefore, I repeat once again - CHECKING THE GENERATOR IS MANDATORY
Checking the diode bridge VAZ 2109 - 2114.
Hello. This article explains in simple terms why a diode bridge is needed in a VAZ 2109 -2114 generator, signs of a diode bridge malfunction and how to check a chocolate bar on a VAZ 2109 - 2114 generator (a chocolate bar is also a diode bridge).
How the diode bridge VAZ 2109 -2114 works.
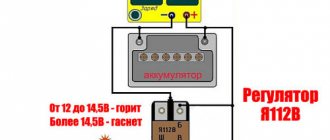
The diode bridge in the diagram below is circled in a green rectangle.
It consists of nine diodes and two plates. The plates serve not only for fastening diodes, but also connect their terminals to one point. A diode bridge is needed to obtain direct current from the three-phase stator winding.
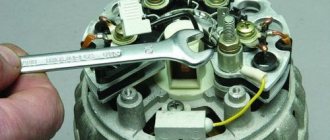
The photo below shows the bolts that connect the stator winding to the diode bridge. In the diagram above, the locations of these connections are marked with dots.
Signs of a malfunction of the diode bridge of the VAZ 2109 - 2114 generator.
The most important sign of a diode bridge malfunction is, of course, a lack of charging of the car battery or insufficient charging.
One of the signs of a faulty diode bridge can be seen only by seeing the diode bridge - this is the breakdown of additional diodes (three small black cylinders with a light stripe). A broken diode can be identified visually: it may have a crack or traces of melting.
How to ring the diode bridge of a VAZ 2109 - 2114 generator.
To check the diodes for breakdown, put the multimeter in the continuity mode (if there is no such mode, then simply select the mode for checking resistance up to 1 kOhm)
We place the positive probe on the top plate, and with the negative probe we alternately probe the terminals of the three diodes marked with numbers in the figure. If the multimeter does not beep and the display shows one, then everything is in order with the diode, move on to the next one, otherwise the diode bridge needs to be replaced.
After checking the top row of diodes, we check the bottom row in the same way. We place the negative probe on the bottom plate, and go through the remaining diodes with the positive probe.
I will answer the question that has probably arisen: why does the entire bridge change even because of one faulty diode? The fact is that a diode bridge is not an expensive spare part. It’s easier to buy it entirely and replace it than to go through the hassle of replacing one diode.
I hope now it has become clearer to you why a diode bridge is needed in a VAZ 2109 - 2104 generator and how to check it. If you have any questions, leave them in the comments.
Why does the generator fail?
The generator itself has a simple structure; if you want, it’s a regular electric motor (only made to allow for large current generation), try to spin a regular electric motor and attach a light bulb or LED to it, it will start to light up - and there you have it, an elementary current generator.
Someday I will have an article in which I will tell you what the generator consists of. BUT today it is simple and exaggerated - this is the rotor (moving part), stator (fixed part), brush assembly, relay regulator , and of course the housing in which the whole thing is located.
And now the actual breakdowns.
- The bearings are jammed. This is a fairly common problem with already worn-out generators, the rotor in the housing spins on bearings, from time and moisture (dirt), they wear out and simply jam or wedge. If there is a wedge, then this is one thing - the rod stops rotating. But if wedging occurs, it is difficult to notice; the rod may or may not rotate. In any case, with such symptoms, the belt that turns the generator from the engine is more likely to break. THIS IS THE FIRST CALL.
- The winding on the stator or rotor has burned out. It is there in any case and most likely will be on the stator, so - also from moisture (salt on the roads), it can be corroded and it will simply short out or simply burn out, since copper wires are used there. Accordingly, current generation will stop.
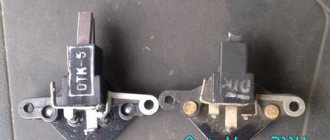
- Failure of the brush assembly. This is also very common, brushes are graphite (often square) rods that run along the stator tracks. So, from time to time they simply wear out and need to be replaced.
- Failure of the regulator relay. This relay prevents the generator from recharging the battery, bringing the voltage and current within the desired range. Often it also fails and the battery does not charge at all! Need to watch.
In general, for these 4 main reasons, the generator may not work, so it must be checked before purchasing a new battery. It's likely that this is what you're dealing with.
Car tips
Actually, I already told you about them from above; if the generator refuses to work, then it is easy to notice even inside the cabin.
- All modern cars will be signaled by a warning lamp - “red battery” on the instrument panel. If it lights up or even blinks, then there is nothing good about it, you need to react immediately, otherwise a discharge is just around the corner.
- Weak glow from all instruments. The “warning lamp” may burn out, but if you notice that the instruments begin to glow dimly, this means that the car is running on the battery, and not on the generator. Again you need to check.
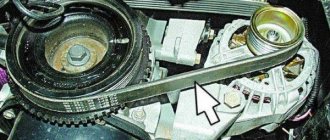
- Belt break. If you crawl under the hood and there you see a break in the belt that spins the generator, then you MUST CHECK THE OPERATION! Otherwise, again, you can kill your battery.
These are all obvious malfunctions, but it happens that the battery is dead and everything seems to be fine, but something inside is “gnawing” - maybe it’s the generator? How to check easily and quickly on a car without removing it? Question? And everything is quite easy here
Check without removing from the car
There are two 100% ways that I personally recommend to you.
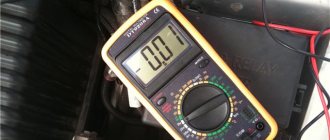
1) Check with a multimeter . Of course, not everyone has it, but in fairness it’s worth noting that this is a fairly common device and let’s say your father, neighbor, friend will have it “anyway.” To begin with, we measure with the engine not running, at the battery terminals, the normal voltage should be about 12.5 - 12.7 V, ideally.
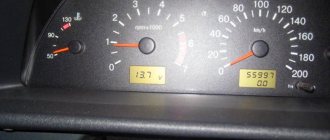
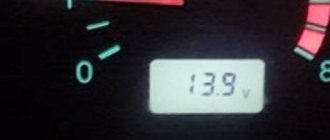
We start the car, do not accelerate, and do not turn on any electrical appliances - with the engine running, we measure the voltage, it should be within 13.8 - 14.5 Volts.
However, on modern cars, where a lot of electronics are crammed, manufacturers assure that 14.8 Volts IS ALSO NORMAL. More on this below. Next, we connect the load - headlights, heater, heated rear window, foglights, radio, after that the voltage should drop a little - but not lower than 13.7 - 14.0V. If it is lower, say 12.8 - 13V, then the generator is not working, you need to check it.
Battery overcharge
However, often it is not “undercharging” and “overcharging”. The electrolyte from the battery boils away and the battery also fails; there is nothing good about this either.
The first sign will be white streaks on the top of the battery, which means the electrolyte simply boils and evaporates. That is, the battery is charged, but the generator still “craps” charging it. The relay regulator has most likely failed here.
The check here is also elementary - you need to connect a multimeter or tester (whatever they call it) with the car running, and look at the charge. If it greatly exceeds 14.5 - 14.8 V, but is within the range of 15 - 15.2 V, it means that it is overcharging. We urgently change the relay-regulator, otherwise you will constantly boil your battery, ALSO NOTHING GOOD. It’s trivial that the plates may crumble.
Now let's watch the video version.
That’s all, he told me, exactly the methods without removing it from the car, and of course give it to a good auto electrician for repairs.
This is where I end, sincerely yours, AUTOBLOGGER.
( 91 votes, average: 4.42 out of 5)
Similar news
Engine chip tuning. Advantages and disadvantages. Is it worth doing at all? .
Generator overrunning clutch. What is it and what is it for? Important.
Why does the alternator belt whistle? When cold or under load. .
Source: avto-blogger.ru
Car generator for 2114: features
Let's start with the fact that although simple domestic models (for example, VAZ 2107, 2110, 2114, 2115 and many others) do not have a large number of primary and additional on-board electronics, the VAZ 2107 generator or VAZ 2115 generator is of particular importance. The reason is the need to charge the battery and replenish the charge lost by the battery to start the internal combustion engine, as well as the power supply to the on-board network.
The generator or generator set on the VAZ 2114 is a three-phase alternating current electrical installation. The device has a built-in rectifier unit, which converts alternating current into direct current.
The VAZ 2114 generator has the following technical characteristics: the voltage value for powering the excitation winding ranges from 13.2V to 14.7V. The generator produces a current of 80A.
The general structure of the generator includes a number of individual elements:
- a front cover made of aluminum and a rear aluminum cover (the covers have seats for bearings);
- battery connection terminal;
- connector for supplying voltage to the excitation winding;
- capacitor for noise suppression;
- mounting location for the generator brush assembly;
- diode block (6 power diodes and 3 additional) mounted on the inside of the back cover;
- in order for the semiconductors in the generator device to be well cooled, they are installed on special aluminum plates;
- The stator core cylinder, made of transformer iron, also stands out. The covers are attached to the stator with 4 bolts;
- There are grooves inside the stator into which power windings are placed, having leads for connection to the rectifier block;
- We also note that the excitation winding with its leads is connected to slip rings mounted on the rotor shaft;
- in front of the rotor shaft there is a special keyway where the drive pulley is located;
- The brush assembly of the VAZ 2114 generator is not dismountable, it is made as one piece with a relay-regulator, which is enclosed in a separate steel case attached to the brush holder (by the way, the brushes are carbon-graphite).
Features and principle of operation of the device
The conversion of energy from one type to another is carried out according to the principle of a magnetic field. The design of the unit consists of two main working elements - the rotor and the stator.
The stator is a hollow ring consisting of separate steel parts, each of which is insulated from the winding. Inside the stator grooves there is a winding made of fairly thick copper wire. The stator is a stationary element of the generator design.
The rotor is a moving structural element. It has a monolithic steel core, on the edges of which there are steel tips assembled from thin sheet metal. At the tips there are excitation coils, to which external power is supplied.
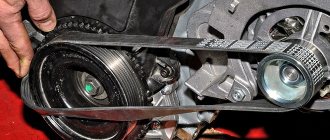
The rotor and stator are hidden in a metal housing, which also houses bearings, on which the rotor rotates, a voltage regulator, a diode bridge, an impeller and a pulley. The pulley is the drive of the device; it is made in the form of a groove on which the belt is fixed. Using a belt, the mechanical energy generated by the fourteenth engine is transmitted to the generator.
The device body is prefabricated and consists of a front and rear part, which are connected to each other using bolts. The stator is also fixedly fixed with bolts on the inner surface of the housing. The electric generator has two bearings - front and rear: the rear bearing is located on the rotor shaft, the front one is pressed into the device housing. Separate replacement of the front bearing, if it breaks, is impossible; you will need to change the entire corresponding part of the housing.
[custom_ads_shortcode1]
Symptoms of generator malfunctions, diagnosis and repair
So, problems with the generator are often indicated by the fact that the battery light on the instrument panel lights up. This indicates problems with charging the battery from the generator. Problems can also manifest themselves in the form of a constant discharge of the battery or undercharging of the battery. Also a sign of problems is overcharging the battery (the battery is “boiling”, the electrolyte is boiling away, etc.).
Briefly, the list of main problems:
- A common problem is the fuse. If it burns out, it needs replacement. It is also important to determine the cause of burnout. To do this, you should check the power circuits, connections of the “zero” to other contacts, etc.
- If the diagnostics do not reveal problems with the wires, terminals and contacts, the generator elements should be checked. Often, the list of main faults includes failure of the generator brushes (severe wear, destruction).
How to test a generator with a multimeter
In practice, an effective way to check a generator is diagnostics using a multimeter. To do this, the engine must be started. Next you need to measure the voltage at the battery terminals. Then you should create a load (turn on energy consumers, for example, headlights and a radio), press the gas pedal, spinning the engine to 2500-3000 rpm.
At this moment you need to measure the voltage at the battery terminals. Normal - the voltmeter will show 13V. If you turn on power consumers, the voltage should increase to 14.7V. If deviations from the norm are visible, certain conclusions can be drawn.
By the way, experts do not recommend checking the generator without a multimeter by simply removing the “plus” from the battery. Remember, this can damage the vehicle's electronics. If the cause cannot be determined without removing the generator, then dismantling the unit is necessary.
We also note that it is also necessary to evaluate how the generator operates in terms of noise. If extraneous sounds are heard when the rotor rotates, the culprit may well be the generator bearing, which is loaded by the belt and may fail.
Generator checks
Control checks of the VAZ 2115 generator
Checking the generator on the stand
Testing at the stand allows you to determine the serviceability of the generator and whether its characteristics correspond to the nominal ones. The brushes of the generator being tested should be well ground to the contact rings of the commutator, and the rings themselves should be clean.
Rice. 7.7. Connection diagram for testing the generator on the stand: 1 – test lamp 12 V, 3 W; 2 – generator; 3 – voltmeter; 4 – rheostat; 5 – ammeter; 6 – switch; 7 – battery
Install the generator on the stand and make connections as shown in
Rice. 7.8. Connection diagram for checking the generator with an oscilloscope: 1 – switch; 2 – generator; 3 – voltmeter; 4 – rheostat; 5 – ammeter; 6 – switch; 7 – battery
To check, assemble the circuit according to
Rice. 7.9. Shape of the generator rectified voltage curve: I - generator is operational; II - the valve is broken; III - open circuit in the valve circuit (stator winding)
Check the voltage at the B+ terminal of the generator using an oscilloscope. When the valves and stator winding are in good working order, the rectified voltage curve has a sawtooth shape with uniform teeth (
Rice. 7.6. Generator system connection diagram: 1 – battery; 2 – generator; 3 – mounting block; 4 – battery charge indicator lamp, located in the instrument cluster; 5 – ignition switch
After checking the shape of the voltage waveform at terminal B+ of the generator and making sure that it is normal, check the voltage at plug D of the generator with the wire disconnected from plug D+ of the voltage regulator. Plug D is the common terminal of three additional diodes (see Fig.
Rice. 7.10. Circuits for checking rectifier valves: 1 – battery; 2 – control lamp; 3 – generator; I - checking simultaneously “positive” and “negative” valves; II - checking “positive” valves; III - checking “negative” valves
A short circuit in the valves of the rectifier unit can be checked without removing the generator from the car by first disconnecting the wires from the battery and generator and removing the casing from the back cover of the generator. The wire from the D+ terminal of the voltage regulator is also disconnected. You can check with an ohmmeter or using a lamp (1–5 W, 12 V) and a battery, as shown in
Removing the generator from the car and disassembling it
It is quite obvious that superficial diagnostic methods do not always allow one to accurately determine the malfunction. Moreover, in order to carry out repairs, the unit in many cases must be removed. At the same time, on some models (for example, the generator on a VAZ 2107) it is easier to remove than on others. As for the more modern VAZ 2114 or VAZ 2115, removing the generator is somewhat more difficult and you need to know certain nuances. Let's figure it out.
- So, the option discussed below allows you not to remove the engine protection. To remove the VAZ 2114 generator, you need to prepare: wrenches 13, 10, open-end wrench 17 x 19, head 15, as well as a pry bar;
- Now you can remove the terminals from the battery, loosen the alternator belt and remove it. Afterwards, the belt tension mechanism is dismantled;
- Then you should disconnect the wires from the generator, disconnect the connector to the voltage winding;
- The generator itself is secured with a nut and a long bolt. First, unscrew the bolts with head 15, on which the bracket is secured to the block;
- Now the device is rotated in a clockwise direction. This will allow you to remove the axis of attachment to the bracket;
- Afterwards you can unscrew the nut (19mm wrench) and remove the nut together with the bushing. Then the axle is knocked out of the bracket with an extension;
- The final step is to remove the generator by pulling it up;
The next step is to disconnect the winding leads and remove the rectifier unit. At the same time, the capacitor is removed, which eliminates radio interference. Next, you need to unscrew the 4 screws holding the case together, after which the cover where the slip rings are located is removed. Next you need to unscrew the nut securing the pulley. To do this, it is better to immediately clamp the rotor shaft in a vice, thereby avoiding rotation.
Next, you need to remove the generator pulley and thrust washer from the rotor shaft. Then the cover is removed from the rotor. It is recommended to mark the position of the stator in relation to the covers in advance to simplify assembly.
The result of the work done is the opportunity to inspect the disassembled VAZ 2114 generator and carry out troubleshooting. Upon completion, assembly and installation of the generator on the machine is carried out in the reverse order. If the device is immediately replaced with a new one instead of repaired, then you can immediately proceed to installation.
As for 2114, in this case, many car enthusiasts choose a more powerful 115 Ampere generator (from Lada Priora or VAZ Kalina) instead of an 80 Ampere device. The fact is that in terms of fastening there are no differences. You just need to change the drive belt pulley. Having replaced the specified pulley, all that remains is to install a generator from Priora or Kalina on the VAZ 2114.
Replacement and repair of generator on VAZ 2114 (2115)
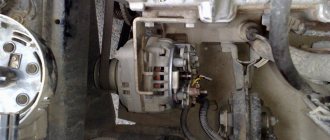
Location: engine compartment, to the left of the power unit, at the end.
Preparatory stage:
- a set of keys, heads, cranks;
- a torque wrench to check the tension of the drive belt;
- mounting spatula to remove the belt;
- flat head screwdriver
Step-by-step replacement instructions:
- We fix the vehicle on a level platform.
- Squeeze the parking brake.
- Turn off the ignition.
- Open the hood.
- Disconnect the terminals from the battery.
- Unscrew the fastening of the “+” and “-” terminals from the generator set.
- We turn out the coupling bolt of the support bracket.
- We lower the unit down and remove the drive belt from the groove.
- We unscrew the studs and turn out the coupling bolt.
- To change the GU, we remove it from its regular place.
Do-it-yourself dismantling of the control unit on the VAZ 2114 (VAZ 2115) is completed. We carry out comprehensive preventative maintenance of the equipment, clean the housing and elements from dirt and dust, blow through the windings with a stream of compressed air, and dry the contacts.
We replace worn parts and components with new ones as necessary, if defects are detected. The generator must be completely replaced if cracks are detected in its housing.
In this case, further use of the equipment is strictly prohibited.
We measure the resistance of the excitation winding with a multimeter and check the diode bridge for operability. We also inspect the fuse for integrity and replace it with a new one if damage is detected.
DIY generator installation:
- We fix the GU on the support brackets, put on a pin and a spring washer.
- Place the belt in the groove.
- We screw in the fastening bolts.
- We move the GU body up, tighten the mounting bolts of the bar.
- We tighten the generator fasteners with a torque wrench with a force of 28.0 Nm.
- We check the belt deflection; the range should not exceed 12 mm. tighten as needed.
- We clamp the power cables on the installation.
- We put on the battery terminals.
To reduce the frequency of replacing power units, some car owners install generators from Priora (injector, 8 valves). The equipment is more powerful in terms of technical characteristics, which means it ensures stability in the generation and supply of current to the motor.
A new generator set is 500 - 750 rubles more expensive than a standard one. The holes for fasteners completely coincide with the factory ones on the VAZ 2114 (VAZ 2115).
Recommendations for care and maintenance of PG on VAZ 2114
- strictly adhere to the technical inspection deadlines;
- when purchasing consumables and spare parts, check the correspondence of catalog articles;
- give preference to original parts where the manufacturer guarantees quality;
- in the absence of experience, carry out prevention in certified workshops;
- when purchasing components, require the manager to provide documents for the products he sells;
- Always use the vehicle’s operating manual and consult with car service specialists.
Repairing a VAZ 2114 generator in a garage: to help car owners
There are two power sources for the hog network in modern cars: a battery and a generator. The article discusses the generator for the VAZ 2114 car: the main causes of malfunctions, their diagnosis and repair instructions, photo and video materials are attached.
A generator is a three-phase electrical machine that produces alternating current. The rectifier unit built inside the unit must convert alternating current into direct current.
The generator includes:
- rotor;
- stator;
- Aluminum alloy covers and bearings;
- diode block;
- brushes, the assembly of which is combined with a three-level voltage regulator.
The device of the VAZ 2114 generator
The unit is driven when the engine is running using a V-belt placed on the crankshaft pulley.
Which generator is installed on the VAZ 2114 and VAZ 2115
The standard AC power source has the following characteristics:
| Name | Indicators |
| Maximum voltage | 13.18 V – 14.70 V |
| Maximum current | 80 Amps |
| Belt drive deflection | 0.8 cm per 10 kg |
| Weight | 5.0 kg |
| Electrical energy source | KATEK 2114 / 15 |
| Rated voltage | 12 Volt |
| Power | 450 W |
Causes of malfunction
Photo of the VAZ 2114 generator
- the unit produces too low voltage;
- the installation is heating up;
- no battery charging voltage;
- The charging voltage exceeds the required values.
Mechanical failure causes increased noise in the unit when the engine is running. The cause of noise may be wear of the bearings. First, the bearings in the front cover wear out. They are subject to increased load, so they wear out faster and may fail.
Diagnostics
To check, the generator does not need to be removed. The test is carried out using a tester. You can use a cheap Chinese tester. The two probes of the measuring device need to be connected to the battery terminals and the voltage checked.
Analysis of voltage values makes it possible to judge the health of the generator set. What voltage the generator device produces can be found in the manual.
Unit location
Signs of device malfunction:
- The charging indicator light is constantly on or flashes when the engine is running;
- the battery either does not discharge completely or receives an increased charge;
- The headlights do not shine well enough when the engine is running, poor performance of other electricity consumers;
- the headlights are too bright, the electrolyte in the battery boils;
- heats up at high voltage;
- increased noise during engine operation from the generator side.
There may be problems in the brush assembly, which may be due to a malfunction of the brushes, their size, or problems with the three-level regulator. It is impossible to check the size and serviceability of the brushes without removing the generator. But you can change the brushes.
Signs of worn brushes:
- no battery charging;
- Voltage jumps when charging;
- The on-board voltage in the network is below normal.
If the brushes are less than 0.5 cm long, that is, they do not correspond to the required size, they need to be replaced. The condition of the brushes is checked to see how the brushes move in the grooves. After replacing the brushes, the generator restores its operation after a few minutes when the slip rings and brushes grind in.
Three-level voltage regulator
The three-level regulator should be checked along with the brush holders. If the regulator is working properly, the voltage should be 14.7 V. If the voltage is less than 13 V, the regulator must be replaced with a new one, since it maintains the required voltage for devices in the on-board network. If the regulator is faulty, the installation heats up. The procedure for replacing the three-level regulator is similar to replacing the brushes, since the devices are removed together.
Problems are possible not only with the cheeks, but also with the diode bridge.
Signs of a diode bridge malfunction:
- There is no charging at all;
- charging significantly exceeds the permissible values.
Repairing a diode bridge by replacing its spare parts is problematic. Therefore, the problem can be solved by replacing the diode bridge with a new one. When replacing the diode bridge, install the contact bolt, install the leads of the stator windings, and install the brush assembly. After installing the protective casing, the diode bridge is mounted, the power supply is connected and the drive belt is put on the pulley. After installing the belt on the pulley, check the tension of the drive belt.
Checking the auxiliary diodes
- We connect the probe of the positive terminal of the voltmeter (red probe) to the common bundle of auxiliary diodes (Fig. 1), connect the negative probe (black) to the opposite terminal of any of the auxiliary diodes (Fig. 2).
- We look at the voltmeter readings: a working diode - the readings go to infinity.
- We swap the tester probes and look at the readings of the same diode. A working diode - the readings will be approximately 300-700 Ohms.
- We perform this operation with the two remaining auxiliary diodes.
[custom_ads_shortcode3]
Instructions for removing the generator
To remove the generator from the car you will need an inspection hole, a lift or an overpass (author of the video channel “In Sandro’s Garage”).
Tools and materials
To remove the VAZ 2114 generator, you need to prepare the following tools:
- wrench for “10” and “13”;
- open-end wrench 17x19;
- mount;
- head at "15".
You should prepare a rag to clean surfaces from dirt.
Stages
The removal procedure includes the following steps:
- First you need to remove the protection from the engine.
- Next, loosen the drive belt tension roller placed on the pulley.
- Then first unscrew the upper mounting bolt of the generator, and then the lower one.
- Loosen the air conditioning compressor mount.
- We remove the drive belt from the pulley and dismantle the generator, moving it to the right side closer to the battery.
- After unscrewing the bolt securing the air conditioning compressor, we hang the device.
- Unscrew the generator set mounting bolts.
- Having disconnected the terminals of the generator, we remove it for repair.
Next, you can repair the removed unit.
Repair instructions for the VAZ 2114 unit
Disassembling the unit for repair is a sequence of steps:
- By releasing the three latches, remove the protective casing from the housing.
- We make marks of the relative positions of the two covers and the stator to facilitate assembly.
- Having unscrewed the fastening screws, we dismantle the brush assembly.
- Next, you need to disconnect the wires from the regulator terminal.
- We unscrew the fastening bolts and dismantle the diode bridge, while disconnecting the winding terminals.
- After unscrewing the four tie screws, you need to remove the cover from the side where the generator slip rings are located.
- We fix the rotor shaft from turning using a vice and unscrew the pulley mounting nut. Now remove the generator set pulley and washer from the rotor shaft.
- At the last stage, we dismantle the rotor cover of the unit.
Then you can inspect the parts and repair or replace them. The brushes, diode bridge, bearings, three-level voltage regulator and other parts of the generator set may be faulty.
Modern cars are equipped with a large number of electronics, which requires a more powerful generator set for stable operation of the on-board network. Low voltage can affect the operation of the valves. Under heavy load, the generator heats up. In this case, a generator from Priora or Kalina is installed on the VAZ 2114, capable of delivering a current of up to 115 A. It is mounted in the same way as the standard one, only the drive belt pulley needs to be replaced.
The generator is installed on the VAZ 2114 in the reverse order. After installing the unit in its original location, all connectors and wires are connected, and the drive belt is put on. To tension the drive belt with a volume of 1.5 liters, the generator housing is removed from the motor block using a mount. And with a volume of 1.6 liters, the belt is tensioned using a tension screw. The performance of the generator depends on the tension of the belt. If the tension is insufficient, a weak charge is generated, which negatively affects the operation of the on-board network.
Thus, the car’s generator ensures uninterrupted operation of the on-board network and charges the battery. If problems occur with the diode bridge, bearings, brushes or other parts of the generator set, their cause should be identified and repaired or replaced, otherwise problems may arise with the instruments and sensors included in the on-board network.
Functionality check
The VAZ 2114 generator should be checked every six months, even if the device itself is operating in normal mode.
If the unit breaks down, all systems that consume electricity are affected: if the generator produces a charge of insufficient power, the battery will simply discharge and the car will stop, but if it produces excessive voltage, then serious problems may arise with the wiring and electrical equipment of the fourteenth.
The first signs of a malfunction, upon detection of which it is necessary to check the generator on the VAZ 2114:
- The battery light on the instrument panel glows excessively brightly even when the engine is running, this indicates that the battery is overcharged;
- The battery light does not light up after the ignition is activated, the turn signals, wipers and similar devices do not turn on - the battery is not charged because the generator is not working;
- The generator is very noisy
The noise indicates that the bearings are worn out. As a rule, the front one wears out most often. You cannot drive with such a problem, since the bearing may jam, which will lead to damage to the rotor and stator, after which the entire device will become beyond repair.
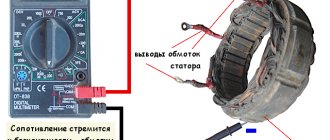
Now let's figure out how to check the generator. To do this, we need a multimeter; you can purchase it at any auto store for 400-600 rubles. The check is performed according to the following algorithm (the method can be used on the VAZ 2113 and VAZ 2115):
- Turn on the ignition. We make sure that all the dashboard lights are on;
- Let's start the fourteenth. The battery light on the dashboard, if the device is working properly, should go out;
- Warm up the engine to operating temperature (90 °C). Now you need to create the maximum load on the car’s electrical network, for this you will need to turn on all the devices that consume electricity - the radio, high beams, stove, cigarette lighter, heated glass;
- Set the multimeter to voltmeter mode. Here we need an assistant who will sit in the driver’s seat and maintain engine speed at 3200-3500 rpm;
- We connect the multimeter probes to the battery. During the heaviest load on the on-board electrical network, the generator must produce a voltage of at least thirteen volts. If the multimeter shows a reading less than the required one, it means that due to a malfunction, the generator on the VAZ 2114 produces low voltage;
- Next, turn off all energy consumers and check the electrical appliance at minimum load. We do the same thing - we take measurements when the engine is running at 3200-3500 rpm. Now the multimeter should show at least 14.7 Volts.
Checking with a multimeter Knowing how many volts the generator should produce on a VAZ 2114, after detecting inconsistencies, it is necessary to begin troubleshooting and, if necessary, repair or replace the device.
[custom_ads_shortcode3]
