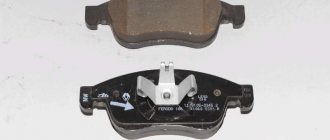
Pads are one of the components of a car's braking system whose job is to slow down or stop the car using friction.
The driver, by pressing the brake pedal, creates brake fluid pressure in the contour pipes that are connected to the calipers. Calipers convert fluid pressure into mechanical movement by squeezing the brake pads between which the disc rotates.
The pads operate under conditions of strong compression, serious friction forces, sudden changes in temperature conditions and prolonged operation at high temperatures.
These elements of the brake system are subject to natural wear of the friction element - ferodo. The rate of wear is influenced by driving style, vehicle weight, as well as whether the brake system is working properly or not.
Purpose of pads
The brake system of new cars consists of two main components: discs and pads. Although most drivers go to auto mechanics whenever they feel something is wrong with their brakes, it would be nice to know some information. What do brake pads do, how do they work, and when is it time to replace them?
First of all, it's worth considering why pads are so important. Brake pads are an important component of the braking system because they provide the friction to stop or slow down your vehicle. When the driver applies the brakes, they press against the brake rotor, helping the car slow or stop, depending on the pressure.
As you can imagine, brake pads are constantly used and therefore wear out and require attention. They are components that need to be changed at certain intervals. This interval varies depending on how much the car is driven each day and how it does it. However, to find out the manufacturer's recommended time for replacing the pads, you should refer to the vehicle's technical manual.
Why do brake pads need to be replaced? Maintenance and timely replacement will help increase the level of vehicle safety. Periodic replacement of pads leads to increased service life of brake discs. You can also avoid more serious and costly vehicle breakdowns.
What should I do if the brake light on the instrument panel is on?
Checking the mechanical component
Self-diagnosis is a simple operation. It is divided into two components - mechanical and electrical. The first is very important, since it evaluates the condition of the brake system drive and determines its performance.
Checking the mechanical component is reduced to assessing the level of brake fluid in the reservoir and the condition of the drive lines and system components - the master brake cylinder and operating mechanisms.
The brake reservoir is located in the engine compartment, on the right near the rear panel of the engine compartment. It is not difficult to find it, since there are two wires going to the tank cap.
When checking, disconnect the wires and unscrew the cap to determine the brake fluid level. There are marks on the walls of the tank, by which you can understand how much liquid is left. A level above the middle between the marks is considered normal.
A drop below o indicates a fluid leak. Therefore, the next stage is checking the lines and brake mechanisms. To do this, inspect the wheels from the inside. If we find a fluid leak from the mechanisms, then we see smudges on the disks.
For an additional check, we start the car and press the brake pedal a couple of times, after which we roll the car back and inspect the surface of the ground for traces of leaking fluid, and check the fluid level. If it is detected, the brake line is damaged, and the amount of fluid will decrease.
If there is a brake fluid leak, the car cannot be used because the car does not have brakes. The best option in this case is to call a tow truck to deliver the car to the repair site. But if you have enough driving experience, then we get to the service station or garage on our own. Car brake systems usually have two circuits, and if the line of one of them is broken, the second continues to work. But due to the fact that the effectiveness of the brakes on a car with a damaged line is greatly reduced, you need to drive at low speed and with the hazard lights on.
Brake pad wear monitoring
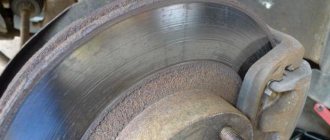
Brake pads are considered consumables for a reason. They wear out and require replacement. The best way to find out if your brake pads need replacing is to look for a few symptoms.
In order to understand these symptoms, you must carefully read the information below:
1. Appearance. The surest way to find out if the pads need replacing is to look at them carefully. They are located directly behind the wheel, on both sides of the brake disc. The thickness of the pads must be at least 4 mm. If you find that the wear is significantly greater and the pads have become thinner, it is time to replace them. Today, most parts are equipped with a brake pad wear indicator. Thanks to these sensing elements, when the pads wear out and need to be replaced, the driver can hear a high-frequency squeaking sound.
2. Sound. Another symptom that your pads need to be replaced is the noise they make. When the brake pads wear out, the driver will hear a noise similar to two pieces of metal rubbing against each other. As mentioned above, today all cars are equipped with acoustic sensors that allow drivers to hear a sharp metallic noise. This means that the pads are worn out and should be replaced.
3. Feelings. The time when you need to replace your pads can be determined by how the brakes feel. If the driver feels jolts when braking and the brakes are no longer as effective as before, it would be a good idea to visit a car service center to check and, if necessary, replace the pads.
Even if the replacement is not a very difficult job, you should remember that safety is at stake, for which the car's brake components are responsible. That's why the best advice in this situation is to contact a specialist to replace the pads.
Front TC
When starting to replace the front TCs, remember that they are changed only in pairs. Buy new pads rather than old ones that have not yet served their useful life just because they are cheaper. Don't skimp on your own safety.
- Place wheel chocks under the rear wheels. The machine must be stationary. If you have a working handbrake, apply it.
- Disconnect the negative terminal from the battery by de-energizing your VAZ 2109.
- Check the current level of fuel fluid in the expansion tank. If the fluid is at or near the MAX mark, part of the brake fluid should be drained. Otherwise, when the pistons are compressed, the fuel fluid will begin to pour out.
- Loosen the tension on the wheel bolts, raise the car, and then remove the first wheel you start with. Next, following the same instructions, change the TC on the second wheel.
- Thoroughly clean the surface of the brake disc and caliper from accumulated dirt. No mineral solvents. Dry clean only.
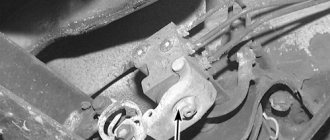
- Remove the rubber seal (also known as the brake hose holder) from the bracket located on the rack.
- Bend the antennae of the lock washer of the bolt responsible for fixing the guide pin.
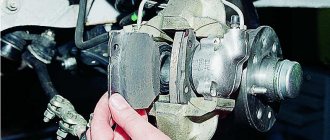
- Unscrew the bolts and remove the housing.
- You have freed up access to the front fuel tanks, so nothing prevents you from dismantling them.
- If you need to remove the TC, but you are not going to change them, be sure to put marks on them. If you mix them up during assembly, the consequences may not be the most pleasant.
- Measure the thickness of the friction layer on the TC. If it is less than 1.5 millimeters, the pads must be replaced. Replacement is also required if there are clearly visible chips, scratches, or defects on the surface of the pads.
- Before installing new brake brakes, carefully remove all dirt from the brake mechanism.
- Using a mounting spatula and one of the old TCs installed in its socket, press the piston into the cylinder, thereby fully preparing the site for reassembly with a new block.
- Assembly is performed in the reverse order of disassembly.
When driving on the roads, you are not only responsible for yourself. Therefore, your car should always be in good condition.
https://youtube.com/watch?v=1M8iKMFVM0
If you change your brake pads in a timely manner, you guarantee the safety of yourself, your passengers and other road users.
Types of systems and operating principles
Sensors that warn of critical wear are divided into two types:
Mechanical.
Electronic.
The mechanical type is the simplest and at the same time effective sensor that monitors friction lining wear. Its design includes a plate mounted on the base of the block. The ends of the plate protrude beyond the limits of this pad and at the moment when the material wears away, the end begins to come into contact with the disk. This causes strange grinding sounds to appear. Unfortunately, today mechanical sensors are practically not installed on modern cars. The design, although simple, has its drawbacks. The first drawback is the high chance of losing the plate. The second “minus” is false positives, which in practice occur quite often. Sometimes, even recently installed pads begin to make squeaks, and the sensor begins to make a characteristic squeak. Also, a mechanical part cannot be placed on drum mechanisms due to the design features.
Electronic sensors are considered technologically advanced because they interact with the lamp on the instrument panel. The car owner does not need to listen to extraneous sounds. All information is sent to the sensor. It, in turn, is divided into external and integrated types.
The external type has a recess. It is placed on the block, namely on its metal part. The advantage of this type is that when replacing pads there is no need to change the sensor; it can simply be moved to a new part. Integrated devices are placed inside the pad, and it is impossible to remove it from there. When replacing the pads, the sensor also changes. This is quite easy to do.
Consequences of pad wear
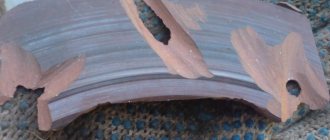
Having found out what the operating principle of the brake pad wear sensor is, the driver should study information about the safety of driving with worn elements. Parts that are not replaced on time lead to unpleasant consequences, and sometimes to an accident. The first signs of wear are expressed by the appearance of squeaks, vibration and an increase in braking distance.
Experienced drivers immediately notice how the pedal travel increases, the handbrake function worsens and the amount of “brake fluid” in the tank decreases. All these factors must be taken into account in order not to provoke bad consequences. Brake and wheel discs will begin to overheat and develop mechanical defects or rupture.
References
- "Wind turbine brake pads." Archived from the original on 2015-02-11. Retrieved 2015-02-11.
- "Crane brakes". Archived from the original on 2013-08-11. Retrieved 2013-10-04.
- "How the material works: how disc brakes work."
- "Installing Subaru 4-piston brakes." Archived from the original on 2013-10-05.
- “Professional motor mechanic. Brake pads - questions and answers."
- “Gill sensors; through hole position sensor."
Fault diagnosis and repair
Drivers can independently diagnose brake pad sensors if they notice any malfunctions. An element can fail for various reasons. This usually occurs due to damaged or broken wires. The indicator light does not light up even if the pad wear is at its maximum. Another common reason is oxidation of the contacts in the area where the plug connects to the sensor. Oxidation occurs due to the ingress of water, which negatively affects the circuit resistance. Thus, the lamp lights up even if new pads are installed.
To fix the problem, you need to use a multimeter. If the wiring is “ok”, then you need to disconnect and clean the contacts, and then connect again. This method works if moisture and dirt get into the brake system.
If a false operation of the system occurs, the driver needs to eliminate moisture from the friction material and rubbing elements. You will have to check the repeated heating that occurs during braking.
Lubricant requirements
The lubricant must meet the following requirements:
- do not freeze at low ambient temperatures;
- be inert towards water and brake fluid;
- have a high operating temperature (150-180°C);
- do not enter into a chemical reaction with parts of the brake mechanism, do not cause deformation of the anthers;
- the dropping temperature should be absent or be as high as possible;
- exhibit chemical resistance to aggressive substances;
- do not leak or melt throughout the entire service life;
- have anti-corrosion properties;
- do not allow contacting surfaces to stick;
- do not wash for a long time.
Many brake mechanisms use rubber, which is based on a copolymer of ethylene, propylene and diene monomer. Rubber is highly sensitive to lubricant quality.
Is it possible to replace a faulty sensor?
You can replace the faulty part yourself, but you need to follow some recommendations. First, the car is raised with a jack and the wheel is unscrewed. The external sensor is located near the hub, mounted on a spring or clamp. The sensor is pulled out of its place, the contacts are cleaned of dust. Instead, another sensor is installed and the wheel is secured. After lowering the car “from a height”, it is worth checking the functionality of the element. The lamp lights up when the pads are very worn. A replacement sensor is selected that is similar to the old one, that is, the one recommended by the manufacturer. The work is carried out in accordance with the car repair instructions. Correct selection of parts makes driving safer.
