The front suspension is the weak point of any car. Many owners of domestic cars are interested in how to replace the front suspension of a VAZ 2106 with their own hands. There is nothing difficult about this if you follow the instructions and use a good set of tools.
The quality of roads in our country has always not been of high quality, and it especially deteriorates after winter. After the snow melts, numerous potholes and cracks are found in the asphalt. As you know, the VAZ 2106 suspension is designed to soften vibrations transmitted from potholes on the road to the vehicle body. Over time, the chassis wears out and requires repairs, which you can do yourself.
Front suspension device for VAZ 2106
Smooth movement and maneuvering in corners depend on the front suspension of the car. Periodic inspection and maintenance are required to ensure safe driving. If while driving you hear any extraneous sounds and knocks, grinding or feel swaying - all these are signs of a malfunction in the front suspension of the VAZ 2106.
Suspension diagram
It is recommended to carry out diagnostics every 15 thousand kilometers. In this case, it is important to inspect in detail the hinges of the levers, check the condition of the lower and upper ball joints, springs and shock absorbers, as well as the levers themselves. If there are no defects, just do a wheel alignment.
How is the repair carried out?
Do-it-yourself repair of a VAZ 2106 chassis can include a wide range of works, including:
- Adjusting the bearings on the hubs.
- Replacement of grease and bearing seals.
- Replacement of front suspension shock absorbers.
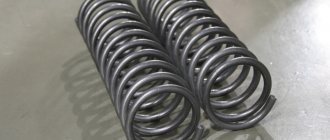
- Replacing springs in pairs.
- Installing new joints on the upper and lower control arms.
- Replacement of arms, both upper and lower.
- Replacing anti-roll bar cushions on a VAZ 2106.
- Installing new upper or lower supports.
After completing all of these or one of the listed works, it is necessary to have the wheel alignment done in a specialized workshop.
Adjusting the front bearings
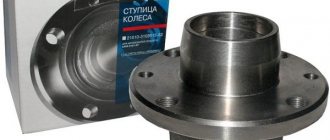
This procedure should be carried out as often as possible - approximately every 10 thousand km. mileage On a VAZ-2106 car, the front suspension needs constant monitoring; unfortunately, this is the most vulnerable unit. You hang the wheel, remove the protective cap, after which you will need to loosen the nut on the hub. And only after this you need to use a 27 wrench to unscrew or screw in the nut. It depends on which direction the adjustment is required.
Note: the tightening force should be light. In addition, after tightening, it is necessary to make approximately a sixth to seventh part of a turn in the opposite direction. The fact is that the hub has cone bearings, which are easily destroyed when trying to tighten it with force. But they are able to withstand heavy loads due to the fact that the contact area between the holder and the rollers is rather large.
Replacing the front cross member
To replace the front suspension cross member of a VAZ 2106 you will need a small set of simple tools:
- keys for 13, 17, 19 and 22;
- screwdriver;
- hammer;
- extension cords
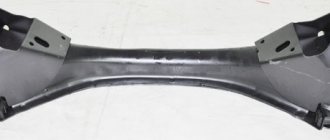
Jumper under the hood
Having prepared all this, get to work. First, remove the lower front suspension arm from the car (we'll tell you how to do this below). It should be removed assembled with the ball joint and silent blocks. After this, open the hood, remove the carburetor air filter and cover this hole with something to protect it from the penetration of contaminants during operation.
Prepare a cross member that will be needed to support the engine in a suspended state when dismantling the front suspension cross member. The material used is an ordinary construction board 5 cm thick. The length of the crossbar should be made equal to the distance between the flanges of the front wings. In the middle of the traverse, make a hole into which a long bolt or pin with a bracket is inserted.
Supports under the cross member
Install a traverse on the flanges of the front wings of the VAZ 2106 under the hood and insert a long bolt and bracket into its hole. The latter should be connected with a bolt to the eye of the power unit. By slightly tightening the nut on the stud, you need to remove the gaps in the connections between the bracket bolt and the motor eye.
Using a socket, through the hole in the cross member on both sides, you need to unscrew the nuts holding the motor mounts and remove the nuts with spring washers. Next, place supports under the cross member and lower the car onto them so that the cross member lightly touches them.
On each side it is necessary to unscrew the horizontal and vertical bolts that secure the cross member to the side members. When jacking up the car, the cross member will remain on the supports. At this point, the process of dismantling the VAZ 2106 front suspension cross member with your own hands is completed: replace it with a new one and reassemble everything in the reverse order of disassembly.
Replacement with jet rods
Elements such as torque rods relate to the rear suspension. They are fastened with bolts and bushing-type adapters to absorb impacts, reduce wear and deformation when hitting bumps. Like any other rubber products, such bushings also fail quite often. It is noteworthy that it is recommended to change them all at once.
To disassemble the suspension and torque rods you need a special set of tools:
- keys, especially 19 mm;
- lubricating fluid;
- a set of new hinges;
- blade for installation;
- brush for working with metal.
The VAZ-2107 car has such an element as a long longitudinal rod. It also has bushings; the process of removal and replacement is also important, because the remaining consumables on other elements are dismantled in a similar way.
In this case you need:
- Clean the fasteners from dirt using a special metal brush.
- After this, the fasteners must be treated with a lubricating fluid.
- After a certain time, unscrew the fastening using a key and remove it.
- On the reverse side of the rod, unscrew the fastening of the lower side of the shock absorber.
- Remove all fasteners and spacer sleeve.
- Move the shock absorber.
- Having approached the jet thrust fasteners, lubricate them and unscrew them.
- Take a mounting spatula and use it to remove the jet thrust.
- The rubber bushings can only be removed if the cage is knocked out of the metal. In this case, you need to apply a special instruction.
- You can try to squeeze out or knock out the rubber elements that remain in the traction.
- Clean the cage thoroughly before installing new bushings.
- Lubricate the new product with liquid and drive or press in with a hammer.
- Take a special cone and install a metal sleeve. If it is not available, you can make it yourself by grinding off the head of the bolt.
- Press in the bushing with the cone.
- To completely remove the bolt, use a sleeve.
How to remove silent blocks without a puller
Without using a puller, most likely it will not be possible to remove the silent block. If you don’t have a ready-made tool, you can make it yourself. There is a sufficient amount of material for this on the Global Network.
Homemade puller diagram
Thus, you can replace the suspension joints in a VAZ-2107 car yourself. This will take quite a lot of time, but will save you on visiting the service. It is advisable to choose a set of new hinges made of polyurethane, as it is more reliable and durable.
Replacing ball joints
Sometimes self-repair of a VAZ 2106 chassis requires replacement of ball joints. First you need to diagnose the element as follows:
- hang the wheel;
- place something under the lower arm;
- lower the car.
When lowered onto the stand, the lower arm will stop putting pressure on the suspension. Grab the wheel with both hands from below and above, and make several sharp movements: the top towards you, and the bottom away from you, and then vice versa. If at the same time you hear a knock and feel play in the hub and caliper in the area of the ball joints, the front suspension of the VAZ 2106 requires repair.
To replace, you will need a jack, a hammer and a regular set of wrenches. First you need to dismantle the wheel and unload the suspension, and then use a 22mm wrench to unscrew the nut of the lower or upper support. Give a few blows with a hammer to the protrusion of the steering knuckle, releasing the ball joint, and then release the support from the lever.
Using a 13mm wrench, unscrew the 3 nuts on the bolts securing the ball to the lever. When removing the ball from the lever, be careful. It is better to dismantle the plate along with it, not forgetting to put it in place when installing the ball joint. Don't forget that the lower and upper supports are different from each other. Assembly is carried out in the reverse order of disassembly.
Replacing the upper arm
Removing the upper arm
To replace the upper arm of the VAZ 2106 front suspension yourself, you will need keys 13 and 22, a jack, a support, and a wheel wrench for removing the wheel. To dismantle the upper front suspension arm, you must follow the instructions:
- Raise the car on a jack and remove the wheel, then place a support under the lower arm and lower the car. This is necessary to load the suspension to the point that the car is standing under its own weight. The levers will then be aligned.
- Secure the upper arm axle with a wrench and loosen the axle nut by unscrewing it until it aligns with the end of the axle.
- Unscrew the bolts that hold the upper ball joint in place, and then move the lever up a little and completely unscrew the axle nut, pulling the axle out of the lever.
- Remove the lever together with the silent blocks without dismantling them.
Next, carry out all the work that required you to remove the front suspension arm of the VAZ 2106, and install it in place or replace it with a new one. The assembly process is the same as disassembly, but in reverse order.
Removing the lower arm
When a VAZ 2106 chassis is being repaired, it may be necessary to replace the lower front suspension arm. To work, you will need wrenches 13 and 22. First, remove the front suspension spring, and then, using a wrench, unscrew the two nuts that hold the arm to the cross member. Remove it from the cross member bolts without removing the silent blocks, axle and ball joint. If necessary, replace the ball joint or change the lever. Reinstall it in the reverse order of disassembly.
Homemade silent block remover
It is convenient to change the rubber-metal elements of the front suspension using a puller. However, not everyone has it. Therefore, you have to make the device yourself, since it is quite difficult to dismantle the hinges with improvised tools. Let's take a closer look at how and from what materials a puller can be made.
Description
To work you will need the following list of parts and tools:
- a piece of water pipe 3 cm long with an internal diameter of 40 mm and an external diameter of 50 mm;
- washer with an outer diameter of at least 50 mm;
- M12 bolt 7 cm long with washers;
- two pieces of pipe 10 cm long and 40 mm in diameter;
- vice;
- hammer;
- lubricant
We manufacture the puller in the following sequence:
- Using a hammer, we rivet a part of the pipe with a diameter of 40 mm, increasing it to 45 mm.
To avoid troubles when driving a car, it is necessary to periodically inspect the condition of the suspension elements and promptly change not only silent blocks, but also other parts that have failed. By following the step-by-step instructions and using the appropriate set of tools, you can replace the hinges without any special skills.
