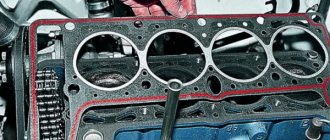
The cylinder head gasket is a perforated sheet made of iron and asbestos or aluminum paronite with edging on the sides and holes for cylinder chambers and connecting bolts. The main task of the cylinder head gasket is to seal the connection between the planes of the cylinder block. In addition, the gasket maintains the required internal oil pressure in the engine system and also prevents mixing of coolant and engine oil.
This photo report shows how the cylinder head gasket of a VAZ 2110 (injector) is replaced. On a car with a carburetor engine, the principle is the same, only instead of the injector, you need to remove the carburetor.
Replacing the cylinder head gasket of a VAZ 2110 (8 valves)
The cylinder head gasket is a perforated sheet made of iron and asbestos, sometimes of aluminum paronite, along the edge of which there are holes for chambers and connection bolts.
The purpose of the gasket is to seal the connection between the cylinder blocks. At the same time, it serves to maintain oil pressure in the general engine system and inhibits the mixing of coolant with engine oil. The photo report below clearly shows the process of changing the cylinder head gasket on a VAZ 2110 car. On a car with a carburetor, it is not the injector that needs to be disconnected, but the carburetor.
Signs indicating cylinder head failure
Nowhere is it said what the service life of the cylinder head gasket is, so its service life is influenced by many factors, such as the operation of the car, the driver’s driving style, the car model and others. But there are certain factors by which it is possible to identify a breakdown.
- Formation of drips at the connection between the block and the head.
- Light impurities and the resulting foam that occurs when connecting to the cylinder head remain on the oil dipstick.
- The color of the exhaust changes to light blue, this indicates the penetration of water into the combustion chamber of the block.
- Formation of oil stains in the coolant tank.
- Hot gases enter the cooling system, causing an increase in engine temperature.
What you need to know when changing the cylinder head
The first step is to set the crankshaft to TDC, then close the two valves of the 1st cylinder. It is best to replace the removed fastening bolts, since after several uses they are pulled out, the metal is strained, after which it breaks. When the bolt length increases to 135.5 mm, they must be replaced.
The gasket must be replaced whenever the engine head is removed, even if it is not damaged or damaged.
It is necessary to tighten the bolts with a tightening torque of 20 Nm in the first stage, and 69-85 Nm in the second stage, and in the third stage the tightening force of the bolt reaches 90 degrees.
The actions when changing the gasket on a VAZ 2110 with a 16-valve engine are similar to those with an 8-valve engine. Here it is worth paying attention to some points:
- The first step is to remove the dismantling.
- When removing the pulleys from the timing belt, two pulleys are marked and they are removed.
- The fuel rail is removed.
- Tightening occurs according to the instructions for a 16 valve engine.
Necessary tools when changing gaskets for a VAZ 2110 car
To carry out work to replace the gasket, you need to drive the car into a pit, this will make it more convenient to work, while preparing a set of tools in advance:
- Ratchet sizes 10,13,17 and 19.
- Torx key.
- A simple screwdriver.
- Special key for candles.
It is also worth taking care of the components: Gaskets included in the TRIALLI kit, item number GZ1017022, costing 500 rubles; Gasket for cylinder head VICTOR REINZ number 613666000, the cost will be approximately 280 rubles; The original cylinder head gasket is VAZ number 21083100302020, its price is 140 rubles.
Prices are indicated for Moscow and the region as of 2022.
We install the piston of the first cylinder to the TDC position of the compression stroke, fix the camshaft pulley, and remove the spark plugs.
Using a 10mm wrench, unscrew the two bolts securing the cable bracket, and then remove the bracket. We get rid of the ventilation hose, as well as the hose installed on the valve cover fittings. Using a 10mm wrench, unscrew the two nuts securing the valve cover and get rid of it.
Using a 10mm wrench, unscrew the bolts holding the front timing cover, one located in the center and two on the sides. We remove the timing cover.
The mark applied to the camshaft toothed pulley must coincide with the installation lug located on the rear cover of the timing drive; using a 17mm wrench, remove the pulley.
Armed with a 10mm wrench, remove the fastening nut on the protective casing and remove the casing.
The timing belt also requires replacement.
Disconnect the sensor connector indicating the oil pressure level.
Using a 10mm wrench, unscrew the two nuts and bolt securing the plug. Using a 13mm wrench, remove the 6 nuts securing the rear camshaft bearing housing. Remove the bearing housing.
Armed with a 14mm wrench, you need to remove the four nuts holding the housing in front of the camshaft and also remove it.
Unscrew the four nuts located on the muffler mount.
Using an E14 Torx head, unscrew the ten bolts located on the cylinder block and remove the block itself.
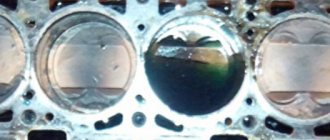
Burn marks are visible on the gasket.
Remove the old cylinder head gasket.
After changing the gasket, tighten the cylinder head bolts according to the diagram.
Source
What is she?
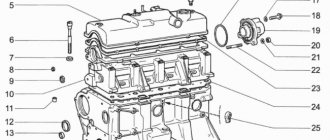
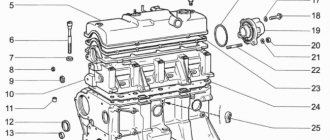
This part of internal combustion engines serves as a seal to the place where the cylinder head is connected to the cylinder block. The engine has another gasket that seals the valve cover with the cylinder head. These parts cannot be confused with each other; these are completely different products, their design, purpose and application are different.
This part seals three separate but interconnected engine systems at once. These are lubrication, cooling and gas distribution systems. It is because of this that very high requirements are applied to it. During the compression of the fuel mixture, high pressure is created in the combustion chamber, therefore, after each removal of the cylinder head, the gasket must be replaced.
On 8 and 16 valve engines, dismantling and replacing the side cushions is carried out in a similar manner, there is no difference. But the front lower ones change differently.
To change the front lower mount on a 16 valve engine, you need:
Signs of failure of the cylinder head gasket of a VAZ 2110
There are no specific warranty periods for the use of a cylinder head gasket. Its durability is influenced by such factors as: the degree of operation of the engine, its model, driving style and other reasons. However, there are several symptoms by which you can determine that the gasket has failed:
- at the junction of the block and the head there are leaks of engine oil or coolant ;
- using an oil dipstick, foreign light impurities or foam-like emulsion , which occurs when antifreeze penetrates through the connection with the cylinder head;
- the color of the exhaust changes to bluish-white, which indicates water entering the combustion chamber of the cylinder block;
- presence of oil stains in the coolant reservoir;
- The engine temperature rises due to the breakthrough of hot gases into the cooling system, which immediately heat the coolant.
Tips for replacing the cylinder head gasket
Removal and installation of the cylinder head gasket is carried out with the crankshaft set to TDC. It is also necessary to ensure that both valves of the 1st cylinder are closed.
It must be remembered that the cylinder head gasket must be changed after each removal of the engine head, even if this is not due to its unsuitability.
The procedure for replacing the cylinder head gasket on a VAZ 2110 on a 16-valve engine is generally similar to how to change the cylinder head gasket on an 8-valve engine, but has several nuances :
- The receiver must be dismantled.
- When removing timing belt pulleys, a mark is placed on two pulleys and two pulleys are removed.
- The fuel rail is removed.
- The order and tightening torques are carried out in accordance with the requirements for a 16-valve engine.
Consequences of incorrect cylinder head installation
Correct tightening of the cylinder head is very important, since the performance of the motor directly depends on it. The cylinder head acts as a cylinder cover, and any violations in its fit affect the processes occurring inside the power unit.
Insufficient tightening of the head leads to a drop in compression due to loss of tightness at the junction of the cylinder head with the cylinder block, burnout of the gasket, breakthrough of working gases from the cylinders and their entry into the channels of the lubrication or cooling systems, penetration of technical fluids into the combustion chambers, which in turn is negative affects the functioning of the power unit and can cause very serious damage.
Excessive tightening also does not bring anything good; in this case, damage to the head often occurs - cracks appear, or fasteners are destroyed - bolts break, threads break, etc.
Uneven or incorrect tightening often causes warping of the head, due to which gaps appear at the junction of it with the block, which leads to the same consequences as insufficient tightening.
What is needed to replace the cylinder head gasket of a VAZ 2110 (8 valves)
Required tools :
- ratchet with 10mm socket heads; “at 13”, “at 17”, “at 19”;
- wrench with Torx bit;
- screwdriver;
- torque wrench;
- wrench for removing spark plugs.
Suitable accessories :
- the TRIALLI gasket set has article number GZ1017022, its price is 500 rubles ;
- The VICTOR REINZ cylinder head gasket has article number 613666000, its price is 280 rubles ;
- The original VAZ (VATI) cylinder head gasket has article number 21083100302020, its price is 140 rubles .
The price of gaskets is relevant for the summer of 2017 for Moscow and the region.
Set the piston of cylinder 1 to the TDC position on the compression stroke. We fix the camshaft toothed pulley from turning with a clamp. We unscrew the candles.
A) Using a 10mm wrench, unscrew the two nuts securing the throttle drive cable bracket to the receiver and remove it. B) Remove the crankcase ventilation hoses and the supply hose from the valve cover fittings. C) Using a 10mm wrench, unscrew the two nuts securing the valve cover and remove it.
Using a 10mm wrench, unscrew the bolts of the front timing cover: two on the side and one in the center. Remove the timing cover.
We check the coincidence of the mark on the camshaft timing pulley with the installation antenna on the rear cover of the timing drive. Using a 17 key, unscrew the pulley.
Using a 10mm wrench, unscrew the nut securing the protective casing and bend the casing.
We see that the timing belt also requires replacement.
Disconnect the oil level pressure sensor connector.
Using a 10mm wrench, unscrew two nuts and one bolt securing the plug. Evenly, using a 13mm wrench, unscrew the six nuts securing the rear camshaft bearing housing. Remove the rear camshaft bearing housings from the studs.
Then, also evenly and using a 13mm wrench, unscrew the four nuts securing the front camshaft bearing housing and remove it.
Unscrew the four nuts securing the muffler to the exhaust manifold.
Using an E14 Torx head, unscrew the 10 bolts on the cylinder block and remove the block.
Burn marks on the gasket.
We take out the old cylinder head gasket.
Install a new cylinder head gasket.
We replace the gasket with a new one, tighten the cylinder head bolts in the sequence according to the diagram.
Source
Articles
The gasket costs pennies compared to the labor of replacing it.
Before you start replacing the gasket, you should purchase this gasket. Although any car store will select a suitable spare part for you, it is better to know its part number. The most suitable gaskets for the VAZ-2110 are:
- The original VATI gasket, which has the article number 21083100302022.
- Part VICTOR REINZ. This item is of higher quality than the original. Its article number is 613666000.
- TRIALLI gaskets, which have the article number GZ.
It’s better to immediately buy a better quality spare part than to bother with disassembly again later.
Replacing the cylinder head gasket of a VAZ 2110 (8 valves)
It’s probably no secret to anyone that our cars need servicing much more often than foreign cars. This applies primarily to VAZ cars of all generations. As a rule, these cars are purchased by people with average incomes and constant servicing of the car at a service station is an unaffordable luxury. To save money, you need to learn how to do some work yourself. For example, it is necessary to be able to correctly tighten the bolts of the cylinder head of the VAZ 2110 8 valves, the tightening order of which is strictly regulated.
This work is difficult at first glance, but in reality, car enthusiasts, faced with it for the first time, cope quite successfully, thereby saving their time and money. It is worth knowing that the tightening of bolts on an 8 valve and 16 valve engine has some similarities and some quite important differences. For example, if their tightening torque is the same, then the pattern according to which this process occurs, that is, the order, is completely different. This must not be forgotten, otherwise all the work will be ruined by simply not following the order of tightening the bolts. If tightened incorrectly, it is quite possible that the gasket will be skewed or squeezed and, as a result, depressurize the structure and loss of performance characteristics of the VAZ 2110 cylinder head.
Lada 110 [Hide]
Removing and disassembling the cylinder head of the VAZ-2111, -2110 engine
Page 1 of 2 We remove the cylinder head in case of replacing the gasket, repairing the valve drive mechanism and the head itself, as well as when completely disassembling the engine. We work on a lift or inspection ditch.
Disconnect the negative cable from the battery and drain the coolant from the engine.
Disconnect the exhaust pipe from the exhaust manifold.
We remove the receiver with throttle assembly (VAZ-2111), carburetor (VAZ-2110), intake and exhaust manifolds (the head can be removed without removing the manifolds).
On the VAZ-2111 engine, we disconnect the “mass” wires from the left end of the head and the fuel rail with injectors and fuel pipes.
We disconnect the tips of the high-voltage wires from the spark plugs, the connectors of the oil pressure and coolant temperature indicator sensors.
On the VAZ-2110 engine, remove the ignition distributor and the housing of the auxiliary units with the fuel pump.
Remove the timing belt, tension roller with spacer washer, and camshaft toothed pulley.
We unscrew the nut securing the rear timing cover to the cylinder head.
Remove the cylinder head cover. All of the above operations are described in the relevant articles.
1. Use a Phillips screwdriver to loosen the clamps and remove all hoses from the exhaust pipe of the cylinder head.
2. Using a 10mm hexagon, unscrew the ten bolts securing the cylinder head.
3. Remove the bolts and washers.
4. Remove the cylinder head
6. When disassembling the valve mechanism, place a stop (a wooden block) under the plate of the valve being disassembled.
Tool for the job
Before you begin the actual replacement, you need to collect all the necessary tools and materials:
- A set of keys of various diameters “10”, “13”, “17”, “21”.
- Screwdriver.
- Pliers.
- Brand new coolant.
- Container for coolant.
- Clean rags.
- New consumables (depending on the purpose of the work being performed - approx.).
- Anti-rollback boots.
For ease of work, it is best to use an inspection hole or a lift.
In what cases is it necessary to tighten the block?
It becomes necessary to tighten the bolts if the cylinder head was removed to change the gasket or repair some components. Also, some car owners recommend tightening after a certain period of operation of the car or after a certain mileage of the VAZ 2110. It is important to know that before installing the head it is always recommended to install a new gasket.
Reinstalling an old one, even if it is in good condition, may not give the desired result. A new gasket is inexpensive and for VAZ 2110 cars they are sold in almost all car stores. You also need to know that the bolts that secure the cylinder head wear out over time and, under constant stress, can even stretch to some extent. Re-installation of bolts is permissible, but only when their length is no more than 9.5 centimeters.
The length should not exceed 9.5 centimeters
Removing and disassembling the cylinder head of the VAZ-2111, VAZ-2110 engine
Removing and disassembling the cylinder head of the VAZ-2111, -2110 engine
We remove the cylinder head in case of replacing the gasket, repairing the valve drive mechanism and the head itself, as well as when completely disassembling the engine. We work on a lift or inspection ditch.
Disconnect the negative cable from the battery and drain the coolant from the engine. Disconnect the exhaust pipe from the exhaust manifold. We remove the receiver with throttle assembly (VAZ-2111), carburetor (VAZ-2110), intake and exhaust manifolds (the head can be removed without removing the manifolds). On the VAZ-2111 engine, we disconnect the “mass” wires from the left end of the head and the fuel rail with injectors and fuel pipes. We disconnect the tips of the high-voltage wires from the spark plugs, the connectors of the oil pressure and coolant temperature indicator sensors. On the VAZ-2110 engine, remove the ignition distributor and the housing of the auxiliary units with the fuel pump. Remove the timing belt, tension roller with spacer washer, and camshaft toothed pulley. We unscrew the nut securing the rear timing cover to the cylinder head.
Remove the cylinder head cover. All of the above operations are described in the relevant sections.
Page 2
Hydraulic tappets
The valves are driven by cams on camshafts and hydraulic pushers. These elements are located inside the guide holes. With the help of hydraulic pushers, it is possible to automatically eliminate gaps in the valve mechanism. Therefore, when operating a vehicle, there is no need to adjust the thermal clearances of the valves.
In order for the hydraulic pushers to operate in normal mode, oil is supplied to them from the lubrication system. It is supplied through special channels in the engine block and cylinder head. Oil passes through these channels to lubricate the journals on the camshafts. The channel has a valve that prevents oil from draining from above after the engine is turned off. This allows you to maintain the system in normal mode until it stops completely.
Read also: Who is responsible for axle overload
You will need: a torque wrench, a 10mm hex wrench, a 13mm and a 17mm wrench, two large screwdrivers, a Phillips screwdriver.
Disconnect the wire from the “–” terminal of the battery.
Set the piston of the 1st cylinder to the TDC position of the compression stroke (see “Installing the piston of the 1st cylinder to the TDC position of the compression stroke”).
On a car with an injection engine, reduce the pressure in the power system if the work is performed immediately after a trip (see “Reducing pressure in the power system” in the subsection “Engine power system”).
Disconnect the exhaust pipe of the muffler from the exhaust manifold (see “Replacing the exhaust pipe of the muffler”).
Unscrew nut 1 securing the bracket to the water pump supply pipe and loosen nut 2 securing the bracket to the exhaust manifold.
Disconnect the block with wires from the oil level sensor in the engine crankcase.
In addition, on the engine mod. 2111 unscrew or loosen the nut securing the support bracket 1, unscrew the bolt securing the support bracket 2 and.
11 disconnect the block (white) with wires from the crankshaft position sensor by pressing the plastic latch.
Remove the camshaft drive belt from its timing pulley, tension roller, water pump timing pulley, move it to the side and remove the tension roller (see “Replacing the camshaft drive belt and tension roller”).
Secure the camshaft timing pulley from turning by inserting a screwdriver (shown by the arrow) into its hole and resting it against the pin, unscrew the pulley mounting bolt and remove it along with the washer.
Using two screwdrivers, remove the pulley from the camshaft. Do not damage the camshaft oil seal.
Unscrew the nut of the upper fastening of the support bracket 1 and remove it.
Unscrew the nut of the upper fastening of the support bracket 1 and remove it.
Loosen the clamp and disconnect the outlet hose from the throttle pipe.
Loosen the clamps and remove the inlet pipe hose.
Turn the throttle drive sector as far as it will go and disconnect the throttle drive rod from it.
Unscrew the two fastening nuts and remove the tips of the “mass” wires from the studs securing the rear cover of the cylinder head.
Unscrew the fastening nut and remove the tip of the “mass” wire from the stud securing the water cooling jacket pipe.
Disconnect the injector harness blocks by pressing the plastic latches.
Disconnect the block with wires from the coolant temperature sensor by pressing the plastic latch.
Replacement of cylinder head gasket VAZ 2109, 2113, 2114, 2110, 2111, 2112, Kalina 8 valves
Unscrew the fastening nuts and disconnect the fuel supply hoses 1 and drain 2 from the fuel pipes, holding the hoses from turning with a second wrench (the fuel supply hose is marked with paint).
Please note that there are O-rings installed on the fuel pipes. After disconnecting each hose, remove the O-ring from the tube.
Disconnect the block with wires from the throttle position sensor by pressing the plastic latch.
Disconnect the block with wires from the idle air control regulator by pressing the plastic latch.
Replacement of cylinder head gaskets VAZ 2109, 2110, 2114 8 valves. Removing the Injector Head VAZ 2109, 2114
Disconnect the vacuum hose of the electro-pneumatic valve from the fitting on the receiver, then loosen the clamp and disconnect the vacuum hose of the brake booster from the fitting on the receiver.
Disconnect the block (red) with wires from the adsorber of the gasoline vapor recovery system by pressing the plastic latch.
Pull the wiring harness out from under the receiver.
Loosen the clamp and disconnect the canister purge hose from the fitting on the throttle body.
Remove the wire ends from the spark plugs.
Loosen the clamp and disconnect heater hose 1 from the water cooling jacket pipe.
Loosen the clamp and disconnect the radiator supply hose from the cooling jacket pipe.
Disconnect the wire from the coolant temperature gauge sensor.
Disconnect the wire from the oil pressure sensor.
Loosen the ten head bolts in the order shown, then completely unscrew the head bolts and remove them along with the washers.
Lift the cylinder head slightly, slide it so that the end of the camshaft comes out of the hole in the rear drive belt cover, and remove the cylinder head.
Clean the mating surfaces of the cylinder head and cylinder block (the surfaces must be dry and clean) and remove oil from the threaded holes in the block for the head mounting bolts.
Install a new head gasket onto the block (the gasket must be dry and clean) along the installation sleeves. In this case, the hole for the passage of oil in the gasket (with a copper edging) should be located between the 3rd and 4th cylinders.
Install the head on the block, first making sure that the crankshaft and camshaft are in the TDC position (both valves of the 1st cylinder must be closed). Tighten the head bolts in the following sequence in four stages:
Stages of repair on 8 and 16 valve cars
Eliminating engine fluid leaks
Sorry, there are no surveys available at this time. Leaking motor fluid from an internal combustion engine (8 or 16 valves) is an important symptom in which the cylinder head requires repair. Typically, fluid leaks from under the plug. It is located directly on the cylinder head at the rear of the engine. Leakage is usually caused by worn o-rings.
- In order to replace the plug, you need to unscrew three bolts from the studs.
- Having done this, you can remove the sealing rubber from the installation site.
- It is better not to use domestically produced sealing gaskets, since their quality leaves much to be desired. In order to protect yourself from having to replace the ring again, it is better to use a sealant. For greater convenience, the sealant can be filled into a medical syringe.
- Squeeze some sealant into the place where the plug will be installed. Wait five minutes before installing the new gasket in place and then installing the plug.
The request returned an empty result.
Replacing the unit
If this happens and you have to carry out not a repair, but a replacement of the cylinder head 2110 8 valves, and you do not have the skills to carry out such repair work, then our instructions will be useful to you:
- Open the hood of the car and disconnect the negative terminal of the battery.
- Place a container under the bottom of the car to collect used consumables. Locate the refrigerant drain plug and unscrew it. You need to wait a while until the antifreeze is completely drained, usually this takes no more than 15-20 minutes.
- After this, disconnect the throttle cable and the intake pipe, as well as the wires located on the left side of the cylinder head of the 8-valve motor. In addition, you will also need to remove the connectors of the antifreeze temperature and engine fluid pressure control sensors. Don't forget to disconnect the cooling system pipes.
- Next, in order to remove the block head, you should dismantle the receiver with the throttle assembly. In addition, you will need to dismantle such mechanisms and components as the intake manifold, a device for accumulating gasoline with injectors and all pipes, and the cylinder head cover.
- Then, using a wrench, remove the bolt of the rear support bracket directly from the motor. You should also unscrew the toothed discs of the timing pulleys, and then the rear cover of the timing belt.
- To remove the cylinder head, it is not necessary to remove the intake and exhaust manifolds. To remove the head, use a 10-point hex key: unscrew all the bolts that secure the top of the engine. The bolts must be removed along with the washers. After unscrewing the bolts, remove the cylinder head along with the head gasket.
- Please note that the gasket is disposable, so it must be replaced every time the head is removed. Install a new gasket. After this, take the working cover of the block and install it, lubricating the end part with sealant. All assembly steps must be carried out in reverse order.
The request returned an empty result.
How to change it yourself?
Replacing the cylinder head gasket on a VAZ 2110 with an injector or carburetor engine requires certain knowledge and skills.
To change the head mechanism on an 8 or 16 valve engine, you must carefully prepare for this task.
Tools and materials
If you change the cylinder head gasket yourself, you will need:
- star key;
- a set of ratchet wrenches with socket heads;
- Phillips and flat head screwdrivers;
- torque wrench for tightening cylinder head bolts;
- spark plug key.
Channel Sdelaj Sam! Pljus interesting! published a video that will help you understand how to correctly determine the burnout of the cylinder head gasket between the cylinders of the power unit.
Step-by-step instruction
A detailed guide on how to remove and change the cylinder head gasket on a VAZ 2110 is given below:
- Drive the car into a garage with a pit or onto an overpass; if possible, it is better to use a lift, since some of the work will be done under the bottom of the car.
- Open the hood and loosen the bolt securing the battery terminal, disconnect it. This is necessary in order to prevent voltage surges during repairs.
- Then disconnect the intake line from the exhaust pipe.
- If the car is equipped with a carburetor engine, then the carburetor itself must be removed.
- Disconnect the lead cables from the spark plugs. A wire with a connector is connected to the power unit temperature controller; it also needs to be removed. After this, disconnect the plug from the pressure and engine fluid level controller.
- Loosen the fastening and disconnect the vacuum booster tube that is fixed to the intake manifold.
- Disconnect the connectors and disconnect the ignition distributor controller.
- Remove the gasoline pump with all its components. Loosen the clamps and disconnect the pipes connected to the pumping device. Some fuel may come out of it, so use a rag when dismantling it.
- Using a wrench, loosen the screw securing the timing belt tension roller. This will allow you to remove the wheel along with the belt.
- Next, secure the camshaft toothed disk to prevent it from turning during further repair work.
- Unscrew the fixing screw and remove the pulley from its seat. To perform this task, you need to use two screwdrivers at the same time.
- Next, locate the nuts securing the rear timing cover. You need to unscrew them and remove the cover. Using a Phillips head screwdriver, loosen the clamps to disconnect the pipes connected to the cylinder head exhaust pipe.
- Using a hex wrench, remove the cylinder head mounting screws, there are ten in total. The bolts are removed along with the washers. Assess the condition of the latter. If washers or bolts are damaged, they must be replaced with new ones. The screws themselves are reusable parts, but they often wear out, leading to the need for replacement. You can tell how worn the bolts are by their length. If it is about 13.55 cm, then purchase new clamps in advance.
- Then the cylinder head with the failed seal is dismantled.
- During further installation of the GB, new screws must be lubricated with engine fluid. This will ensure simple and reliable fixation of the parts. In addition, lubrication will prevent accelerated wear of the bolts.
- The contact surfaces of the head and the block must be thoroughly cleaned of wear and contaminants. These elements usually show signs of an outdated gasket. Thoroughly clean and dry the surfaces before further installation of the service seal.
- Perform a visual inspection of the mounting screw holes. Often when repairs are carried out, they contain residues of the sealing element, engine fluid or antifreeze. Any dirt in the holes must be removed.
- A new seal is being installed, which must first be cleaned and dried. During installation, make sure that the hole used for the passage of engine fluid is located between the fourth and third cylinders. Also, when installing the gasket, make sure that the valve elements of cylinder 1 are closed.
- When the installation procedure is completed, you need to correctly tighten the cylinder head bolts, taking into account the sequence and torque. First, the two middle bolts are tightened - the bottom and the top, and then all the rest. On the first tightening circle, the torque should be 20 Nm, this indicator is controlled using a torque wrench. On the second lap the torque should be about 69.4-85.7 Nm. On the third circle, all the bolts are rotated 90 degrees in the prescribed order, and they are turned by the same amount on the fourth circle.
- Further assembly is done in reverse order. When performing the task, it is not allowed to rotate the crankshaft and camshaft until you install the timing belt. The camshaft pulley is mounted in such a way that the protruding part of the hub is directed towards the car engine. When the repair procedure is completed, check the correct assembly and make sure there are no gaps on the valves. Also adjust the timing belt tension.
Replacing the cylinder head gasket on a VAZ 2110 (8 and 16 valves)
It is important for VAZ 2110 owners to remember that the cylinder head gasket is a disposable part, therefore it must be replaced whenever this unit is disassembled.
In our material today we will talk about when and how to change the cylinder head gasket. These recommendations are equally suitable for owners of the “ten”, under the hood of which engines with 8 and 16 valves are installed.
Element appearance
When is replacement required?
The primary issue that concerns car owners is the frequency of replacing the element. Even if the unit is not disassembled, the seal has a certain service life.
In general, the lifespan of a gasket directly depends on the quality of the material used in its manufacture. Also, the frequency of replacement is affected by the intensity of use of the vehicle.
As we have already noted, replacement should be performed when disassembling the BC head, or when primary signs of wear appear.
What is this?
What exactly is this gasket?
This is a rubber element that has a certain elasticity. With use and wear, elasticity is lost. This reduces the quality and efficiency of performing the main task of the element - sealing the connection between the cylinder head and the cylinder block.
In order for the engine to work properly and without problems, the gasket must be installed efficiently and reliably. Ignoring its wear will lead to a serious reduction in engine life.
Signs of wear
If your old gasket is worn out, it won't be difficult to determine. There are several characteristic signs of loss of elasticity of a rubber element:
- White steam starts coming out of the exhaust;
- Traces of coolant or engine oil leakage appear at the cylinder head joints;
- Traces of oil appear in the coolant;
- An impressive amount of lubricant accumulates in the pan;
- Foam forms around the filler cap.
To check for the presence of steam in the exhaust gas, you need to remove the cap from the expansion tank with coolant and put the bag on the neck. If after a short period of operation of the power unit the bag inflates quickly, the gasket is worn out and therefore needs to be replaced.
When should you change?
The need to replace the cylinder head gasket on a carburetor or injection car arises when, during use and due to natural wear, the seal loses its elasticity. This leads to a decrease in the quality and efficiency of fulfilling the main purpose - reliable sealing of the cylinder head connection with the cylinder block itself.
to replace the cylinder head gasket on a VAZ 2110 in the following cases:
- If oil drips appear at the junction of the head and the block. There may also be a refrigerant leak in this area.
- The presence of light-colored foreign impurities or foam in the motor fluid. This can be detected by removing the dipstick from the inspection hole. The formation of a foam emulsion and the appearance of impurities occurs as a result of mixing engine and coolant fluids.
- Change in color of exhaust gases. A more saturated white-blue gas comes out of the car's muffler. This indicates that water has entered the combustion chamber of the cylinder block.
- The appearance of oil stains in the expansion tank with antifreeze.
- Increase in power unit temperature. As a result of exhaust gases entering the cooling system, the antifreeze heats up much faster. This leads to an increase in engine temperature.
User Sergei Tsapyuk showed in his video the consequences of a burnt-out head gasket in a VAZ car.
Thus, a major overhaul of the cylinder head of the 16-valve VAZ 2112 engine is being carried out. This process at a car service center will take 1-2 days, but in his garage a car enthusiast can spend much more time, since the lack of tools will affect him. Thus, it is recommended to carry out cylinder head repairs at car repair shops, where everything will be done much faster and with better quality. Of course, this will hit your pocket, since high-quality and major repairs of this part will cost on average about 7,000-10,000 rubles. along with spare parts.
Tightening process and diagram (on an 8-valve car)
As we have already said, the procedure for tightening the cylinder head bolts on an 8-valve and a sixteen-valve unit is very similar. The tightening torque is the same in both cases, but the bolts are unscrewed and then tightened according to a completely different pattern. It is important to thoroughly clean the contacting surfaces before installing a new or old VAZ 2110 cylinder head. It is highly undesirable to do this with sandpaper, a file or other hard objects that can damage these surfaces.
Rough cleaning of the surface can lead to depressurization of the cylinder block system with ensuing dangerous consequences. For this purpose, special liquids are sold in the store. They are applied to a surface that may have remnants of an old gasket or other contaminants and are left to dry for some time. After some time, they are carefully removed and the surface remains perfectly clean.
Required Tools
Key for tightening to the required torque
- rod compass;
- surface treatment liquid;
- knob;
- new gasket; Cylinder head gasket
Stages
After installing the head, you can proceed to tightening the bolts.
- Insert all bolts into their respective slots. Important! There should be no rust on the bolts and sockets; if there is any, be sure to remove it using special liquids. You can also lubricate them to make them screw in easier.
We begin to tighten the bolts in four circles strictly according to the diagram for the VAZ 2110 using a torque wrench.
- The first one is tightened to 20 Nm (2 kgf/m).
- In the second circle we tighten 69.4-85.7 Nm (7.1-8.7 kgf/m).
- Next, following the diagram, use a wrench to tighten it ninety degrees.
- Then, going around the fourth circle, we tighten it another ninety degrees.
- Let's look at the work done. There should be no distortions in the places where the cylinder head comes into contact with the VAZ 2110 block. The gasket should not be squeezed out anywhere.
The diagram according to which the tightening takes place
At this point, the process of tightening the GB cylinders can be considered completed, as you yourself have seen, nothing is difficult, and having completed the work once, the next time you can do it all literally with your eyes closed. The video we offer will help you better understand the process.
Head milling
There are several cylinder head malfunctions that you cannot fix on your own. When the engine overheats systematically, the aluminum cylinder head becomes deformed. The perfectly flat surface of contact between the head and the engine block ceases to be so.
This leads to the gasket between the block and the head starting to leak. Replacing it with a new one does not solve the problem. In this case, grinding the adjacent surface may be the solution. Milling is performed on a special machine, which allows the work to be completed with perfect precision.
In the conditions of your garage, it is unlikely to carry out such a procedure yourself. Using a hand sander (as some garage “kulibins” advise) for this purpose means completely ruining the adjacent surface. In this case, repairing the cylinder head will lead to a complete replacement of the head - it is impossible to grind it indefinitely.
How to remove the valve cover and replace the gasket on a VAZ 2110-2112 8-cl.
So, the first thing you need to do is open the hood of the car and, using a 10mm socket, unscrew the two bolts securing the throttle cable bar, as is clearly shown in the photo below.
Take it to the side and secure it so that it does not interfere with us in the future.
Replacing the cylinder head gasket of a VAZ 2111
This video was processed in YouTube Video Editor ()
Removing the injector head of VAZ 21083. Do it yourself!
Shown how to remove the 8 valve
from a VAZ
21083 at home is very simple...
Then, using a Phillips screwdriver, unscrew all the clamp screws on the hoses that fit the valve cover. In the photo below they are all marked with arrows:
Elimination of lateral play
The lateral play is determined by loosening the camshaft up and down, for which one of the covers of the support cushions is removed. This play appears when the camshaft journals and the shaft bed support pads against which they rest are worn.
First, we dismantle both camshaft cushion covers and remove excess metal using an emery stone with a fine-grained abrasive. Its surface must be perfectly flat so as not to disturb the geometry of the part. An alternative is fine-grained sandpaper glued to smooth glass.
The pad cover is ground with an abrasive to reduce its depth, causing it to hold the shaft more tightly. To prevent the emery from clogging, it is recommended to periodically water it with water. After 1-1.5 minutes of processing, the cover must be replaced and tightened, checking for play. It is important not to remove too much metal as the camshaft will stop turning. After installation, it should move without play with a slight, so-called “velvety” force.
Next, the operation is repeated with the second cover of the support cushion, while the cover that was processed earlier must be removed so that it does not interfere with determining the degree of camshaft play. After the backlash is completely eliminated, both covers are installed and the engine is assembled. After starting the engine, the knocking should stop completely.
