Antifreeze is a special liquid that is designed to maintain the operation of a vehicle's cooling system and which does not freeze at low temperatures. Using the presented liquid, the car engine is cooled when necessary. Apart from its main purpose, antifreeze also lubricates the inside of the cooling system of a Chevrolet Niva car, which helps prevent the formation of corrosion.
The car cooling system is designed to maintain the optimal temperature of the engine of a Chevrolet Niva vehicle. When the car engine heats up, antifreeze comes into action, with the help of which the vehicle engine returns to the optimal temperature. The coolant should be replaced according to the instructions specified in the operating manual for the Niva Chevrolet vehicle. This article will provide information on the procedure for replacing antifreeze yourself, without resorting to the help of specialists, and will also discuss in detail the stages of draining the refrigerant, flushing the cooling system and filling in new coolant.
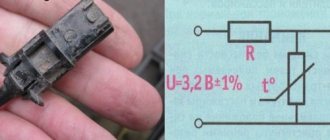
Until the engine temperature of a Chevrolet Niva car is low, the cooling system thermostat is closed, and the coolant circulates in a small circle without entering the vehicle radiator. In a situation when the engine temperature of a Chevrolet Niva car reaches approximately 85 degrees Celsius, the thermostat opens slightly and antifreeze enters the car’s radiator. If the vehicle's engine reaches 105 degrees Celsius, the thermostat opens all the way and heated coolant enters the radiator, warming up the interior. After completing these steps, the antifreeze returns to the pump. The engine temperature of a Chevrolet Niva car is determined using a special sensor.
Antifreeze or antifreeze? Replacing coolant Niva Chevrolet
Replacing the coolant is an integral part of maintaining any car. Every owner of a Chevrolet Niva needs to know how and what kind of fluid needs to be filled.
Types of coolant
Antifreeze is a liquid that is a mixture of pure distilled water, propylene glycol and various additives. Water is used as a universal solution, and propylene glycol makes the liquid viscous and sticky. Additional additives provide better engine cooling and also perform a number of additional functions depending on the composition:
- silicate additives prevent metal oxidation and also reduce the overall temperature of the liquid;
- carboxylate additives destroy fat deposits on the walls of the cooling system channels and also increase the shelf life of antifreeze;
You can also find antifreeze with special additives on sale that can perform a number of specific functions - they prevent the liquid from freezing at subzero temperatures (relevant for cold regions), eliminate scale and foam (relevant for old problematic engines), and so on.
Recommendations for choosing for Chevy Niva
To determine which antifreeze is best to pour into your Chevrolet Niva, you need to know which one was filled from the factory, since each model has a lot of specific nuances. However, in most cases, the choice of coolant depends on the year of manufacture of the car:
- for older models that were produced before 2001-2002, class G12 fluid is suitable;
- for later models (from 2003 to 2010), G12+ antifreeze is suitable;
- for modern models (manufactured after 2010), it is recommended to purchase coolant category G12++.
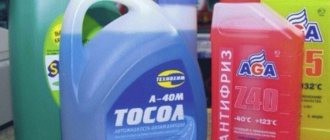
Also, many people use the domestic mixture Antifreeze class TS-40 as antifreeze. Motorists often speak negatively about Antifreeze, but in its properties this liquid is practically no different from foreign antifreezes. To understand the absurdity of negative reviews, you need to remember that most Chevrolet Niva cars are filled with antifreeze at the factory.
conclusions
Timely monitoring of the operation of the air conditioning system, through the filter of which odors from the engine compartment penetrate, will help to reveal many of its mysteries. Remember, coolant leakage directly affects increased engine wear.
Do not mix cooling products from different manufacturers.
For long-term operation of the car, it is necessary to regularly perform its maintenance and carry out routine operations. One of such operations is replacing the coolant. It is responsible for cooling the engine and protecting parts from corrosion. You can change antifreeze on a Chevrolet Niva yourself in a garage, following step-by-step instructions.
How often do you need to change the coolant and how much to pour?
Manufacturers recommend changing the coolant after a couple of years of operation or every 60 thousand kilometers. It depends on which event comes first. Additionally, you need to control the color of the antifreeze. If it changes color, this indicates that the inhibitory additives have begun to disintegrate. In this case, the liquid becomes aggressive to all elements of the cooling system, so it urgently needs to be changed.
There are a number of signs based on which a decision is made to replace the coolant:
- reduced liquid density;
- a reddish color indicates the beginning of corrosion processes;
- suspensions or sediment at the bottom of the tank containing coolant;
- the presence of various impurities, waste residues, metal shavings, foam, etc.
Where did the smell of antifreeze come from in the interior of the Niva Chevrolet?
A manifestation of this is the broken seal of the heater radiator, its hoses and clamps. The location of the leak can be determined by visual diagnostics, which reveals mechanical defects in pipes, connections, and tightness of hose fastenings.
A sweet taste in the mouth is the first sign of an antifreeze leak.
This is evidenced by the engine temperature sensor going off scale. As a result, the coolant boils, coming out of places with weak connections. The situation becomes more complicated with the appearance of a smell when the stove is running, which does not exclude the fact that the heater radiator is faulty (leaky).
Prolonged use of the car renders rubber gaskets, cuffs, and other non-metallic components unusable. They need to be replaced urgently, and secured with reliable metal clamps.
The cause of the smell is also considered to be the expiration date of the antifreeze. Over time, the liquid ages and loses its frost resistance under the influence of environmental pressure and temperature changes. Effective cooling of the engine, preventing its boiling, and preventing corrosion remains the main function of the liquid. A temporary improvement in the properties of antifreeze is considered to be the effect of diluting it in a ratio of 3:1, but this depends on the properties of the product.
Malfunctions and symptoms
A serious problem is the leakage of antifreeze into the engine sump. A malfunction of this kind is accompanied by the appearance of a white coating on the oil tank cap. The leakage of antifreeze leaves a puddle under the car.
Characteristic marks and spots of moisture are often found on the timing belts.
The reason for this is a possible malfunction of the pump, although it is difficult to determine this assumption visually.
Faulty coolant reservoir cap
In this case, the smell will appear when the stove and ventilation in the cabin are turned on. Under the hood, characteristic traces of leaks from the expansion tank will be visible.
Malfunction of the antifreeze circulation system
A malfunction of the coolant circulation system leads to a change in the engine temperature.
This is facilitated by severe high-pressure conditions and temperature changes in which antifreeze circulates. And this is a compelling argument for rapid wear of interfaces and premature failure of the vehicle.
Cases of decreased antifreeze levels have a right to exist. Where does the liquid go if there are no signs of external leakage? So, inside. Such a leak may appear due to a crack in the block head.
The process consists of warming up the engine, unscrewing the spark plugs and detecting the presence of antifreeze by smell. The exact determination of the leak is checked by removing the cylinder head. The presence of antifreeze in the crankcase oil is checked.
How to replace antifreeze on a Chevrolet Niva: step-by-step instructions and video
Replacing the water pump, replacing the coolant (antifreeze) Niva Chevrolet
After replacing the coolant on a Chevrolet Niva, tighten the reservoir cap tightly, because when the car warms up, pressure will be created in the system with antifreeze. The drain plug is sealed with a rubber ring.
To drain antifreeze on a Niva, place the car on a flat surface and open the hood. In the cabin…
Require topping up the beer after the foam settles. Well, how can you immediately fill in new antifreeze immediately after this, remember that 1 liter will remain in the system not drained? In general, decide for yourself.
Replace a ring that is torn, cracked or has lost elasticity.
Before adding coolant, it should be prepared. There are ready-to-use liquids, mainly antifreeze.
How to replace antifreeze?
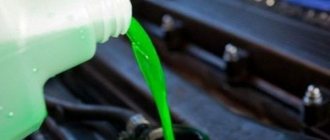
Next, you can proceed to filling the cooling system. Fill with antifreeze. The coolant is poured into the expansion tank.
As soon as it begins to flow out of the throttle body nozzle, put the hose on the nozzle and tighten the hose clamp. Next, continue to fill the antifreeze solution to the maximum mark in the expansion tank.
Chevrolet Niva
Next, you need to start the engine and wait for the electric fan to turn on. If this does not happen, you need to check what kind of air is coming from the heater.
If it is warm, then the fan is faulty, if it is cold, the reason is the presence of air pockets formed in the system. To get rid of them, you need to open the cap on the radiator, start the engine, and after 5 minutes of operation, turn off the engine. Now close the radiator cap.
Remove the radiator cap When the second cooling circle opens, the coolant level will drop significantly. You must wait until the engine cools down. Next, check the fluid level again. On a cold engine it should be between maximum and minimum, on a hot engine - at maximum. If necessary, add to the required volume. Poll Have you changed the coolant yourself?
Radiator plug and drain bolt It is also best to avoid contact with antifreeze, as it has toxic properties. When it no longer drains, use a 13 key to unscrew the bolt near the ignition module, between the spark plugs of the 3rd and 4th cylinders to drain the antifreeze from the engine cooling jacket, having previously placed a container under it
Cooling jacket drain bolt Do not pay attention to the fact that the bolt is not screwed in completely
In this case, a tapered thread is simply used as a seal.
To make it more convenient to unscrew the bolt, it is better to remove the high-voltage wire from the spark plug of the 3rd cylinder. Next, we pour the system with ordinary drinking water through the expansion tank with the plugs open until clean water flows, but it will most likely flow only from the bolt hole, since the thermostat, already closed by that time, will not allow water to flow to the main radiator.
Here it should be clarified that we fill the wash with clean water and not with old coolant. Although, if your antifreeze is more or less pure and you decide to just rid the system a little of scale, etc. Next, start the engine, remembering to connect the explosive wire to the spark plug. We warm it up to 90 degrees and let it idle for another minute, depending on the expected degree of contamination.
Replacing antifreeze with antifreeze. Niva Chevrolet.
We repeat points 3,4,5 and 6. We drain something like this: Require topping up the beer after the foam settles. Well, how can you immediately after this, do not forget that 1 liter will remain in the system not drained, immediately fill in new antifreeze?
Therefore, we carry out further rinsing. First rinse after washing. We tighten both plugs and fill the system with distill.
We start the engine, remembering to connect the explosive wire to the spark plug. Warm up to 90 degrees. We repeat points 3,4 and 5.
Chemistry
There are more than two dozen cooling system flushes, maybe more, but I’m talking about what I use myself and not only in cars of the Niva family. In this case, the product of the company. I've probably done about 50-70 cooling system flushes myself with this product at this point. Why did I like him? According to two indicators. The first is humane pricing and the opportunity to work directly with a Russian manufacturer. The second is its chemical characteristics. If no special explanation is needed for the first point, then I will dwell separately on the second.
Replacement procedure
After choosing the type of coolant, we will consider how to change antifreeze in a Chevrolet Niva.
Required Tools
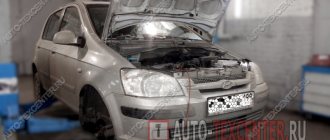
First you need to find an inspection ditch or lift to access the car from below.
Now you need to prepare the following tools:
- wrench 10;
- pliers;
- flat screwdriver;
- funnel for filling a new cooler;
- container for draining old fluid (volume of at least 8 liters);
- distilled water (if required).
Next, let's look at how to drain antifreeze with your own hands:
- Turn off the engine and wait until the system cools down completely.
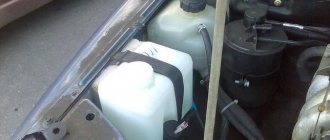
- Open the hood, find the expansion tank and remove the cap from it. The lid should be unscrewed gradually, as hot air may accumulate under it.
- Find the drain hole and place a container over it.
- Remove the drain plug and wait a while for the old fluid to drain out of the tank.
For a more visual representation of the process, we recommend watching the video:
Filling with new coolant
Now let's study the instructions on how to fill:
1. Carefully read the instructions for the cooler - the fact is that in some cases antifreeze is sold as a concentrate, so sometimes it needs to be diluted with distilled water according to the instructions (usually a ratio of 1 to 1 or 2 to 3 is used).
2
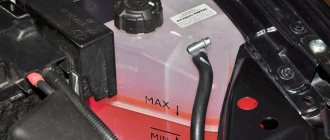
Insert a funnel into the hole and pour antifreeze into the system (note that the liquid should not exceed the MAX mark)
3. While filling, periodically press the radiator tube - this will avoid the appearance of air locks in the system.
4. Close the tank and start the engine.
5. Turn on the interior heater fan and pay attention to the air temperature - if the air is very cold, then a plug has formed in the system. To eliminate this defect, remove the cap on the radiator and run the engine for 5-10 minutes, then turn off the engine and close the cap
6. Get into the car and drive 10-20 kilometers, and then check the coolant level and, if necessary, add antifreeze to the maximum according to the standard algorithm (sometimes after refueling, some of the antifreeze evaporates for natural reasons).
Cooling flushing technology
The process of flushing the cooling system is the same for both the Niva and the Shnivy. What will be described below needs to be done either by yourself or by a master whom you trust and are willing to pay for a whole working day. This is not a cute joke or a figurative comparison, it is the truth. Not a single service will spend time on this, in the amount of time that will be discussed. Distilled water will need about 25-30 liters. So, let's go.
- Place the machine on a slope so that the left side is 10 degrees or more lower than the right. Here we will be saved by a slide, a curb, or, as an extreme option, a jacked starboard side. This is necessary so that everything drains from the block to the last drop.
- We drain all the liquid that has been filled from the radiator and block. Let me digress from the topic for a second. Sometimes cars arrive with no living creatures in the expansion tank. I always remember the story about the baby elephant, Kipling, and the phrase about the muddy green, fetid waters of the Limpopo River))) We returned to washing.
- Fill in about 4 liters of distilled water (hereinafter referred to as DV), then fill in the chemicals and add another 4 liters of DV.
- Let the engine run for 20 minutes or a little more. Nothing bad will happen even if you make a short trip.
- We drain the chemicals and flush the DV system TWICE. Each time, driving the engine until the fans turn on.
- We remove the expansion tank and wash it separately. All the foam and all the dirt settles on its walls during washing.
- Fill in new working antifreeze.
Why does liquid leave if it is not leaking anywhere?
The loss of fluid from the system may be hidden. It is not immediately possible to determine the cause, since smudges are nowhere to be seen. Antifreeze can even escape through a microcrack formed on one of the system components, since the leaking compound simply evaporates when the engine is heated and no traces of leakage can be detected. The worst thing is if the coolant goes into the crankcase and mixes with the oil, and this leads to a reduction in the life of the crankshaft and camshaft bearings, even with the slightest ingress. You can determine if antifreeze has gotten into the oil by simply removing the oil dipstick from a cooled engine and droplets of water will be visible on it, and the oil itself will be very dark. Antifreeze can leak even through a damaged or poorly pressed head gasket.
Coolant can also escape through a leaky bridge of the block gasket, entering the cylinder
In this case, you should pay attention to the color of the exhaust - it will be bluish or white. The gurgling of exhaust gases in the expansion tank cannot be ruled out.
In other cases, determining a coolant leak is quite difficult; it is best to contact a car service center.
At home, you can diagnose the system for leaks using pressure testing. The method is quite effective and simple. The essence of pressure testing is to pump pressure into the system using a conventional pump, which makes it possible to detect leaks at all points in the system where leaks have formed. By pressure testing it is possible to detect a leak in the manifold gasket, since it is impossible to detect a leak with a normal inspection - the coolant quickly evaporates when the engine is running.
Pressure testing of the car cooling system
Pressure testing of the system is carried out both in an auto repair shop and in a garage. At an auto repair center, the cost of work varies from 500 to 1 thousand rubles. Do-it-yourself crimping in your garage is quite simple, but you need to make a neck plug through which air will flow into the system. To make the neck you will need:
- tire valve;
- unnecessary radiator cap;
- drill.
The valve, or pipka in common parlance, is cut out of the old chamber along the contour of the circle, observing the diameter of the standard radiator cap gasket. A hole equal to the diameter of the pipe is drilled in the radiator plug.
After drilling a hole, it is necessary to process it with a round file to remove metal burrs
Having screwed the manufactured plug onto the neck, connect the pump to the valve and supply two pumps to the system, pressing the expansion tank plug with the palm of your hand. And it is also possible to supply air through the expansion tank.
The discharge pressure on the pressure gauge should not exceed 1 kg per square centimeter to avoid damage to the radiators
Pressure testing (pressure in the system) lasts about 2 minutes, after which all possible points of the cooling system are inspected for leaks. It is not recommended to use untested sealants and other chemicals added to the coolant to eliminate leaks, as this can cause irreparable damage to the entire cooling system, and these are completely different issues and a lot of money.
Video: finding coolant leaks in the cooling system using pressure testing
There are many reasons why coolant leaves the system, so it is rarely possible to quickly solve the problem.
It is important to pay attention to all details and mechanisms, because a malfunction of any part of the system leads to disruption of the cooling of the power unit as a whole, which can lead to various problems
Replacing antifreeze VAZ 21214
Replacing the coolant is a regulated maintenance procedure, which is prescribed in the operating instructions. There is nothing complicated about it if you clearly and carefully follow the described action plan.
Suitable for Niva cars:
- VAZ 21214
- VAZ 21213
- VAZ 2121
- VAZ 2131
Before you start replacing the coolant, to avoid getting burned, you need to wait until the engine has completely cooled down. You should also avoid getting antifreeze or antifreeze on the skin, eyes or digestive organs, since the chemical composition of the liquids is toxic.
Coolant drain
Before starting the draining procedure, you should prepare tools, containers for used antifreeze, as well as new liquids for subsequent refilling. If protection is installed under the engine, it can also be removed for convenience.
- turn the temperature regulator in the cabin to the maximum position to the right (Fig. 1);
- place a drain container under the radiator;
- we find the plug in the bottom left corner of the radiator and unscrew it (Fig. 2);
- We put a hose on the drain neck with an internal size of 16 mm and lower it into the drain container. This will prevent antifreeze from splashing;
- after that, unscrew the plug on the radiator filler neck to drain the liquid faster (Fig. 3);
- unscrew the fastening of the expansion tank and lift it up (Fig. 4). In this case, the liquid will drain through the radiator drain hole. And the tank itself can be completely removed and washed;
- To drain the coolant from the engine, you need to unscrew the drain bolt using a 13mm wrench. The bolt itself is located on the left side (Fig. 5).
After completing this operation, do not forget to put the expansion tank in place and also tighten all the drain plugs.
Flushing the cooling system
If there are deposits in the drained liquid or there is a transition from antifreeze to antifreeze, the system should be flushed. To do this you need to do the following:
- Flush the system with plain water through the expansion tank of the VAZ 21214. The plugs must be open;
- tighten the drain plug and bolt;
- fill the system with a flushing agent (you can use Liqui Moly Kuhlerreiniger or Lavr cooling system flush) with distilled water (6-7 liters);
- start the engine. Warm up to 90 degrees;
- leave it idling for 5-10 minutes, depending on the contamination of the system;
- muffle it. Allow the engine to cool to approximately 60 degrees;
- drain the flush using the same steps as removing the old fluid;
- tighten both plugs;
- fill with distilled water to rinse the cooling system;
- start the car and warm up to 90 degrees;
- turn off and let cool to 60 degrees, drain;
- repeat steps 8, 9, 10 and 11 if necessary.
Filling antifreeze into Niva 21214, 21213 without air locks
To fill new fluid into the cooling system, you can use the instructions described in the book on car repair and operation. But when doing this, motorists very often end up with air jams.
Air locks can cause the engine to overheat and boil. And also the heating stove in VAZ 21214, VAZ 21213 (Niva) may not work.
So, let's start filling it correctly:
- before filling, unscrew the hoses supplying antifreeze to the throttle valve heating unit and lift them slightly up (Fig. 1);
- remove the plug from the filler neck of the radiator and begin to fill in antifreeze until it is completely filled (Fig. 2);
- after this, we begin to expel air from the upper radiator pipe (Fig. 3). By pressing and pulling it with your hand towards the filler neck. When performing this procedure, air bubbles should appear in the neck;
- we twist something like a funnel out of a plastic bottle and insert it into one of the pipes (Fig. 4);
- We begin filling through the funnel until the liquid reaches the upper edge of the radiator filler neck. Screw the lid on it tightly;
- After this, we continue filling through the funnel until antifreeze flows from the second pipe. We put both pipes in place and tighten the clamps (Fig. 5);
- pour antifreeze into the expansion tank a few centimeters above the MIN mark;
- We start the car, warm it up to operating temperature, let it run for 5 minutes, then turn it off.
The filling of the liquid is completed, all that remains is to wipe off the spilled antifreeze and wait for the engine to cool. With the car now cooled down, check the level in the expansion tank again and top up if necessary.
Leaks and problems
When replacing the coolant, you should inspect all pipes and connections for possible problems. After all, when the fluid is drained, it is easier to replace them than to tear them during operation. You need to pay special attention to the clamps; for some reason, many people use ordinary worm clamps. Over time, they squeeze the hoses, causing them to break.
In general, the Chevrolet Niva has several main problems related to the cooling system. It often happens that antifreeze leaves the expansion tank. The plastic on it constantly bursts, which causes leaks. In this case, replacement will be required.
Another problem is antifreeze under the driver's mat, which can cause a sweetish smell in the cabin and also fog up the windows. Most likely the culprit will be a leaking heater radiator. This problem is usually referred to as “a chef’s nightmare.”
There is also a situation where antifreeze is thrown out of the expansion tank. This may indicate a broken cylinder head gasket. This is checked as follows. With the car completely cooled down, remove the expansion tank cap, after which you need to start the engine and rev it up intensively. It is advisable to have a second person so that he can see whether the antifreeze in the tank will bubble at this time.
Then we remove the plastic roof from the engine to make it more convenient to work. We stop near the left headlight and look down and in the left corner of the radiator under the fan we see (or feel with our hand) a plastic lamb. The photo should make it clear where to look for it.
We unscrew and try not to lose the rubber gasket, because... the pressure at the beginning is decent (be careful, you can get burned with hot antifreeze!) in my case, the gasket remained perfectly in place...
Filled new antifreeze into Niva Chevrolet
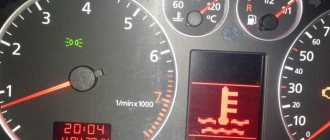
After the next few short rides, my Shevik began to behave strangely - when starting up, it almost immediately began to warm up. If before the car warmed up to 60-70 degrees in exactly 5 minutes, now it takes about one and a half to two minutes.
There’s nothing to do, I heated it up to 90 and climbed under the hood to see if the fans were working. As you know, the Chevrolet Niva has two of them and they turn on in different ways and for models of different years - for some, both at the same time, and for others, first the right one, then the left one. To avoid confusion, count the fans while sitting in the driver's seat - the right one means the one on the passenger side. Left - driver's side.
I read the forums - first the right one should turn on at approximately 93, and the left one should turn on as an additional one at 102 degrees, that is, to quickly extinguish the “fire.” (By the way, the operating mode and temperature depend on the firmware version of the brains). Then they both thresh, cooling to 93. For me, only the right one turned on, and the left one remained there, even when the temperature exceeded the red zone. Well, I think Carlson has blown up or the fuses or relays have blown.
Useful to look at the fuses and relays. For cooling system fans, they are located under the glove compartment, exactly above the passenger's feet. I went to work first with a screwdriver, because the main fuse box on the driver's side is unscrewed with a Phillips screwdriver. And it broke off - for the “passenger” block you will need an 8 mm key.
You unscrew it - there will be relays in the middle, and on the right and left there are big red ones - 50 ampere fuses. And 3 more small blue ones of 15 amps each. I checked everything that was there - everything is in order.
I also tampered with new ones - the fan won't spin. This means the relays and fuses are ok.
Then I remembered that the pump on my six was breaking and I also had the same problem - the car warmed up quickly. The pump was closed - there was no antifreeze in the system, which means there was nothing to “drive” there. I think there might be a problem here too - I looked into the expansion tank - what an idiot I am, there is no antifreeze. At all. So the whole point is simply this: the coolant has run out.
However, where did the coolant go then? If it leaks, it means either the pump has closed again, or the radiator or pipes are leaking. Everything needs to be checked, look for where the leak is and fix it. It often happens that leaks occur in places where hoses are secured with clamps.
I ask myself this question and immediately remember how the seller told me that he filled it with antifreeze. Otherwise, I’m used to pouring the cheapest antifreeze into the six.
The difference between antifreeze and antifreeze is that it’s all about the additives. But in any case, antifreeze will be healthier for the car. I read a bunch of forums where most people advise pouring antifreeze into the Chevrolet Niva. Since you don’t really want to save money on your car, you want to fill it with optimal fluids, and then the car will last longer.
In general, they advised me to fill in G11 or G12 antifreeze - the most normal and relatively inexpensive. I looked in the store - there are 5 liters of green for 487 rubles and 5 liters of red for 417. As the seller explained, red is for aluminum blocks, and green is for cast iron. Although it seems like red is considered “cooler” and should cost more))
In general, I bought this one for 417 rubles; when I poured it, the color was orange.
I found a more understandable explanation on the Internet - green creates a protective film over all the internal surfaces of the cooling system. This plaque reduces the internal diameter of tubes, pipes and other elements of the system. As you understand, this is not a buzz; the cooling efficiency deteriorates. But red antifreeze, more expensive, covers only the places where corrosion has formed with a film. And it lasts longer, this is already a proven fact. So if you are pouring antifreeze into an already tested system (it doesn’t ooze anywhere, it doesn’t “snot”, the pump doesn’t leak, the pipes are stretched, etc.), then feel free to take the red one, it’s a hundred more expensive, but more efficient and better.
In general, I took the green one for now, it was cheaper, in case it turns out that the pump is covered and it all leaks out. Although then, should I just take the cheapest antifreeze at 180 rubles for 5 liters and fill it up for now? If it leaks, don't mind it. But a pump malfunction will not be so expensive to diagnose)) Of course, if the hoses and pipes are checked and the clamps are tightened. Damn, I don't like it when the car breaks down. Well, to hell with it, I filled it with red, let's see how things will turn out.
I drove for a whole year without any breakdowns, of course the car is from 2004, although it has been rebuilt, it will still be naughty in small ways. The main thing is to have time to eliminate minor troubles in time so that they do not transform into major ones)) Good luck to everyone and do not have problems with the car.
Replacement instructions
The procedure for replacing the coolant is not complicated, so even a novice car enthusiast can perform it.
How much to pour?
Antifreeze in a car, according to the manufacturer’s recommendations, should be changed after 40 thousand kilometers or after two years of operation. In this case, it is necessary to constantly monitor the condition of the coolant and check its level. If it has darkened or become cinnamon in color, then it needs to be changed. If the level is below the required level, add water or antifreeze. Replacement may be required if the coolant poured into the car does not meet the density.
The required volume of liquid to be filled is 10 liters. It is advisable to fill with coolant specified in the owner's manual.
Coolant
What will you need?
To carry out the replacement, you will need an inspection hole, a lift or an overpass. The machine must be installed horizontally and secured so that it cannot roll during work. The front of the machine should be installed higher than the rear. The procedure is carried out only on a cold engine. To carry it out you need to prepare the following tools and materials:
- spanner set to “10”;
- pliers;
- screwdriver;
- funnel;
- container for draining waste liquid;
- new antifreeze;
- clean rag.
A watering can can be made from a plastic bottle by cutting it in half. A canister or plastic water bottle is suitable as a container.
Stages
Having installed the car on the inspection hole, they begin to replace the coolant.
- First, open and secure the hood.
- The next step is to unscrew the cap on the expansion tank.
It is advisable to perform the procedure on a cold machine. Expansion tank Niva Chevrolet
If this is not possible, then the coolant temperature should be no higher than 90 degrees. To avoid getting burned by steam or hot liquid, place a rag on the engine and around the neck of the expansion tank. The lid should be unscrewed carefully. First you need to unscrew it a little so that hot air comes out and release the tank from pressure, and then unscrew it completely.
- Now unscrew the plug on the drain hole and drain all the liquid. When the used antifreeze has drained, screw the plug back into place.
- To prevent the formation of air plugs in the cooling system, you need to disconnect the hose from the throttle body fitting. To do this, use a screwdriver or pliers to loosen the fastening on the clamp and move it back. Then disconnect the hose from the throttle assembly fitting.
- Before adding coolant, it should be prepared. There are ready-to-use liquids, mainly antifreeze. There are antifreezes that require dilution with distilled water; usually the proportion is 50/50, unless otherwise indicated in the instructions.
- Next, you can proceed to filling the cooling system.
Fill with antifreeze
Coolant is poured into the expansion tank. As soon as it begins to flow out of the throttle body nozzle, put the hose on the nozzle and tighten the hose clamp. Next, continue to fill the antifreeze solution to the maximum mark in the expansion tank.
When pouring antifreeze solution, tighten the radiator hoses to prevent air pockets from forming. After the cooling system is filled, tighten the cap on the expansion tank. Next, you need to start the engine and wait for the electric fan to turn on. If this does not happen, you need to check what kind of air is coming from the heater. If it is warm, then the fan is faulty, if it is cold, the reason is the presence of air pockets formed in the system. To get rid of them, you need to open the cap on the radiator, start the engine, and after 5 minutes of operation, turn off the engine. Now close the radiator cap.
Removing the radiator cap
When the second cooling circle opens, the coolant level will drop significantly. You must wait until the engine cools down. Next, check the fluid level again. On a cold engine it should be between maximum and minimum, on a hot engine it should be at maximum. If necessary, add to the required volume.
When several days have passed after the replacement, you need to check the fluid level and get rid of possible air pockets. The process for getting rid of air pockets is the same as when replacing antifreeze: remove the cap on the radiator, let the engine run for a few minutes, close the radiator
You should also pay attention to the color of the antifreeze, if it has changed: it has darkened, become reddish, most likely a fake has been filled in, in this case the coolant needs to be replaced
Notes and recommendations
After draining the liquid again, it is imperative to wait for the block to cool down to 40-50 degrees, and under no circumstances pour cold liquids into a hot block (especially in winter). During each filling process, check whether hot air is coming from the stove and whether an air lock has formed. Try not to breathe too much fumes from hot antifreeze. Rubber gloves are required, glasses are advisable. Every day I inhale the divine smell of gasoline and oils and do not feel any discomfort. But my body reacts much worse to hot antifreeze vapors. Headache and nausea are present, and I know for sure that I’m not pregnant))
Replacing coolant Niva Chevrolet, Niva, VAZ
Modernization or simplification of maintenance of the Chevrolet Niva cooling system
Correct replacement of antifreeze (antifreeze) without air locks NIVA VAZ. Buying antifreeze for replacement
Removing an air lock from a car's cooling system
Flushing the cooling system.
Replacing antifreeze with antifreeze. Niva Chevrolet.
Niva Chevrolet. Cooling system 2123+ 2101, engine cooling
How to remove an air lock on a VAZ NIVA. Correctly removing the air lock on a VAZ NIVA
Chevrolet Niva, we solve the boiling problem!
How and with what to flush the radiator and cooling system of a car engine
According to the maintenance regulations for a Chevrolet Niva, the coolant should be replaced every 60 thousand kilometers.
Chevrolet > Niva
Removing the smell of antifreeze from the interior
The presence of antifreeze under the driver's mat is considered one of the common causes of the “odor.” Liquid leaks from cracks in pipes are subject to evaporation, causing a specific “aroma”. These mechanical problems can be eliminated by replacing all inlet and outlet pipes.
The smell is eliminated by dry cleaning, ozonation, deodorization and long-term ventilation of the interior.
Replacing the cooling radiator
The smell is caused by an old, faulty (not removed) heater radiator, where some antifreeze remains. As the liquid evaporates, it inevitably becomes a scourge of the cabin air. Eliminating this begins with disassembling the unit and eliminating defects.
The reason for replacing the heater radiator is the presence of cracks, breakages of the side tanks, tubes, often aluminum.
The leakage of odor from the engine section, caused by leaking pipes when the engine is warm, allows antifreeze vapors to enter the passenger compartment. It can be eliminated by inspecting the cooling system and eliminating defects.
Problem
Imagine the situation: a person buys a used bib, all the cooling pipes are oak, the clamps are rusty, the whole system is “candied.” And “nuclear” washing is poured there. As it should be, it works very well and removes “whole pieces” of dirt from the walls. But these “blood clots” clog the capillaries of the main radiator and the heater radiator. After which you either need to remove them and try to blow them out with high pressure or take them to the trash heap. “Soft” rinses work on the principle of dissolution. Dirt and chemical film from old antifreeze dissolves (rather than falling off in pieces) and drains from the system.
Replacement frequency, what antifreeze to fill
In the maintenance information for Niva Chevrolet, it is recommended to change antifreeze every 60,000 kilometers. But many car enthusiasts are not happy with the flooded antifreeze, which becomes unusable by 20 thousand. Dzerzhinsky antifreeze is usually filled from the factory, but there is also information about pouring red antifreeze.
When choosing coolant, it is better to use a concentrate rather than a finished product. Since it can be diluted in the required proportion, because after flushing there is still some distilled water left in the system.
A good choice would be Castrol Radicool SF concentrate; it is what dealers often recommend for use.
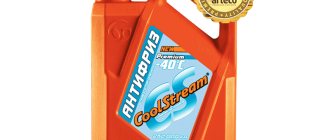
If you choose ready-made antifreezes, then you should pay attention to the red AGA Z40. Well-reviewed FELIX Carbox G12+ or Lukoil G12 Red
How much antifreeze is in the cooling system, volume table
| Model | Engine capacity | How many liters of antifreeze are in the system | Original liquid / analogues |
| Chevrolet Niva | gasoline 1.7 | 8.2 | Castrol Radicool SF |
| AGA Z40 | |||
| FELIX Carbox G12+ | |||
| Lukoil G12 Red |
A drop of history
I’ll try to very briefly outline the situation, what happens in general and what specifically applies to our cars. What is antifreeze and what is ANTIFREEZE. When the Italians came to the USSR to adapt cars and engines for the 2101, they didn’t like a lot of things. In particular, the quality of gasoline and coolants. Then Soviet chemists developed TOSOL. I decipher it - Technology of Organic Synthesis of OL (designation of alcohols, according to some state standards). So, TOSOL is one of the cheap antifreezes.
Antifreeze or antifreeze? Replacing coolant Niva Chevrolet
Replacing the coolant is an integral part of maintaining any car. Every owner of a Chevrolet Niva needs to know how and what kind of fluid needs to be filled.
Antifreeze is a liquid that is a mixture of pure distilled water, propylene glycol and various additives. Water is used as a universal solution, and propylene glycol makes the liquid viscous and sticky. Additional additives provide better engine cooling and also perform a number of additional functions depending on the composition:
- silicate additives prevent metal oxidation and also reduce the overall temperature of the liquid;
- carboxylate additives destroy fat deposits on the walls of the cooling system channels and also increase the shelf life of antifreeze;
You can also find antifreeze with special additives on sale that can perform a number of specific functions - they prevent the liquid from freezing at subzero temperatures (relevant for cold regions), eliminate scale and foam (relevant for old problematic engines), and so on.