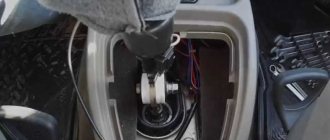
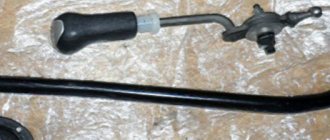
- To gain access to the bolts, the decorative cover must be removed from the knob box lever. The latter is not secured to the lever in any way; to remove it, it will be enough to pull strongly.
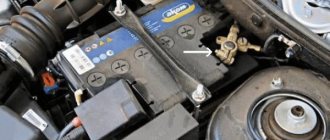
How to install a short-throw rocker on a Lada Priora
- We dismantle the gearbox lever rod from the cardan by loosening the clamp using a key set to “13”.
Installing a Lada Priora short-stroke rocker yourself
- To gain access to the lever, you must release the ball that blocks the engagement of reverse gear, which springs when engaged. Be careful! Do not pull the lever to get it released.
How to install a short-throw rocker on a Lada Priora
- The retaining ring is removed, then you need to remove the lever with the ball and spring inserted into the plastic case.
Do-it-yourself short-throw rocker on a Lada Priora
Do-it-yourself short-throw rocker on a Lada Priora
- Remove the lever with the rod through the interior. To make it more convenient, they can be separated.
How to make a short-throw rocker on a Priora
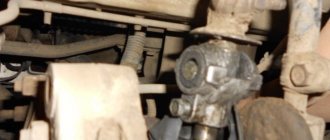
- Remove the cardan. To do this, tighten the rubber boot with a “10” key. Then you need to unscrew the bolt that secures the cardan on the left side.
How to make a short-throw rocker on a Priora
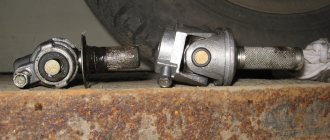
- It is noticeable in the photo that the cardan rods are different in length. This problem can be solved by shortening the Kalinovsky rod, taking into account the type of short-stroke link. Sometimes the rod does not go in completely, so the gearbox lever moves towards the handbrake. If you need to shorten it, cut off 1-2 centimeters.
Kardanchik Klin and Priora
“Fucking basin. "
Hi all!
My name is Mikhail, now I’ll tell you a story about how I managed to exchange my two-wheeler for a 2010 Camry. It all started with the fact that I began to be wildly irritated by the breakdowns of the two-wheeler, it seemed like nothing serious was broken, but damn it, there were so many little things that really started to irritate me. This is where the idea arose that it was time to change the car to a foreign car. The choice fell on the melting Camry of the tenth years. Yes, I had matured morally, but financially I just couldn’t handle it. I’ll say right away that I am against loans and taking a car, especially not a new one, on credit is unreasonable. My salary is 24k a month, so collecting 600-700 thousand is almost impossible for me. I started looking for different ways to make money on the Internet. You can’t imagine how many scams there are, what I haven’t tried: sports betting, network marketing, and even the Vulcan casino, where I successfully lost about 10 thousand ((The only direction in which it seemed to me that I could make money was currency trading on the stock exchange, they call it Forex. But when I started delving into it, I realized that it was very difficult for me. I continued to dig further and came across binary options. The essence is the same as in Forex, but it’s much easier to understand. I started reading forums, studying trading strategies. I tried it on a demo account, then opened a real account. To be honest, I didn’t manage to start earning money right away, until I understood all the mechanics of options, I lost about 3,000 rubles, but as it turned out, it was a precious experience. Now I earn 5-7 thousand rubles a day. I managed to get the car buy after half a year, but in my opinion this is a good result, and it’s not about the car, my life has changed, I naturally quit my job, I have more free time for myself and my family. You’ll laugh, but I work directly on the phone)) If If you want to change your life like me, then here’s what I advise you to do right now: 1. Register on the site 2. Practice on a Demo account (it’s free). 3. As soon as you get something on the Demo account, top up your REAL ACCOUNT and go to REAL MONEY! I also advise you to download the application to your phone, it’s much more convenient to work from your phone. Download here.
To replace the “ten” cardan you will need a pit, keys for 10 and 13:
- The gearbox control rod joint is hidden under the boot.
- We remove the boot and move it to the gearbox.
- Loosen the clamp bolt to 13, loosen it a little and pull the link off the hinge. Then unscrew the 10mm bolt that secures the hinge on the gear selector rod and remove the hinge.
- We install a new hinge without play on the gear selector rod and secure it with a 10-point bolt. To prevent it from turning away from vibrations, we lubricate it with a thread locker.
We put the boot and the drawstring in place and adjust it.
After that we do a test drive. If everything is good, then tighten the clamp. There is an opinion that before installing the glass you need to saw off its tip a little, in fact, everything installs perfectly without sawing. After adjustment, the gearshift lever is located exactly in the middle.
Impressions from the backlash-free driveshaft of the Lada Kalina on a VAZ 2110
It seems that the lateral travel of the lever has decreased. The difference is especially noticeable while driving than when parked. Gear changes have become clearer, there is no “yaw” movements of the lever.
However, do not forget about gearbox vibration . If previously these vibrations were transmitted to the rocker and were partially damped by the play of the standard cardan, now they are transferred in full force to the gearshift knob, which causes rattling, which has to be dealt with over time.
Gearbox switch Kalina device
Lada K alina 2 .
REMOVAL AND INSTALLATION OF THE AUTOMATIC TRANSMISSION SELECTOR CONTROL ROCKET AND THE MANUAL TRANSMISSION CONTROL LEVER ROCKET You will need: a 13-mm socket head, a Phillips-blade screwdriver, side cutters, a plastic mounting spatula.
The work is shown using the example of an automatic transmission selector lever. The control lever for a manual transmission is removed and installed in almost the same way. The difference is in the number of transmission control cables. 1. Disconnect the wire from the negative terminal of the battery.
Disassembling the rocker in case of damage does not make sense, since the rocker parts are not supplied separately as spare parts. 19. Adjust the transmission control drive (see “Adjusting the transmission control drive,” page 154).
The backstage adjustment on the Lada Kalina must be done every time any work has been done on the gearbox. It also happens that the rocker clamp is not tightly clamped to the rod, or the nut becomes loose, which leads to displacement of the rocker and poor gear shifting. You can do all this yourself, armed with a wrench.
In order to get to the clamp on the rod, you need to drive onto an inspection hole or overpass. After this, fully open the clamp (it is located behind the cardan drive on the gearbox side) and place the gear shift lever in reverse or first gear until it stops. It is best if you have an assistant who will hold the lever in the cabin.
When the lever is fixed, tighten the clamp. If there are any issues with the tightening of the nut or the integrity of the clamp, it is better to replace them. When the clamp is tightened, you need to check how the gears shift.
If you still have issues with switching, you need to try to start from the opposite. That is, if you adjusted the rocker when reverse gear was engaged, try adjusting it in first gear and vice versa. If this does not help, you need to check the fastening of the link to the lever and the ball joint of the lever.
Perhaps the lever is simply “loose” - this will be felt by a slight play. When the lever is securely fixed, the appearance of play may mean that the ball joint is worn out or its fastening is displaced. In such cases, it is better to replace it.
I rode for a very long time with the handle falling apart, it was swinging around the cabin quite a lot, the ride was hellish. The reverse gear had to be engaged with both hands, the lever rested against the tunnel. The fifth one was turned on, as in the classics - at the passenger’s feet.
I started thinking about repairs after I tried to turn on the reverse in a parking lot near a shopping center. Everything would be fine, but a whole column of cars was waiting for me until I pulled into a parking space and cleared the way for them. And then the other day I decided to get rid of this problem. I went to the store and bought some goodies. I immediately bought a short-stroke rocker, as it was highly praised in various BZs. I bought a gearbox hinge and a boot for it, so as not to bother with removing the old one (I just cut it off).
Tools: 1. 13x2 wrench 2. 10 wrench 3. Phillips screwdriver. 4. Round file. 5. Hammer. 6. Vadeha. 7. Litol.
Work algorithm:
1. We climb under the car and first unscrew the torque rod from the ball joint race of the gear shift drive
5
(this is how I will mark the parts shown in the picture above)., 2 bolts from below.
2. Then loosen the iron clamp and pull the rod back. You can put it aside, or you can throw it away altogether. I'll tell you about this at the end.
3. Next, while we are under the car, you can loosen the clamp securing the rocker to the hinge 7
.
4. You can get out and go to the salon. Inside, you need to disassemble the tunnel and unscrew the 4 bolts securing this entire structure to the car body.
5. Pressure plate 3
unscrew it, take it out into the cabin along with the cover
4
and clip
5
.
6. After these steps, pull the drawstring into the interior if everything is unscrewed. You may need to crawl under the car again and help the driveshaft say goodbye to the rocker. 7.
Ball joint
22
is quite easy to remove; first you need to deal with the retaining ring
23.
Now a little about the pitfalls.
— We’ll have to modify the entrance to the slide with a hammer and the old cardan, in the place where it is attached to the cardan, so that the new one can easily fit in without effort.
— File the driveshaft in the place where it is attached to the gearbox, again so that it fits in without effort. — We assemble it like this: 1. Boot 9
on the gearbox 2. Cardan on the gearbox
7
, fix it with bolt
8
.
My problem with a loose lever was precisely this - the old cardan was poorly secured with a bolt, it simply hung on the gearbox rod. Pay attention to this, everything should be clear and nothing should fall out. 3. Pull the boot 9
onto the cardan
7
.
4. We insert a new link from the interior. 5. We fix it on the cardan 7
.
It must fit tightly onto the cardan, otherwise 2nd and 4th gears will not engage. Attention, do not tighten the clamp all the way, this is required for subsequent adjustment of the link.
6. Don’t forget to pull the cover
4
onto the new slide; a brake may be required.
7. Then insert lever 20
into the corresponding hole in the case.
8. We secure everything in the cabin. All 4 bolts 2
pressure plate
3
. There is no need to build a tunnel yet. 9. Put the rod in place. 10. Assemble the tunnel and the handbrake housing. 11. We set the lever in the center and go under the car to tighten the link. An assistant may be needed to hold the lever.
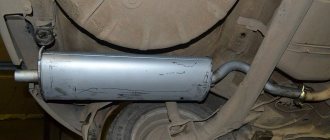
Thoughts on jet propulsion.
So, I installed the KHK, it’s very cool, I’m happy, the stroke has decreased, but I installed it with the old lever, more on that later. The problem is this: the rocker touches the jet thrust. You can remove this rod altogether, but then you need to install a brace with an additional engine support. Since without additional supports and without jet thrust, gears may fly out on bumps. It costs about 2k rubles. Nothing complicated to install, I’ll probably do just that, but for now I’ll touch the rod with the rocker. In principle, it’s okay, but the fifth one is difficult to turn on because of this. On the nines there was no jet thrust at all; everything was decided by a cardan with backlash.
Unsolved problems.
I bought a rocker without a lever damper
21
Due to the fact that it is missing, I can’t install the lever from the new rocker, I installed the old one.
I tried to knock the damper out of the old lever - nothing worked. We went shopping, and since May 8 is a pre-holiday day, some stores are closed. I don’t know what to do. Help me. Does anyone have this thing? Or do you know how to remove it from the gearshift lever? And is there any difference at all with the stock lever and the direct one from KHK?
Also check out
- How to replace the cabin filter of a Lada Priora with your own hands
- Algorithm for replacing the front brake pads of Lada Kalina at home
- Installation of new front struts on Lada Priora cars
- Install the Kalinovsky cardan by applying lithol to its inner surface. Since the bolt is cone-shaped, screwing in is not difficult.
VAZ short-stroke rocker
- The thrust should be installed through the interior. It's good if you have an assistant nearby. He will hold it by the elastic band in the cabin, at this time you need to stretch the traction.
Installing a short-stroke rocker with your own hands
Assembly is performed in reverse order
- First, we put the rod on the cardan shaft.
- Then you can begin assembling the reverse gear locking mechanism. Lubricate the spring ball.
- Adjust the gearshift lever.
- Tighten the clamp on the rod.
Installation of a short-stroke rocker.
I rode for a very long time with the handle falling apart, it was swinging around the cabin quite a lot, the ride was hellish. The reverse gear had to be engaged with both hands, the lever rested against the tunnel. The fifth one was turned on, as in the classics - at the passenger’s feet.
I started thinking about repairs after I tried to turn on the reverse in a parking lot near a shopping center. Everything would be fine, but a whole column of cars was waiting for me until I pulled into a parking space and cleared the way for them. And then the other day I decided to get rid of this problem. I went to the store and bought some goodies. I immediately bought a short-stroke rocker, as it was highly praised in various BZs. I bought a gearbox hinge and a boot for it, so as not to bother with removing the old one (I just cut it off).
KX link - 550 rubles, Gearbox hinge - 350 rubles, Boot - 50 rubles.
Tools: 1. 13x2 wrench 2. 10 wrench 3. Phillips screwdriver. 4. Round file. 5. Hammer. 6. Vadeha. 7. Litol.
I didn’t take many photos, I’ll describe the process and include photos of other guys, and at the end I’ll tell you about the pitfalls that I encountered and still haven’t solved. I did everything on two jacks, the pit simplifies the process.
Work algorithm:
1. We climb under the car and first unscrew the torque rod from the ball joint race of the gear shift drive
5
(this is how I will mark the parts shown in the picture above)., 2 bolts from below.
2. Then loosen the iron clamp and pull the rod back. You can put it aside, or you can throw it away altogether. I'll tell you about this at the end.
3. Next, while we are under the car, you can loosen the clamp securing the rocker to the hinge 7
.
Reviews
Delivery of goods is carried out throughout Russia and the CIS:
1. Russian Post (from 350 rubles and above)
Delivery to all regions of the Russian Federation and CIS countries
2. Transport Companies (from 350 rubles and above)
Delivery throughout Russia and the Republic of Kazakhstan
- TK Energy (nrg-tk.ru)
- TC Business Lines (dellin.ru)
- TC SDEK (www.cdek.ru)
- TK PEK (pecom.ru)
- TK KIT (tk-kit.ru)
3. Pickup
The order can be picked up at the office at Tolyatti, 40 Let Pobedy 38, TD “Malachite”, 1st floor.
The waiting time for sending an order in our online store is approximately 2-7 working days, large orders 7-14 working days. days; color of bumpers, mirrors, body parts, spoilers, etc. 7-14 work. days; sewing covers, upholstery, steering wheels, gear knobs, EVA mats, etc. 7-14 work. days.
During this period, we will send you a tracking number by email. email to track the parcel en route.
Payment can be made in the following ways:
1. Payment to a Sberbank card
You can pay using the SBERBANK-Online application and other Bank applications.
After placing an order, making payment, do not indicate comments , we ourselves will understand by the amount of the order and the name of the sender. After receiving the funds, the status of your order will be changed to paid until 17.00 of the current day, or from 9.00 of the next Moscow time.
2. By bank card
Automatic acceptance of payments using MIR Bank cards, VISA International, Mastercard.
You can also pay with credit cards with a grace period.
To select payment for goods using a bank card, on the corresponding page you must click the “Pay for order by bank card” button.
2. Payment to QIWI wallet 89272115207
3. Payment on Yandex.Money 410013993950891
5. Payment to a bank account for legal entities and individual entrepreneurs (commission 6%)
Send your organization's details to [email protected] for invoicing. After paying the bill, be sure to send a payment order.
4. Cash on delivery of Russian Post (commission from 4%)
IMPORTANT! When sending by cash on delivery, RUSSIAN POST will take a commission for providing the cash on delivery service of 150-300 rubles, and the delivery cost also increases due to the evaluation of the goods.
Cash on delivery delivery is possible only within Russia.
ATTENTION! When choosing cash on delivery, the delivery cost is paid in advance before shipment, for the product itself upon receipt.
The amount of the order by cash on delivery should not exceed 5000 rubles; also, painted parts, goods made to order, covers, upholstery, door inserts, EVA mats, steering wheels, etc. are not sent by cash on delivery. (minimum 50% prepayment).
Be sure to save the payment receipt or a screenshot of the transfer.
The best guarantee of order fulfillment and quality is the feedback from our customers.
Reviews of our work can be found in our VKontakte group https://vk.com/topic-136384247_36675422?offset=180
We guarantee product quality, integrity and timely fulfillment of all requirements for the shipment of goods.
- home
- About Us
- Catalog
- Shipping and payment
- Reviews
- News and Promotions
- Personal Area
- Site Map
- Tuning Lada Largus
- Tuning VAZ 2113, 2114, 2115
- Tuning VAZ 2110, 2111, 2112
- Tuning VAZ 2108, 2109, 21099
- Tuning VAZ 2101, 2105, 2106, 2107
- Tuning for foreign cars
Replacing the gearbox on a Lada Kalina
On rocker boxes (1118 or 2180), replacing any rocker blocks is extremely rare. Much more often it is necessary to change plastic or rubber gaskets, and also tighten the clamp.
The rocker is a complex mechanism that transmits driver commands to the gearbox. It is with its help that the person behind the wheel switches on one speed or another. Some of the parts of this mechanism in the Kalina car are not very strong. Therefore, due to various factors, it fails, after which repair or replacement of the Kalina gearbox gate is required.
Technical features of the gearbox
The drive gear block is engaged by the input shaft
This is important to consider when repairing a gearbox. As for the input shaft itself, a constant clutch is created for it with the front gear elements that perform similar functions
When repairing the secondary shaft, we must remember that it has a hollow structure. It is thanks to this that the oil reaches the driven gears without any problems.
The design of the gearbox is such that repairs cannot be done without the use of special circuits. In this case, the radial clearance on the roller bearings is no more than 0.07 millimeters.
Repairing the gearbox is also a rather complicated process. Especially considering that 0.04 millimeters should not exceed the same figure, but for ball analogues.
Location of the checkpoint backstage on the Lada Kalina.
The oil sump is responsible for supplying oil. It is located in the area of the front bearing, fixed behind the output shaft. Major repairs often affect such details. If you select the desired thickness of the rings, it will be possible to adjust the tension indicator. The dimensions of the seals are easy to find in the instructions; these parts can be replaced without problems, even at home.
When repairing the gearshift knob, you must remember that the driven gear of the gearbox on this machine is attached to the differential flange. Through the saloon, the atmosphere is combined with the box itself, located at the top of the structure we are considering.
Lever repair is not the only operation that needs to be carried out from time to time. Sometimes it is necessary to replace bearings; this is done when extraneous noise appears. A gearbox repair kit must be purchased if excess noise becomes noticeable when pressing or releasing the clutch pedal.
All control drive elements of the Lada Kalina gearbox.
The repair manual says that the box is controlled using a drive, which consists of several elements:
- Switch rod.
- Spherical bearing.
- Lever arm.
According to the manual, cable structures are always equipped with jet traction, then the gears do not turn off on their own. One of the ends of the rod is connected to the lever, and the other to the motor. If the seals of the internal joints are faulty, it is necessary to carry out independent repair of the gearbox. But before replacing them, you need to completely change the oil. The front wheel drive is completely disconnected.
Three axes are present on the shift system. One axis is equipped with a three-arm lever for selecting and disengaging gears. There is no gearbox on the second axle, but there are brackets that block rotation. After every 75 thousand kilometers, this design is completely changed. Gearbox lever play should also alert you, as should failure of other parts.
What is a backstage
There is no clear definition of a rocker even among experienced drivers and mechanics. After all, this term refers to different parts of the device connecting the lever and the gearbox:
- interior gear selection mechanism (SMMS);
- rod connecting the lever and gearbox (on boxes 1118, 2180);
- jet thrust (on boxes 1118, 2180);
- drive cables (gearbox 2181);
- gear selection mechanism (GSM), located at the gearbox;
- gear shift mechanism (GSM) inside the box.
Therefore, we will talk about the maintenance and replacement of each of the devices to which this term is applied, and also show what it is to check and replace the Kalina gearbox linkage.
Tuning the VAZ 2109 transmission
The classic transmission of all VAZs is manual. It is quite reliable, cheap to maintain and well suited for use on domestic roads.
There are several popular types of tuning for manual transmissions. They appeared as a banal need to improve the performance of the car. The main work packages include:
- Replacing the backstage.
- Conversion from 4-speed to 5-speed.
- Installation of a sports row.
- Modernization of the pedal unit.
- Replacement of the main pair and differential.
Let's take a closer look at one of the tuning options. Replacing the rocker with a short-throw one is a useful tuning that will significantly simplify gear shifting. We all know that the lever of the “nine” and most other VAZ cars is absolutely inconvenient. It has a huge backlash, which simply has a terrible effect on the accuracy of gear shifting. If men with long hands can still cope with it without any critical effort, then women will have a very difficult time with it.
The easiest way out of the situation is to install a short-stroke cardan from the Lada Kalina on the 2109. Such tuning will cost you approximately 1,500 rubles. Along with the cardan, you will have to get a boot from the same model, because it won’t be original with it.
The necessary tools for work are a set of keys, a slotted screwdriver and a hammer. It will also be very good to have an assistant.
Signs of a malfunctioning rocker
Defects in the gear selection and shifting mechanism are said to be:
- unclear switching of speeds;
- switching on speeds at different positions of the gearshift lever;
- vertical or horizontal play of the lever;
- loud rattling noise in the cabin.
Here are possible malfunctions that lead to unclear gear shifting:
- wear of parts of the gear selection lever mechanism located in the body (on vehicles with gearbox 1118, 2180);
- loosening the clamp securing the cardan in the rod (on vehicles with gearbox 1118, 2180);
- wear or stretching of cables (on vehicles with gearbox 2181);
- breakdown or wear of parts of the gear selection mechanism located at the gearbox;
- defects in the gear shift mechanism inside the gearbox.
Possible reasons for the inclusion of speeds at different positions of the gearshift lever, as well as its vertical or horizontal play:
- wear or damage to the plastic and rubber parts of the SMVP, including the holder (on vehicles with gearbox 1118, 2180);
- wear or stretching of cables (on vehicles with gearbox 2181);
- weak tightening of the clamp securing the cardan in the rod (on vehicles with gearbox 1118, 2180);
- improper fastening of the Kalina gearbox linkage or its individual parts.
Possible causes of loud rattling noise in the cabin:
- wear or damage to the plastic and rubber parts of the SMVP, including the holder (on vehicles with gearbox 1118, 2180);
- incorrect adjustment of one of the rods, that is, the reaction rod or drive (on vehicles with gearbox 1118, 2180);
- insufficient fixation of the cables to the car body (on cars with gearbox 2181).
Other reasons for the lack of reverse gear on the VAZ-1118
The gearbox may not yet turn on if the link (thrust) is not adjusted, but in this case problems will also arise when trying to turn on some other speed (for example, first or fifth). That is why, whenever removing a manual transmission, it is recommended to put marks on the slide so that during reassembly it can be installed in exactly the same position.
Another reason for the malfunction of the gearbox is an unadjusted or poor clutch, but here, too, other gears either do not engage or shift with a crunch. The travel of the clutch pedal on Kalina is adjusted by decreasing or increasing the length of the cable; when the disc is worn out, the car begins to drive with slipping and does not pick up speed well. One of the main signs of bad ferrodo is the smell of burnt linings, which is especially noticeable when the car picks up speed and operates under increased load. At the same time, the free play of the clutch pedal increases, and it is not always possible to adjust it.
The Kalina gearbox has its own characteristics that every car owner should know. The manufacturer installs 5-speed gearboxes on the cars, which have 1 rear gear and 5 forward gears. Some car owners complain that the gearbox makes a squeaking noise when the lever is shifted. The thing is that the manufacturer installed special synchronizers on all forward gears. They are the ones who create the creak. When adjusting or replacing synchronizers, the squeak disappears. To carry out repairs, you will need a diagram of the device.
Most often, buyers choose cars with manual transmissions at car dealerships. It must be said that their power directly depends on how many valves there are in the car’s engine. More recently, the car plant has carried out work to improve them; changes affected engines with 8 and 16 valves. The installation of reinforced parts made the engines more powerful and reliable.
Diagnostics and repair
In order for the diagnosis to be as objective as possible, all parts of the gear shift mechanism must be perceived as a single unit. Only in this case can you quickly find the real cause of a particular problem.
However, the situation with repairs is different. It is much easier to repair only damaged parts, replacing them entirely or installing new components instead of worn ones. Therefore, replacing the entire gearbox on the Lada Kalina is almost never required.
There are 2 diagnostic methods suitable for rocker (1118, 2180) or cable (2181) boxes. The division into rocker and cable ones is due to the different way of transmitting signals from the SMVP to the MVT. On outdated gearboxes, this function was performed by a rod in the form of a bent steel pipe, and on new transmissions (2181) - 2 Bowden cables.
Diagnostic method for rocker boxes
To check or replace the Kalina gearbox rocker you will need:
- a hole or overpass, and if there are none, then you can get by with a jack with safety stands;
- a set of spanners and open-end wrenches;
- Screwdriver Set;
- flashlight (if the garage has poor lighting or you have to work outside in cloudy weather).
Here is the sequence in which diagnostics must be carried out:
- drive shaft;
- drive rod;
- drive and jet thrust;
- SMVP.
Checking the drive shaft
- Loosen the clamp and remove the rubber boot from the cardan shaft.
- Turning it to the sides, as well as moving it back and forth, engage all gears one by one.
- After engaging the gear, rock the cardan by holding the part closest to the gearbox, easily turning it with your fingers in different directions and moving it slightly back and forth.
If the parts of the mechanism located in front of it are in good working order and correctly adjusted, then there will be no backlash. If you find play, check the clamp securing the cardan in the rod, as well as the gearbox rod. After making sure that there is no play, carry out the same check, but working on the part of this part that is as far away from the gearbox as possible. The absence of play indicates the serviceability of the part. If the cardan moves even a little, it needs to be replaced.
Checking the stem
This diagnostic stage is carried out only after play is detected when the part of the cardan shaft closest to the gearbox is exposed. Procedure:
- Turn on any gear.
- Unscrew the screw securing the cardan shaft to the rod shaft.
- Separate the parts.
- Wrap your fingers around the rod and check for play.
A positive result indicates that the gearbox needs to be removed and repaired.
Checking the drive and thrust
Perform this only if no play was found during previous checks.
To assess the condition of the drive and thrust, turn on any speed, then grab the thrust with your hand and check for play (move along and along the axis of rotation). If everything is fine, grab the jet rod with your hand and pull it strongly in different directions - it should not give in. The play indicates that it needs to be properly secured or replaced.
Reasons for replacement
There are several situations when the owner of a VAZ 2109 has or wants to get into the design of the gearbox and specifically work with the rocker:
- Oil is leaking due to a damaged rocker seal. It must be replaced;
- The old drawstring was out of order;
- I would like to exchange the long-stroke for a short-stroke in view of its advantages.
Now to the question of when replacing or repairing the backstage is a necessary measure.
- The backlash of the gearbox selector has increased significantly.
- Gears change with difficulty, and when changing speed, extraneous sounds appear.
- It is possible to change gears, but with a lot of effort.
- Speeds change incorrectly. Instead of one, a completely different one turns on.
- It is impossible to turn on all or part of the gears at all.
Even if the resulting play is still insignificant, it is advisable to immediately begin repairs or completely change the drawstring.
Replacing the oil seal
If you find that the oil in the gearbox is gradually disappearing, you can suspect the rocker seal. There is nothing else left to do but change the element.
- First, buy a new shift rod seal. It costs about 70-100 rubles.
- Drain the oil from the box, having prepared a clean container in advance. This is in case you refill the same oil. Although this is an excellent reason for you to change the transmission lubricant at the same time.
- To make sure the oil flows out better, first unscrew the filler plug or remove the speedometer gear. After draining the oil, screw the cap back on.
- We climb under the car and disconnect the fasteners of the gearbox lever driveshaft.
- Pull the boot off the cardan, unscrew the bolts securing it to the gearshift rod. Problematic fasteners that you will have to tinker with.
- After removing the cardan shaft, remove the rod boot.
- We remove the damaged oil seal using an awl or suitable available tools. The main thing here is the stock itself.
- We install a new one in place of the old oil seal and press it with a tube of the appropriate diameter.
- Put the boot back in place and rotate the driveshaft.
- Please note that the bolt securing the cardan to the rod is an adjustment bolt. Therefore, screw it in exactly the same way as before dismantling. Otherwise, some speeds may not turn on.
Removing and disassembling the gearbox control drive
We carry out the work on an inspection ditch or overpass. Below the car..
. Using a 13mm spanner, loosen the tightening of the nut of the coupling bolt of the clamp securing the control rod to the shank of the gear selector rod hinge.
Using a slotted screwdriver, we open the clamp and move it along the rod.
Remove the transmission control rod from the shaft of the gear selector rod hinge. Remove the clamp from the rod.
Using a 13mm spanner, unscrew the two bolts securing the torque rod to the base of the gear shift lever.
. and disconnect it from the base. In the cabin, remove the floor tunnel lining (see “Removing the floor tunnel lining”). Having unscrewed the fastening nuts, disconnect the air ducts for blowing the feet of rear seat passengers from the heater (see “Removing the instrument panel assembly with the heater”) and lift the air ducts. Squeezing the clamps of the wire block..
. disconnect it from the reverse gear lock solenoid switch block.
Use a 13mm socket to unscrew the three bolts securing the base of the gear shift lever, and unscrew the fourth bolt under the air duct with a 13mm wrench.
We remove the gear shift lever with its base, bringing the control rod into the cabin through a hole in the floor. Use an awl or a thin slotted screwdriver to pry it off.
. and remove the gear shift knob plug. Using a 13mm socket, unscrew the locknut securing the handle.
Unscrew and remove the handle from the lever. Turning the decorative cover inside out, loosen the plastic clamp securing the cover or cut the clamp.
Remove the cover from the lever. By loosening the plastic clamp securing the solenoid switch wires.
. remove the switch. If it is necessary to replace only the reverse gear lock solenoid switch, then these operations can be performed on the vehicle without removing the entire transmission control drive.
Using a 13mm spanner, unscrew the nut of the control rod axle bolt, holding the bolt axle from turning with a wrench of the same size. We take out the bolt-axle.
. and remove the metal washers, plastic bushings and spacer bushing.
Using circlip pliers, remove the circlip on the ball joint of the lever.
We remove the gear shift lever with the ball joint from the base. Removing the gear shift lever can be done on the vehicle without removing the entire drive assembly. To replace the upper rubber sealing ring (round section) of the ball joint, use a screwdriver to pry off the ring.
Remove the ball joint from the lever. Remove the lower sealing ring (rectangular section) from the ball joint.
Remove the transmission control rod from the case. The cover on the pull rod fits tightly. Therefore, to make removal easier, we moisten the rod with soapy water. If you only need to remove the drive rod.
. then using a 13mm spanner we loosen the tightening of the nut of the coupling bolt of the clamp securing the jet thrust to the tip. We unscrew the two bolts securing the torque rod to the base of the gear shift lever (see above).
Using a 13mm spanner, unscrew the nut securing the torque rod end to the gearbox bracket.
. and remove the jet rod assembly with the tip.
We remove two plastic bushings from the torque rod tip.
. and a rubber damper. Unclenching the clamp.
. remove the tip from the rod. We assemble and install the gearbox control drive in the reverse order. Before assembly, put LSC-15 lubricant into the ball joint of the lever. An assistant will be required to adjust the drive. Make sure that the switch rod in the gearbox is in the neutral position. Do not tighten the clamp bolt nut. We check the ease of axial movement and rotation of the box control rod relative to the shank of the switch rod hinge. In case of jamming, it is necessary to release the groove of the rod with a slotted screwdriver. We install the gear shift lever so that its lower part is perpendicular to the floor of the body, and the handle is located from the front passenger seat at a distance equal to 1/3 of the distance between the seats. Having installed the control rod clamp at a distance of 2-3 mm from the end of the rod, tighten the nut of the clamp coupling bolt. We check that the drive is adjusted correctly - nothing should interfere with the movement of the lever, the gears should engage easily and without jamming. Otherwise, repeat the adjustment.
Stories from our readers
“Fucking basin. "
Hi all! My name is Mikhail, now I’ll tell you a story about how I managed to exchange my two-wheeler for a 2010 Camry. It all started with the fact that I began to be wildly irritated by the breakdowns of the two-wheeler, it seemed like nothing serious was broken, but damn it, there were so many little things that really started to irritate me. This is where the idea arose that it was time to change the car to a foreign car. The choice fell on the melting Camry of the tenth years.
Yes, I had matured morally, but financially I just couldn’t handle it. I’ll say right away that I am against loans and taking a car, especially not a new one, on credit is unreasonable. My salary is 24k a month, so collecting 600-700 thousand is almost impossible for me. I started looking for different ways to make money on the Internet. You can’t imagine how many scams there are, what I haven’t tried: sports betting, network marketing, and even the volcano casino, where I successfully lost about 10 thousand ((The only direction in which it seemed to me that I could make money was currency trading on the stock exchange, they call it Forex. But when I started delving into it, I realized that it was very difficult for me. I continued to dig further and came across binary options. The essence is the same as in Forex, but it’s much easier to understand. I started reading forums, studying trading strategies. I tried it on a demo account, then opened a real account. To be honest, I didn’t manage to start earning money right away, until I understood all the mechanics of options, I lost about 3,000 rubles, but as it turned out, it was a precious experience. Now I earn 5-7 thousand rubles a day. I managed to get the car buy after half a year, but in my opinion this is a good result, and it’s not about the car, my life has changed, I naturally quit my job, I have more free time for myself and my family. You’ll laugh, but I work directly on the phone)) If If you want to change your life like me, then here’s what I advise you to do right now: 1. Register on the site 2. Practice on a Demo account (it’s free). 3. As soon as you get something on the Demo account, top up your REAL ACCOUNT and go to REAL MONEY! I also advise you to download the application to your phone, it’s much more convenient to work from your phone. Download here.
To replace the “ten” cardan you will need a pit, keys for 10 and 13:
- The gearbox control rod joint is hidden under the boot.
- We remove the boot and move it to the gearbox.
- Loosen the clamp bolt to 13, loosen it a little and pull the link off the hinge. Then unscrew the 10mm bolt that secures the hinge on the gear selector rod and remove the hinge.
- We install a new hinge without play on the gear selector rod and secure it with a 10-point bolt. To prevent it from turning away from vibrations, we lubricate it with a thread locker.
Replacing the backstage of Lada Kalina sedan (VAZ Kalina)
I decided to update an existing article that was written more than a year ago. In that case, the rattling of the gearshift lever was not particularly strong and was eliminated quite simply, which will be written about at the very bottom.
In the meantime, I want to give a short instruction on how to eliminate lever rattling on Kalina. For this I needed the following accessories:
- Open-end wrench or socket wrench 13
- Pliers
- Electric sharpener
Gear selection rod viburnum
Articles Loading...
We carry out the work on an inspection ditch or overpass.
We move the joint assembly with the control rod from the gear selector rod.
Using a 10mm spanner, unscrew the hinge locking screw.
. and remove the screw.
We move the joint assembly with the control rod from the gear selector rod.
Remove the protective cover of the hinge from the switch rod
Using a powerful slotted screwdriver, evenly (from different sides) pry the seal ring by the collar.
. and press the race with the oil seal out of the clutch housing socket.
A mandrel of the appropriate size.
. press the oil seal out of the cage. We clean the race and the seat under it in the clutch housing from the old sealant. Select a mandrel (for example, a tool head) with a diameter close to the outer diameter of the oil seal.
. press the oil seal into the cage until it stops (the working edge of the oil seal should face the clutch housing). We apply transmission oil to the working edge of the oil seal, and sealant to the outer surface of the race.
We put the cage on the switch rod and press it into the clutch housing socket, resting it with a mandrel of a suitable size on the collar of the oil seal cage. We carry out further assembly in reverse order. We replace the damaged hinge cover.
Before assembly, clean and degrease the threads of the hinge locking screw and apply locking (thread) sealant to the threads. Before tightening the screw, we ensure that the holes in the hinge and the gear selector rod match
Hello). Another small repair. Loss of fuel and lubricants in the engine compartment area is a bad thing.
Through long and complex research in a top-secret laboratory, it turned out that the gear selection oil seal (the “rocker” oil seal) had given up... and the transmission quietly, little by little, but constantly, went into protection and then into the ground. “Looking into tomorrow” it became clear that this cannot continue for long, it is necessary to change:
Unscrew the rod and the rocker...:
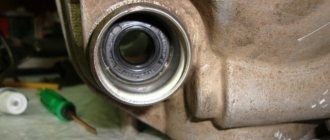
...and the first surprise - having pulled the boot a little away from the gearbox housing, oil rushed out of it, probably 200-300 grams just leaked out:
It’s good that the substrate was laid in advance, otherwise they would have added a link and a cardan for 3.14):
Because The oil was almost all gone, and the boot was getting in the way a lot, so I threw it away:
Next it was necessary to unscrew and remove the cardan:
...and here is the second surprise - I can’t unscrew it...pzdts)). Firstly, it’s not convenient to climb, hands and keys in the oil-liquid are slippery, and secondly, the bolt has already begun to “lick”, and it’s not simple, but specific - The prospect of following him to the store did not make me happy, and what’s the point if I didn’t unscrew this cardan... The disassembly of the gearbox from below has already begun) ... well, what if I could throw my head on the “8”:
And the **** there)), still can’t get to it. In the end, somehow (I didn’t understand how) I turned it a little with the cap, then completely unscrewed it and removed the cardan:
Then the only thing left to do is to knock out (carefully) the “bucket” from the gearbox, in which this unfortunate oil seal is located. As it turned out, there was no oil seal in it... it was on the gearbox rod, that is, it was stupidly knocked out of its seat... so and such rivers of oil flowed.
Before all this crap, on the advice of KalinAklubnikov, I bought not one oil seal, but two: Kalinovsky and eight-wheel:
And the duster is also unforgotten:
I did not shorten the springs on the seals, because... if I had gone to remove them, I would definitely have messed up and torn them, from experience, it was...nah, I don’t want to)). I just carefully pressed the Kalinovsky one in first, and then pressed it down with an eight-piece... in size they are just like:
Sealant on the “buckle” from the outside and put everything in the reverse order, replenishing the loss of oil from the gearbox. Nothing complicated, though there is one point: adjusting the rocker so that the speeds turn on normally. Before removing it, someone puts a mark on the driveshaft, and then follows it puts on the drawstring, I completely missed this point, I didn’t put marks, I did it according to the ABC book: when putting the drawstring on the cardan, you need to leave a 13-15 mm gap between them. I didn’t climb there with a ruler, I just measured 1.5 cm using a match and set it up like this...well, you understand, in general, who regulated it)):
But no, not everything, I don’t remember, someone was wondering why the block below was covered in oil. Answer: dry crankcase gas hoses and a rubber seal on the dipstick. 1.5 or 2 years ago I changed everything, this is how it is at the moment, relatively clean:
Issue price: 180 ₽
REQUIREMENTS AND SUGGESTIONS
Figuring out what and how we could improve, we agreed on one thing: not to touch the gear part, namely the shafts, gears, and synchronizers. Otherwise, huge financial costs will be required to launch a new gearbox into production - without high-precision equipment, it will not be possible to ensure the proper quality of engagement, operation and synchronization.
Main elements of the VAZ-2181 gearbox:
2 - secondary shaft;
4 — fifth gear fork;
6 — reversing light switch;
8 — gear shift mechanism;
SYNCHRONIZER
The first samples were equipped with a three-cone synchronizer. But calculations have shown that double-cone, cheaper ones, can withstand the required torque with a margin (see pictures). Among other advantages, they made it possible to get rid of the problematic cone on the gears of the first and second gears, which is in contact with the synchronizer ring and requires high precision in manufacturing. The ring set now creates two friction surfaces for smooth and efficient synchronization. In addition, the German manufacturer (Ho¨rbiger) applies an additional coating to the intermediate ring, which reduces wear and ensures stable operating parameters, including the required coefficient of friction.
Structure of VAZ-2110 (A) and -2181 (B) gearbox synchronizers:
2 — intermediate rings;
4 — synchronizer clutch;
6 — clamp;
How to remove the old one and install a new gearshift pad with your own hands
After driving a VAZ-1118 for some time, many owners of this car noticed that the Kalina gearbox lever was rattling. Moreover, this rattling sound resembles the sound that was present in earlier cars of this plant (from VAZ-2108 to VAZ-2110). The fact is that the mechanical transmission is structurally controlled according to one type.
Driving a car when the interior is noisy is not very pleasant. Therefore, it is better to get rid of this problem, since the experience of many drivers shows that rattling does not go away on its own. On the contrary, as the mileage increases, it becomes increasingly louder. Ordinary driving turns into real torture for people sitting in Kalina, causing particular discomfort.
The main cause of this problem is an imperfectly executed system for attaching the gearbox lever to the linkage. The car owner can take two ways to correct the situation: fix the problem yourself or have the car repaired at a service station.
SWITCH MECHANISM
The new mechanism is a separate module. It can be installed last and removed if necessary without disassembling the box. This is technologically advanced not only in production, but also in repair. Already at the concept stage developed by the VAZ team, a selector grill appeared in it, clearly repeating the gear shift pattern and setting the lever stroke when selecting gears. The mechanism includes a lock against accidental reverse gear, which is only accessible from neutral.
The characteristics of the mechanism were selected on the original simulation stand. The tester sits down on the seat and begins to go through the gears, while the automatic system imitates the shift pattern, forces and lever strokes implemented on a specific production car. You can also upload your own settings. Don't like an overly tight lever? A couple of taps on the keyboard and the effort is reduced. So, step by step, we selected the optimal settings for the “eighty-one”. The computer processed the data and produced parameters for constructing an accurate mathematical model, according to which those very tricky central plates were made.
ROPE DRIVE
The single-rod gear shift drive was replaced by a cable. The unpleasant vibrations on the lever are gone, there is less play, and shifting is clearer.
Lightweight aluminum German gear forks are equipped with anti-wear shoes made of plastic. Previous parts were cast from steel, and to reduce wear, a bronze layer was applied to individual parts, which wore off over time and tinted the oil with golden powder.
VAZ-2181 is the first AVTOVAZ gearbox for which a computer calculation of all parts subject to loads was performed: crankcases, forks, levers, etc. Thus, the design was not only optimized, but also made more reliable.
1 — gear selector levers;
3 — selector grid;
5 - central three-dimensional plate.
Thank you for your help in preparing the material.
Mikhail Votinov, Vladimir Petunin,
Which box is suitable for Kalina?
Box from 2109 will fit Kalina. It is recommended to take it from Sputnik if the car is used in hard mode. It is much more reliable, although louder. The gearbox from 2110 will also fit the Kalina. Specifically, in terms of transmission, Kalina is closer to a “ten” than to a “nine”.
Hydraulic automatic "Zhatko"
The four-speed Japanese automatic transmission Jatco JF414E turned out to be quite successful and reliable. It was developed shortly before the release of Kalina and Grants and was made taking into account their design. Contrary to popular belief, this “automatic” is new, and not borrowed from the Toyota of the last century. Now it is found on many modern Nissans.
Hydraulic automatic "Zhatko"
A car with an automatic transmission costs a little more and is also more expensive to operate due to the maintenance of the gearbox. Oil and filters need to be changed more often, and at 200 thousand mileage a major overhaul will be required. The cost of operation is one of the key differences between the Kalina automatic transmission and the Kalina manual transmission.
The main thing in this “machine gun” is survivability. This box can be easily installed on Kalina.
AMT
AMT gearbox
During the design, some parts were borrowed from ZF, and the box was tested with Porsche engineers, just like on the G8 in the eighties. Owners of Kalin with a robotic gearbox speak warmly about it.