Lada Kalina gearbox repair
The rubberized metal socket is attached to the frame by means of two jumpers, which are prone to destruction as a result of intensive use and temperature changes.
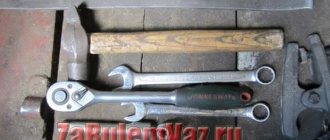
Replacing the gearshift lever cage on a Kalina will require work inside the car and under its bottom, so to carry out the work you will need:
- keys, heads for “10” and “13”;
- slotted screwdriver;
- a shaped screwdriver for unscrewing screws;
- a device for removing a lock ring or pliers;
- jack, wheel chocks and safety stands.
An inspection hole, overpass or lift is also required.
Activities in the salon
To replace the gear selector cage, it is necessary to completely dismantle the Kalina gearbox rod drive mechanism by performing the following steps:
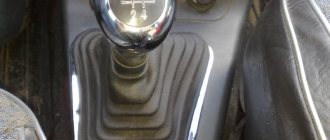
- Pry off and remove the cover with the gear shift pinout from the knob.
- Unscrew the nut with a “13” head and then unscrew the knob by hand.
- Pull the casing out of the socket and remove it from the lever, disconnecting the reverse gear connector.
Rupture of the clip
Further actions will require removing the console, which is prevented by the parking brake button bracket, which blocks access to the end screw. After removing the casing, two “10” bolts securing the handbrake handle to the bottom and releasing the bracket, you can begin dismantling the console, for which:
- The end screw is unscrewed.
- Unscrew two screws securing the side panels with ventilation holes on the driver and passenger sides.
- The console body is removed and moved to the side.
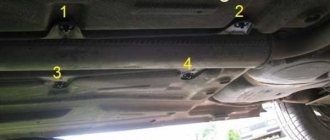
The overhead metal plate for fastening the holder is held in place by four bolts in the corners, which must be unscrewed. Access to the left front bolt is blocked by an air duct tunnel, which will have to be removed or moved with a spatula or screwdriver slightly to the left to be able to work with an open-end wrench. Next, remove the bolt that secures the gear selector lever to the eyelets of the rocker. After this, you need to continue working under the bottom of the car (see the corresponding section).
Dismantled holder or support for the Kalina gearbox
The dismantled mechanism consisting of the rocker, lever and its holder is placed in a convenient place for further work:
- The metal mounting platform is separated from the holder.
- The retaining ring is removed from the metal mounting socket, then the lever with the bearing.
- After removing the old bearing, a new one is put in its place through a bushing on the end of the lever and the entire assembly is placed in the socket, where it is fixed with a clamping ring.
- The faulty support is removed from the slide and a new one is installed.
Replacing the Kalina gearbox cage is completed by assembling the restored gear selection device in the reverse order with mandatory adjustment of the rocker position (see the corresponding section).
To do this, secure the reaction rod with two previously removed bolts, and leave the clamp on the rocker untightened, allowing it to move relative to the gearbox rod.
Actions under the car
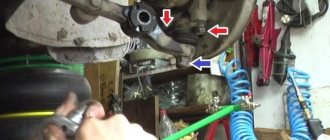
To dismantle the drive mechanism, you will need to disconnect the torque rod from the holder. The tools you will need are a 13" socket and a slotted screwdriver, with which you need to unscrew the 2 bolts securing the torque rod to the holder.
Backstage adjustment
After this, continue working in the interior, pulling out the clip mounting area along with the boot and the rocker inside.
Backstage adjustment
Replacing the gearshift lever cage on a Kalina will require re-adjusting the position of the rocker on the rod. For this:
Malfunction of the yoke cardan
This is one of the most common problems. At the same time, eliminating it is quite tricky. Backlash occurs as a result of wear of the cardan parts. This happens regularly. Therefore, in order to save time, it is better to buy and install a sports version or from Kalina. Such cardans last much longer. When installing a “original” part, be prepared that you will soon have to change it again.
The part should be changed in an inspection pit or overpass. First you need to loosen the clamp on the drive rod. You will have to use an open-end wrench size 13. Next, the hinge is removed from the rod. The boot is turned away and we get access to the cardan.
It is secured with a locking bolt. To remove it you will need a 10 mm wrench. It is advisable to use a clamp used for brake pipes. Otherwise, there is a risk of crushing the edges. The fact is that domestic engineers came up with an ingenious way to avoid unscrewing the bolt during vibration; they put it on glue. After struggling with the bolt and unscrewing it, remove the cardan. After which a new part is installed and reassembled. The correct assembly is indicated by the position of the latch; its head should be completely in a special recess.
SWITCH MECHANISM
The new mechanism is a separate module. It can be installed last and removed if necessary without disassembling the box. This is technologically advanced not only in production, but also in repair. Already at the concept stage developed by the VAZ team, a selector grill appeared in it, clearly repeating the gear shift pattern and setting the lever stroke when selecting gears. The mechanism includes a lock against accidental reverse gear, which is only accessible from neutral.
The characteristics of the mechanism were selected on the original simulation stand. The tester sits down on the seat and begins to go through the gears, while the automatic system imitates the shift pattern, forces and lever strokes implemented on a specific production car. You can also upload your own settings. Don't like an overly tight lever? A couple of taps on the keyboard and the effort is reduced. So, step by step, we selected the optimal settings for the “eighty-one”. The computer processed the data and produced parameters for constructing an accurate mathematical model, according to which those very tricky central plates were made.
ROPE DRIVE
The single-rod gear shift drive was replaced by a cable. The unpleasant vibrations on the lever are gone, there is less play, and shifting is clearer.
Lightweight aluminum German gear forks are equipped with anti-wear shoes made of plastic. Previous parts were cast from steel, and to reduce wear, a bronze layer was applied to individual parts, which wore off over time and tinted the oil with golden powder.
VAZ-2181 is the first AVTOVAZ gearbox for which a computer calculation of all parts subject to loads was performed: crankcases, forks, levers, etc. Thus, the design was not only optimized, but also made more reliable.
1 — gear selector levers;
3 — selector grid;
5 - central three-dimensional plate.
Thank you for your help in preparing the material.
Mikhail Votinov, Vladimir Petunin,
How to replace the Lada Kalina rocker support without dismantling the tunnel.
Eliminating rattling
Some people don’t even realize that eliminating the rattling of the gearbox lever in a VAZ 2110 is a completely feasible task, and does not even require special skills. Of course, you will have to tinker a little, but then being in the car will become much more pleasant. We also remember: what helps one car may not be useful for another car. Therefore, we experiment.
The simplest solution is to install a spring, which is designed to hold the gearbox lever, preventing it from dangling. This type of tuning has a particularly nice feature - you don’t need to disassemble almost anything! Many people wrap the handle with a medical tourniquet before installing the spring to make the fixation tighter.
Installation of washers (plastic or rubber) on the gearbox axle. You will need a plastic lid for a regular glass jar (you can also use other elastic plastic or thick rubber). From it, after a little disassembly of the handle (produced from the salon), several washers are cut out. The first is the size of the sleeve. Here, after lubricating it with lithol, it is fixed. In addition, two more washers are inserted into the slots around the edges of the gear shift mechanism on both sides of the bushing. In this case, you may have to sharpen the bushing a little.
We purchase a repair kit for the scenes. Moreover, it is specifically for the VAZ 2110. It usually includes all those parts that most often need replacement: bushings, washers, a ball joint for the gearbox lever, a lining and a spring that holds the handle in a fixed position and does not allow it to dangle. First, you need to lift the protective and decorative cover in the cabin. After which, using a repair kit, the worn parts are replaced with new ones. However, sometimes this has only a small effect.
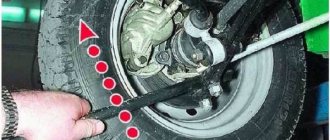
Place the car on an overpass (pit) and unscrew the ball joint of the gearbox lever from the bottom of the car. Sometimes replacing it helps eliminate rattling. This support is included in the repair kit.
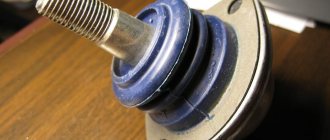
New gear knob ball joint
The gear shift lever is an important element of a manual transmission, as it is designed to manually control gear changes while driving a vehicle. With a faulty lever, it is impossible to start or continue further movement. The main reasons for lever failure are its mechanical damage from improper use. In any case, if repairs are required, you need to know how to do it correctly. We repaired a VAZ 2110 car; the procedure is similar on other AvtoVAZ models.
Before starting disassembly and repair, it is necessary for the convenience of carrying out its lower and upper parts.
What indicates the need to replace a particular pillow?
Many factors influence the service life of parts. The gearbox support is designed for an average of 100 thousand km. However, it is necessary to take into account temperature changes, which worsen the properties of rubber, and uneven roads, leading to premature wear. As a result, their service life may be significantly reduced.
The fasteners may be pulled out - this occurs as a result of loose tightening of the fastening bolts. The seats are being broken down. In this case, replacing the Kalina gearbox mount is inevitable.
A broken gearbox support affects the wear of the cushion
When oil leaks and gets on the supports, the properties of the rubber deteriorate, which also leads to wear.
With this malfunction, you will hear suspicious clicks and extraneous sounds in the front of the car. Usually the sounds appear when starting or braking. This is due to the high load at these moments.
Correct diagnosis of a breakdown is the key to a long vehicle life. To determine when it is necessary to replace the Kalina box cushion, look at it carefully. There should be no cracks or signs of delamination on the rubber. The rubber should be soft and not dry. If at least one sign is present, change the support, do not delay repairs. Continuing to drive a car with a worn mount may cause it to rupture.
SYNCHRONIZER
The first samples were equipped with a three-cone synchronizer. But calculations have shown that double-cone, cheaper ones, can withstand the required torque with a margin (see pictures). Among other advantages, they made it possible to get rid of the problematic cone on the gears of the first and second gears, which is in contact with the synchronizer ring and requires high precision in manufacturing. The ring set now creates two friction surfaces for smooth and efficient synchronization. In addition, the German manufacturer (Ho¨rbiger) applies an additional coating to the intermediate ring, which reduces wear and ensures stable operating parameters, including the required coefficient of friction.
The gearshift lever has fallen through on a viburnum, what should I do?
I have a VAZ 2110 gear lever that moves up and down and makes it difficult to change gears. How to fix it. The Kalina gearbox lever fell down.
Similar articles
7 comments on “The Kalina gearshift lever fell down. I have a VAZ 2110 gear lever that moves up and down and makes it difficult to shift.”
Check the jet thrust and the cushion on the box
Societies › VAZ: Repair and Modification › Blog › Replacing the gearbox lever cage Kalina car 1, 6 8kl
Mineralnye Vody, Our homeland
There is a joke that AvtoVAZ engineers will not die of their own destruction. Every time I take on car repairs, this joke becomes more and more powerful.
It all started with an iron dull knock in the engine area on bumps. At first I thought maybe there was something to do with the protection. But that was not the case here. I drove into the pit. And there p?ts. The gearshift lever rod rests on the muffler. Oh how! It turns out that the gearshift lever is held on a clip, which is rubber and in two places very narrow for such loads. This is how a week of waiting for repairs and driving with the understanding that something was wrong with the car began. I read on the web about repairs. There are few articles on this subject. One person wrote that the shift took 20 minutes. HOW?! I don't know how he did it. The replacement me about 2 hours.
Let's start the substitution.
New ball joint race for the gearshift lever (570 RUR)
Pliers with thin ends or tweezers.
If you have a ratchet, it will make the job much easier.
The absence of minors nearby, because the repair of viburnum greatly develops the imagination in the direction of obscenity.
The car must be driven into a pit or onto a lift. Some of the work happens from underneath the car.
Advantages of a short-stroke rocker
The advantages of a short-throw shifter are that, in addition to the clarity of gear engagement, less time is spent on this, and accordingly, acceleration becomes faster. Moreover, the price of the issue is not so high. The dynamics of the car improves.
And one more thing that should be noted is that the rattling and shifting of the lever disappears. Why? Their number is really reduced because a backlash-free Kalinovsky cardan is installed.
To summarize this article, we can say with confidence that a short-stroke rocker significantly improves comfort for the driver of the car. And many people note that after installation the cabin becomes much quieter. And if you take into account the number of advantages and the not at all high price, then we can confidently recommend this product to you.
An alternative solution to the "problem"
In the market of auto parts and components, new, modified hinges have become widespread, which, according to their manufacturers, significantly correct problems that have long been known to everyone. The main advantage of the new hinge is a significant reduction in operating noise, vibrations and an increased service life. The thing is that the main part of the hinge is made of rubber, while the factory element consists of metal.
Therefore, to improve the characteristics associated with noise and vibration, it is definitely worth purchasing an improved torque joint for the Kalina gearbox. As a result of replacing the stock element with a new product, most car enthusiasts notice the following changes:
- noticeable reduction in vibrations on the gearshift lever;
- increasing the service life of the hinge up to 2 times in comparison with the factory product;
- improvement of gear shifting rigidity;
- disappearance or significant reduction in the level of noise (crunching) when switching the gearbox lever.
REQUIREMENTS AND SUGGESTIONS
Figuring out what and how we could improve, we agreed on one thing: not to touch the gear part, namely the shafts, gears, and synchronizers. Otherwise, huge financial costs will be required to launch a new gearbox into production - without high-precision equipment, it will not be possible to ensure the proper quality of engagement, operation and synchronization.
Main elements of the VAZ-2181 gearbox:
2 - secondary shaft;
4 — fifth gear fork;
6 — reversing light switch;
8 — gear shift mechanism;
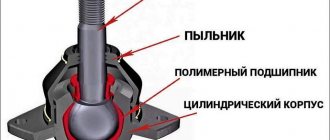
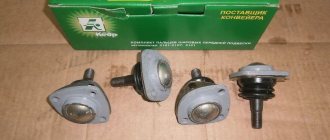
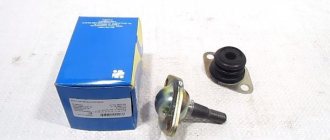
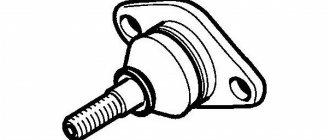
Selection of ball joints for Lada Kalina
Its front suspension is not much different from previous VAZ models, for example, Priora, Samara, etc. The chassis of different generations of Kalina itself does not stand out fundamentally. On the first generation and on Lada Kalina cars of 2 different modifications, ball joints with catalog number 21100-2904192-82 are installed, and for supports with a set of fasteners, catalog number 21100-2904192-86.
The modern auto parts market offers customers different types of supports. The first are original (welded from several parts), and the second are stamped and reinforced. Structurally, all these hinges are arranged identically. The only differences are in the manufacturing technology and quality of the steel used, as well as its thickness. This determines the strength of the products, their durability and, of course, cost. In terms of size and principle of operation, they are no different from each other. From this we can conclude that the question of choice is not fundamental and depends on the personal preferences of the car owner.
Experienced car enthusiasts, as well as auto mechanics, recommend using exclusively original components. Only by choosing the original, you can be guaranteed to obtain the declared quality, reliability and long service life. However, as practice shows, original spare parts are sometimes much more expensive than analogues, so most car enthusiasts prefer to use the second option.
When choosing analogues, you need to approach the issue carefully and responsibly. You should not choose very cheap spare parts from an unknown manufacturer, and you should also not take components from markets, unknown points, or simply from your hands. Before purchasing, you should carefully inspect the components. There should be no visible welds on them; the surface should be gray, which indicates heat treatment of the part.
The components must have an emblem and a quality mark. As a rule, fakes do not have this.
Indirectly, quality is indicated by holograms on the case or packaging of components, as well as an additional set of fasteners. The cost of a ball joint for Kalina usually does not exceed 500 rubles. It's inexpensive, but it's worth considering that purchasing units for tuning can be significantly more expensive. For example, those from Pasker are valued tens of times higher.
If the cause of the rattling is in the upper gearbox cover or nuts
In some cases, the Lada Kalina lever rattles due to the fact that the gearbox cover does not fit tightly enough to the mechanisms located under it. If this is the cause of the problem, then it is enough to remove the cap and stick a piece of electrical tape about 3 mm wide and a length corresponding to the diameter of the cap on its inner surface.
After such a DIY repair, the cap should fit tightly. If the gearshift lever is still dangling, then you should apply another circle of electrical tape and put on the cover. Sometimes the cause of an unpleasant sound is poorly tightened nuts. This problem can be easily detected by removing the cover of the device. In this case, it is enough to tighten the nuts all the way so that the noise disappears. Upon completion of the work, you need to accelerate the vehicle and release the gas pedal. If the mechanism no longer hums, then the gearbox repair is complete.
