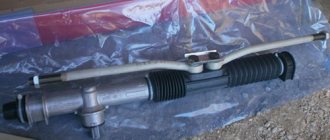
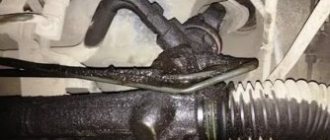
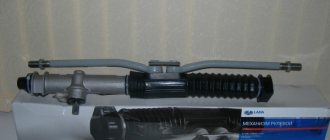
The steering rack is an integral and very important thing in a car, over time it wears out and an unpleasant knock appears, which is especially audible when turning and when driving on uneven roads. This knock is not exactly annoying, but it clearly makes it clear that something is wrong with the car so, and in general there is no need to joke with the steering mechanism and you will still have to throw away some money if you don’t remove this knock (in principle, you can even remove it for free by simply tightening the rack for this, we will write how to do this in another article to which we will give you a link a little later) then the rack may one day simply jam, in connection with this the steering wheel will freeze in one position and you will only have to press the brake, because there will be no other way out, so be careful with the rack.
If you want to repair your rack, then stock up on tools in advance, namely: You will need a special octagon wrench for 17 (In the car shop, tell them that you need a special wrench to loosen the rack stop nut and if the seller turns out to be knowledgeable, he will sell you exactly that what you need), as well as a chisel with a hammer, a vice (without them, work will not be convenient), all kinds of wrenches (socket wrenches, wrenches, if you have socket heads, stock up on them) and screwdrivers with pliers you will need!
Steering rack VAZ 2115 - device
One of the important components of a car is the steering mechanism. The steering rack in a car is the most important part of the unit.
Through it, the force applied by the driver to the steering wheel with the help of tips and rods is transmitted to the turning levers, which are connected to the steered wheels through axles. It follows from this how important the serviceability of the steering rack is for the safe movement of the car.
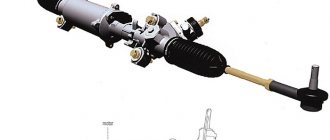
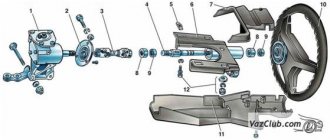
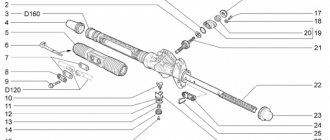
The photo shows the elements that make up the steering control design.
Steering rack assembly components:
- Position 20 – staff.
- Position 21 – rack support sleeve.
- Position 22 – damping ring.
- Position 23 - rubber-metal hinge.
- Positions 10, 11, 14 – parts for attaching the rack to the steering rods.
- Position 12 – brackets for attaching the steering device to the shield in front of the body, 13 – rubber supports for the steering mechanism, 15 – protective cover for the device. The rack of position 20 engages a drive gear mounted on bearings in the housing of position 17 of the steering rack assembly. A cermet stop, sealed with a rubber ring in the crankcase, presses the rack against the gear with a spring, which rests against the nut.
The locking ring prevents the nut from unscrewing. There are marks on the steering gear housing and boot to facilitate correct assembly of the unit.
Steering rack adjustment
The steering rack can be adjusted either directly on the vehicle or by removing a spare part. The first method is usually used after car repair. But the second one is used to slightly adjust the rack. For this work you should have the following tools:
- adjustable wrench;
- universal octagon 17 mm.
Any work related to the steering rack must be carried out while the car is either on the inspection pit or on a lift.
How to tighten the steering rack on a VAZ 2110, 2112, 2111, 2114 and 2115
Overview of steering
racks on
VAZ
2110-2112 and Samara 2114 and
2115
. The only differences will be...
Adjusting the steering rack of a VAZ (how to tighten the rack) Is it possible to adjust the steering rack of a VAZ 2115
Sorry for the quality of the footage, I'll fix it soon. How to tighten the steering rack on a VAZ
—
2115
…
The procedure is as follows:
- The car is put on the handbrake. If the car is in a pit, it is necessary to install a stop under the rear wheels.
- The steering wheel is locked.
- The car's on-board network is de-energized (to do this, you need to remove the negative terminal from the battery).
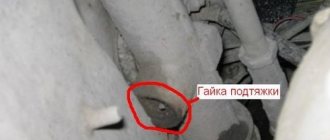
- Find the nut with which the steering rack
. It is located on the rail mount on the trunk side. - The bottom of the car is washed. It is best to use a special device for this. This is done to clean the nut responsible for adjusting the rack from dirt.
- Next, use a wrench to tighten the nut to the desired position. The nut rotates clockwise.
After this, the steering rack adjustment can be considered complete. If this procedure does not bring the expected result, it is necessary to check the condition of the tips. It is likely that they will have to be replaced.
Steering rack VAZ 2115 - how to eliminate play
While the car is moving, there are times when the driver feels a slight kickback when the car hits a pothole or a small obstacle on the road, in the steering wheel, and a knock appears in the mechanism. Then there is a need to fix the problem.
In this case, VAZ does not require repair of the steering rack, but only adjusts the gap formed between the rack and gear. Why are there special instructions?
To perform the work, it is better to install the car on an inspection hole, a special lift or overpass.
Work order _
- If there is protection on the crankcase, it can be removed.
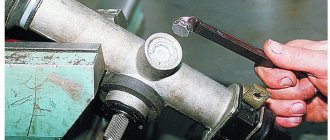
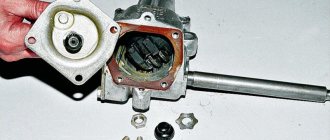
- Using a special 17 mm wrench, turning clockwise, the adjusting nut is tightened until the play in the rack gearbox is eliminated.
Eliminating play in the steering rack
Before tightening the nut, it must be thoroughly cleaned of dirt.
If such an operation does not eliminate the knocking, you need to disassemble the steering mechanism, check the condition of all its parts, and replace worn elements with new ones. The cost of such repairs will be higher.
- Then, after assembling the steering gear assembly, the rack stop, which has an O-ring, is installed until the stop makes contact with the rack.
- After this, the retaining ring and thrust spring are installed and the nut is lightly screwed on.
- The nut is tightened with a torque equal to 1.12 - 1.37 kgf.m, the two divisions marked on the nut or on the 24 wrench are released, which provides the required gap of 0.12 millimeters, from the nut to the stop of the rack.
- The ease with which the rack moves is checked, the absence of knocks or jamming.
- The steering rods are mounted to the steering mechanism in such a way that their axes should be parallel to the steering mechanism housing.
The play is eliminated, but the knocking does not stop, then one of the options is chosen: buy a new steering rack or repair the steering rack on the VAZ 2115, which is much cheaper.
Many people already know that the VAZ 2111 injection engines have the following disease: “Axial runout of the camshaft.” This disease does not progress and does not cause damage to other timing components, but it manifests itself in the form of an unpleasant camshaft knock. It just so happened that the developers of the 2111 engine missed this point. Where carburetor engines used to have a fuel pump and distributor, injection engines have a regular plug into which the camshaft rests. The camshaft axial play set by the manufacturer should not exceed 0.15-0.20mm.
Over time, as the camshaft pastel wears out, the axial play increases, and a distinct knock begins to be heard from under the valve cover. Of course, you can continue to drive with this knock and not worry, but not every car enthusiast will be pleased. I am sure that almost any auto repair shop will tell you: “Either ignore this knock, or change the entire head! ". But there is one simple and absolutely free way to eliminate this annoying knock by placing a washer between the camshaft and its side cover! Below is a detailed description and photo report of the work done.
Checking the camshaft axial play. Remove the timing belt cover and start the engine. Then, with the engine running, press the handle of a screwdriver into the camshaft gear bolt. If the knock disappears when pressed, the reason is: Axial runout of the camshaft.
Preparing for work. Now you need to clear the space around the side camshaft cover. The air filter was in my way, so I unscrewed it and moved it to the side. Remove the camshaft cover. To begin with, using a powerful old-fashioned key of 17, we set the camshaft gear to the mark.
This is necessary so that the “pin” that is on the camshaft does not interfere with removing the cover. Then, using a 10mm wrench, unscrew the cover (2 nuts and one bolt with a rubber ring). In the photo you can see only 2, the third from the back: Carefully remove the cover. We make a washer.
For the material for the washer, I took a piece of galvanized steel approximately 0.5 mm thick and secured it to a piece of MDF panel with four self-tapping screws (so as not to tear). I drew 2 circles with a marker (inner diameter 25mm, outer 35mm) and hollowed out the inner diameter with a chisel. I cut out the outer diameter with metal scissors, and I ended up with this curve, the washer blank was all covered in burrs: I processed the inner diameter of the washer with a round file, and sharpened the sharp corners on the outer one: Install the washer. We put the washer on the camshaft (it should fit freely, if not, then adjust the dimensions). Put the cover back and tighten it.
Attention! Be sure to check if the camshaft is jammed. To do this, berm the key to 17 and try to rotate the camshaft. It should turn with the same force as before installing the washer. If the camshaft becomes very difficult to turn, or is completely jammed, then remove the cover again, take out the washer and grind it to thickness: Finish the work. After the washer is adjusted, the cap is tightened and the camshaft rotates freely - start the engine and enjoy the silence of its operation!
Signs of faulty tie rod ends
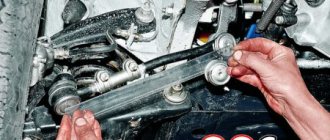
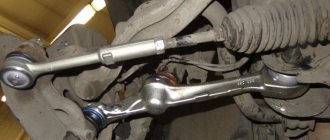
The steering tips need to be replaced if, when driving over uneven surfaces, or when accelerating, you feel the steering wheel beating and vibration reverberating through the gas pedal. It is possible to visually determine the condition of the steering rack tips only when checking the anthers. These parts have a direct impact on wheel alignment, which means they should be replaced on time, since the rubber will begin to wear unevenly.
Replacing steering rack tips is also carried out when the car is on a lift or in a pit. By the way, this procedure is best left to the masters, since the work requires precision and strength in the hands. In total, the entire process of replacing tips takes no more than one hour, so you don’t have to part with your favorite car for a long time.
Remember that if you replace the tips in a timely manner, your car's steering rack will last much longer, and the ride quality will noticeably improve.
There is a special offer on our website. You can get a free consultation with our corporate lawyer by simply submitting your question in the form below.
No one will deny the fact that proper steering in any car guarantees not only the safety of the driver and passengers, but also trouble-free operation in principle. Regardless of the type of steering gear, be it worm gear, power rack or pinion steering, they all require periodic maintenance. VAZ-2114 and all second-generation Samaras received a fairly reliable and easy-to-repair and adjust steering mechanism. It does not have a hydraulic booster, which makes its maintenance and adjustment easier.
Diagnostics of the steering rack and steering mechanism
Before tightening the steering rack on a VAZ-2114, it is worth considering the prerequisites that will tell you that it’s time to repair or tighten it.
Backlash
First of all, this is a backlash.
In principle, AvtoVAZ guarantees a fairly long service life of the steering mechanism, namely ten years
. However, we must understand that we are talking about ideal operating conditions. This assumes smooth asphalt roads, constant availability of high-quality lubrication in the rack housing and a gentle driving style.
Under normal operating conditions, this period is practically unattainable. Poor roads, poor quality of spare parts and often harsh operating conditions of the car
lead to the fact that the mechanism makes itself felt much earlier.
The first symptoms of a faulty steering mechanism on a VAZ-2114
The first symptoms of a rack malfunction or the need for tightening are clear:
The latter can be considered a glaring signal of malfunction and can lead to serious troubles while driving.
In this case, most likely, tightening the situation will not correct the situation, however, it is too early to draw conclusions, you can try to adjust it. This can be done in two ways - both on the car and with the rack removed.
Complete disassembly of the steering rack and replacement of the repair kit
In the second case, the adjustment is already made. We will try to make do with little expense and simply adjust the gap in the gear-rack engagement
, thereby eliminating backlash and knocking.
We tighten the VAZ-2114 rack with our own hands
Most often, all work on tightening the rack comes down to only selecting the play in the engagement and adjusting the play of the steering wheel
. In the event that the wear of the mechanism parts (bushings, the rack itself, the gear, oil seals and anthers) is critical, repair and installation of a repair kit cannot be avoided. However, the easiest way to check this is to tighten the rack directly on the car.
To adjust the rack, you will need a special wrench, which is inserted into the adjusting nut in the steering mechanism housing. You can make this key yourself, but it is sold in any store, it costs a penny, and it never hurts to have it in your arsenal of tools. In addition, it will significantly facilitate the work not only when adjusting, but also when disassembling the rack if necessary.
The VAZ-2114 rack is adjusted as follows:
Video about adjusting the steering rack
Having chosen the play, we do not hide the tool, but do a test drive, during which we evaluate the operation of the steering mechanism. If the steering wheel rotates freely and there is no play, the adjustment can be considered complete.
If the steering wheel turns too tight, it is better to loosen the adjusting nut a little by turning it a few degrees counterclockwise.
