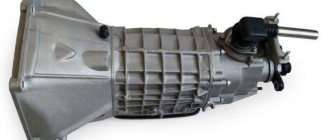
When replacing the clutch, you need to know how to remove the box on a VAZ-2109. Without this, it is impossible to repair the clutch basket and discs, as well as repair the gearbox. On “nines” you can remove the box without using an overpass or inspection hole. You can also install it without such conveniences. But skill will be required, since all the work is done in this case a little more complicated. You definitely need to get some tools, it is advisable to have a good set of keys on hand.
Preparatory work
Before removing the box on the VAZ-2109, it is necessary to prepare the car for dismantling. For this:
- Completely disconnect the battery and remove it.
- A jack is installed under the left side.
- Loosen the bolts that secure the wheels.
- Unlock the nut securing the outer CV joint and loosen it.
- Lift the left side and completely remove the wheel from the car.
- Place a container of at least 5 liters under the gearbox housing.
- Drain the gearbox oil. Assess its condition and, if necessary, refill it with fresh water.
With this, the preparatory work is completed, you can begin to dismantle the elements that will interfere with the removal of the gearbox.
Disassembling the left drive
Before removing the box on the VAZ-2109, it is imperative to disassemble the left part of the suspension. The fact is that the left drive will interfere when the box is moved. Therefore, you need to free up space for maneuvers:
- Using the “17” wrench, unscrew the two bolts that secure the ball joint race to the hub steering knuckle.
- Using pliers, you need to pull the cotter pin out of the hole in the steering tip, and then unscrew the nut with a key “19”.
- Having installed the puller on the tip, you need to remove the finger from the fist hole.
- Move the brake hose to the side.
- After this, you need to completely unscrew the nut on the outer CV joint.
- Pull the entire stand toward you until the drive falls to the ground.
You don’t have to do the sixth point; you just need to remove the internal grenade from the gearbox. But the right grenade is removed only after the box is moved to the side. It is not difficult to remove the VAZ-2109 box with your own hands, just follow the sequence of all actions.
Disassembling the old-style front-wheel drive transmission is not a cable transmission.
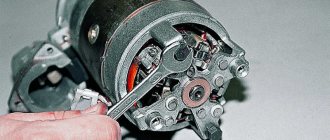
First of all, having removed the boot, take out the clutch fork. To do this, we hit the fork upward and knock out the plastic plug and take it out. Then you can immediately remove the release bearing guide by unscrewing 3 M6 bolts.
With the gearbox on its side, unscrew the nuts of the gearbox cover and housing. Then, hitting the ebb of the lid, remove it. Sometimes this is not so easy to do. If the box is old, has not been disassembled for many years, and has also been actively bathed in winter salt solutions, then corrosion will tightly grip the opening of the lid and the pins. These lid moldings break instantly. In this case, I heat it with an acetylene torch, gradually rock it and remove it. There is no better way.
Well, this box is from an almost new Priora, so there were no problems. Next you need to unscrew the two shaft nuts. First you need to secure the shafts from turning. To do this, engage some gear, then unscrew the 5th gear fork bolt and push the clutch and fork down. That is, we engage 2 gears at the same time.
But then everything depends on your equipment. With a thousand Newton impact wrench, everything is easy and simple; you don’t even have to lock the shafts. If you turn the head manually, then here is the problem: if the shaft bearings are destroyed, then these shafts dangle and when you try to unscrew the 5th gear gears, they will diverge and the teeth can easily crumble. But even if the bearings are intact, you should not jerk the wrench too sharply in an attempt to rip off the nuts. There have been cases when the teeth of the 5th gear gear broke off due to a sharp jerk.
The nuts are unscrewed, now you need to remove the 5th gear gears. We start with the driven one, it is held by a hub that sits on splines on the shaft. Using two screwdrivers, we try to remove the gear along with the hub and fork. It happens in different ways: sometimes this hub can be easily removed with your hands, and sometimes you come across such things that you can’t even use screwdrivers. Then you have to pull the clutch with the fork from the hub (in this case all the balls with springs fly apart) and only press it with a puller.
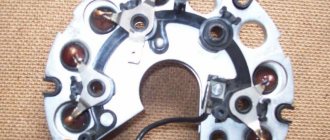
The leader (damn) is always easy to remove. Then unscrew the screws securing the steel plate with an impact screwdriver or impact wrench. True, the screwdriver may not be able to unscrew very tightly tightened screws; the slots in the screws will break off, or the bit will fall apart. In this case, an impact screwdriver will be more reliable, but you will have to hammer it.
To remove the retaining rings, I use ordinary pliers, only I sharpen the edges so that they become flat.
Rod plugs are now made with an internal hexagon of 8. Therefore, first we carefully clean the hole from dirt, then I recommend tapping them with a hammer. Even in those that were made before, the edges often curled up, but these are very weak, it is very easy to tear off the edges. A couple of blows with a hammer helps a lot. By the way, this also applies to old-style traffic jams. After unscrewing the plugs, we pull out the springs and balls with a magnet. Or we don’t pull it out and then when we remove the crankcase we look for balls in the dirt.
To separate the crankcase, we hammer in one screwdriver as shown by the arrow, and lift the other one from the other side. The same problem can arise as with the lid - corrosion.
Having removed the crankcase, unscrew the two bolts of the forks and remove the rods. We simply pull the rod of the first and second gear up, slightly tapping the fork. Then we turn the 3-4 gear rod and also pull it up. We take out the 5th and rear rod.
We take the primary and secondary shafts at the same time and pull them out. We unscrew the three bolts of the gear selection mechanism.
All that remains is to unscrew the rod bolt and pull out the rod. Sometimes you have to tinker with this if the rod lever fits very tightly, and plus the thread locker was poured from the heart.
Well, that's all, business for 15 minutes. Well, all that remains is to knock out the old seals and bearings, if they need to be changed. Do all bearings need to be changed? More on that in another post.
Final disassembly
Then you need to perform the following manipulations:
- Remove the starter, first disconnecting two wires from it.
- Using a 13mm wrench, unscrew the negative wire attached to the gearbox.
- Loosen the clutch cable and remove it.
- Unscrew the speedometer drive cable.
- Place a support under the gearbox; you can use a regular jack.
- Disconnect the lever from the rocker.
- Completely remove the cushions that secure the transmission to the car body.
- If you need to remove the VAZ-2109 engine with gearbox, you will need to hang it.
That's all, now the gearbox is held in place by just three bolts and one nut on the engine housing.
Step-by-step instruction
The gearbox weighs relatively little - 27 kg, but it is still not easy to remove it with your own hands, so invite an assistant. All work is carried out after installing the machine on the ramp or above the pit. Additionally, the car still needs to be jacked up and placed on supports so that the wheels are in the air.
First of all, remove the mudguard, the motor crater protection and disconnect the battery. Further:
- drain the gearbox oil;
- remove nuts from wheels and drives;
- remove the clutch cables and also the speedometer;
- disconnect all the ball joints by tightening the bolts holding them to the knuckles;
- dismantle the longitudinal tie;
- pull out all the drives included in the gearbox (you will need the help of a friend), remove the central nuts and remove them completely;
- unplug and remove the starter.
After this, all that remains is to disconnect the gearshift linkage and the gearbox itself from the engine (it is held in place by four nuts). But before this action, the power unit must be secured.
It is either hung out, leaning on the spar (or rather, on its glasses) or propped up from below with a jack.
The gearbox still needs to be disconnected from the body supports, and only then can it be removed. This is done in this way: the box is rocked a little and moved away from the engine by 10 cm - this is enough for the primary shaft to leave the disc and clutch basket. In order not to damage the latter, you must act very carefully.
The gearbox is installed in place after all problems and malfunctions associated with it have been fully eliminated.
Before the reassembly process you should:
- make sure that all elements affected by the dismantling process are in good condition;
- check the alignment of the clutch;
- Renew the lubricant on the splines of the release and input shaft bearing flanges.
When installing a gearbox on a car, the following scheme is used:
- the power unit is lowered on a jack or stretcher with a slope of 15 degrees;
- the box itself is lifted and inserted until it stops (do not try to tighten the engine and gearbox with bolts until it sits tightly in its designated place);
- tighten all four elements securing the gearbox to the engine;
- install “pillows” (supports) under it;
- attach the clutch cable and adjust its tension (its pedal is normally located a centimeter above the brake);
- return the previously removed starter together with the rear speed sensor to its place;
- install the flywheel protective housing;
- screw the speedometer cable and ground wire;
- connect the shift gear mechanism - its lever is aligned according to the marks made during dismantling;
- assemble the drive, install ball joints, couplers;
- put the car on the wheels and tighten the bolts on them;
- tighten the drive nuts;
- add fresh oil.
How to completely remove the box?
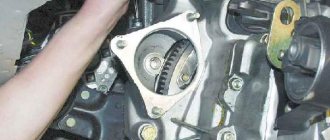
After completing all the previous steps, you will need to unscrew the three bolts and one nut using “19” keys that secure the gearbox to the engine boat. Do not be afraid, the box will not fall after unscrewing these threaded connections. It will have to be undocked using mounting blades.
Carefully, trying not to damage the crankcase elements, move the gearbox away from the engine. It is best to carry out all work on an overpass or inspection hole, but if you do not have such facilities, then it is enough to hang the front part of the car. Be sure to install a piece of pipe in the hole instead of one of the inner CV joints. Otherwise, the differential mechanism may be destroyed, and the box will have to be completely disassembled and repaired. Once the transmission input shaft has come off the splines, you can lower the gearbox to the ground. This gives you full access to the clutch mechanism, which is mounted on the crankshaft flywheel.
Installation of the box
The installation procedure is performed in reverse order. Be sure to clean the gearbox housing of any dirt. You need to do the following:
- Raise the transmission until the input shaft is approximately centered on the flywheel. At the same time, you need to install the right grenade into the hole.
- Install the input shaft in the flywheel hole. If necessary, you can twist it so that it fits onto the splines.
- Pull the gearbox housing as close to the engine as possible. Do this as evenly as possible so that the gearbox does not go awry.
- Install three bolts and a nut for securing the gearbox.
- Install the left inner CV joint into the hole.
- Replace the cushions, the rocker, the starter, and connect all the wires.
- Reinstall the clutch and speedometer cables.
After this, you can assemble the left side of the suspension by installing the ball joint in place and securing it with two bolts. Place the steering knuckle on the steering knuckle and tighten the nut. Secure it with a cotter pin. The hub nut must be tightened only after the vehicle is installed on the wheels. Here's how to remove the gearbox on a VAZ-2109, the procedure is not complicated, but skill is required - the process can take a couple of days if there is no experience.
Signs of a faulty VAZ 2109 gearbox
- noise in the gearbox;
- difficult gear shifting;
- spontaneous transmission shutdown;
- “crackling” when the gear is engaged;
- increased noise when disengaging the clutch.
These signs may indicate a serious breakdown of the gearbox, which will require replacement.
It should be remembered that the gearbox of the VAZ 2109 (aka VAZ 2108 and the rest of the family) weighs a decent amount from 32.7 to 33 kg. The piece of iron is heavy. And if you also take into account that you need to remove the box from a level above your head, then you should calculate your strength, especially if you work alone. It is necessary to prepare a place for the box in advance so that you do not have to lift the gearbox from the bottom of the inspection hole.