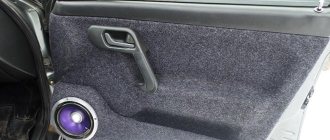
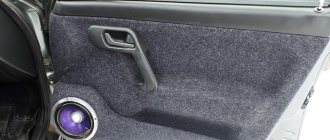
People who use domestic cars and sometimes encounter these problems need to know how to remove the front door trim. The need for this procedure arises if:
- The door needs to be insulated.
- Make various types of tuning.
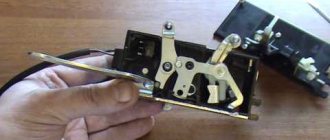
- Fix the malfunction of the window lifter or door handle.
- Fix jammed glass.
The fact is that a car enthusiast cannot always go to a car service center when a breakdown occurs. Circumstances vary and often a person has to carry out some repair work themselves. Removing the front door trim is one of these operations.
Removing Granta door trims
| If you decide to do the soundproofing yourself or simply repair something inside the door (ESD, door handle, etc.), you will have to remove the door trim. |
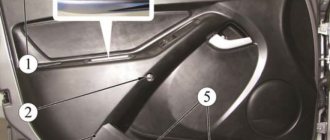
| Lada Granta door trims are fixed with self-tapping screws and special plastic handles (clips). There is a possibility that the cufflinks will break when the upholstery is removed (especially in the cold season), so it is recommended to purchase new cufflinks in advance. |
Tools required: Phillips screwdriver and screwdriver. Disconnect the negative terminal from the battery.
- Using a screwdriver, pry up the stud of the screw that secures the top cover;
- Disable;
- Unscrew the screw;
- Remove the screw that secures the trim inside the door pocket.
- Pry up the door handle trim with a flathead screwdriver;
- Remove it and unscrew the two screws located under the casing;
- Remove the two screws at the bottom of the door trim;
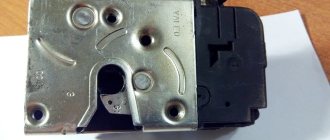
- Unscrew the lock latch on the door;
- For a vehicle without power windows, remove the hinge arm seal;
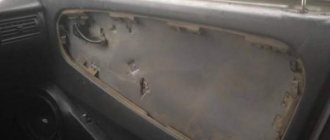
- Insert a long slotted screwdriver between the strip and the door, one by one, unhook the fasteners along the perimeter of the upholstery;
- Pull the trim away from the door;
- Disconnect all wiring harnesses from the control unit.
| The door trim is held on by 9-meter pins (clamps). Remember their location, then removal will be much easier. |
Tools required: Phillips screwdriver and straight screwdriver. Disconnect the negative terminal from the battery.
- Using a thin flat screwdriver, press out the lock on the window handle;
- Move this lock aside;
- Remove the power window handle and socket;
- Unscrew the rear door lock latch.
- Lift the rear door handle strip using a putty knife or straight screwdriver;
- Remove the tailgate handle cover;
- Remove the 2 screws under the handle washer;
- Insert a long slotted screwdriver between the rod and the door;
- Remove the clips from the upholstery one at a time.
- Pull the trim away from the door;
- The location of the 10 pins (clips) on the Grant rear door trim is shown in the figure.
Keywords:
- provide a door
- Granta door trim
Let's start with the driver
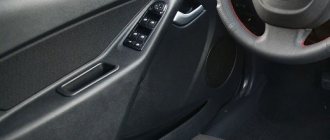
In Kalina, Priora and Grant the fastening scheme is identical. To remove the driver's door trim, since it is held in place not only by screws, one Phillips screwdriver is not enough. You will need something else sharp and flat. So, first, let's deal with the obvious hardware. The first is at the bottom of the door. There on all these models there is a plastic pocket, at the bottom of which there are two recessed holes. It is in them that the screw heads are visible. It’s not very convenient to get into it with a screwdriver with a long blade, so if possible, take a short one. Then locate the plastic plug near the door handle. Pry it with the same sharp object that we mentioned above, and you will find a screw there. Another one is hidden at the base of the opening handle. Bend it to its extreme position and unscrew it. Well, there is another one in the recess on the body. We think it would be unnecessary to mention that you should put all these screws separately so that you don’t frantically search for them and lose them later. Finally, unscrew the door lock cap.
How to Remove the Rear Door Trim on a Priora
Largest Skin Remove Priority Doors
Drivers of domestic cars often encounter problems such as noise insulation of doors, tuning, broken windows and door openings, and jammed glass. Not all car owners, of course, immediately contact a car dealership. Some of the work is done by itself, the nettle removes the skin. We will talk specifically about the Lada Priora car - the most popular car in the Russian car market at the moment.
Removing door pre-treatment
The body of the Priora car is attached to strong fasteners and bolts, mostly made of plastic. The clips have to be broken when working, so you need to worry about what you really need, especially if you do it in winter when the plastic becomes more brittle.
You will need to arm yourself with a Phillips and straight screwdriver. It is also necessary that you disconnect the negative cable from the battery before doing any work. To prevent damage to the gasket, keep the screwdriver close to the bolts and holders while working. To avoid breaking the paint on the top of your car door, you need to wrap the screwdriver crosses with electrical tape, and also, you don't need wire insulation. How to take off Door treatment?
Insulation of doors and trunk of Lada Priora # GarageLife
How to remove the rear door cover of a vase 2114.
Soundproofing the facade and back entrance
Ladies
priorities
, I just did the trunk. Help Romanovich by phone.
Entrance door trim stairs
Materials and tools:
- crosshead screwdriver;
- flat screwdriver;
- insulating tape;
- clamps.
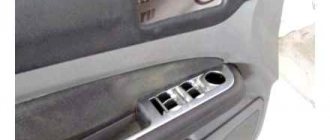
Removing the front panel of the car is done in stages. First of all, you need to unscrew all the screws, they are located near the car door handle, as well as the bolts that secure the special power window control module. They then pull out this module along with the car's mirror adjustment system.
Secondly, you need to disconnect the wires connected to the systems and leading to the power source by disabling the latch. Then, if you disconnect what is left to make our customers' wires, proceed to unwind the handle housing holders. So the front door is disassembled.
Remove the bolts by unscrewing the bolts. The car lining is fixed with 3 screws located at the bottom; they must be unscrewed. Next, unscrew the special button responsible for locking the door lock. The next step is to remove the trim from the front door of the Prior, which is the most difficult.
Using a flathead screwdriver, carefully lift the panel and remove the special plastic clips that hold the pad in place. When they come out, set them aside. What remains for our client to do is the main work.
How to remove Skoda Octavia Rear door trim.
How to remove black entrance skin
How to disassemble the back door. Sequence and systematic removal of pads p back
The car door is no different from removing the front
door
. The difference is that the rear doors do not have a rear window or rear view mirrors.
Summarize. Be careful not to drop any traces of installation tools. We must not forget that it is necessary to dismantle what remains for our client, what is mounted on top, so that the possibility of positioning the parts located there does not interfere with production. Observing our client, the above notes and tips remain, removing indents will not cause you much trouble both on the money side of the issue and with unfamiliar time issues.
Recommendations
When the front right door trim requires dismantling, this procedure can be done with your own hands if you adhere to the clear algorithm described above and with basic caution. But today there are people who don’t even know which side of the door the trim is on. Especially for such citizens, there are car services and service stations, where all the necessary procedures will be performed efficiently, quickly and at a reasonable price. There are few such places and one of them is Uremont.com. So far, not a single car enthusiast has regretted visiting this site. Here everyone will receive high-quality car repair services.
Remove the front door trim of the Lada Granta
Any car owner can dismantle the door panel trim on the Lada Granta model on his own, since this work does not involve any difficulties.
Removing the casing takes little time. The procedure itself can be carried out through several simple steps. For dismantling, you should only equip yourself with screwdrivers: flat-profile and figured. In this article we will describe how to remove the trim on a Grant from the front door and, accordingly, from the rear door.
How to dismantle the casing in Grant yourself?
How to remove the casing correctly and with your own hands? The first step is to disconnect the negative terminal from the power battery of the Lada Grant. This action is not necessary if the stern doors are not equipped with power windows. When dismantling the trim from the front door panel, disconnecting the terminal is a mandatory measure!
To securely fit the casing in its place, you will need to acquire new clips. It is possible that these fasteners may break during the removal procedure.
Next, on the decorative door panel of the Lada Granta, using a flat-profile screwdriver, pry up the plug and remove it. We act carefully to avoid breaking off its fasteners. Use a Phillips screwdriver to unscrew the fixing screw. We perform a similar procedure with a bolt located in a plastic socket.
After this, we switch to the plugs placed in the handle itself
If you carefully remove them, you will have access to two screws that also need to be unscrewed. We recommend placing all fastening elements in suitable containers. This will allow you to quickly and accurately assemble the unit to its previous state.
This will allow you to quickly and accurately assemble the unit to its previous state.
The only action left is to unscrew the remaining pair of trim fixing bolts, which are located at the bottom of the door card.
To remove the locking button, you will need to perform a simple manipulation - turn it to the left and slowly pull it up.
If the car is equipped with a manual drive of the mirror mechanism, then use a screwdriver to pry up the sealing gasket of the mirror hinge lever and remove it.
Based on the photo, it is recommended to first familiarize yourself with the locations of the clips in the Lada Granta. This will reduce the risk of damage and save time on work.
How to remove manual or power windows?
Removing manual mechanisms
In this case, armed with a flat screwdriver, we effortlessly press the mechanism handle lock away from the socket. Next, we move the latch to a position where its protrusion is freed from engagement with the socket. Now remove the socket with the handle.
If the window lift is electric?
The process of removing a panel with an electric mechanism on a LADA Granta is similar to that discussed earlier: the panel is pryed off and dismantled. To eliminate interference caused by the removed panel, it should be placed inside the door card by feeding it through the hole that is the panel seat.
- Speed sensor Lada Granta
- Grant headlight adjustment
- Rapids on Granta
The final stage of dismantling the casing
How to remove the trim carefully? Using a plastic spatula, pry up the casing and carefully remove it from its engagement with the latches. Next we see the switching harnesses with cables. They are necessary to connect door mechanisms:
They are necessary to connect door mechanisms:
- window regulator;
- mirror drive;
- loudspeaker, etc. (depending on the configuration version).
We disconnect their connectors.
Upon completion of work, you should make sure that there are no broken clips. If any are present, then we replace them with new analogues. We assemble the casing on the LADA Granta in the reverse order. Now you have become familiar with how to remove the trim on a domestic car on the front door and, accordingly, the rear door.
Show me the cubic capacity!
Having released the latches, we open the rear doors 180 degrees. Now we pull two plastic flags in turn - and the back of the rear sofa falls forward. Now we put the remaining parts in our hands in place and pull the sling - the sofa moves forward. All that remains is to unlock two more latches, grunt a little and pull the bench out of the cabin.
Then it’s even simpler: the middle sofa easily folds into the front seats - and here they are, the promised “two and a half cubes”! The permitted load capacity of 555 kg allows you to fill this volume with something not too heavy. For example, TVs, gas stoves and bicycles can easily be placed on a flat floor - and possibly at the same time.
Yes, you don’t have to throw the third row of seats in the parking lot, but take it with you - all you need to do is fold down a smaller part of the middle sofa. After loading the bench, there will still be quite a lot of space left inside for luggage.
Preparing the machine for work, necessary tools
The car must be driven into a garage or box (an inspection hole is optional - only when repairing other vehicle components) and secured in place, supporting the wheels to prevent shifting. It is allowed to carry out repairs outdoors in warm, windless weather on flat asphalt or a concrete surface. Be sure to find a fastening box with compartments so as not to confuse what was taken out and where it came from.
For the dismantled cladding, you will need free space to put it aside until the very end of all repair activities. This way it will be completely preserved – it can be further cleaned from the inside before re-installation. You should definitely stock up on clips, which may crack during the process of removing the trim (a kit for such work should be on hand).
You should also disconnect the battery (negative terminal) to prevent a short circuit due to elements under the casing. All components removed from under the trim can also be placed away from the car so that they do not accidentally get underfoot. The following instructions apply to all Lada Granta cars without changes by the owners.
Fastening elements are located along the lower perimeter (three bolts per ten), as well as along the entire door card - eight pistons. To complete all the work you will need:
- two screwdrivers (Phillips and flat head);
- set of tools for removing trim. If this is not the case, then you can use a flat-head screwdriver, an unnecessary credit card, or a similar flat tool;
- latex gloves;
Set of tools for removing trim and clips - rags;
- soldering iron (for fixing wires to the speakers in the absence of a detachable connection).
Additional tools may be required depending on the situation and the intended task.
Dismantling the box
A door frame is a frame that is inserted into the opening and attached to the wall using anchors. If there are bolts, they need to be unscrewed using a special wrench.
When it is not possible to unscrew, or they are welded, you will have to resort to the help of an angle grinder. We cut down the reinforcement pins. In this case, be sure to use safety glasses and gloves. Also use a new circle, the diameter of which can cope with cutting the fasteners, and the device should not come into contact with the box.
At the junction of the pins with the door frame, you need to remove a layer of plaster to gain free access to the anchors. Then you can start cutting the fasteners.
You need to work in a circle. First of all, the lower part of the box, the threshold, is released. Next, the sidewalls are cut out and only lastly the upper part of the door frame. If you break this sequence and release the top part of the box before the others, it may simply fall out of control.
When installing entrance structures, the free space between the box and the wall is filled with construction foam. In case of dismantling, you need to cut out the dried old mixture with a knife.
Having eliminated all possible fasteners, you can easily dismantle the door frame. Place it in a safe place so as not to block the passage on the site. Remove installation debris and clean the opening from single old nails, pins, and hanging pieces of plaster. Secure the doorway. For the subsequent installation of the entrance structure, you will have everything ready. Be sure to take care of disposing of old doors. Take it to your summer cottage or give it to those in need.
Dismantling and installing the iron door after this will take quite a lot of time. First, assess your strengths and decide whether you can cope with such a task or whether it would be better to turn to specialists for help.
Selecting a skin
As a substitute for standard door inserts, you can use:
- genuine leather. The cladding will look good and serve for a long time, but the cost of the material cannot be called affordable. It is better to use natural leather if you plan to upholster the car interior with your own hands;
- leatherette (dermantine) - inferior in quality, but costs much less than genuine leather. More than a reasonable option for finishing doors;
- eco leather. The material is a high-quality substitute for genuine leather. The composition includes cotton, cellulose-based artificial materials, synthetic polymers and natural leather. Has excellent elasticity, resistance to temperature changes and mechanical stress;
- velours. The material is well suited for door trim, used for car interior trim, and less commonly for ceilings;
- alcantara. High-quality samples will not be cheap, but an analogue from a budget manufacturer can be found at a very reasonable price. Of course, the material from famous manufacturers is of higher quality and easier to paste, but the budget option can also provide a pleasant tactile sensation;
- artificial suede fabric. The textile consists of polyester on a cotton base. Velvety and soft to the touch;
- a special fabric that is usually used to replace a car's headliner. The material must be dense if it is intended to cover the elbow areas, and not just decorative inserts. Prices for ceiling fabric are quite reasonable.
Material, tools
You can calculate the amount of material required for sheathing yourself. We cannot indicate these figures, since everything depends on the size of the insert, as well as the area of the bends. For an approximate calculation, you can use a ruler and formulas for calculating the area of geometric shapes. The price of fabric is set per linear meter.
You can sheathe cards using glue, which is used to reupholster the ceiling with your own hands. If you follow the technology, you are guaranteed not to have problems with GTA Boterm or universal glue “88”. If you cannot buy these adhesives, you can use Moment-1 Glue or Kaiflex K414 Glue. To cover all the door cards of an average passenger car, you will only need one 1 l/0.8 kg can. To apply the glue you will need a brush. Before gluing, it is advisable to degrease the surface. To do this, simply wipe the repair area with a paper towel soaked in solvent.
You will definitely need a standard kit for assembling and disassembling the door cards of your car. Usually a medium-sized Phillips screwdriver is enough for this. To avoid damaging the casing, to remove the cards after unscrewing the screw connections, you can use a set of plastic elements for dismantling car interior panels. You will also need a utility knife and scissors to trim the fabric. The need for a specialized tool may arise at the stage of detaching the fabric inserts from the plastic frame of the door cards.
Stage 3. Pouring resin
Now begins the most interesting and tedious task
It is best to use small disposable containers for mixing the resin; I used the proportions for 100g of resin: 1g of hardener
It is best to use plastic cups for beer, they have thick plastic, which is what we need. When the resin reacts with the hardener, it generates heat that can melt our container.
!Attention! Use resin only in well-ventilated areas, wear a respirator and gloves. I usually spray the outside twice with drying intervals of 2-3 hours. I usually shed the outside 2 times with drying intervals of 2-3 hours
I usually spray the outside twice with drying intervals of 2-3 hours.
Now we pick up a grinder or any other tool for cutting our cards.
Here you can clearly see the bars for rigidity
We cut out the entire inside of our cards, leaving space for the clips.
How to remove the door trim of a Lada Priora yourself
The car brand was released twelve years ago, and since then has been very popular among drivers. And it’s not surprising, because the cost of a high-quality product from the domestic automobile industry is quite low.
Many car enthusiasts can afford to buy it. Repairs and service are cheap, and some parts can be replaced yourself.
For example, from this article, readers will learn how to remove the Priora door trim.
In some cases, vehicle owners want to replace the door trim on the Priora. Achieving this goal is quite simple; you will need a minimum of tools. Lack of experience should not be scary; even people who are not involved in such repairs will be able to remove the old door trim and install a new door trim according to the instructions.
How to remove the trim
The process is divided into three main stages:
- Finding all screws and fixing elements, unscrewing the bolts.
- Removing door trims.
- Dismantling the casing.
The covering of the rear and front panels is removed separately. These steps will be described in detail below in the article; if you do not want to go to a car repair shop, we will provide instructions on how to remove the door trim on a Lada Priora car.
Why is dismantling necessary?
The upholstery of the Lada Priora car is available in several colors. If a car enthusiast wants to change the interior color, then he will have to change not only the seat upholstery, but also the door trim. Components such as noise insulation or insulation cannot be installed without first removing the sheathing.
If the window lifts are damaged, or the door handles are damaged, you will also have to remove the Priora door trim, notice the broken components, and install it back. Also, over time, the cladding loses its appearance, stains appear that cannot be removed.
How to dismantle the casing: instructions
You will need the following tools:
- flat screwdriver;
- Phillips screwdriver;
- clips and pistons to which the covering is attached.
It is not necessary to complete the last point, but it’s better to stock up on clips and pistons in case you break the old ones. In order not to waste time and not run to the store, it is advisable to buy the kit in advance.
When choosing caps or clips for Priora, pay attention to what brand they are intended for. These components for Priora are similar to parts for Kalina
The difference is in length - for Kalina, the clips are one and a half millimeters longer. Ask consultants for help, they will help you choose the right parts.
Front door
So how do you remove the front door trim? Reading the instructions:
- Unscrew the door lock latch.
- Unscrew the screw securing the handle to the door. Remove the screw and remove the handle.
- Unscrew both bolts that hold the switch block. Remove the unit; to do this, unclip the wires from the connector.
- Find the three fixing screws at the bottom of the door, unscrew them, and set them aside.
- Unclip the trim clips using a flathead screwdriver. Using the flat tip of a screwdriver, pry up the edges of the casing and carry out the process from the bottom up.
Such simple manipulations allow you to remove the front door trim. Install the new or old covering (depending on the purpose) in the reverse order
Backdoor
How do you remove the rear door trim? See instructions:
- Remove the socket from the glass receiver handle.
- Move the fasteners aside.
- Carefully remove the window handle and set it aside.
- You will find three bolts at the bottom of the door, unscrew them.
- There are four latches on top; unscrew them with a Phillips screwdriver.
- On the side, where the handle is located, there is another bolt, unscrew it.
- There are two screws on the other side of the door, unscrew them.
- Take a flat-head screwdriver and pry up the trim from below, gradually separating it from the door. Perform manipulations from the bottom up.
Install the door trim in reverse order. A map of the location of the fasteners can be found on the Internet, so you will be sure that you are unscrewing the bolts that secure the covering.
Conclusion
The dismantling process will not take much time and effort. It is so simple that the decision to go to a workshop and order a replacement of the covering there seems irrational. Following the instructions, everyone will be able to remove the Priora's trim.
Additional Information
Removing the Chevrolet Lacetti side window is an excellent opportunity to repair or service the power window . Having disconnected the glass, to dismantle the window lifter mechanism you only need to unscrew the guide along which the slider moves and remove the window lifter motor .
Servicing the window lifting mechanism is especially important in cases where the car has already covered 150,000 - 200,000 (km) mileage. It is around this time that problems with the operation of the window lifting mechanism usually begin, especially on the driver’s side.
The power window has several weak points:
Most often the engine fails. The fact is that the window lifter drive uses a variety of plastic and polymer gears, the service life of which is noticeably inferior to their metal counterparts .
Regarding the cable that moves the slider with glass up and down, over time it simply stretches and frays. It often happens that a stretched cable simply begins to wrap incorrectly around the electric motor drum. Incorrect winding leads to tangling of the cable, which causes the window regulator to stop working properly.
The Chevrolet Lacetti repair blog has a very detailed review on the topic of power window repair .
Removing the door trim makes it possible to service not only the window lifting unit, but also the locking mechanism , handles , button module, as well as the sound system and lighting.
How to remove the door trim of a Lada Priora yourself
The car brand was released twelve years ago, and since then has been very popular among drivers. And it’s not surprising, because the cost of a high-quality product from the domestic automobile industry is quite low.
Many car enthusiasts can afford to buy it. Repairs and service are cheap, and some parts can be replaced yourself.
For example, from this article, readers will learn how to remove the Priora door trim.
In some cases, vehicle owners want to replace the door trim on the Priora. Achieving this goal is quite simple; you will need a minimum of tools. Lack of experience should not be scary; even people who are not involved in such repairs will be able to remove the old door trim and install a new door trim according to the instructions.
How to remove the trim
The process is divided into three main stages:
- Finding all screws and fixing elements, unscrewing the bolts.
- Removing door trims.
- Dismantling the casing.
The covering of the rear and front panels is removed separately. These steps will be described in detail below in the article; if you do not want to go to a car repair shop, we will provide instructions on how to remove the door trim on a Lada Priora car.
Why is dismantling necessary?
The upholstery of the Lada Priora car is available in several colors. If a car enthusiast wants to change the interior color, then he will have to change not only the seat upholstery, but also the door trim. Components such as noise insulation or insulation cannot be installed without first removing the sheathing.
If the window lifts are damaged, or the door handles are damaged, you will also have to remove the Priora door trim, notice the broken components, and install it back. Also, over time, the cladding loses its appearance, stains appear that cannot be removed.
How to dismantle the casing: instructions
You will need the following tools:
- flat screwdriver;
- Phillips screwdriver;
- clips and pistons to which the covering is attached.
It is not necessary to complete the last point, but it’s better to stock up on clips and pistons in case you break the old ones. In order not to waste time and not run to the store, it is advisable to buy the kit in advance.
When choosing caps or clips for Priora, pay attention to what brand they are intended for. These components for Priora are similar to those for Kalina. The difference is in length - for Kalina the clips are one and a half millimeters longer
Ask consultants for help, they will help you choose the right parts
The difference is in length - for Kalina, the clips are one and a half millimeters longer. Ask consultants for help, they will help you choose the right parts.
Front door
So how do you remove the front door trim? Reading the instructions:
- Unscrew the door lock latch.
- Unscrew the screw securing the handle to the door. Remove the screw and remove the handle.
- Unscrew both bolts that hold the switch block. Remove the unit; to do this, unclip the wires from the connector.
- Find the three fixing screws at the bottom of the door, unscrew them, and set them aside.
- Unclip the trim clips using a flathead screwdriver. Using the flat tip of a screwdriver, pry up the edges of the casing and carry out the process from the bottom up.
Such simple manipulations allow you to remove the front door trim. Install the new or old covering (depending on the purpose) in the reverse order
Backdoor
How do you remove the rear door trim? See instructions:
- Remove the socket from the glass receiver handle.
- Move the fasteners aside.
- Carefully remove the window handle and set it aside.
- You will find three bolts at the bottom of the door, unscrew them.
- There are four latches on top; unscrew them with a Phillips screwdriver.
- On the side, where the handle is located, there is another bolt, unscrew it.
- There are two screws on the other side of the door, unscrew them.
- Take a flat-head screwdriver and pry up the trim from below, gradually separating it from the door. Perform manipulations from the bottom up.
Install the door trim in reverse order. A map of the location of the fasteners can be found on the Internet, so you will be sure that you are unscrewing the bolts that secure the covering.
Conclusion
The dismantling process will not take much time and effort. It is so simple that the decision to go to a workshop and order a replacement of the covering there seems irrational. Following the instructions, everyone will be able to remove the Priora's trim.
Glass replacement
It is better to buy glass and a glass holder as a set for replacement.
To replace, you need an extension, a wrench, an 8 and 10 mm socket and an assistant.
The side glass is blocked with a screwdriver to prevent it from falling out. The door trim is removed. A felt-tip pen marks the places where the glass frame is attached to the door on the frame and on the door. The bolts securing the glass frame to the window regulator are turned out.
The window regulator bar must be fully raised. The cable on the roller from the bottom of the glass is dismantled. Then the seals (velvet covers) are carefully removed.
Hold the glass during this time so that it does not fall out. After removing the seals, the glass is lowered down about 10 cm, tilted to the side and removed from the groove.
Replacing the door glass of a VAZ 2114
The new glass is installed in the reverse order. Apply WD-40 or a similar lubricant to the glass frame, insert the glass and leave to dry. After the grease has dried, the glass is installed in the door. New glass is installed in the seals.
If the seals have become unusable, new ones are cut out of rubber, while the old ones are used as patterns.
The glass with seals is inserted into the groove, aligned and lowered into the stopper. The window lifter handle is lowered to its lowest position. The glass is fixed with bolts and the cable is installed in its original place.
The operation of the window regulator is checked and, if necessary, the cable tension and the position of the seals are changed.
Selecting a skin
As a substitute for standard door inserts, you can use:
- genuine leather. The cladding will look good and serve for a long time, but the cost of the material cannot be called affordable. It is better to use natural leather if you plan to upholster the car interior with your own hands;
- leatherette (dermantine) - inferior in quality, but costs much less than genuine leather. More than a reasonable option for finishing doors;
- eco leather. The material is a high-quality substitute for genuine leather. The composition includes cotton, cellulose-based artificial materials, synthetic polymers and natural leather. Has excellent elasticity, resistance to temperature changes and mechanical stress;
- velours. The material is well suited for door trim, used for car interior trim, and less commonly for ceilings;
- alcantara. High-quality samples will not be cheap, but an analogue from a budget manufacturer can be found at a very reasonable price. Of course, the material from famous manufacturers is of higher quality and easier to paste, but the budget option can also provide a pleasant tactile sensation;
- artificial suede fabric. The textile consists of polyester on a cotton base. Velvety and soft to the touch;
- a special fabric that is usually used to replace a car's headliner. The material must be dense if it is intended to cover the elbow areas, and not just decorative inserts. Prices for ceiling fabric are quite reasonable.
Material, tools
You can calculate the amount of material required for sheathing yourself. We cannot indicate these figures, since everything depends on the size of the insert, as well as the area of the bends. For an approximate calculation, you can use a ruler and formulas for calculating the area of geometric shapes. The price of fabric is set per linear meter.
You can sheathe cards using glue, which is used to reupholster the ceiling with your own hands. If you follow the technology, you are guaranteed not to have problems with GTA Boterm or universal glue “88”. If you cannot buy these adhesives, you can use Moment-1 Glue or Kaiflex K414 Glue. To cover all the door cards of an average passenger car, you will only need one 1 l/0.8 kg can. To apply the glue you will need a brush. Before gluing, it is advisable to degrease the surface. To do this, simply wipe the repair area with a paper towel soaked in solvent.
You will definitely need a standard kit for assembling and disassembling the door cards of your car. Usually a medium-sized Phillips screwdriver is enough for this. To avoid damaging the casing, to remove the cards after unscrewing the screw connections, you can use a set of plastic elements for dismantling car interior panels. You will also need a utility knife and scissors to trim the fabric. The need for a specialized tool may arise at the stage of detaching the fabric inserts from the plastic frame of the door cards.
Pros of sound insulation
Today, every car needs sound insulation, and it doesn’t matter whether it’s a domestic car or an expensive foreign car, the sound insulation rating of foreign cars is gradually decreasing in order to make the car cheaper and thereby attract buyers, even world-famous concerns produce cars without sound insulation at all. It is important to know the positive aspects of sound insulation, in other words, what it gives:
It is important to know the positive aspects of sound insulation, in other words, what it gives:
It is important to know the positive aspects of sound insulation, in other words, what it gives:
- Serves to reduce the noise level inside the car interior and improve the sound quality of acoustics
- Noise reduction allows for quiet communication without raising your voice
- Excessive noise causes rapid driver fatigue, slows down reaction time and irritates the driver, which can lead to an accident.
- Many people do not know that increased noise causes the blood vessels in the body to narrow, this causes additional stress on the heart, over time angina develops and the risk of heart attack increases.
- Therefore, sound insulation is a concern for your own health and safety.
You can do sound insulation yourself, it’s not complicated, or you can pay and specialists will do everything for you.
Tuning seats VAZ 2107
How to adjust the doors of a VAZ 2107
Unlike earlier VAZ Seven models, the factory was equipped with anatomically shaped seats and headrests connected to the backrest. The front seats of the VAZ 2107 are quite fragile and quickly fail - the frame breaks, the backrests warp, and the upholstery wears off.
Standard VAZ 2107 seats are not particularly ergonomic or durable
On our “seven” the seats were exactly like this: wobbly and creaky. The adjustment mechanism also constantly jammed - before adjusting it to suit you, you had to spend a lot of effort.
The easiest way to tune seats is to install covers. Covers for VAZs are sold in almost any auto store; custom-tailoring is also possible.
Installing seat covers on the VAZ 2107 improves the appearance of the interior
Seat trim for VAZ 2107
After upholstering the seats, the interior of the car becomes very attractive. For this you can use:
- genuine leather;
- leatherette;
- suede;
- velvet;
- velours;
- flock;
- carpet;
- alcantara.
Natural leather is undoubtedly the most durable. But as you know, this is a very expensive material, and in hot weather it is uncomfortable to sit on leather seats. The most budget-friendly and fairly reliable upholstery is made from Alcantara and velor. Therefore, these materials are most widely used among car enthusiasts.
Based on the purpose of tuning and financial capabilities, you can do a complete reupholstery of the interior, including the ceiling, door trim, sun visors, steering wheel, and dashboard.
After you decide on the type of material, you need to choose its color. Traditionally, seat upholstery is made in the same color as the interior upholstery, but a harmonious combination of different shades can make the car interior more original and attractive.
The seats of the VAZ 2107, covered with artificial leather, look representative
Video: self-upholstery of VAZ 2107 seats
Changing seat mountings
When installing non-original seats on the “seven”, a situation may arise that the seats do not fit the mounts. In this case, you will have to resort to welding.
Experts believe that any seats that fit the dimensions can be installed on the “seven”. However, changing their mounting is a very labor-intensive job, so if possible, it is better to choose seats that do not require welding for installation.
Installation of seats from another car on a VAZ 2107
Seat covers are a great tuning option, but if they are already loose, they will have to be replaced. On the “seven” you can install both new original seats and seats from foreign cars. Seats from a 1996 Mercedes W210 and a 1993 Toyota Corolla are suitable. Seats from SKODA and Fiat are suitable, but to install them you will need to make two additional holes.
In addition to the above, Peugeot and Nissan seats are used, but they do not match and require modification of the fastening. The seats from Volkswagen fit almost without modifications, but they are too high for the VAZ 2107, therefore, despite the increased comfort, installing them is not recommended.
Peugeot seats fit the VAZ 2107, but to install them you need to slightly modify the fastening mechanism
Options and prices for the 2018 GLE W167
- 250d (4.03 million rubles);
- 300 (4.16 million rubles);
- 400 (4.31 million rubles);
- 350d (4.37 million rubles);
- 500e (5.38 million rubles);
- AMG 43 (5.47 million rubles);
- AMG 63 (7.52 million rubles);
- AMG 63 S (8.22 million rubles).
It must be remembered that the prices indicated are approximate, corresponding to the European market. In Russia, cars will be sold at a higher price - with markups from the manufacturer and official dealers.
��� ����� ������� ������ � �������� ����� �� ������? ������, �� �������?
������ ��������� ���������, ��� ����� ������� ������ � �������� ����� �� ������. ������������� ������� ��� ��������� �� ���������� ��������. ��, � ����� ������, ������� �������� ������������, ��� ��������� ������� ��� ������ ��� ����������� ��� ���������� � ���� ������� ��������� ������. ���� ���� �������� �������� � ��������� �������� ���� ������. ��� �������� ��������� ��������� ���������������� � ������. ��� ������������ ������ ��� ��������� �������, ����� ��������� �� ��� ������ ����� ���������. ����� ����� �� ���������, ���������� ������� ����� ���������� ����������, � ������� �������� ���������, ��� � ��� ����� ������.
��� ����� ������� ������ � �������� ����� �� ������
. ���� ������ ����� ������ ������������. ���� ������ ��� ���� ������ ���������� ����� ��������� ���������:
- ������������� ������� �����������������, ���������� ������;
- ���������� ��������;
- ������ �������;
- ��������� �������������� ������������.
� ����� �� ���� ������� �������� ������� ������������ ��������. ������ � ����� ������� ����� �������� ����� ������, � � ������ �������� ������� �� ���� ������.
��� ������ ��� ����������� ����������� ����� ������������. ������ ����� ��������� �� ���� ���������� � ������ ������, ������� ����������� ��� ���������� � ������:
- �������� �������� � ���������;
- ������� ���������.
����� ������� ����������� �� �� ���� �����������. �� ��������� ������������ ������� �������������� �����.
���� ������� �������� �� �������� � ������ (���������). ����� ���������� ������� ������� �����������������, � ����� ����� ������. ���, �� ����, ���� �������� ������ ������� ���������. ������������ �������� � ��������� �������:
- ��������� �������� ������ � ����� ���������� ������������������. ��� ������ ��������� � ������� 2 ���������. �� ����������� ��������� ���������. ����� ���� ������� �������� �������, � ��������� ����������� �������;
- ��������� � ����� �����, � �� ���� ������� �������, ������� ���������� ���������;
- ����������� 3 �������� ����� �����, ��� ����� ���� ���������� ��� �����������;
- ������ ��������� ����� ���� ��� ������������ ������ ������� ������� � �������, ��� ������ ���������� ��� �������;
- ���������� ��������������� � ������ �������. ����� ���� ���������� ����������� �������� ��������, �� ���� ���������� ���������. ��� ��������� �������� ����������� ��������. � ������� �������� ��������� �������� ����������� �������;
- ����� ����� ������� ��������� ����� � ��������� �� ���� �������� ������. ����� �� �������� ����������� �������, ������ � ����������������. � �����, ��������� ����������� ��������� ������.
