Many drivers know that replacing the heater radiator on a VAZ 2107 is not a rare occurrence. This is due to the structural features of the heating system on Zhiguli cars. Therefore, it is advisable for any owner of a car of this model to know how to properly carry out the replacement work. It should be noted that the heating on the VAZ 2107 is almost identical to the “penny”.
The difference is in some nuances of the location of the air ducts. Also, the replacement process here is completely the same; on the “sevens” there is a little more fuss with the radio panel and the glove compartment. Therefore, anyone who has changed the heater on any of the classic VAZ models will easily cope with the task. Well, for others it will be useful to know how to identify a radiator malfunction. And how to change it without any problems.
Signs of breakdown
Replacing the heater radiator on a VAZ 2107
is not a difficult job, but first you need to determine the cases when it needs to be changed, or at least removed:
- . This is usually determined by a puddle of antifreeze under the feet of the driver and/or passenger. Such a malfunction can appear at any time of the year. It is advisable to make a replacement as quickly as possible. After all, antifreeze fumes are toxic;
- The stove blows cold air
, this is usually detected in winter. In this case, first check the radiator tap; perhaps it is simply closed. If everything is fine with it, then you need to remove the radiator and understand the causes of the breakdown.
The first of the problems described leads to the replacement of the radiator.
Of course, it can be soldered, but in practice this does not make sense. It is much easier to purchase a new radiator. In the second case, replacing the tap can help; it often fails. But the exact reason can only be determined by removing the device from the car. There is one small nuance that needs to be taken into account when buying a new radiator. If you want a more favorable interior climate, try to find a copper radiator. This type of heater releases heat much more efficiently. But aluminum will last much longer. Therefore, your choice is the following: comfort or service life.
Replacement
Since the heating radiator is integrated into the cooling system, before starting work, stock up on a liter of antifreeze to replenish coolant losses. Manufacturer from the cylinder block before any work on the heater. But, in principle, you can do without it. To perform the actions you will need screwdrivers and a set of keys. It is also a good idea to stock up on a small container to collect antifreeze from the radiator. The work consists of the following stages:
- We unscrew (2 screws) the radio panel, and also dismantle the glove box;
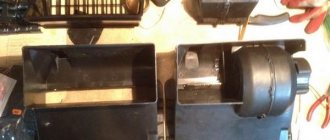
- Having gained access to the fan, unscrew it;
- In the engine compartment, hoses are removed from the heater valve pipes, as well as from the heater return. To do this, you need to remove the clamps from them. When pulling off the hoses, be careful not to injure your hands on the manifold;
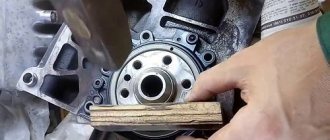
- Using a 7 socket, unscrew a pair of screws and remove the sealing diaphragm;
- in the cabin, unscrew the casing of the heating system control cable and remove it from the lever;
- Carefully remove the radiator. To do this, you need to remove the tubes from the partition between the passenger compartment and the engine compartment; With the radiator removed, use a 10mm wrench to remove the return pipe and heater tap;
- Check the heater valve. It often becomes clogged with various deposits. If there are problems with its opening and closing, or its throughput is reduced, then the tap should be replaced;
- Next, we look at the condition of the stove itself. If it leaks, it is better to immediately replace it with a new one. It is important to check it for throughput. In some cases, the functionality of the radiator can be restored by flushing it. To do this, take a strong one and drive it through the heater using a compressor. If there is damage to the tubes or they cannot be washed, you will also have to go to the store for a new device;
- When reassembling the radiator, you need to install new rubber gaskets; old ones may leak;
- Further assembly is carried out in reverse order. It is advisable to install new clamps in the engine compartment. Also pay attention to the condition of the hoses; if they have cracks, it is better to replace them.
The last step is to adjust the cable for opening the stove tap.
It must ensure full opening and closing of the tap. After all work, all fasteners are checked for leaks. You also need to remove the air plug from the cooling system. To do this, open the expansion tank and start the engine for a few minutes. After which you can add it to a system that lacks coolant. And finally assemble the glove compartment and radio panel.
Conclusion
. All drivers understand that a functioning heater in winter increases the level of comfort and safety. Therefore, replacing the stove radiator on a VAZ 2107 in the event of a malfunction is a primary task. The work is not difficult and can be done even by a novice mechanic.
Removing the heater radiator on a VAZ 2101-2107 and those models between (2102, 2103, 2104, 2105 and 2106) is not as difficult as it might seem at first glance, the only thing you need is to stock up on antifreeze or antifreeze, depending on what is filled.
I removed the heater radiator for the first time for a trivial reason: the heater tap was leaking. Replacing it involves removing the radiator completely.
Also, the reasons for removing the radiator may be due to the fact that, as it happened to me.
And it is possible that the radiator itself may leak, as my friend had, then you will have to buy a new radiator (preferably copper).
And these are the main reasons when it is necessary to remove the heater radiator on a VAZ classic.
Now let’s look at how to remove the heater radiator using the example of VAZ 2105 and 2107 (on other VAZ cars, the process is similar).
Removing the radiator
1. Remove the radio if it is present and interferes with the process. I am giving an example for VAZ 2105 and 2107, so in addition you will have to remove the side pipes of the interior heating system, since they will make it difficult to remove the stove.
2. Next, we disassemble the stove in the car interior, you need to remove the metal clips, there are 4 of them, and unscrew the shelf on the passenger side. After this, the heater should move to the driver’s feet and you will have full access to the heater radiator.
3. The next process will be to go to the engine compartment, where you need to unscrew the 2 clamps on the tubes suitable for the stove, do not forget that when you disconnect the tubes, coolant will flow. And unscrew the 2 bolts of the gasket, it is shown in the photo, and pull it out.
After the work has been done, you can remove the heater radiator.
Usually, if the stove on a VAZ 2107 does not heat well or has stopped heating altogether, the driver notices this only in winter or autumn, because it is not used in the summer. Although in some cases it can be discovered ahead of time that the stove is faulty. In this case, the motorist will notice a leak of water or antifreeze under his feet. But more often than not, news about a stove malfunction is unexpected and unpleasant. In winter, it is difficult to do without it; the car will be very cold, and the driver will be blown with cold air. Usually, stoves for the VAZ 2107 are made well and of high quality, they are able to serve their owner for a long time and they heat well. And problems with heating a car arise very rarely, but if they do, they can be solved.
First you need to find out what are the reasons why the stove does not heat well. The reason may be the fact that the faucet, metal pipe or heater radiator has rusted. And in such cases, you can often notice that coolant is leaking. When this is the reason, it will not be difficult to fix the problem, just change the required element. But if the radiator itself begins to rust, you will have to purchase a new one, but when a copper radiator is used, it can be repaired. But to do this efficiently, you will need a good specialist. Cold air may come from the air ducts because the heater valve has stopped working and is constantly closed. If this is the reason, you need to replace the heater valve. Debris may also become clogged in the radiator; to eliminate this, you will need to clean or replace the radiator.
Repair and replacement of individual heating system elements
In addition to the radiator, the heating system includes a fan with an electric motor, a tap and a control unit.
Drivers who have been driving Zhiguli cars for many years often say that the VAZ 2107’s stove sometimes does not heat well. The most common cause of malfunctions in a system such as the VAZ 2107 stove is a leak in the radiator, as well as in pipes, taps and connections located directly between them. To this can be added switch failures for electric fan modes, damage to the device wires or oxidation of their components.
Fan motor
The electric motor of the stove is considered one of the weakest points of the VAZ 2107. This is due to the material of the bushings on which the rotor rotates. When these bushings wear out, the fan operation is accompanied by a characteristic whistle. This happens after two to three years of using the car. The electric motor can be brought back into working condition by cleaning and lubricating. However, after a short time the whistle from the stove fan will appear again. In such cases, experts recommend replacing the standard electric motor with a new one - a bearing one. As a result, the whistle will disappear, and the reliability of the unit will increase. The replacement process is associated with certain difficulties, since the electric motor is located in a rather inaccessible place. Nevertheless, after installation, the bearing motor is guaranteed to work for several years.
The factory electric motor of the VAZ 2107 heater fan is usually replaced with a bearing one
Heater valve
The heater valve is replaced when it jams, leaks, or in other cases when repair is impossible. Experts recommend installing a ceramic faucet in this case.
The metal heater valve usually opens in the fall and closes in the spring. During periods of inactivity, it can sour, become covered with scale and simply fail. The result can be extremely unpleasant for the car owner. These disadvantages do not exist with a ceramic faucet. There is practically no scale accumulation on ceramics, and it is not subject to corrosion. As a result, even after a long period of inactivity, the heater valve will be in working order.
The standard faucet of the VAZ 2107 stove is often replaced with a ceramic one
Control block
The heating system is controlled from the interior of the VAZ 2107 by several levers on the instrument panel, connected to the controlled elements by a flexible rod (steel wire). Using these levers you can:
- adjust the degree of opening of the air dampers;
- open and close the heater tap;
- distribute air flows between the windshield and side windows;
- take air from the engine compartment.
Each of the levers of the control unit is responsible for the operation of a specific unit.
In addition, there is also a lower damper (air distribution cover), which is controlled by a special lever located under the instrument panel on the driver’s side.
Thus, any car owner can perform most of the work on repair, maintenance and replacement of elements of the VAZ 2107 heating system independently. In addition, recommendations from experts will help you modify the stove yourself and make it work more efficiently.
Replacing the VAZ 2107 radiator
To replace the radiator, you will need to drain the cooled liquid; it is located in the engine block. But this condition is not mandatory, because the losses will be insignificant. Afterwards, you need to unscrew the two clamps from the engine compartment that are located on the radiator pipes, and then you need to remove the hoses. Then you should unscrew the fasteners of the rubber seal and remove it. Afterwards, inside the car itself, you need to remove the radio panel and the fasteners of the heater tap drive cable need to be unscrewed. To do this you need to use a “7” key or a screwdriver. You need to remove 4 spring clips using a screwdriver; they are located on the fan casing. Then you need to lower the casing down and move it to the left. And then you can pull out the radiator. You need to inspect the radiator; if there are damages that can be fixed, then it needs to be repaired; if not, then a new one is purchased and the radiator is inserted in its original place.
Let's sum it up
Even a novice driver can handle replacing the stove on a 7 on his own, the main thing is the desire to work for a positive result. Carry out regular preventive diagnostics of your car's heating system at least once a year, before the onset of cold weather. This will provide you with comfort in the car at any time of the year.
Sources
- https://avto-idea.ru/sovety/pechka-vaz-2107-ustroystvo-rabota-osnovnye-neispravnosti/
- https://avtocity365.ru/ustrojstvo-i-ekspluatatsiya-avtomobilya/remont-radiatora-vaz-2107/
- https://7road.ru/drugoe/radiator-pechki-2107-razmery.html
- https://avto-idea.ru/remont/vaz-2107-remont-pechki-svoimi-rukami-zamena-pechki-vaz-2107/
- https://ladaautos.ru/vaz-2107/kak-pravilno-razobrat-pechku-na-vaz-2107.html
- https://bumper.guru/klassicheskie-modeli-vaz/sistema-ohdazhdeniya/pechka-vaz-2107.html
- https://7-vaz.ru/remont/kak-zamenit-radiator-pechki-na-vaz-2107.html
- https://akki-carsh.ru/dvigatel/otopitel-vaz-2107.html
- https://remam.ru/vozdsys/zamena-pechki-vaz-2107.html
In what cases is it necessary to replace the heater radiator?
The radiator itself is a simple device from a technical point of view. It consists of a system of tubes through which the coolant moves, equipped with thin lamellas. It would seem that there is nothing to break here. However, radiators fail very often. There are only two reasons here:
- leakage due to drying out, corrosion or mechanical damage;
- obstruction resulting from sedimentation of oxidation products on the tubes or “clogging” with various debris or the same products of oxidative processes.
If you can try to combat the latter reason by flushing the radiator with chemical reagents, which does not always help, and not for long, then if a leak occurs, the only correct solution is to replace the radiator with a new one.
You can, of course, try to correct the situation by soldering the leak, but this option is only suitable for copper-brass radiator models. And no one will give you a guarantee that symptoms will not appear in the near future.
Do you need to bother with repairing the heater radiator if it is not that expensive, and you don’t have to go to a service station to replace it?
What will you need?
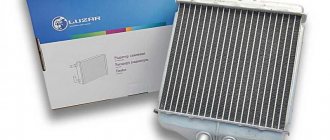
You will need quite standard tools for this work. Be sure to prepare screwdrivers (phillips and slotted). You will also need several keys. It is advisable to stock up on rags and containers for collecting coolant. If you are sure that the radiator is damaged, then you should buy it in advance. On sale you can find 2 types of heater radiators for classics. One of them is copper, which is now quite difficult to find. But such radiators have better heat transfer, which has a positive effect on interior comfort. Such heaters fail relatively quickly.
Aluminum radiators are more reliable. But, they cope somewhat worse with heat transfer. If the problem is related to a lack of warm air supply, then most likely there is a problem with the faucet. It often becomes clogged with deposits, and accordingly ceases to cope with its responsibilities. In such a case, it is easiest to replace it.
Selecting a new heater radiator
Buying a stove radiator today is not at all a problem. Automotive markets and spare parts stores are overflowing with such products, but making the right choice is not always easy. It's all about the manufacturer and price.
The cheapest radiator from an unknown manufacturer, also made from an unknown alloy, will cost you a maximum of 500 rubles. Naturally, no one will give a guarantee for several years of its productive operation. At the same time, you can buy a high-quality heat exchanger made of copper-brass alloy with a guarantee, at a price of about 3,000 rubles.
There are also compromise options that involve fairly high-quality products from well-known manufacturers at reasonable prices. Below is a table indicating the models of VAZ 2107 heater radiators from trusted manufacturers.
| Manufacturer | Catalog number | Factory number | Material of manufacture |
| DAAZ | 21050-8101060-00 | Aluminum | |
| AVTOVAZ | 21050810106000 | 21050810106000 | Aluminum |
| Hola | RH372 | LRh-0106 | Copper |
| LUZAR | 2105-8101050 | Aluminum | |
| AURORA | 2105-8101050 | HR-LA2105 | Aluminum |
| AT | 2105-8101050 | AT 1050-005RA | Aluminum |
| Extra (Hungary) | 2105-8101050 | 2105-8101050 | Aluminum |
| Alaska | 2105-8101050 | 2105-81001050 | Aluminum |
| AMZ | 2105-8101050 | PAC-OT2105 | Aluminum |
| BAKER | 2105-8101060 | Aluminum | |
| SHAAZ | 2101-8101060-02 (three-row) | Copper | |
| SB OR | 2101-8101060 | Copper | |
| Bautler | BTL-0006H | Aluminum | |
| Master-Sport | 2105-8101050-PCS-MS | Aluminum | |
| OAT | 21050-8101060-00 | Aluminum | |
| Finord (Finland) | FN2215 | Aluminum | |
| Oberkraft (Germany) | 2105-8101060 | Aluminum | |
| Fenox (Belarus) | RO0003O7 | Aluminum |
Causes of heating system malfunction
Experts identify several reasons why normal circulation of antifreeze is impossible:
- Coolant leak. It can occur as a result of natural wear and tear of parts of the cooling system, damage to the unit by corrosion or a hard object. In this case, it is necessary to replace the radiator or other damaged parts of the system. A malfunction in the stove shows itself as antifreeze leaking into the cabin, under the feet of the front passenger or driver.
- Obstruction of the internal tubes of the heat exchanger. This is evidenced by the impossibility of adjusting the air supply - only a cold or exceptionally warm stream will blow into the cabin. In this case, it is possible to get by by washing and purging the unit.
It is important to convince
It seems that the cause of the leak is in the heat exchanger. In the VAZ-2107, taps often leak or pipes leak. Copper-brass units can be soldered yourself or in a car service, but this is a temporary measure. Experienced craftsmen recommend replacing the unit even if there are blockages, since their appearance is one of the signs of the onset of corrosion.
Preparing the car
Before starting the radiator replacement procedure, it is necessary to drain the coolant from the system. To do this, you need to warm up the engine (so the liquid drains faster) and install the car in any convenient way so that you can get to the drain plug (on an inspection hole, overpass, etc.). After this, open the caps of the cooling radiator and expansion tank.
Climbing under the car, we find the coolant drain plug on the cylinder block. Do not confuse it with the oil drain plug located on the oil pan! Having substituted a previously prepared container, unscrew the cap with a key set to “17” and wait until all the liquid has drained. This may take from 2 to 5 minutes. After this, the plug can be wrapped.
Now you can begin the procedure for replacing the stove radiator.
Heating scheme
Air flow diagram of the VAZ-2104 heating system
Cold air is supplied inside the heating system through the air intake grille 28, installed near the windshield from the outside of the car. Further heating of the VAZ-2104 can be carried out in three directions, which are selected by the control system:
1 – heated windshield, this direction is indicated in red. With this scheme, air enters through hatch 7 into air supply box 30 to remove dust and water droplets. Then it moves through the radiator 25, where it takes heat from the coolant, as well as the fan housing 13, from where it enters the windshield heating air duct 3.
2 – heated side windows at the front, this direction is indicated in blue. Here the air also enters through the hatch into the box, then into the radiator casing 23, and then enters the left and right air ducts 1 and 2.
3 – foot heating, this direction has a green designation. Air enters the cabin, as in other directions, but after the radiator casing it enters the internal ventilation air duct 8.
Instructions for replacing the VAZ 2107 heater radiator
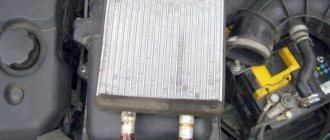
- 1. Open the hood and find protruding heater radiator pipes on the partition separating the engine compartment from the passenger compartment. Using a Phillips screwdriver, unscrew the bolts of the clamps that clamp the connecting hoses to the nozzles. Disconnect both hoses. If at this moment coolant begins to pour out of the pipes, use a clean rag.
- 2.Using an open-end wrench set to “7”, unscrew the two radiator mounting screws, and then remove the seal.
- 3.Next we go to the salon. This will require partial disassembly of the panel, or rather dismantling of the radio shelf (“beard”). It is dismantled by unscrewing two screws.
- 4. Under the “beard” we find the heater valve, and using the key “7” we unscrew the fastening of the cable drive. Move the free end of the cable to the side.
- 5. There are four steel brackets on the heater casing, with which the two halves of its body are fastened. Unclip the staples and remove the bottom half.
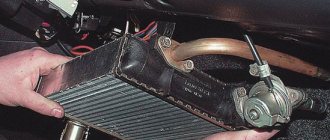
- 6.Only after this, carefully remove the old heat exchanger along with the heater tap, trying not to spill the remaining coolant.
- 7.Using a “10” wrench, unscrew the two bolts securing the valve to the radiator. We inspect the rubber gasket that is located between them. If it becomes unusable, we throw it away.
- 8. Just in case, use the same key to unscrew the two bolts securing the inlet pipe to the stove tap. Checking the gasket.
- 9.Check the faucet for functionality. If there are problems with it, it is better to replace it too.
- 10. Screw the inlet pipe to the tap, not forgetting to install a new gasket between them and lubricate it with sealant. Next, we screw the tap to the new radiator, also installing a gasket lubricated with sealant between them.
- 11.Install the new radiator in place.
- 12. Without closing the heater housing, screw the radiator to the partition between the passenger compartment and the engine compartment, installing the seal.
- 13.Connect the rubber hoses to the radiator pipes and crimp them with clamps. If the hoses have cracks or other signs of wear, they need to be replaced. This also applies to clamps.
- 14. After making sure that the drain plug is tightened, pour coolant into the system. In this case, the stove tap must be completely open so that the liquid gets into the stove radiator.
- We tighten the caps of the expansion tank and the cooling radiator.
- 15.Start the engine and warm it up to operating temperature.
- 16.Without turning off the engine, we check from the interior side to see if the new radiator is leaking, and if there is a leak from the place where it connects to the tap. Check the coolant level. If necessary, add it until the required level is reached.
- 17.If everything is in order, connect the crane drive cable and secure it with a bolt.
- 18.Attach the bottom cover of the heater housing and secure it with metal brackets. We put the radio shelf in place and screw it to the panel with self-tapping screws.
Dismantling algorithm
VAZ cars of the classic family, which includes modification 2107, are good because to remove the heater radiator you do not need to dismantle the front panel, so the work of removing the heat exchanger of the interior heating system is not difficult. No specific tools are required, just 8 and 10 size screwdrivers and wrenches are needed.
We recommend: Adjusting headlights on VAZ 2103, VAZ 2106
Algorithm for removing the heater radiator:
- Drain the coolant by unscrewing the drain plugs on the engine and main radiator.
- On the left side of the engine shield (standing in front of the car) we look for two rubber tubes through which coolant is supplied and discharged to the heater. We loosen the clamps of these tubes and tighten them.
- We unscrew the screws securing the rubber seal through which the metal radiator pipes pass. Let's remove the seal.
- We move to the salon.
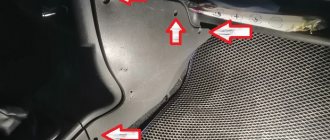
- We dismantle the shelf under the storage compartment on the passenger side. To do this, you need to unscrew the screws that secure it.
- Remove the lower part of the center console. It is attached to the floor and front panel with self-tapping screws. Since keys, a cigarette lighter, and a clock are installed on the lower part, after unscrewing the fastening elements, we move the box toward you (by turning on the reverse gear at the gearbox) and disconnect the wiring going to the indicated elements (it is better to mark the wires so as not to confuse them during assembly). After this, the box can be removed from the cabin.
- Unscrew the control mechanism cable from the antifreeze supply shut-off valve.
- We disconnect the lower part in which the fan is located from the stove body. It is attached to the top of the case using 4 latches installed on the sides. Use a screwdriver to pry up the latches, after which the lower part of the case will drop down. We move it to the side or completely remove it, having first disconnected the power wires of the fan motor.
- After dismantling the bottom of the case, you will have access to the radiator, which can be removed by pulling it down using the metal pipes.
Radiator installation
Note that this is only one of the methods for disassembling the stove on a VAZ-2107. It is not necessary to drain the antifreeze; you can disconnect the rubber tubes without removing them, and 1.0-1.5 liters of coolant will flow out of the cooling system, which are topped up after assembly. The main thing is that after disconnecting the tubes, lift their ends up and secure them in this position.
During the disassembly process, you can immediately disconnect the pipelines from the radiator along with the shut-off valve and then remove the heat exchanger itself.
Some useful tips to extend the life of your heater radiator
- 1. When buying a new radiator, focus on the manufacturer and the material it is made of. You should not buy cheap spare parts from unknown companies.
- 2.Do not fill the cooling system with low-quality coolants or water. Under no circumstances should antifreeze be mixed with antifreeze and vice versa. Do not allow fuel or oil to get into the liquid.
- 3. In the warm season, when the heater is not in use, open the heater tap at least a couple of times a month so that coolant flows into the radiator. This will prevent the radiator from drying out and prevent sticking of the valve shut-off mechanism.
If after reading the article you still have questions about replacing the heater core, watch the video:
It requires certain skills, but experienced motorists who have been using domestic cars for many years note that the process on the “seven” is similar to the identical procedure on the “kopek”. When upgrading your car, it is worth remembering that the difference between the two vehicles lies solely in the location of the air ducts.
To change the radiator yourself, you will have to spend time removing the panel with the radio and glove compartment. The material below provides instructions that will help you replace the heater radiator in the domestic “seven” without any special investments or huge labor costs.
How to install an additional stove
To install an additional heater in a VAZ-2107 you will need:
- stove (homemade, purchased);
- pipelines;
- tees for insertion into the cooling system;
- shut-off valve (to completely shut off the second radiator).
The installation algorithm is relatively simple and includes the following steps:
- Drain the coolant from the engine.
- Place and secure the stove in the chosen location
- We cut tees into the cooling system pipes
- Install the shutoff valve on the supply pipe
- We connect the radiator to the cooling system using pipelines through a tap according to the selected circuit (series, parallel). We place the tubes laid throughout the cabin secretly (in places where they are not visible and the likelihood of damage is low).
- We lay the power wires for the stove fan and install the control button.
- We fill the cooling system with antifreeze and check the connections for leaks.
- We remove air pockets from the cooling system.
- We check the functionality of the second stove.
If everything is done correctly, then the second heater, after heating the engine, supplies a heated air flow into the cabin. Finally, we note that if the additional stove heats poorly, it means that the performance of the standard water pump of the cooling system is not enough to ensure proper circulation of the liquid. In this case, installing another pump - an electric one from GAZelle - can solve the problem.
Another pump cuts into the pipes through which antifreeze is supplied to the interior heating system. This unit ensured proper fluid flow through the system.
Fault signal
Before thinking about how to change a radiator with your own hands, a motorist should be aware of the signs that indicate an existing malfunction.
First of all, you need to pay attention to the presence of obvious fluid leaks. You can notice this by the puddle of antifreeze that will regularly appear under the driver’s feet.
The second sign may be cold air blowing from the heater, which is especially noticeable during the cold season.
Most often, the first problem entails an inevitable replacement of the radiator, if the second can only be corrected by replacing the faucet.
Stove modernization
Very often, in parallel with the prevention of stove malfunctions and its settings, the driver modernizes the heating system for more efficient operation.
We recommend: How to calculate engine hours in kilometers and what is an engine hour?
Most often, for these purposes, the standard fan and resistor are replaced with products from the figure eight. The new fan is larger in size, due to which a larger amount of warm air is supplied, and the vehicle interior warms up faster. The new fan fits into the standard seat with virtually no modifications. It is only necessary to cut off one of the aerodynamic ridges from the impeller. After such improvements, it will also be necessary to replace the standard fan button with a product from the figure eight.
Sometimes, for better airflow of the driver’s side windows, additional small fans are installed in the deflectors. Such improvements, combined with preventive maintenance, will ensure comfort and warmth in the cabin even in the coldest times.
Instructions for replacing the heater radiator on a VAZ-2107
To change the heater radiator in the domestic “Seven”, you need to know the principle of its design and operation. The car is integrated into the cooling system complex, which is why, even before starting manipulations, you should purchase at least a liter of antifreeze, which will need to be used after noticeable losses of the coolant in the tank.
On the advice of the manufacturer, it is necessary to drain the liquid from the cylinder block whenever the motorist plans to improve the heating. True, in reality, many, even experienced craftsmen, neglect this advice, and prepare only a set of screwdrivers and keys for work. There will be no extra container in which to collect the antifreeze flowing from the radiator. Replacing the VAZ-2107 heater radiator consists of:
- in unscrewing the radio panel, which is attached with only two screws;
- removing the glove box;
- unscrewing the fan, access to which opens immediately after performing the two above manipulations;
- dismantling hoses from the stove tap tubes, which are located in the section with the power unit. It is worth noting that a similar procedure must be carried out from the heater return. To do everything correctly and accurately, you need to dismantle the clamps. When removing hoses, do not make sudden movements, as this may result in injury to your hands on the manifold;
- removing several screws using a 7-head socket and dismantling the sealing diaphragm;
- unscrewing the cable casing that controls the heating system. Repairing a stove on a VAZ also requires removing it from the lever;
- dismantling the old standard radiator. The motorist will have to use his own hands, with extreme care, to pull the tubes out of the partition, which is located between the passenger compartment and the engine compartment.
After removing the structural element to be replaced, using a 10mm wrench you need to remove the return pipe, as well as the tap of the heating device being upgraded.
Before replacing the VAZ-2107 heater radiator, you need to check the heater valve; the fact is that there are often cases when a huge amount of various deposits accumulate in this small element of the system. If a motorist can immediately notice a malfunction when opening or closing this part, or a decrease in its throughput, then the valve will have to be replaced.
It should be done only after a thorough examination of its condition. If there are various leaks and defects, the used equipment should be replaced with new one without much thought. During the inspection process, special attention should be paid to the throughput of the unit. If it is possible to restore the previous functionality, you can use a special flushing agent to help clear the clogged element. A strong solution of water with citric acid, which will subsequently be repeatedly driven through the stove by a compressor, can help the motorist. If the tubes on a VAZ-2107 are damaged or the car owner is unable to wash them, then most likely you will have to replace the old design with a new one purchased from a car store.
If the motorist understands how to change the radiator and independently dismantled the old unit, he must remember that when reassembling the radiator it is necessary to replace the old rubber gaskets, since the old ones will most likely contribute to fluid leakage.
After the car owner carrying out the repair selects from the accessories presented in the auto shop the heater radiator that is better than the others in terms of technical characteristics, it is necessary to reassemble the dismantled components in the reverse order. Along with other elements that need to be replaced, it is important to change the clamps located in the power unit compartment. It is also better to remove all cracked hoses and put new ones in their place.
After complex and time-consuming work of replacing or repairing individual parts of the heating device, you need to adjust the cable responsible for opening the stove tap. This device must ensure both full opening and tight closing of the tap.
The last steps are to check the existing joints and fasteners, which will prevent further leakage. Do not forget about the need to remove the air lock that is in the cooling system. This can be done by opening the expansion tank and activating the motor for just a few minutes. After this, you can add the missing fluid to the system, install the glove compartment back and install the radio panel.
Diagnostics and restoration of performance
When removing a part, first of all you should pay attention to the integrity of the tubes. If there are obvious signs of damage, you should purchase a new radiator. Some of the damage can be soldered, but this is not very reliable. Therefore, it is still recommended to install a new heater.
If there are problems with the flow of fluid into the radiator, you should first check the condition of the tap. Due to the nature of its design, it often becomes clogged with various deposits. If liquid does not pass through it, then a new bypass device should be installed. Experienced car owners prefer to install cranes from Volkswagen. They are completely suitable here, and their service life is much longer.
Also, a problem with weak heating can occur as a result of a large number of deposits directly in the radiator. To fix the problem, you need to flush the tubes. To do this, take 300 grams of acid per 5 liters of water. The radiator is washed with the resulting solution. The easiest way to force the cleaning solution through the tubes is to use a compressor. It can be used for quick cleaning. If there is no compressor, you will have to do everything manually. To do this, use a watering can to pour cleaning liquid into one of the nozzles. But keep in mind that such work will take quite a lot of time. If after all the manipulations it was not possible to achieve normal permeability of the tubes, then you will have to buy a new radiator.
Repair as a way to solve the problem
In some cases, you can try to repair the fan using fairly simple manipulations. Repairs are carried out quickly and without complications if you have already had to disassemble and reassemble your favorite “six”.
Signs that the stove is still “alive”, but requires some intervention, can be the following signals:
It is when the heater squeaks or makes noise that you can think about trying to repair the problem unit.
If your heater makes a lot of noise, try the following.
Remove the fan and clean off accumulated dirt and dust. Just don’t forget to remove the ground first, since you are working with the electrical component of the VAZ-2106
For instructions on how to remove the fan, see the replacement section. Pay attention to the presence of axial play in the heater motor. You can check this yourself
If there is any play, it should be eliminated. Use a fluoroplastic washer. Please note that after the manipulations have been completed, there should be a small gap between the elements to minimize friction. It is recommended to lubricate the bearings with a thick compound that does not respond to temperature changes (MS 1000 is suitable). Next, disassemble the motor. Make the required number of washers, lubricate them and return them to the electric motor. Attempting to lubricate with engine oil will only give a temporary effect.
If the heater produces an unpleasant squeak, then you should resort to such manipulations.
- Unclip the casing along with the engine and airflow, which goes to the feet of the passenger and driver. In total, the VAZ-2106 has 4 fastening elements. To the left of the heater above the dashboard there is a negative wire that needs to be unscrewed.
- Now you remove the wiring from the button to turn on the fan. You need 2 outer wires.
- That's it, you can remove the bottom plastic with the engine. The motor is removed by removing a pair of metal brackets and installing a new one in its place. Experienced VAZ workers advise choosing a motor with bearings, since it is more reliable and durable.
- We put everything back together in reverse order, and there is no squeak.
DESCRIPTION OF PIPES VAZ 21073
What a set of pipes for a VAZ 2107 with an injection engine looks like is shown in the figure below:
RICE. 1. A set of rubber pipes for the VAZ 21073 “injector”.
- Outlet pipe
- Inlet pipe,
- Water pump coupling,
- Bypass pipe.
1. Outlet pipe - popularly called the lower radiator pipe. Catalog number 2105-1303010.
The lower pipe is designed to connect the lower part of the cooling radiator to the thermostat. The pipe removes liquid from the radiator and supplies it to the thermostat. It is also used on VAZ “classic” cars with carburetor engines.
2. Inlet pipe – popularly called the upper radiator pipe. Catalog number 2123-1303025. It supplies coolant to the upper part of the radiator of the engine cooling system. It can also be used as an outlet pipe on a Niva - Chevrolet.
3.Water pump coupling - installed between the thermostat and the pump. Its catalog number is 2103 - 1803092. It supplies coolant from the thermostat to the water pump. It is also used in all VAZ “classic” engines. People also call him “shorty”.
4. Bypass pipe - connects the top of the thermostat and the exhaust pipe of the engine cooling jacket. Catalog number 2101 – 1303090. It is also called “corner”.
LOCATION OF PIPES VAZ 2107
Next, we will look at where and how all these pipes are located using the example of a fragment of a VAZ 2107 engine:
RICE. 2. VAZ 2107 engine cooling system.
1. Outlet pipe. 2. Supply pipe. 3. Water pump coupling 4. Overflow pipe. 5. Hose for supplying hot fluid to the heater radiator. 6. Expansion tank. 7. Engine cooling jacket. 8. Radiator cap. 9. Engine cooling radiator. 10. Fan casing (diffuser). 11. Radiator cooling fan. 12. Lower radiator support. 13. Water pump pulley. 14. Liquid outlet pipe from the heater radiator. 15. Water pump belt. 16. Water pump. 17. Exhaust pipe, engine cooling jackets. 18. Thermostat. The arrows here indicate the direction of movement of the coolant.
REASONS FOR MALFUNCTION OF RADIATOR PIPES IN VAZ 2107
The cooling system pipes are replaced when it is discovered that the coolant level is decreasing over time. If you find this in your car, then carefully inspect all the pipes. Sometimes it happens that one of the clamps is loose, and simply tightening it is enough. In some cases, the leak appears in the cooling radiator itself.
Then you will have to change it if you have an aluminum radiator, and if you have a copper radiator, then soldering the radiator will save the situation. But, since we have a different topic today, we will consider the case when liquid leaks due to a defect in the rubber pipes of the cooling system.
Most often, cracks appear on the rubber at the places where they are secured with clamps. This can be detected when leaks appear. It is necessary to slightly bend the pipe in this place and then this crack will immediately become visible. As an example, I will give you the photo below:
RICE. 3. A crack in the pipe where it is secured with a clamp.
Sometimes they install pipes that are not quite suitable in shape and bends. Then either stress or deformation occurs in the material. It is in places of deformation that cracks most often form (or even the rubber breaks off completely) and liquid begins to flow out through them.
It also happens that the pipes burst altogether, as shown in the figure below:
RICE. 4. Broken main radiator pipe.
REPLACING RADIATOR PIPES VAZ 21073
Before replacing the VAZ 21073 pipes, you need to remove the plugs from the radiator and expansion tank. Let's prepare a hose of a suitable diameter and some kind of container, maybe an old canister, but not less than 10 liters. According to the passport, the cooling system of the VAZ 2107 contains 9 liters of liquid.
Then we find the engine drain valve. It is located at the bottom of the block. We put one end of the hose on the fitting of this tap. We insert the other end into a container, which we prudently placed below the engine level. If we install it anywhere, it may turn out to be higher than the engine level. In this case, the cooling system fluid will not leak from the engine.