Especially for our customers and members of the vk.com/club81452708 group, we have made step-by-step instructions with photos on how to replace factory seat covers using the example of Lada Priora seats, similar ones are found on the VAZ 2110-12. This is the first part and it will clearly show how to replace the front seat covers.
1.11) The first thing you need to do is take the seats out of the car; those who don’t know how to do this are written in detail here: www.vazclub.com/lada/prio…na-perednego-sidenya.html
1.12) We begin to disassemble our seat, to do this we need to unscrew the 4 bolts on the sides with a “10” key
1.13) Fold the backrest and remove it using a flat-head screwdriver.
1.14) Pull out the headrest, use a screwdriver to pry up the plastic plugs, and remove them.
1.15) On the underside of the back, bend 8 fasteners with a flat screwdriver.
December 18, 2016
This review with video instructions will tell you how to put seat covers on correctly and quickly.
In the video, an Avtoprofi expert will show and teach how to correctly and quickly put on seat covers with a separate fitting pattern on car seats.
For those in a hurry, here are brief step-by-step instructions for installing covers on the rear and front rows. But we recommend watching the video anyway – it’s interesting.
Installing covers on the front seats
It is better to remove the seats - this way the tension will be as tight as possible and without wrinkles.
If the covers have a separate putting on pattern, then first put the cover on the chair cushion.
- Put on the cover;
- Tuck the tongue between the pillow and the backrest;
- Spread the material around the entire perimeter.
- We first fix it with long thin elastic bands - we put them under the seat, stretch them and tie them together.
- We finally fix the lower part of the cover using installation rubber bands with hooks at the bottom of the seat.
car owners were advised to purchase a strong nylon cord from a fishing store and sew it to the covers instead of ribbons. With the Avtoprofi models, such efforts are not required: all models are pre-installed with wide stitched elastic bands with stainless steel hooks.
- The tongue of the upper half of the cover also fits between the pillow and the back.
- Then the fabric of the cover should be pulled down with a slight movement and smoothed so as to pull the material down as much as possible, towards the tongue.
- The cover is pulled over a tongue on the back of the chair, like leather on a drum.
- With maximum tightening, the front part of the cover is literally imprinted into the shape of the chair.
- The tongue is inserted under the back of the cover and secured with Velcro.
A little trick: holes for the headrest rods in the cover can be made using a screwdriver or... A regular cigarette!
Guide to replacing seats on a VAZ 2114
- Re-upholstery work does not require much space. This can be done both in the utility room and directly in the apartment. The main thing is to do everything step by step, not the whole salon at the same time. It is advisable to start work from the front seats. The upholstery is attached by the manufacturer to special hooks; they will be immediately visible after removing the old fabric. It is recommended to use nylon ties instead of these hooks. Be sure to remove the metal spokes from the old upholstery; they will be used when stretching the new set.
- Check the condition of the foam. As a rule, it is no longer in its best condition, especially in the front seats. If the foam rubber is not pressed through, then, in principle, it can be left or partially replaced.
Advice: if it is not possible to replace the seat foam with a new one, when putting on the knitting needle, retreat 2-3 centimeters from each edge. Thus, in the middle there will be a fastening through the material, and along the edges there will be a knitting needle on a knitting needle.
- The procedure for replacing the rear seat upholstery is almost identical. We insert the knitting needles from the old cover into the new upholstery and secure the fabric.
- If after replacing the upholstery you notice dents or wrinkles, it’s not a problem. In order for the fabric to shrink completely, you need to apply a little more effort. Use a regular hairdryer to dry the fabric, then iron it through the fabric with plenty of steam. The iron can be replaced with a steamer; as a last resort, if there is neither one nor the other, we use a regular water spray. From cases made of leather or Alcantara, remove stains and glue residues.
- Since the reupholstery procedure involves the complete removal of the seats, take advantage of this to carry out related work: major cleaning of the interior with washing of the ceiling, installation of heated seats, painting of frames, and so on.
Even without experience, replacing the seat upholstery of a VAZ 2114 will take a maximum of 6-7 hours of work. A little patience and our recommendations, and you will be rewarded with a clean and comfortable car interior.
Installing car covers on the rear row
Now you need to install the covers on the back row of the car. We remove the pillows and the backrest. Leave the back in place.
The donning pattern here is exactly the same as with the first row:
- On the back of the rear seat, you need to remove the seat belts, if present, and then fold the backrest.
- The cover consists of two halves and is positioned so that its zippers coincide with the fault lines of the back.
- Once put on, the zippers are closed and the two separate halves of the cover become one.
The rear covers are secured to the backs of the chair using elastic bands and hooks (everything is included in the kit).
On headrests, the covers are placed on top and secured with elastic bands.
Improved suspension and chassis
For a powerful engine, the car's suspension must also match. The factory suspension will not provide the required stability, unlike a rigid one, and besides, the factory rear suspension contributes to strong skidding at speed, especially in the cold season. Suspension rigidity is achieved by placing rubber cushions under the springs, installing springs from a VAZ 2121 Niva car and replacing standard oil shock absorbers with gas ones. Stability will also be facilitated by replacing the reaction rods with an A-arm, which provides clear vertical suspension travel without lateral displacement.
Car skidding at speed and in turns can be eliminated by improving the rear suspension, namely:
- replacing the lateral stability rod (Panhard rod) with a Watt mechanism;
- installation of a stabilizer on the rear axle with fastening of its ends to the car body;
- complete replacement of the suspension with another: semi-independent or independent.
As a result of replacing the suspension, you will have to change the drive, since the standard rear axle will not provide torque transmission during suspension operation. In this case, either the rear axle is installed under an independent suspension of the rear wheels, for example, a very common case when the rear axle of an Opel Omega A is installed.
Another option involves changing the drive from rear to front. In this case, you need to either change the engine and install the engine of any other front-wheel drive car, for example with a VAZ 2109, or install a gearbox with CV joints Moskvich 2141, since the first cars of this model were produced with the main engine from the VAZ 2106 with a volume of 1.6 liters, only with gearbox assembly and differential for front-wheel drive. This option will be the cheapest, unlike a complete engine replacement.
To ensure the safe operation of a vehicle, a powerful engine also requires good brakes to quickly reduce speed or stop. Absolutely every owner of a classic Lada model knows that the brakes on this car are a sore subject. The rear drum brakes are not that frustrating, but the front disc brakes leave much to be desired. A disease of a two-piston caliper is the frequent souring of one of the working pistons, as a result of which, in addition to uneven wear of the brake pads and disc, the braking of the car itself is not effective and it can be carried to the side.
Without solving the problem, the piston boot breaks, and replacing it will take a lot of precious time and money from the owner. If you take good care of the braking mechanisms of the front wheels, then the correct operation of the two-piston calipers provides very good braking, but most owners replace them with the calipers of VAZ cars of the Samara family. They are easy to maintain and also provide good braking of the car. It is also possible to replace the calipers and discs with sports ones, since sports calipers allow you to quickly reduce speed or stop the car, and ventilated discs will increase the service life of the brake pads and thereby increase braking efficiency.
Additional tips:
- The tighter the material adheres to the case, the longer they will last. Therefore, it is better to take the time to remove the seats before installation.
- If the seats have built-in side airbags, then choose the appropriate cover models.
- The unraveling seam must be placed on the side where the Airbag pillow is located.
- Remove the seats. At least the front row. The quality of planting will be higher, and it will take less time. Removing the seats is quite simple: turn off the electrics and unscrew the mounting bolts of the slide.
- Be sure to turn off the ignition before removing the seats and rear sofa!
- There is no need to remove the plastic on the sides of the seats. In principle, it is not suitable for removal and returning it to its place can be problematic. To better push the cover fabric between the seat and the plastic, it is good to use a smooth metal plate (about the same as what doctors use to examine the throat).
- Squeeze the seat upholstery while pulling the cover. This will make it easier to install the covers without damaging the fabric around the seams.
- It’s unlikely that anyone is going to install seat covers in the cold, but just in case, it’s worth pointing out that it’s best to install protective coverings at above-zero temperatures. Especially if the covers are made of natural or artificial leather (eco leather). These materials “tan” and lose elasticity at low temperatures, so if you don’t have a warm garage, then summer is the best season to install covers.
PANEL UPGRADE
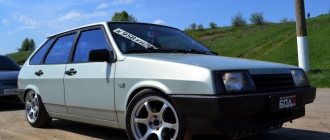
The appearance of the dashboard on the very first Twelves was very far from ideal. In 2006, AvtoVAZ engineers tried to correct this situation and began installing “European”-style panels on these cars. And today, owners of old cars are modernizing their cars by installing Europanels on them.
Europanels began to be installed on the VAZ 2112 only in 2006
SEQUENCE OF OPERATION
To remove the panel you only need a couple of tools: a knife and a Phillips screwdriver.
- The instrument unit is removed along with the decorative visor as described above.
- The car glove compartment opens. There are 3 self-tapping screws inside; they are unscrewed with a Phillips screwdriver.
To remove the VAZ 2112 panel, you only need a knife and a screwdriver - There are 4 plugs located near the central control unit. They are pryed with a knife and removed. The screws located under them are unscrewed.
- The safety block opens. Inside there are 2 self-tapping screws. They also get out.
- The old dashboard trim has been removed from its fasteners. All that remains is to remove it by pulling it towards you and up.
- The removed trim is replaced with a new europanel, the fastening screws are returned to their places (all the mounting holes for the old and new trims match, so there will be no problems).
Car compatibility
Approximate list of compatibility of covers size S*
| Audi | A1, A2 |
| BMW | Episode 1 (04 - 07) |
| Chery | |
| Chevrolet | Lanos, Lacetti, Aveo, Spark |
| Citroen | C2, C3 |
| Daewoo | Tico, Matiz |
| Fiat | Panda, Punto, Albea, 500 |
| Ford | Ka, Fiesta, Fusion |
| Honda | Jazz, Civic |
| Hyundai | i20, i30, Atos, Getz, Accent |
| Kia | Rio, Picanto |
| Mazda | 2, 3 |
| Mitsubishi | Colt |
| Nissan | Note, Micra |
| Opel | Tigra, Corsa, Astra |
| Peugeot | 1007, 107, 206, 207, 306, 307, 308 |
| Renault | Logan, Symbol, Twingo, Clio |
| Seat | Ibiza, Leon |
| Skoda | Fabia, Roomster |
| Suzuki | Swift, Ignis, SX4, Jimny |
| Toyota | Aygo, Yaris, Vitz, Corolla, Echo |
| Volvo | C30 |
| VolksWagen | Lupo, Polo, Golf |
| VAZ | 1111, 2104-2109, 21099, 2110-2121, Granta, Kalina, Largus, Priora |
| UAZ | 3151 Hunter |
*The list is provided for informational purposes only and is not complete.
Sample list of vehicles with M-size seats*
| Audi | 80, 90, 100, 200, A2, A3, A4, A6, TT |
| BMW | Series 1 (since 2010), Series 3, Series 5, Series 7, X5, Mini One, Mini Cooper, X3, X6, M6 |
| Chery | Amulet, Tiggo |
| Chevrolet | Astro, Blazer, Captiva, Tracker, Aveo, Lacetti, Lanos, Niva, Cruze, Cobalt, Epica |
| Chrysler | Town&County, Voyager |
| Citroen | AX, BX, ZX, Berlingo, Jumper, Saxo Visa LN, Xantia, C2, C3, C4, C5, C8, XM |
| Daewoo | Espero, Laganza, Magnus, Nubira, Gentra |
| Daihatsu | Charmant, Sirion, Move, Rocky, Feroza |
| Dodge | Caravan, Caliber |
| Fiat | Brava, Bravo, Idea, Marea, Weekend, Panda, Punto, Stilo, Doblo |
| Ford | Escort, Ka, Maverick, Ranger, Focus, Focus II, Focus C-Max, Fusion, Escape, Galaxy |
| Great Wall | Safe, Deer |
| Honda | Concerto, CR-V, HR-V, FR-V, Logo, Accord, Civic, Jazz |
| Hyundai | Lantra, Matrix, Sonata, Santa Fe, Tuscon, Tiburon, Grandeur, Elantra, Solaris |
| Kia | Ceed, Cerato, Clarus, Magentic, Shuma, Rio, Spectra, Sorento, Sportage |
| Mazda | 626, 121, 2, 3, 6, 323 S, RX-7, RX-8, MX-5, CX-5, CX-7, CX-9, Familia, MPV |
| Mercedes | 100, 190, A-Class, C-Class, E-Class, S-Class, R-Class, CLK, SLK, GL, ML |
| Mitsubishi | Galant, Carisma, Colt, Lancer, Outlander, Delica, Diamante, Dingo, Dion, Eclipse, Pajero, Mirage |
| Nissan | Maxima, Primera, Avenir, Murano, Note, Cedric, Liberty, Cefiro, Pathfinder, Skyline, X-Trail, Terrano, Patrol |
| Opel | Calibra, Kadett, Manta, Tigra, Agila, Astra, Combo, Meriva, Signum, Vectra, Zafira |
| Peugeot | 106, 204, 205, 306, 307, 309, Partner, 406, 407 |
| Renault | Clio, Laguna, Megane, Scenicll, Twingo, Scenic, Modus, Safrane, Sandero, Logan, Duster |
| Rover | 200, 214, 400, Mini, 45, 75, ZT, ZS |
| Seat | Alhambra, Altea, Arosa, Cordoba, Ibiza, Leon, Toledo |
| Skoda | Favorit, Felicia, Forman, Fabia, Oktavia, Superb |
| SsangYong | Musso |
| Subaru | Impreza, Legacy, Leone, Forester, Outback, Tribeca |
| Suzuki | SJ 410, SJ 412, Alto, Baleno, Swift, Grand Vitara, Ignis, Wagon R, Jimny |
| Toyota | Camry, Carina, Lavd Cruiser, Lite Ace, RAV 4, 4 Runner, Starlet, Tercel, Avensis, Corolla, Prius |
| Volvo | C30, S40, S60, S70, S80, V40, V40-Cross Country, V50, V60, V70, XC60, XC70, XC90 |
| VW | Golf, Golf II, Jetta, Scirocco, Bora, Polo, Passat |
| TaGAZ | Tingo ('12- ) |
| GAS | 3102, 3110, Siber |
| UAZ | 3160, 3162, 3163, Patriot, Pickup |
About comfort and coziness in the car. Online store OblMarket.Ru
All car covers from leading companies that are represented on the Russian market have almost the same approach to attaching this accessory. These are either elastic bands with hooks or synthetic ribbons. And it doesn’t matter whether you buy expensive custom cases or more affordable universal ones, installation remains the most important step in this matter. In both cases, you need to either turn to specialists, or carefully study the instructions and do everything yourself.
To confirm the above, we would like to present covers for the front seats of three companies. These are PSV, Avtoprofi and Akuba
As you can see, the mounting principle remains the same
Now let's start the process itself
Of course, you can install covers on your seats without removing the seats themselves, but in this case the installation time will increase significantly, and on some models the covers simply cannot be put on without removing the rear sofa. From experience, the rear sofa is usually secured with two or three bolts and there are no difficulties with the installation and removal process.
Therefore, it is better to spend a little more time and effort one time, but then enjoy the results of your work for a long time. Well-installed car covers last many times longer and are pleasing with their appearance!
We took a fairly standard, time-worn leather car seat.
First we put the cover on the seat itself.
We insert the tongue with fastenings between the backrest and the seat
Next, take the fastening hooks and connect them with elastic bands. We begin to fasten the middle. And we do this on both sides, after first stretching the cover so that the wrinkled places disappear. We try to thread the rubber bands under the structural parts of the seat so that they do not subsequently interfere with the movement of the seat when adjusting the chair.
The middle is fixed - we do the same with the sides.
Now the seat cover “fits like a glove.”
Next we proceed to the back of the seat. We put the cover on the back and also insert the front tongue between the seat and the back.
Then we tighten it very well (holding the tongue of the cover) and secure the hooks with elastic bands under the seat.
Then we do the same procedure with the back of the car cover.
The front seat got new clothes and looks great
Well, who said that universal cases are already individual models? Yes, I’ll make a reservation, not all universal covers can “fit” just as well. And have you already understood why? The side inserts and stretchy back play a very important role in this matter. It is these details that allow the material to “flow around” the very shape of the car seat.
Let's continue installation manipulations with the rear seat. The rear seat is the most difficult issue to install. Because there are many types of it. And, of course, you can’t describe everything. The main thing is to understand the principle. The front seats are also all different. And below, under the seat itself, you can fasten it using a rope, which you stretch from hook to hook, as if weaving a mesh, and to any holes that are available under the seat. The main thing is that the cover is well secured and does not have folds or wrinkles.
On the rear seats (in the back), for convenience, I myself stretched a wire, for which it was then convenient for me to attach the hooks. You can do the same if you do not have fastening hooks in the back. Or you can use, again, a rope.
We also start with the seat.
But I would like to dwell a little on the zippers, which add versatility to the covers.
In those places where locks are installed, car covers can be divided. To do this, you just need to cut the elastic band that secures the two parts of the zipper and unfasten the lock
And those elastic bands that are sewn along the entire lock are fastenings that allow the car cover not to bulge.
Hooks are also attached to them, but you already know what to do next.
Also, due to these locks, car covers can be shortened in width. Unfasten the two zippers and remove some of the honey between them. And reconnect the locks. The cover has become shorter. The principle is clear. Let's continue with the installation.
We align the cover on the seat and start from the middle by attaching the elastic bands with hooks. First, on one side (preferably from the front, so that your case does not move backwards due to the tightening), and then the middle, but only from the back side. And we do this around the perimeter. Then we look at the result of our work, and if it is necessary (there are gaps left somewhere), then we tighten the elastic bands in the right places.
We do the same with the back.
Once again we check the degree of tension and the absence of wrinkles and install the seats back into the cabin.
Front seats
Consistency, accuracy and attentiveness are all you need to successfully install covers on the front seats.
- It is not necessary to remove the front seats to install the covers. All work can be done directly in the salon.
- Remove the head restraints from the seats.
- Pull the cover over the top of the back of your chair.
- Usually there are three elastic bands on the central seams of the covers. They must be passed between the back and the seat so that each element of the product is exactly in its place.
- Now we fix the position of the covers using hooks that are placed under the chair itself.
- Carry out a similar operation with the lower part of the chair.
- The locking hooks are also inserted from the bottom so as not to interfere with the driver and passenger.
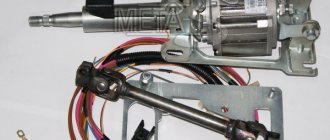
- All that remains is to pull the material onto the headrest. How to install a turbine on a VAZ 2110
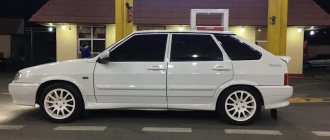
External tuning
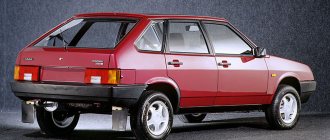
The outer part is the first place where pumping of the VAZ-2110 begins. Tuning the external structure includes several elements, which we will dwell on in more detail:
- Bumpers. These decorative protective elements are subject to various modifications. Of course, there are two options for making these parts. Firstly, stamped. There are several types of tuning bumpers from different ones, "Bogdan". They are fairly standard and are not aimed at improving aerodynamic performance. Secondly, there is also an individual order. In this case, the tuning studio calculates the aerodynamic characteristics. And due to the bumper, the streamlining of the car improves and the resistance to the flow of oncoming air is reduced.
- Door sills, like bumpers, perform aerodynamic functions, which improves air flow.
- Wing. Its main function is to reduce the vehicle's ground clearance, which allows air to flow over the top of the car rather than under it.
- The hood air intake serves as an additional engine cooler. It gets very hot at high revs and speeds.
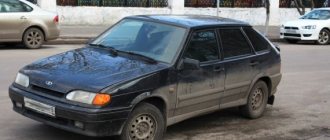
The VAZ-2110 can also be subject to external modifications. Tuning in this case includes individual painting and airbrushing. Usually this operation is ordered from tuning studios, but some motorists decide to do it themselves. In most cases it is unsuccessful.
Back row
Depending on the tailoring and manufacturer, these products may differ from each other. But mostly the installation principle is the same everywhere.
Self-tailoring
If you do not have the opportunity to buy ready-made covers, you do not like the prices or are not satisfied with other parameters, you can always try to make original, good covers with your own hands that are ideal for your VAZ 2114.
Example of a pattern diagram
We offer appropriate instructions.
- Remove the seats. This will make it much easier to take measurements and cut the material so as not to make a mistake with the dimensions.
- Take a regular old cover that is suitable for a VAZ 2114. Maybe it will be an old fabric cover from your own car.
- Space out the old cover to end up with several separate elements. For convenience, you can sign which element is located where relative to the seat.
- Place the elements of the ripped old cover on top of the material chosen for sewing new capes. It is advisable to work on a clean, flat surface. Use a marker to outline the contours, taking into account the allowances.
- Use foam rubber to give the covers extra softness.
- The cut foam rubber elements need to be glued with pieces of fabric or material that you took for sewing.
- Sew together the pieces of material glued with foam rubber from the wrong side so that the seam ends up on the inside. Watch the edges. They must fit together clearly.
- Along the edges of the elements, remove excess pieces of foam rubber with scissors and glue the back seams.
- Move the flaps of the new material to the sides and press them against the foam rubber.
- Use a hammer to tap all stitched seams.
- Sew the lapels using a double finishing stitch.
- Align the cover and iron it carefully.
- Put new products on the chairs.
- Give the covers some time to adapt to the chairs, do not rush to sit on them.
- Check the correct installation of the new set of covers, sit in the chair, make sure that everything is done correctly, nothing interferes with a comfortable fit on the seat.
- Return the chairs to their place with new, hand-sewn covers.
Carefully study the features of all the materials from which you can make your own covers today. If you have experience, you can get unique products not only in appearance, but also in the level of comfort that they will provide for you and your car.
If you are afraid to do such things with your own hands, contact specialized ateliers or simply order sewing of a cover in ordinary tailoring workshops. They have the materials and experience to do things like this. Or buy ready-made products.
There are many options. You will definitely find the ideal covers that will meet the requirements, wishes and features of the seats installed on the VAZ 2114.
Eco-leather
Eco-leather is an excellent modern material from which excellent cases
using the latest technologies. The material is breathable and does not contain polyvinyl chloride components, which ensures comfort for the driver and passengers and does not contribute to fogging of the back and legs when in contact with eco-leather. Covers for VAZ 2110-2112 (if they are put on correctly) look like the original Lada upholstery. How to sew covers and reupholster the seats of vases with your own hands. Due to special micropores, the products allow steam and moisture to pass through, but at the same time reliably retain water. How to open the door of a Lada car. How to change the radiator, removal and installation on a VAZ 2114. Air permeability indicators significantly exceed even the highest quality genuine leather. How to properly put seat covers on a VAZ - features. The only drawback is the rather high price.
Eco leather
Kinds
Let's start by discussing the types of covers. They can be classified by color and texture, but the most significant criterion is the material.
| Material type | Advantages | Flaws |
| Velours | With good quality, it creates a cozy, comfortable interior, lasts a long time, and does not require careful maintenance. | Heavy stains are difficult to remove and absorb odors |
| Textile | Cheap and varied in color and texture | Cheapness negatively affects quality and service life |
| Leather | Traditional solution, attractive appearance, easy maintenance | High cost, delicate, requires careful handling, gets very hot under the sun |
| Eco leather | Modern, high-tech material that breathes, does not fade, does not crack, can be cleaned and washed, and is not afraid of frost. | Limited range of colors, quite high cost |
| Leatherette | It has almost all the advantages of genuine leather, costs less, and is easier to care for. | May initially emit unpleasant odors |
| Animal fur | Soft, comfortable, unusual, create an original atmosphere in the salon | Bacteria and microbes may remain on them. You have to carefully and often care for the covers |
Eco leather in action
From all that has been said above, we can conclude that leather is an ideal option for those who are looking for a combination of quality, visual appeal and durability.
Why leather? Advantages and disadvantages
Let's discuss leather capes and their main characteristics in more detail. Today, many owners of the VAZ 2114 and others opt for this option. Why? Let's try to figure it out.
Let's start with the positive qualities. These include:
- Attractive and stylish appearance, emphasizing the solidity of the interior;
- Easy to clean, easy to wash covers;
- Impressive durability indicators subject to basic care rules;
- Adaptability to harsh climates, which is why the covers will not crack and harden in our frosts;
- Create a soft and comfortable place for the driver and passengers to sit;
- Pleasant to the touch, warm, not afraid of heat;
- The leather is not afraid of such contaminants as motor oil and animal hair, which turn fabric covers into unnecessary rags.
Leather capes
What are their disadvantages? There are only two that can be named, and they are quite controversial.
- The leather cover heats up in the sun, making it difficult to sit on the chairs with bare skin. The problem can be solved by simply covering the windshield with a reflector. All seats are heated, so this is a dubious drawback.
- High price. There is no arguing here, leather capes are really expensive. But the money spent is repaid by the longevity and reliability of operation of such covers. They last a long time and do not need to be replaced every year.
Despite the controversial disadvantages, leather cases have excellent advantages, which makes them the most attractive in the eyes of practical buyers.
Price issue
An important issue when choosing such products is their cost.
Not everyone is counting on long-term prospects, and cannot afford to spend a lot of money on the purchase of certain types of cases. But this position is not entirely correct if you are not going to sell your VAZ 2114 in the near future.
High-quality covers will provide you with comfort and coziness, and protect the seats themselves from wear. Therefore, we advise you to invest a normal amount, but buy some capes.
Prices directly depend on the material used to sew them, as well as on the specific manufacturer and region. Therefore, the price tags listed below may differ from those presented in your market.
- Leather - about 3.5 thousand rubles per set.
- Jacquard - approximately 3 thousand rubles per set.
- Velor and fur - approximately 4.8-5 thousand rubles.
- Genuine leather - from 5.5 thousand rubles and above per set.
- Fabric - you can find sets for 1.5-2 thousand rubles or more.
Covers or new interior?
Many VAZ 2110 owners are seriously thinking about upgrading their car. The original seats aren't great, but they certainly aren't terrible either.
Whatever one may say, a person always strives for maximum comfort. Therefore, thoughts about completely or partially replacing the interior are more than justified.
Finding completely new seats that would fit the “ten” is not difficult now. Some even manage to find leather goods. Whether to take such a step or not is a purely personal decision.
Cases are a much more budget-friendly and versatile solution. How to change the injector on a VAZ 2110 VAZ 2110 replacement. How to check the lambda, but the oxygen sensor can simply give a Lada VAZ 2110 - 2112. Even if you install a new interior
, you will feel sorry for spoiling it with regular use. Because? That's right, you decide to put covers on it.
Purchase and install a new salon
It makes sense only if the original VAZ seats give you discomfort, you are uncomfortable sitting in these chairs and traveling long distances on the road. If the question is purely about appearance, beautiful original covers can change the perception of the VAZ 2110 interior in the most amazing way, so it’s not worth spending money on a set of seats.
How to modify and tune a VAZ 2110 car?
In other words, make tuning and satisfy your own needs:
- Improve engine performance, that is, force it (if necessary) to deliver the required torque.
- Increase transmission characteristics - help the engine show its <<best qualities>>.
- Make the steering wheel comfortable, equip the car with good wheels and tires, shock absorbers and ventilated brakes. All this taken together will help you feel more confident and calm on the road.
- Installation of additional equipment: central locking, the latest security system, electric windows and a sound reproduction system - the main components of foreign passenger cars.
Often, fairly high-end cars are additionally equipped with a parking assistance system. - Changing the appearance allows you to highlight your car and make it as noticeable as possible among hundreds of similar ones.
Each car owner has an individual approach to external tuning and the concept of attractiveness, which allows one to significantly expand the field of activity and, thereby, implement any design solution.This could be a minor change in body elements, or it could be a circular installation of <<body kit in a circle>>.
In this case, the main condition must be observed: external tuning should be an organic addition to tuning associated with improving the technical characteristics of the units and components of your car.
The disadvantage of external tuning is the deterioration of the aerodynamic characteristics of the body
An objective assessment of this indicator can only be given in a special aerodynamic laboratory; Moreover, these studies have a fairly high cost.