Nissan Almera G15
produced in 2013, 2014, 2015, 2016, 2022, 2022, 2022, 2020 in Russia at the AVTOVAZ plant. This model is produced by the Renault-Nissan alliance, on the platform of the popular Renault Logan. In this publication you will find a description of the fuse and relay blocks of the Nissan Almera g15 and their diagrams with decoding of the elements. Let's highlight the cigarette lighter fuse and show you how to change it.
This model has 2 main fuse boxes, one in the passenger compartment, the other in the engine compartment. The number of their elements may differ and depends on the vehicle configuration.
Fuse box under the hood of Almera G15
Fuse box under the hood
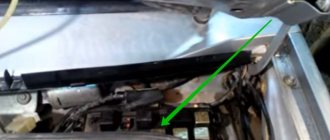
In the engine compartment, the Almera G15 mounting block is located on the left side, directly behind the battery. It contains fuses to protect the following sections of the electrical circuit:
- F1 – not used;
- F2 – power unit ECU, main relay coil of the engine control system (5A);
F3 – ignition coils, fuel pump, power unit control system (30A);
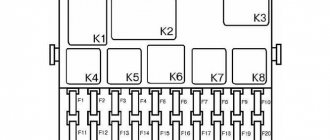
Fuse diagram in the block under the hood
Relays are also used:
- K1 – accelerated operation mode of the air conditioner cooling fan;
- K2 – air conditioner;
- K3 – slow operation of the cooling fan of the air conditioner or engine radiator for the Almera G15 without air conditioning;
- K4 – ignition coils, fuel pump;
- K5 – power unit control programs;
- K6 – cigarette lighter;
- K7 – fog light;
- K8 – heating complex.
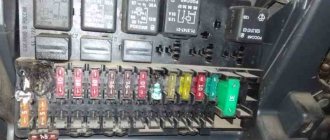
Blown and good fuses
Location and electrical diagram
In the Nissan Almera classic n16 there are several fuse blocks responsible for the operation of electrical equipment. One of them is located in the car interior, the other two are in the engine compartment. On the front side of the power supply unit, located in the vehicle interior, there are several fuses (hereinafter referred to as fuses) and relays. On the other side of the device there are three more main relays.
There are two power supplies in the engine compartment. One of them contains relays, and the other contains only fusible devices. Below are diagrams of all three blocks, as well as a description of the fuses in them.
PSU in the cabin
Layout of fuses on a power supply installed in the car interior. What are these elements responsible for? Below is a table with the designation of each PP.
Table of designations for each part of the unit located in the car interior
You may also have noticed several relays whose purpose is not described in the table. They should be highlighted separately, since the relays are designed for more powerful voltage consumers.
| Number | Purpose |
| R1 | This component ensures the functionality of the headlight lamps, that is, it is responsible for both low and high beam. |
| R2 | The second component by number ensures the functioning of the throttle valve. If it fails, the operation of the car will be incorrect or impossible. |
| R3 | Responsible for the operation of electric windows. |
| R4 | Ensures the functionality of the rear fog lamps. |
As for the device number 22, which is responsible for the functionality of the cigarette lighter. In Nissan Almera classic n16 models, cigarette lighter failure is a common problem. It can even be called a disease, since many motorists encounter this malfunction.
If you notice that the cigarette lighter is not working, first check the functionality of the fuse. Perhaps that is where the problem lies. However, many car owners use their cigarette lighter as a power source for various electrical consumers. In particular, these can be video recorders, special air fresheners, DVD players and laptops.
Of course, even with a voltage converter, the cigarette lighter is simply not able to cope with such a task. So if it is the PP that fails, then you can consider yourself lucky. Otherwise, you will have to change the cigarette lighter, even worse if this causes the mounting block itself to burn out.
As you remember, at the beginning of the article we mentioned that there are also several relays on the back of the power supply, which is located inside the car. If the block is completely dismantled, the relays will look approximately as shown in the photo.
Three relays located on the back side of the mounting power supply in the car interior
| Number | Purpose |
| R1 | Ensures the functioning of the ignition coil. If it fails, starting the engine will be impossible. |
| R2 | Responsible for the operation of the engine supercharger. |
| R3 | This device ensures the operation of additional voltage feeders, that is, in fact, all electrical accessories. |
PSU in the engine compartment
First, let's look at the diagram and description of the power supply with fusible devices, which is located in the engine compartment between the battery and the engine.
Diagram of the power supply located in the engine compartment, between the battery and the internal combustion engine
Description of the components of the power supply installed in the engine compartment, between the battery and the engine
Next, we will describe the diagram of the mounting block with the relay, which is installed in the same place, in the engine compartment, only to the left of the engine, if you stand facing the hood.
Diagram of relays installed in the block, which is located in the engine compartment, to the left of the engine
| Number | Purpose |
| R1 | Responsible for the operation of the third radiator fan relay of the cooling system. |
| R2 | Without this element, the operation of the front fog lamps will be impossible. |
| R3 | This component is responsible for the operation of the air conditioner. |
| R4 | Steering wheel signal relay. |
| R5 | Also ensures the functionality of the radiator fan. |
| R6 | Responsible for the operation of all headlights and lights in the vehicle interior. |
| R7 | The operation of the starter depends on this relay. |
Appearance
Such a miniature device typically consists of several interconnected plates. The entire body is usually covered with organic glass. Manufacturing can be made from different materials, but the common thing is that an element that can easily melt is inserted between them (the latter is precisely part of the general closed electrical circuit).
Check the fuse for functionality.
So, there is a suspicion that the Nissan Almera N15 (N16) does not start due to a blown fuse? To get rid of the problem, you need to know where these parts are located.
Each element of the safety system in the cabin must be marked. Usually this is the letter F - it denotes the ratio of the element itself to the circuit, which will have low power (on fuel pump relay diagrams it is usually marked as F13). In accordance with this, the supplied current itself can be calculated: to do this, the power of the device must be divided by 220 - the result will be a current with a unit of measurement in amperes.
Nissan fuel pump fuse diagram
These numbers will be useful to us when selecting new parts - here the current will be equal to 15 amperes. Another piece of advice from experts will come in handy - it’s best to use original spare parts (cheap Chinese ones can lead to constant replacement).
Device and malfunctions
Before proceeding directly to the repair itself, it is advisable to understand the structure of the device being repaired. Otherwise, some problems and “inconvenient” moments may arise during a relatively simple operation.
A block is a system of fuses combined into one unit, each of which is built into the electrical circuit of a specific device. This element is necessary to protect the circuit from a number of unfavorable processes, including potential ignition of the wiring due to a short circuit. Such unpleasant phenomena occur due to excess current flow in the electrical circuit, which is associated, for example, with a malfunction of the device or wires. The fuse has a lower maximum current threshold, so it blows out first and immediately de-energizes the entire system. As you can see, a knot of this type is very useful and requires due attention.
Due to the specifics of its operation, a block or individual fuse can fail for a number of different reasons:
- malfunction of any device;
- electrical short circuit;
- too high current flowing into the system (often happens when the generator breaks down);
- incorrectly carried out repairs to the electrical unit of the car;
- manufacturing defect;
- excessive wear.
Having considered the above potential problems that caused the fuse to blow, we can conclude that sometimes it will be necessary to correct faults in some other components of the Nissan Almera. Of course, if you have a desire to achieve normal functioning of the car's electrical system and safe operation.
If the starter does not turn as it should, many owners immediately blame the battery. Yes, a low battery can affect starting, especially if the car has a tricky alarm system (we'll talk about that later).
But the battery can only be changed after it has been checked.
Checking the battery with a tester
A new battery is worth buying if:
- the electrolyte density of the old battery is less than 1:18-1:20 g/cm3;
- the battery does not hold a charge - overnight it discharges to 11.7 V and below;
- the electrolyte has sediment or any impurities;
- Battery walls are swollen.
How to change the oil in a Renault Duster box
Nissan Almera G15 2016
Duster manual transmission oil is replaced every 10-15 thousand km or at the next maintenance. To carry out the work, take socket heads, a wrench, and a clean rag. To top up, use a pressure syringe. Lubricant should be purchased with characteristics similar to those already filled.
Servicing a manual transmission with your own hands is not difficult; every experienced driver can handle the task.
They begin changing the oil in the Duster gearbox by analyzing the fluid level in the system. It’s easy to do this yourself, although some motorists also turn to service stations. Sequencing:
- Drive the car onto a viewing hole, overpass or lift.
- Make a check from the side through the inspection hole onto which the threaded plug is screwed. The simplest option is to thoroughly wipe the manual transmission crankcase around the plug using a clean rag and remove the plug.
- Place your finger in the hole and assess the amount of liquid in the system, immediately check the aroma, shade, degree of contamination. When the level is very low, a control sample is removed with a suitable object such as a clean screwdriver.
If there is a deficiency, but the general condition is normal, adding lubricant will suffice. If the waste is dirty, has changed in smell or appearance, drain the oil completely.
Regular maintenance is necessary for the smooth operation of the manual transmission.
The transmission is topped up until the oil begins to pour out through the control hole. Then the threaded plug is returned and tightened sufficiently tightly. When measuring the aroma, shade of a lubricant, or the presence of a large number of foreign inclusions, a partial change will not solve the problem. You can get to the ventilation plug by removing the battery and preparing the site.
contact Group
If the starter relay does not turn on, it is worth inspecting the wire of the ignition switch contact group.
The “disease” of the Nissan Almera Classic is a frayed wire between the air filter and the left pillar. If the ignition switch contact wire is damaged, the car will not start.
Ignition switch contact group
Block in the car interior
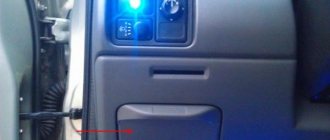
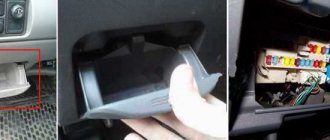
It is located in the instrument panel on the left side, behind the glove box.
Back and front side
Scheme
Description
- 10A Mirrors
- 10A Brake Light Bulbs
- 15A Electrical socket
- 7.5A For additional electrics
- 15A Hazard alarm and turn signals
- 10A For additional electrics
- 20A Heated rear window
- 10A Oxygen sensor
- 10A Additional electrical package
- 10A Electrical package
- 10A Automatic transmission controller
- 10A ECU (i.e. all control of all turn signals, backlight and main power supply of the dashboard, backlight of the panel where the stove is)
- 10A Interior lamp
- 15A Interior fan electric motor (heater/air conditioner)
- 10A Air conditioner
- 15A Interior fan electric motor (heater/air conditioner
- 10A Fuel injection system
- 10A Airbags
- 20A Additional electrical package
- 10A Motor Controller
- 10A Start signal
- 15A Cigarette lighter
- Not used
- 20A Additional electrical package
- 20A Windshield wiper
- 7.5A For additional electrics
- 15A Front and/or rear window washer (on the steering column switch)
- 15A Rear window washer
- 15A Fuel pump
- 10A Speedometer, tachometer, temperature and fuel level indicators
- 10A ABS
- 10A Reserve
- 15A Reserve
- 20A Reserve
Fuse number 22 at 15A is responsible for the cigarette lighter.
Face Relay
- R1 Headlight relay
- R2 Throttle control relay
- R3 Power window relay
- R4 Rear fog lamp relay
Rear side relay
- R1 Ignition relay
- R2 Blower motor relay
- R3 Relay for additional equipment (electrical accessories)
Most consumable item
If you look at the diagram showing the fuses for the Nissan Almera n16, you can see that element number 22 is responsible for the operation of the cigarette lighter. In fact, this one turns out to be the most “problematic”, since it breaks down most often. In itself, it turns out to be incredibly relevant even for those who do not smoke because it is used to recharge and power a wide variety of consumers. These include both DVRs and laptops (the latter, however, work using special converters).
Cigarette lighter Nissan Almera n16
There are two options for failure here - either you will have to install a new “defender” (this will still be considered “small sacrifices”), or you will have to change the cigarette lighter itself
It's important to do it right
The replacement process will be similar in both the cabin and engine versions. You can consider the process of replacing the salon version:
- The hood opens and the battery is disconnected.
- Next, remove the cover from the element where the block itself is located.
- Carry out an inspection to identify a failed cigarette lighter fuse.
- Remove using tongs if one is found.
- Install the new one and reassemble in reverse order.
- Don't forget to connect the battery.
Video on replacing the cigarette lighter fuse:
How to dismantle the Nissan Almera N16 automatic fuse?
A similar part on a Nissan Almera can be located in a variety of places - it all depends on the type of panel in this car:
- With a large and high panel, the required element can be located at the feet of the passenger sitting behind the front seat.
- On a European-style panel, it may be located under the heater control device.
The Nissan Almera Classic fuel pump fuse is located in the interior unit (not the main unit, but the additional one). There can be as many as two of them in this brand of transport:
Fuel pump fuse for Nissan, removal instructions
- under the cover located near the CC lever;
- on the right side of the panel.
Dismantling and subsequent installation of a new fuse is quite simple. To do this you need to do the following step by step:
- The battery is switched off during work.
- Remove the casing to the left of the pedals (to do this you need to unscrew only one plastic nut). Usually, using a size 10 open-end or socket wrench is sufficient for this.
- Next, unscrew the two screws and remove the cover by turning it 90 degrees.
- The relay block is removed from the niche (this must be done carefully, as the wires get in the way). The fuel pump relay No. 13 is pulled out (it is blue and located next to the black one).
- The burnt element is removed and a new one is put in its place. Assembly will be carried out in reverse order.
What if you need to replace a fuse that is already in the mounting block? To do this, we carry out the following actions:
- Pull it out of the mounting block located to the right of the relay fuse already from the rear PTF.
- We insert the PTF into the place that was on the fuel pump relay.
- A chip is put under the screw.
- Everything is assembled in reverse order.
Removing the fuel pump
First you need to remove the rear seat element. The gasoline pressure must be relieved in the fuel line. The fuse box, which is located under the dash on the driver's left side, must be open. There is usually a marking on the top (cover) that makes this fuse easy to find as it is labeled FUEL PUMP. It should be in the second column (fourth from the top), and also have the designation 15A. The fuse must be removed from the socket. Start the car, and after 3-5 seconds the engine will stall on its own. This action must be repeated until the engine no longer starts (this usually works after 3-5 attempts). After that, wait a minute and repeat the steps. If everything is done correctly, the pressure will be released almost to the limit, that is, to the end.
If you do not want to find the fuse, you should disconnect the connectors from the flange (located under the seat) of the fuel tank. There is no need to remove the hoses immediately.
You need to remove the filler cap and then relieve the internal pressure in the gas tank. We unscrew the three black plastic bolts and remove the hole cover for inspection. Afterwards, the large plastic nut must be unscrewed by hand. We should be able to see a white glass, where the fuel pump is installed. This is a cylinder measuring 10 by 3 centimeters. Some models have an internal mesh, which is usually yellow with dirt.
The return hose must be removed by accurately pressing the plastic latch. This hose extends from the beginning of the engine, as well as an arrow that is directed to the fuel pump. With a little pressure, approximately one small glass of gasoline will flow out of the hose. The second hose will also need to be disconnected, but in this case nothing will leak out. The most important thing is that you need to be careful so that they are not damaged when removing them.
The connector with the harness must be removed and the fuel level meter, that is, the float located in the tank, disconnected. And then you need to remove the fuel pump itself.
Now you can start cleaning the fuel pump itself.
Review of Nissan Almera Classic
Nissan Almera Classic is a car with a high level of safety, ease of operation and efficiency.
This model has been produced since 2006, assembly is carried out at the Renault-Nissan Alliance plant in Busan (South Korea), which is equipped with the most modern equipment, which in turn guarantees high quality products.
Specifications:
| Technical characteristics of Nissan Almera Classic | automatic transmission | MCP |
| Fuel tank volume | 55 | |
| Average fuel consumption in urban mode per 100 km | 11,1 | 9,2 |
| Maximum speed, km/h | 177,1 | 183,7 |
| Acceleration up to 100km | 13,9 | 12,1 |
| Engine | Petrol, 1600 cc | |
| Transmission | Automatic, 4-speed | Mechanical, 5-speed |
| type of drive | Front | |
| Torque, Nm/rpm. | 146/3600 | |
| Power, kW (hp)/rpm | 107/6000 | |
| Curb weight, kg | 1700 | |
| Wheelbase, mm | 2535 | |
| Overall dimensions, mm | 4510*1710*1440 |
Purpose, types and colors of electrical fuses
Almera G15 fuses are a protective element of various electrical equipment from the following phenomena:
- short circuits;
- current overloads.
Their circuit can be made in one, two or three blocks. Moreover, each of them is responsible for the operability of the equipment complex, and a separate element is responsible for the protection of a specific device.
The following types of fuses are distinguished:
Plug fuses
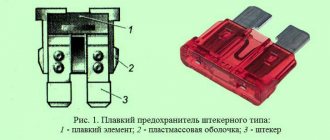
Plug-in - the most common, consist of two plugs, between which there is a fuse-link for a certain amount of current. It is closed with a plastic casing. When the maximum value of the current flowing through the insert is exceeded, it burns out.
Bimetallic - in the specified type of fuses, the fuse-link is replaced with bimetallic plates with silver-plated contacts that fit tightly to each other. If an abnormal mode occurs, the plates heat up and open. Their further contact will occur after the metal has cooled.
Plug and bimetallic fuses with spring
Spring bimetallic - the principle of operation is identical to the previous type. The difference is that the bimetallic plates do not return to their original position on their own. This is achieved by introducing an additional spring into the design, which holds the plate in the off position. To restore the electrical circuit, you will need to press a button that will release the spring.
Fuses are produced with different current ratings. At the same time, manufacturers give each denomination a specific color. In most cases, the following colors are used:
- black – 1A;
- gray – 2A;
- purple – 3A;
- brown-yellow – 5A;
- dark brown – 7.5A;
- red – 10A;
- blue – 15A;
- yellow – 20A;
- white – 25A;
- green – 30A;
- orange – 40A;
- blue - 60A;
- brown – 70A;
- light yellow – 80A;
- lilac – 100A.
Color shades may vary
Cleaning the pump
Attention! If this procedure does not produce results, then replacing the fuel pump is inevitable.
You should disconnect the fuel hose (it is always rigid), as well as the sensor and do not forget about the float. Then you need to bend the latches (there are 3 of them) of the pump casing. There, below, under the casing, there is a filter.
After cleaning, you need to assemble it all in the opposite order.
Materials used in these operations:
- rags (required quantity);
- small basin;
- a small glass, approximately 300 ml, to collect gasoline flowing from the hose;
- a fire extinguisher is a must (you never know what can happen);
- cleaning products (acetone, liquid intended for washing the injector).
This procedure takes an hour or two on average. Doing the work yourself can save you quite a bit of money, but it will get you a lot dirty.
Nissan Almera Classic fuses: where are they located, replacement - AutoExpert
If your car has any malfunction related to electrical equipment, then, first of all, you should start checking the fuse box (hereinafter referred to as the fuse box). This material will help you find out where the Nissan Almera Classic fuses are located, what they are responsible for and how to properly check and replace them.
Nissan Almera classic fuses and relay blocks with a description of their purpose. Cigarette lighter fuse
Some classify the Nissan Almera Classic as the third generation Almera, others as the restyled model of the 2nd generation. Both options have their own truth.
General characteristics of elements
Nissan Almera
The fuses on the Nissan Almera Classic, H16 and G15 have different circuits due to the fact that electrical equipment develops and improves over time. It is worth starting their review in chronological order. In 2000–2006, in the second generation of the car, the block arrangement system that is familiar today was introduced. In Almera H16, G15 and Classic, the fuses are located in 3 places: next to the engine, in the area above the right front wheel and to the left of the steering wheel. The greatest difference is with respect to the latter, since this unit is responsible for most of the electrical equipment. They are primarily responsible for the mechanisms of the power unit
That is why the main attention is paid to fuses located in the cabin
How many fuses are there in the mounting block in the passenger compartment: Nissan Almera N16 - 34 elements, G15 - 39, Classic - 26. Each circuit of electrical equipment has its own protective part. They are installed on the fuel pump, on injectors, on fog lights, on the cigarette lighter, and so on.
The number of fuses in the engine compartment varies from 29 in the Nissan Almera Classic to 9 in the G16. However, in these units the current can reach up to 100 A (for example, in a battery generator) due to the increased load.
Main causes of burnout
To avoid having to change such “defenders” too often in the future, it is best to know the reasons for their breakdown (otherwise the new one will not “live” for long either). The most common include:
- frequent contact of the electrical circuit with moisture (and subsequent oxidation);
- poor contact of the protection element itself with the terminals (defective product);
- failure or break of the wire (you will need to resolder the broken section).
The only thing I would like to warn against is installing amateur elements instead of normal factory relays (usually paper clips or wire). Such “know-how” can negatively affect the operation of the entire electrical circuit and even lead to a fire in the fuel pump.
Did you like the post? Don't be selfish, share with your friends and rate the post. It’s not difficult for you, but it’s nice for the author. Thank you.
“We catch the problem by sound and smell”
It is rare for a starter to break down right away - it continues to work until the last minute. It is important to feel how it works. If you hear that it is having a hard time cranking the engine (as if it is chewing something inside itself), the reason may be the bushings. Because of this, the shaft is crooked relative to the axis and the starter needs more effort to start.
Worn and new starter bushings
If you hear a characteristic burning smell when starting the car, you should sound the alarm. This could be a burnt winding. After disassembly, you can find a faded layer of varnish on the winding. Having discovered the problem in time, there is a chance to get to the repair site without a tow truck.
Correct replacement of fuses
Before replacing the fuse in the Almera G15 mounting block, you will need to purchase a new high-quality element. Upon inspection, there should be no nicks or differences in the cross-section of the fusible insert. To finally verify the quality of the fuse, you will need to perform the following steps:
- Connect two wires to the fuse plugs.
- Connect one of them to the negative terminal, and the second to the positive terminal of the battery.
- If the insert burns out, then the protective element is of adequate quality. When observing the melting of the insert, we can conclude that the fuse is of poor quality.
A poor quality fuse may cause a fire.
The procedure for changing the fuse in the Almera G15 is very simple. It is enough to remove the damaged element from the seat with special pliers or your hands. After this, install a new fuse.
You will first need to identify and eliminate the cause of the failure of the protective element. Work must be carried out with the negative terminal of the battery disconnected.
View of a faulty fuse and a burnt-out fuse link
Checking the circuit voltage:
- One wire of the tester is connected to the negative terminal of the battery or output to the body of the car.
- The second wire of the tester is secured using clamp terminals to the contact point of the circuit being tested, which should be as close as possible to the fuse connector socket - the electrical wiring is checked along its entire length.
- If the wiring of the circuit is correct, the indicator light lights up, then check the remaining circuits and relays.
Circuit short circuit test:
- The fuse is removed from the socket and one wire of the tester is connected directly to the contact in the connector.
- Instead of a fuse, a test lamp or a probe with an indicator is connected to the connector.
- The second wire of the tester is connected to ground.
- There should be no voltage in the circuit.
- Next, you need to carefully tug the circuit wiring along its entire length: if the lamp (or indicator on the probe) begins to blink, then there is insulation damage in this area, which causes a short circuit. In this case, the wiring is replaced with a new one along the entire length of the circuit contour.
Checking contacts for ground:
- Remove the terminals from the battery.
- One probe wire is connected to an autonomous 12V power source.
- The second wire is connected to the contact on the ground connector: if the indicator or control lamp is on, then the ground contact is working normally.
A break or violation of insulation or contacts is practically impossible to detect visually - sometimes a simple twitch of the wiring restores the operation of the circuit, however, this is a sign of a violation and with further operation will certainly cause failure of the element in the electrical equipment.
When replacing fuses, it is important to observe the main condition - the rated value in amperes must always correspond to the rated current in the circuit, which is indicated on the socket of the mounting block, as well as on the fuse itself.
