How to determine the need for replacement?
Strong noise, humming of the rear hub bearing of VAZ 2109, 2110, “howling” from the rear, increasing when turning, clearly indicates the need to check the condition of the rear hubs. The verification methods are quite simple:
- Be sure to stop the wheel diagonally opposite from the jacking side, and then jack up each rear wheel one by one. (Why each? The fact is that very often there are errors in determining the side of the hum, and even more often there is a need to replace both bearings).
- When the wheel is raised, you need to try to spin it as much as possible. If at the same time you hear extraneous sounds similar to a hum, you don’t have to check further - replacement is necessary.
- if in doubt, you can also check the lateral play of the bearing by grasping the edges of the wheel and rocking it towards you - away from you. If you feel the wheel moving on the axle, the bearing needs to be replaced.
Automotive stores can offer you both a separate bearing and a hub assembly. We see no point in purchasing an assembled unit (except for the cases described below), where replacing the bearing is not at all a difficult matter.
Can't we stand on the price?
The cylinder block (BC) is the most labor-intensive part, requiring a significant amount of metal-cutting, mainly automatic equipment. Its replacement or modernization requires huge financial investments. Therefore, when designing the engine, an emphasis was placed on the maximum use of serial parts in the design, primarily such labor-intensive parts as the BC.
What would it mean, for example, to replace a cast iron block with an aluminum one? This would entail a revision of the entire technological chain: instead of existing foundry lines, it would be necessary to purchase expensive injection molding machines. How will this affect the cost, and therefore the selling price? After all, aluminum is more expensive than cast iron.
Step-by-step method for replacing the rear wheel bearing on a VAZ 2109, 2110
- stop the car from the front;
- tear off the wheel bolts;
- tear off the central nut (7) of the hub, having first removed the cap (9);
- jack up the side and set the trestles;
- remove the wheel;
- fill the brake drum mounting area with WD-40 or other special liquids (you can use diesel fuel or brake fluid);
- unscrew the guide bolts (it is advisable to lightly tap with a hammer);
- we try to carefully remove the brake drum (if it doesn’t work, we screw the appropriate bolts into a special thread on the brake drum, apply tension and very lightly try to knock it out with a hammer. In most cases, the result will be positive. There are special drum pullers on sale, just in case , if all else fails);
- unscrew the central nut completely (of course, it is possible to unscrew it immediately, and even remove the hub along with the wheel and drum, but then there is a high probability of damage to the brake pads);
- we tighten the hub (if one of the inner races of the bearing remains on the axle, you need to use a puller or just a sharpened chisel to try to move it from its place);
- inspect the axle for signs of bearing rotation (if there are any, we replace it, it is advisable to replace the hub assembly);
- inspect the brake cylinder for leaks and pads for wear;
- remove the retaining ring from the hub using pliers and/or screwdrivers.
- Be sure to clean the edge from rust, moisten it with WD-40 or whatever you have on hand.
There are three options for pressing out the bearing:
- A special press (not everyone has one).
- A puller (not expensive, can be purchased, will be useful for the future).
- Using a heavy hammer (at least 2 kg) or a sledgehammer. AT first glance, the method may seem a little aggressive, but it is practiced by an overwhelming number of masters and service stations, and we will consider it.
- The hub must be firmly installed on a hard surface, and with several sharp blows through the mandrel, the bearing must be moved from its place. When this happens, you need to install the hub, for example, on a yew tree (so that there is a stop for the hub and free space for the bearing to exit)
- a few more blows and the bearing will come out (don’t rush to throw it away);
- We inspect the seating plane under the bearing, clean off the rust with sandpaper, lubricate it with regular engine oil (you can polish it off);
- the new bearing must be screwed with any suitable bolt through washers (washers must be selected according to the inner races, the bearing is double-row and during installation there is a high probability of its disassembly);
- install the hub on a hard surface.
– we place a twisted bearing on top, and lightly lubricate its mounting plane with oil (a new good bearing usually does not need to be lubricated inside, but if you have doubts and a little experience in assembling and disassembling, you can use Litol -24 lubricant)
– with an ordinary 500-gram hammer, very lightly, we try to align the bearing in the plane;
– take a suitable mandrel (for example, a pry bar), and try to press the bearing in with gentle blows.
-the basic rule is no strong blows, if it doesn’t work, it means it’s crooked
– after the bearing has passed halfway, you can no longer apply much force, since it can no longer warp.
-when we reach the cut of the hub, it is necessary to use the old clip as a mandrel (no strong impacts, the metal is high-carbon, and with a strong impact it can burst and cause very serious injury)
– we push it all the way and install the stopper (if there are problems with installing the stopper, then most likely you did not finish it all the way) the stopper should easily spring into the groove;
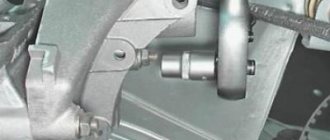
How to unscrew the crankshaft pulley bolt? — Encyclopedia of Japanese cars
Honda makes reliable engines, but they don’t install them like everyone else, with the belts to the right, but vice versa. Accordingly, they spin in the opposite direction - counterclockwise. The seemingly insignificant difference makes you think when you have to unscrew the crankshaft pulley bolt. This must be done at least every 100 thousand km - to replace the timing belt, but unscheduled work also happens: replacing the oil seal, for example. The bolt is tightened with a huge torque of 185 Nm for a 17 head, but to unscrew it, a much greater force is required. It will not be possible to remove the bolt while cranking the engine with the starter: the direction of rotation is wrong.
The gear engaged and the brake pedal pressed to the floor also do not help - the transmission springs, but the bolt does not give way. On older cars, there is a window in the clutch housing opposite the flywheel crown, and some people try to stop it with a mounting tool or a sharpened crowbar. Such a duel between man and machine sometimes ends in spilled blood or a torn crankcase, and sometimes both. The pulley has a hexagonal cutout for a branded key. Only you can’t find a 51 hexagon with a hole for a 17 head on sale, and ordering it for one-time work is expensive. Meanwhile, a blank for a special key is sold on any market: heating battery locknut 54, internal diameter (thread) - 39 mm, width - 10 mm. We grind down its edges by 1.5 mm, weld a strong flat handle 180-220 mm long - the tool is ready. On some pulleys, the corners between the edges of the cutout are rounded, so you can also saw off the mating parts on the nut a little. We unscrew the bolt with a 17 mm head with an extension and a powerful wrench.
You can weld the turned workpiece to a Zhiguli wrench for the crankshaft nut - you will get a VAZ-Honda universal wrench. It is convenient to rest the handle on the front wheel drive shaft.
To prevent the key from falling off, rest the extension cord on a reliable stand. Sometimes it is not even necessary to remove the wheel, but if tires with a larger diameter than the standard ones are installed, the wheel will still have to be removed or a wrench with a universal joint must be used.
Assembly
– that’s it, we begin the process of assembling the rear hub bearing on the VAZ 2109, 2110. To do this, we put the hub on the axle (by removing the bolt with which we tightened the cages);
– tighten and tighten the central nut (be sure to install a new one), not forgetting to put the thrust washer;
– put on and screw on the brake drum and wheel;
– check the rotation (there should be no extraneous noise);
– if all is well, lower the car from the jack;
– tighten the wheel and the central nut (the tightening torque of the hub is approximately 20 kgm, this is quite a strong tightening, if you don’t have a torque wrench, you need to use a lever of at least a meter to tighten the nut with a force twice the tightening force of the wheels);
– tighten the hub nut and tighten the wheels.
Birth pangs
The VAZ-21179 engine did not appear out of nowhere. The entire previous history of its emergence is a series of active design work and periods of oblivion. It all started in the early 2000s with plans to create a new model at VAZ, belonging to class “C” - the “Silhouette” project. A heavier car required a more powerful engine.
The existing 16-valve 1.6-liter engines were not suitable for this purpose. It should be said that in the line of VAZ engines there was a power unit with a volume of 1.8 liters. We are talking about unit 2130, which was installed on all-wheel drive vehicles: the five-door Niva and the Nadezhda minivan.
However, it was designed exclusively for “tractor” traction and had a power of only 85 horsepower. Therefore, they began to develop a new engine for the Silhouette project. Then management plans changed, and the developments were archived.
In 2008, they returned to the previous idea again, but they decided not to attempt a completely new unit, but to limit themselves to a deep modernization of the old 1.6-liter due to a lack of funding. One of the planned innovative solutions was the use of a variable valve timing system.
Since VAZ engineers had no experience in this area, it was decided to enter into a contract with the English concern Ricardo, which has the necessary competencies, to carry out calculation and research work. Also, at one time, thanks to cooperation with Porsche, a rather successful engine for the V8 was created, which became the prototype for all subsequent front-wheel drive models.
Work was stopped several times, then resumed again, as VAZ, like the entire Russian economy, was going through difficult times. And suddenly, completely unexpectedly, in March 2016, a new VAZ engine with the index 21179 was put into mass production.
Do-it-yourself replacement of a VAZ-2110 wheel bearing
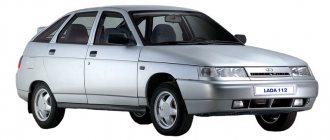
The VAZ-2110 wheel bearing is replaced if it fails. To carry out the work you will need a certain set of tools, including a special puller. Diagnosis of a malfunction is possible by the sound produced by the bearing. When driving at high speed, an eerie howl emanates from it, which is very similar to the sound that an airplane makes when taking off. In this article you will learn how to replace a bearing yourself, without the help of specialists at a service station.
Bolt tightening diagram for GBTSVAZ 2112 16 valves
When performing work, strict tightening rules must be observed. For the 16 valve engine model 2112, the permissible bolt length is 94 mm. If the indicator is 95 millimeters, the parts should be replaced. Some experts even recommend installing new pins for each procedure - this is guaranteed to ensure high-quality operation of the system.
Separately, it is required to adhere to the sequence of tightening the nodes - this guarantees an even fit of the surfaces and the absence of leaks in the future. The last point is the force applied during work. The indicator is critically important, as it ensures tightness and sealing of the block.
Preparing for repairs
When replacing a VAZ-2110 wheel bearing, you need to install the car as level as possible. Place wheel chocks under the rear wheels, which can even be used as ordinary bricks. You will need to remove the front wheels. It is better to carry out repairs first on the left side, then on the right side. In addition, you need to get a 30mm socket or socket wrench. Only with its help will you be able to unscrew the hub nut.
It is advisable that this wrench have a large lever, because the tightening torque of the connection is very large. Please note that you will need to loosen the nut. To do this, you can use a small drift and hammer. A couple of light blows and the nut will be released. It is worth noting that replacing the rear wheel bearing of a VAZ-2110 is carried out in almost the same way. Only a slightly different puller is used.
Cylinder head bolt VAZ 2112 PAYEN turbo M10*1.25 (10 pieces)
- Engine Crankshaft
- Flywheel
- VAZ cylinder head
- Sports camshafts
- Sport timing valves
- Cylinder head components
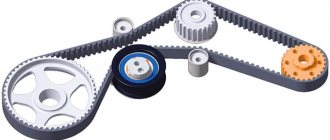
- Belts | Timing gears
- Gaskets | Oil seals
- Intake system
- Throttle valve
- Clubturbo pistons
- TDMK pistons
- Federal Mogul pistons
- Piston rings
- Connecting rods
- Engine mounts
- Inserts for VAZ engines
- ACL earbuds
- Oil catchers
- Oil crankcase
- Oil pump
- Miscellaneous
Cooling
- Adapters for installing an oil cooler | sensors
Cooling systems for VAZ 2101-2107 16v Cooling radiators Oil radiators Heater radiators Water pumps Fans Thermostats Expansion tanks Miscellaneous Silicone
- Straight pipes
Tubes with flange Tubes with 45 degree rotation Tubes with 90 degree rotation Tubes with 135 degree rotation Hoses Mishimoto Silicone Tubes Silicone Tubes for Cooling System Transmission
- Blocking
Main pair of vases Sports rows of gearboxes Gears 6th transmission of vases Drives of vases Clutch Short-stroke rocker Gearbox sport Rear axle gearbox of vases Spare parts of gearboxes of vases Brake system
- Vacuum booster
Brake master cylinderRear disc brakesBrake discsHand brakesBrake padsFittings for the brake systemFlange washers | transition kitsPedal unitBrake force regulatorCaliper | brake slave cylinderMiscellaneousSuspension
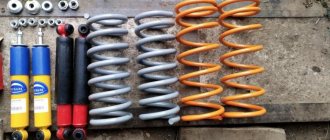
- Clubturbo suspension
Shock AbsorbersSprings Support BearingsTriangle ArmsStretchers | Amplifiers Safety frame Subframes Wheel spacers Steering Anti-roll bars Silent blocks | rubber bushings Silent blocks | polyurethane bushingsStuds | wheel nuts, swivel knuckles, joint heads | Sliding bearingsBall jointsMiscellaneousExhaust system
- Silencers for VAZ
Universal mufflersInsert catalystSpiderDownpipeResonators for VAZUniversal resonatorsBendsPipe | BendsVibration damper (corrugation)FlangesMiscellaneousElectronics
- Ignition system
Turbo timerControl units | WiringInstrumentsAir temperature sensorInnovateBoost controllerAbsolute pressure sensorMiscellaneousFuel system
- Filler necks
Fuel tanks Drain tanks Fuel pressure regulators Fuel rails (ramps) Brackets for fuel pumps Fuel pump Fillers for fuel tanks Fuel injector Fuel filters Hoses Miscellaneous Kits
- Moto kits Turbo
Engine displacement kitsExhaust system kitsE-GAS conversion kitStyling
- Adapters for installing sports steering wheels
Alternative opticsTow hooks | HingesDecorative license platesLocksMirrorsPodiums for instrumentsSeat beltsSteering wheelsGearbox lever capsSport seatsStorage and transportation systemsPedal coversHelmetsFiller capsMiscellaneous4×4Clothing and souvenirs
- Keychains
Vinyl for the car Club card, branded clothing Soft toys | PillowsWindshield stickersPostersMiscellaneousStickersSmartphone casesNailplatesKey lanyardsBody plastic
- Bumpers tuning for VAZ
Air intakesRadiator grillesGlass | Sports upholsteryFenders | Wheel arch extensionsDashboardsDoorsSpoilersLiningsHoodsTrunk lidsMudguardsPlastic body partsAileronsSkirtsMiscellaneousFittings
- Hoses | tubes
Fittings for rubber hosesFittings for Teflon hosesFittings for aluminum tubesCouplings| fittingsAN adapters - Metric threadAN adapters - Inch threadAN adapters - ANAdapters AN - ORBHose fasteningsWelded fittingsThrough the partition fittingsAN TeesPlugsMiscellaneousMiscellaneous
- Thermal insulation
Air filterOils and auto chemicalsToolsWiper bladesPneumohydraulic hood supports
- home
- Catalog
- Engine
- Miscellaneous
- Cylinder head bolt VAZ 2112 PAYEN turbo M10*1.25 (10 pieces)
Cylinder head bolt VAZ 2112 PAYEN turbo M10*1.25 (10 pieces)
PAYEN cylinder head bolts М10*1.25. For the cylinder head of a VAZ 2112. Bolts are used for a higher tightening torque. Installation only requires replacing your standard bolts. Recommended for use when installing turbocharging on a VAZ engine. A special tool is required for installation. Set of 10 pieces.
Specifications:
Disassembling the unit
Let's say you start making repairs on the left side of the car. The first thing you need to do is unlock the nut and unscrew it using a 30mm wrench. But you shouldn’t unscrew it all the way, it’s enough just to tear it off the thread. Then raise the left side of the car using a jack. Remove the bolts that secure the wheel to the hub. Then you need to unscrew the two bolts that secure the front wheel brake caliper. Without this, it is impossible to replace the VAZ-2110 wheel bearing.
Once you have freed the brake disc from the caliper, you can remove the latter. Just be careful not to damage the hose. After this, unscrew the guides that are on the disk. They attach it to the hub. Then you need to remove the brake disc. That's it, you've reached the hub itself. But it has two attachment points - to the rack and the lower arm. The upper mount to the rack must be marked so as not to disturb the camber of the front wheels. Then remove the two bolts that secure the ball joint to the lower control arm. Next, tear off the hub from the grenade slots.
Bearing removal
Please note that replacing the VAZ-2110 wheel bearing is done using a special tool. If you decide to do without it, the repair procedure will increase in duration. Of course, you can use a hammer to press out the wheel bearing, but it is much easier to do this with a puller. The whole point is that you need to apply effort evenly, but with a hammer it only works in impulses.
To remove the bearing, you need to install a special puller on the hub. And now, gradually rotating the bolt, you squeeze the bearing out of the hub. But if there is no puller, you will need at least an old bearing race. Install it on top of the bearing, which is located in the hub. Then strike with a hammer: the sharper they are, the better. Consequently, replacing the front wheel bearing of a VAZ 2110 will be much faster.
How hard should you tighten the wheel nut on your car?
For each car, torque standards are established, since the tightening force for the locknut depends on the following factors: - Bearing dimensions; — Regulated axial clearance; — Diameter and thread pitch; The following are the force indicators for properly tightening the nut. The database will be gradually replenished.
If you have not found the tightening torque values for your car (Skoda Octavia, Subaru models, Toyota Corolla), find the bearing you have installed and the same thread diameter or ask a question in the comments.
Tightening torques for the front wheel bearing on a VAZ (LADA)
Tightening torques for the front wheel bearing on Ford
Tightening torques for the front wheel bearing on a Chevrolet
Tightening torques for the front wheel bearing for Renault
Tightening torques for the front wheel bearing on Daewoo
Tightening torques for the front wheel bearing on Opel
Bearing installation
The installation can be done in several different ways. Firstly, you can heat the bearing itself and cool the hub. But you should be careful with this, as you can damage the rubber seal under which the bearing grease is located. Secondly, you can carry out installation work using the same tool that was used for dismantling.
This is a universal tool that will help you both during disassembly and assembly of the unit. Without it, it is impossible to replace the rear wheel bearing of a VAZ 2110. There is no need to use additional lubricant during operation. The only thing you need is to apply lithol to the threaded connection of the outer CV joint. In addition, the nut used to secure the outer CV joint needs a new one.
All the work of replacing the bearing can be done independently within two hours, or even less. In this case, special tools will require a puller and a 30 mm wrench with a long lever. Please note that the nut must be tightened with maximum torque. This is the main difference from the front wheel hubs of classic series cars, which have a conical bearing and a small tightening torque. In fact, removing and replacing the front wheel bearing of a VAZ 2110 will take you a little time - about half an hour on each side. In total you will spend at least an hour, provided that you have all the necessary tools.
10 charming celebrity children who look completely different today Time flies, and one day little celebrities become adults who are no longer recognizable. Pretty boys and girls turn into...
9 Famous Women Who Have Fallen in Love with Women Showing interest in people other than the opposite sex is not unusual. You are unlikely to be able to surprise or shock anyone if you admit it.
7 Body Parts You Shouldn't Touch with Your Hands Think of your body as a temple: you can use it, but there are some sacred places that you shouldn't touch with your hands. Research showing.
Surprise: Husbands Want Their Wives to Do These 17 Things More Often If you want your relationship to be happier, you should do the things on this simple list more often.
Top 10 Broke Stars It turns out that sometimes even the biggest fame ends in failure, as is the case with these celebrities.
20 photos of cats taken at the right moment Cats are amazing creatures, and perhaps everyone knows this. They are also incredibly photogenic and always know how to be in the right place at the right time.
What is a cylinder head?
In order to carry out any manipulations with this unit, it is necessary to understand the purpose and operating principle of the device. The cylinder head on the VAZ-2112 model we are considering is made of two options: cast iron, aluminum. Essentially, to put it bluntly, this is the engine cover.
One of the most important components of a vehicle, which is responsible for:
- combustion of gasoline in the engine;
- removal of exhaust gases during the combustion process.
Secondary functions performed by the cylinder head:
- the functional option is carried out thanks to the work of support washers, valve bushings and other parts located in the head;
- thanks to the hole in it, the chain tensioner and the drive of the pulley distributor are installed.
The abbreviation cylinder head is used more often in the terminology of automotive components, since there is not always time to pronounce long and complex names. But it is clear that you need to know all the decryptions. Especially if it is an internal combustion engine (internal combustion engine) and cylinder head (cylinder head).
Therefore, the tension moment must always be adjusted and not carelessly, but correctly, otherwise its functionality will be impaired.
First of all, this is necessary to avoid moisture accumulation at the junction of components in the block and their connections. Thanks to this protection, condensate collects on a special plane to allow liquid to leak out of the engine.
Adjustment
Checking its functionality and adjusting it is carried out as follows:
- Raise the front wheel using a jack;
- Remove the wheel;
- Using a chisel, remove the protective cap on the front hub bearing;
- Remove the brake pads;
- The indicator holder should be secured to the steering knuckle;
- Place the leg of this indicator against the hub, as close as possible to the adjusting nut;
- Rings of spanners are placed on the studs and the nuts are tightened. While holding them, the hub rotates and moves in the axial direction;
- Using the indicator, the movement or gap indicator is determined. If it is more than 0.15 millimeters, the gap must be adjusted;
- Reinstall the wheel without using the protective cap. Secure it with two bolts screwed in diametrically;
- Using a chisel, straighten the flange on the bearing nut and remove the nut with a 27mm (socket) wrench;
- Using a torque of 2.0 kg-cm, tighten the new adjusting nut;
- Loosen the nut, then tighten it again, but now with a torque of 0.7;
- Slowly release the adjusting nut 25 degrees and turn the wheel in a vertical plane. There should be a slight play;
- Check the gap. Its indicators should be in the range from 0.08 to 0.02 millimeters;
- In this position, lock the nut with the collar caulked in special grooves. They are located on the steering knuckle at the end of its axle;
- Remove old grease from the protective cap and apply new one. About 25 grams. Experts recommend using Litol 24, although there are worthy alternatives;
- Install the protective cap on the bearing;
- The wheel is installed in its rightful place.
Such diagnostics with repair elements will extend the life of your wheel bearing. If the adjustment does not allow the gap to return to the required parameters, the bearing should be completely replaced.
Design nuances
The 21179 engine bears little resemblance to the basic version 21127, as both the design and appearance have changed:
- phasing of intake valves within ±30 degrees;
- hollow camshafts with cams using powder metallurgy;
- vortex air supply into the combustion chamber;
- cylinder cooling system (jacket);
- improved configuration and cylinder head gasket volumes;
- ShPG Federal Mogul;
- Korean pump;
- inclined drilling of oil channels in the crankshaft journals;
- polymer cylinder head cover and solid aluminum pan;
- flywheel for clutch 215 mm, which is recommended by the manufacturer.
Motor gaskets
ShPG from Federal Mogul
Replacement methods
We recommend watching a video on how to remove a wheel bearing from a VAZ 2110. This will allow you to better understand the nuances of the work. A clear example will never be superfluous.
As for the replacement, there is also a video teaching how to do this process. Craftsmen use three replacement methods, each of which has its own characteristics and advantages. Therefore, it would be correct to talk about each of them.
First way
We take out the locking ring
- You will definitely need a puller to remove the bearings.
- Carefully remove the bearing with a specialized tool and replace it with a new one.
- Upon completion of the shift work, the unit is reassembled.
The advantage of this method is that the camber adjustment bolt does not need to be touched. If you violate its geometry, move it from its rightful place, it will be quite problematic to put it back.
But there are also disadvantages - you will have to take a position that is not the most comfortable to perform the operation. Therefore, it is strongly recommended to carry out work with a lift or using an inspection pit. But even so, you can forget about comfort.
Second way
Here you have to complete the following steps:
- Carefully remove the steering knuckle to remove the bearing. After this, the hub is completely removed;
- Next, use the workbench;
- On the workbench, replace the element and then put it in place;
- It is important to follow the correct reassembly sequence
From an execution point of view, the second method is easier than the first. But here you can affect the camber. If this happens, adjustment may become difficult. Do not rush to remove the bolts securing the knuckle to the strut. Make marks with chalk or a marker to later find their original position. Based on the marked marks, it will be much easier to put the unit back together.
Even a professional cannot achieve a perfect match of marks, but it is more than possible to minimize deviations.
We recommend you take several steps:
- Place tags. The first is the position of the adjusting bolt on the strut, and the second is the previous position of the knuckles;
- Knock out the knuckle bolts;
- Remove the fasteners from the lower ball joint;
- Knock the bearing out of the hub;
- Remove the retaining rings;
- Press out the bearings with a vice;
- When you put the assembly back together, generously lubricate the cavities in the fists with lubricants.
This method is relevant for cases where a full repair of the chassis is performed. This way you can easily replace not only the wheel bearings, but also ball joints, steering ends, lever silent blocks, etc.
GC1–6
The crankshaft has an increased crank radius.
The working volume of the cylinders has increased due to the larger piston stroke. The crankshaft has an increased crank radius. The working volume of the cylinders has increased due to the larger piston stroke. Adjusting the phases required upgrading the lubrication system. Main bearings with an oil distribution groove of variable cross-section are installed to reduce oil consumption. For the first time, a foreign-made oil pump appeared on a VAZ engine - the South Korean GMB. The productivity of domestic pumps is 34–38 l/min at an engine speed of 6000 rpm, and GMB produces 54–60 liters. The pump body is aluminum, not cast iron. The cross-section of the oil intake is, of course, increased. The aluminum engine sump has a flange to mate with the clutch housing, which increases the rigidity of the power unit. The oil sump volume is 4.4 liters versus 3.2 liters for the 1.6 engine.
The water pump is also Korean, with high-quality bearings and seals that guarantee reliability. It is better than the serial VAZ ones: among other things, higher performance. The plastic intake module is made by the Tolyatti company Motor-Super. The gas-dynamic characteristics of the intake tract are optimized for the new engine. The developed fins of the module made it possible to reduce noise. The engine control system does not work with mass air flow readings, but calculates parameters through temperature and pressure. Therefore, the intake module has a slot for the corresponding sensor.