The need to replace the front struts arises after dull knocks alternating with clicks begin to be heard from under the wheel arches while the car is driving over uneven surfaces. Typically, this was not observed at high speeds, but when overcoming speed bumps, they appeared again.
After self-diagnosis of your Lada Priora, it is not always possible to find the cause of the knocking, the suspension is normal, but the noise is still there. After digging a little on the net, I came across several similar topics in which people discussed my problem, and it was there that I learned that the front struts were to blame and that now I had serious work to do called: replacing the front struts with my own hands. After I went to the service station, my verdict was confirmed, it was possible to fix everything right there, but I decided to do everything myself. Read more about knocking in the front suspension here.
After several hours of searching, I found front struts that suited me in all respects; these were Acomi struts model “Comfort CLASSIC A170.2905.002/003-05”.
I chose the front struts with the expectation that they would be softer and, as they say, the price would be adequate, comfort while driving is perhaps the most important thing in a car. The original hard SAAZs are no good, so I didn’t repeat the manufacturer’s mistake.
The front struts I bought are hydraulic, collapsible, which is very convenient; if necessary, you can simply go buy cartridges and replace them yourself, which you will never do with your own SAAZ ones.
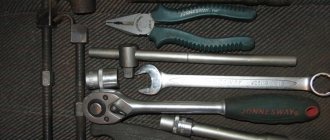
It’s not the most complicated procedure I’ve ever done, but it’s complicated by the fact that it requires special tools in the form of special ties for springs and a special puller for steering tips.
In addition, you will need the following set of keys to work:
- End caps on “13”, “17”, “19” as well as caps on “17”, “19”, “22”;
- Hexagon at "6";
- Steering wheel end remover;
- Pliers;
- And, of course, a hammer.
Before you start replacing the struts with your own hands, I recommend treating all connections, nuts and fasteners that need to be disassembled with WD40 liquid; this can be done the day before or the evening before.
Nus, let's go!
What you need for this: tools, components
Replacing the front struts on a Lada Priora is possible with special equipment. If the appropriate equipment is not available, you should contact a service station. You will need the following tools: spring ties and a puller for steering tips. Some of the more accessible ones will be useful:
- Socket and socket wrenches.
- Six inch hexagons.
- Pliers.
- Hammer.
- A lift or trolley jack to raise the car.
Usually, replacement components are purchased for a car; sometimes they can be found in one set or purchased separately, saving money. The set includes:
- the racks themselves;
- set of bolts;
- support bearing;
- a pair of steering tips, as well as a pair of bump stops and boots.
Before starting disassembly, it is recommended to spray WD-40 on the joints of the parts and leave to “soak” for up to 10 minutes. This will allow you to easily remove old components and other elements.
Priora front struts and rear shock absorbers: the best solutions
As practice shows, correctly selected front struts on a Priora can significantly improve the car’s behavior on the road. Taking into account the fact that Lada Priora is a budget model, there is no talk of installing expensive shock absorbers such as Bilstein, Koni, Sachs and others.
Some manufacturers simply do not have struts for Priora, others have solutions that are too expensive, and in some cases, modifications, alterations, etc. will also be required to install a new shock absorber. However, among the more affordable and high-quality racks for Priora, SS20, SAAZ or KYB (Kayaba, Kayaba) can be distinguished.
The main difference is the stiffness of the SS20 shock absorbers. These struts are hydraulic and are available in “standard”, “comfort” and “sport” versions. The manufacturer offers both rear and front struts of the Priora, which allows you to select suitable parts and perform the so-called replacement of struts “in a circle”.
The SS20 “standard” struts are the softest and are well suited for a quiet ride. The “comfort” version is more universal, the shock absorbers are a little stiffer, and are better suited for high-speed driving on the highway. Also, these racks work more efficiently on bad roads.
The SS20 “sport” version is the toughest and is designed for high speeds. At the same time, the car's handling improves noticeably, however, when driving on bad roads, the stiffness of the shock absorbers somewhat affects comfort.
Let’s also add that in addition to the struts, the manufacturer offers the Priora support bearing (SS20 support), bump stops, etc. In practice, supports for Priora and other parts allow you to purchase a kit and replace the racks without any modifications. Also, the supports are considered reinforced, the bumpers withstand impacts well, and the pillars do not break through.
If you need imported racks, in this case it is recommended to pay attention to Kayaba racks (KYB for Priora). The manufacturer from Japan is well known all over the world, and also offers spare parts for Russian-made cars
For the Priora, KYB has developed Exel-G gas-oil shock absorbers. This line includes the front and rear pillars of the Priora. In practice, these shock absorbers are in great demand among car enthusiasts. Kayaba on Priora is considered a universal solution, the rigidity is average (it holds the road well on the highway and performs well in the city).
KYB shock absorbers are also distinguished by their long service life and reliability. The only negative is the rather high price. It should also be noted that when comparing which is better, Kayaba or SS20, often the first option is better.
The SAAZ racks complete the list. Let’s note right away that these are Priora’s standard factory struts. In other words, this Priora shock absorber is on the car from the factory. This option can be taken if the car’s behavior on the original shock absorbers is completely satisfactory.
The price is quite affordable, although the service life of SAAZ shock absorbers on the VAZ 2170 is no more than 40 thousand km. It can also be noted that in some cases you can limit yourself to only replacing the racks themselves, leaving the factory supports and bumpers (if they are fully functional).
Installation of new front struts on Lada Priora
- Remove the mounting bolts from the wheel. Install the jack on the side where the repair will be carried out.
- Unscrew the bolts and remove the wheel.
- Disconnect the brake hoses. Remove them from the holder on the stand.
- Use pliers to unscrew the locking pin of the steering tip pin. Remove the nut using a “17” wrench.
- Install the puller onto the steering end. Press it out of the socket.
- Expand the support. Unscrew the steering knuckle mounting nuts.
- If necessary, you can use a hammer. It is important to avoid damage to the threads.
- The upper eccentric bolt is designed to adjust the camber. It has a washer on it that often sticks to the post. Do not throw away this bolt, as it will be reinstalled a little later. There is no point in remembering how the eccentric is located along the axis, since it will still be necessary to carry out wheel alignment.
- Using a “13” key, unscrew the fastening nuts securing the front pillar to the body. They are under the hood.
Installing spacers on the Priora
Lada Priora - everything you need to know about increasing ground clearance. Part 9
Installing spacers yourself is not difficult for anyone who has at least minimal experience in car repairs. In this article we will talk about the sequence of actions that are performed when installing spacers, as well as the most common mistakes made during the work process.
How to install spacers
In one of the previous articles, we talked about the main activities that need to be carried out before installing spacers. If you have replaced sagging springs, changed struts and silent blocks if necessary, and also bought spacers of the required size, then you will need ordinary driver's tools - a jack, a support, wheel chocks, a set of keys, and a steering pin puller. The exception is a spring puller, but this can be purchased at your local auto parts store.
Installing spacers on the front suspension
To replace spacers on the front suspension, chock the rear wheels, raise either side with a jack, and install stands. Do not perform any work under a car that is on a jack, it is deadly. With one of the front sides of the car hanging, remove the wheel and unscrew the hub nut. To do this, you will have to engage first gear with the engine off. If that doesn't work, have someone press and hold the brake pedal. Often you have to use a powerful wrench to unscrew this nut. Then loosen and unscrew the steering pin nut and ball joint bolts. Using a puller, remove the steering pin from the strut.
If you do not have such a puller, visit your local auto parts store. Using a crowbar, press the lower suspension arm so that the ball joint comes off the steering knuckle. Pull the brake disc towards you so that the hub comes off the constant velocity joint shaft (grenade) and support the strut with something
Unscrew the three nuts that secure the support bearing to the body and carefully lower the rack down. Replace the bearing bolts with longer ones, then put a spacer on it and install the strut in place, then reassemble the suspension in reverse order. Don't forget to adjust the camber and toe
Don't forget to adjust the camber and toe.
Installing spacers on the rear suspension
Support the front wheels with chocks, engage first gear, support either rear side with a jack and support it. Remove the wheel. To install the lower spacer, unscrew the lower bolt of the shock absorber, pull it out of the mount, insert the spacer into the mount and secure it with the same bolt and nut. Insert the shock absorber into the spacer and secure with a new bolt and nut in the desired hole. To install the upper spacer, compress the springs using a puller, then hold the shock absorber rod and unscrew the fastening nut. Remove the standard gasket and install a spacer instead. Do not place a spacer on the gasket; it will pop out over time. If necessary, attach an extension to the rod and install the shock absorber, securing it with a nut. Loosen the puller so that the spring takes its place. Put the wheel on and tighten the wheel bolts.
Or you can combine both by buying a small car and then making it suitable for crossing bad roads. You can create such a universal car by simply increasing the ground clearance of your existing car. In the conditions of Russian roads, such fraud will always be relevant. So, for example, by increasing the ground clearance on a car like a Priora, you will save a lot of money on its repairs. After all, you won’t have to repair the suspension in vain after encountering a couple of holes.
Why do racks fail?
There may be several reasons for breakdowns. Firstly, do not forget that the unit is a consumable item and must be periodically replaced (approximately every 20 thousand kilometers). Secondly, parts are subject to increased wear due to excessive load, especially in conditions of poor quality, broken roads.
3 popular ways to check the health of a node
The first way is to check for play in the front suspension struts. To do this, you need to remove the front wheel, grab the stabilizer bar with your hand and pull it forcefully
At the same time, pay attention to the presence or absence of play. If it is present (even minor), the product must be replaced
To carry out the second method, you will need a hole. The idea is that one person is in the pit and puts his hand on the stabilizer post. At this time, the second participant is behind the wheel of the car and slowly moves forward and backward. If there are problems with the performance of the stabilizer struts, at the moment the car begins to move, the person in the pit will feel a blow.
"Important! To avoid injury, when carrying out such diagnostics, you should follow safety rules and exercise vigilance and caution.” The third common way is to undergo a complete suspension diagnostic at one of the professional auto diagnostic centers.
The third common way is to undergo a complete suspension diagnostic at one of the professional auto diagnostic centers.
Replacing front springs
With a sufficiently high mileage of the Priora, its front springs in any case lose their properties and sag over time.
Of course, the work of the suspension with seated springs will not be complete; the front of the car will become even lower, which will negatively affect the work of the entire suspension as a whole. To replace the springs with your own hands, you will need the following tool:
- Spring ties
- Key for 22
- 6 mm hexagon
Basic faults
The main sign of a failed “support” is a knocking sound at the top of the support when driving on an uneven road. It may be a consequence of deformation or mechanical damage to the bearing gaskets, as well as a violation of the integrity of the bearing itself.
A malfunction of the “support” can be caused by:
- long service life;
- exceeding permissible dynamic loads;
- moisture or dirt entering the structure.
You can determine that the support bearing has become unusable in the following way. Lift the hood, remove the protective cover on the “glass” of the pillar, place your palm on its support, and rock the car up and down. If the bearing is faulty, you will hear a characteristic knocking sound accompanied by corresponding vibration. In this case, the “support” must be replaced.
The maximum bearing life for the Priora is 100 thousand km, however, given our roads, it wears out much faster. Therefore, the optimal mileage from replacement to replacement is 50 thousand km. In addition, the bearing must be replaced if any of the above faults are detected.
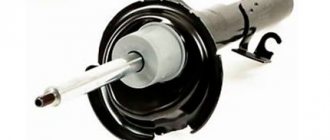
What it is
Front pillars are a device located at the front of the car on the sides, fixed in the glasses. They are responsible for the comfort of vehicle movement, stability, smooth ride and turning. Without them, the car would shake while driving, even on smooth roads, and the risk of horizontal car roll would increase significantly.
The front struts consist of:
- springs;
- shock absorber;
- ball joint and others.
The rear and front struts with shock absorbers have the same design and differ little from each other. There is an oil type device on the front pillars.
How to replace them yourself
Replacing the front struts on a Lada Priora with your own hands is quite possible if you make sure you have all the tools and components. You also need to take into account the recommended sequence of actions so that you do not have to overpay when correcting errors.
To carry out this procedure:
- We take the jack and install it on the side where the installation begins.
- We remove the wheel, unscrew the brake connections, take out their fastenings located on the rack.
- We take pliers and carefully unbend the lock on the finger of the steering tip, take it out, and unscrew nut number seventeen.
- We reach the steering tip puller and pull it out.
- Scroll the support and unscrew the steering knuckle nuts. If you used WD-40 before, this will not be difficult to do.
- If this was not possible, but you can’t unscrew it, you can try knocking them out with a hammer. We just act as carefully as possible so as not to damage the thread.
- Next, we take on the eccentric bolt located on top and save it - it is necessary for adjusting the wheel alignment. It is also recommended to remember its location, focusing on static elements.
- All that remains is to unscrew the retaining nuts that secure the structure; access to them is under the hood.
- Now it’s time to remove the assembled structure with the shock absorber from the wheel well.
Replacement of racks is carried out after dismantling the old ones, so we disassemble everything step by step.
Also check out
- How to replace the cabin filter of a Lada Priora with your own hands
- Algorithm for replacing the front brake pads of Lada Kalina at home
- Installation of silent locks from VAZ 2114 to VAZ 2106 on your own
- The front strut needs to be pulled out of the wheel well.
Replacing the front struts of a Lada Priora with your own hands
Replacing the front struts of a Lada Priora with your own hands
How to disassemble an existing structure
- At this stage, you will need pre-prepared spring ties. They need to be installed on the second coil of the spring. The second tie is installed in exactly the same way, only on the other side.
- Reduce the spring by twisting the coupling bolts of the first tie. This must be done until the moment when the second tie begins to move freely on the coils. Repeat all these steps on the second screed.
Removing the shock absorber and spring of the rear suspension of Lada Priora (VAZ-2170)
We remove the shock absorber for replacement when it loses its working properties, as well as when replacing a spring or failed rubber pads for attaching the shock absorber or compression stroke buffer.
To ensure that the performance characteristics of the left and right shock absorbers do not differ, both shock absorbers should be replaced. It is also necessary to replace the springs in pairs. Removal is shown on the left shock absorber, the right shock absorber is removed in the same way.
Inside the car, we recline the back of the rear seat and move the carpet away from the socket of the upper shock absorber mounting to the body.
Using a 17mm z-shaped wrench, unscrew the nut of the upper shock absorber mounting, holding the shock absorber rod from turning with a special wrench with a 6 mm wide slot. Remove the spring washer from the shock absorber rod...
...a support washer and an upper rubber pad.
From the bottom of the car, using a 19mm wrench, unscrew the nut of the bolt of the lower shock absorber mounting to the beam arm bracket, holding the bolt from turning with a spanner of the same size. We hang out the back of the car.
We take out the bolt (if there is difficulty, knock out the bolt with a soft metal drift). We remove the shock absorber from the eye of the lever bracket...
...and remove the shock absorber along with the spring. The spring gasket usually sticks to the body, from where it must be removed and ensure that there are no deformations or tears.
Remove the spring gasket.
Remove the spring from the shock absorber.
Remove the spacer sleeve with the lower cushion from the shock absorber rod... ...the cover with the cup and the compression stroke buffer.
If there is damage to the cushions, cover or buffer, replace them with new ones.
We assemble and install the shock absorber and spring in the reverse order.
For ease of assembly, we recommend attaching the gasket to the spring with adhesive tape or insulating tape. In this case, the end of the spring coil should rest against the protrusion of the gasket.
When installing the shock absorber rod cup, the flange of the 1st cup should fit into the recess 2 of the boot.
We put the compression stroke buffer on the shock absorber rod so that the buffer grooves are located at the bottom.
The end of the lower coil of the spring should rest against the protrusion of the lower shock absorber support cup.
When installing the shock absorber, we install it so that the shoulder of the support cup with a smaller height (shown by the arrow) faces the wheel, while the end of the lower coil of the spring on the left side of the car will be directed towards the rear of the car, and on the right side - towards the front.
To facilitate installation, you can put a piece of plastic tube (with an outer diameter of no more than 14 mm) on the threaded section of the rod... ...which will allow you to direct the rod into the hole in the upper spring support cup on the body.
We secure the lower end of the shock absorber, but do not tighten the bolt nut.
Using a jack to lower the car onto a wheel...
... using a tube, insert the tip of the shock absorber rod into the hole in the body. Having removed the plastic tube from the shock absorber rod, install the upper rubber cushion and support washer (convex downward) on the rod and secure the upper end of the shock absorber.
The nut of the shock absorber lower mounting bolt is finally tightened to the prescribed torque in the “car on wheels” position.
To bleed the rack do the following:
Bring the stand to a vertical position, then pull the rod to its highest point and slowly return it to its place.
Repeat these movements 3-4 times. There should be no dips, falls or jamming of the stem. Once bleeding is complete, the posts must be in an upright position before being reinstalled. Bleeding the racks will bring them into working condition.
After this, assemble a new shock absorber, for this you need:
- Set the rack rod to the upper position.
- Put on the boot and compression buffer.
- Install the spring, cup and damper.
- Place the smaller washer first, then the larger washer from the kit. After this, you can install the support with the bearing.
- Install the nut that secures the rod.
- Tighten the nut with a hexagon to “6” while holding the rod. The final tightening should be done after the front strut has been installed in the car.
- Remove the zip ties.
- Turn the support with the pointer forward and slightly inward of the car body.
- Install a new strut into the car.
- Tighten the upper support bolts and place the strut on the steering knuckle. An eccentric bolt with a washer must be secured in the upper hole, a regular bolt in the lower hole. After that, “stretch” everything.
- Pin the finger.
- Place the brake hoses in the holder bracket on the rack.
This completes the replacement of the front strut. You just need to put the wheel back in place and remove the jack. As soon as the car is on the ground, you should tighten all the nuts with a wrench until they stop.
Repeat all steps on the other side. This usually does not cause any difficulties.
After replacing the front struts of your Lada Priora, you need to go to a service station and get a wheel alignment done. If you do not do this, problems may arise: the car will sway from side to side.
What are rear struts?
The design and principle of operation of the rear shock absorber struts of the Lada Priora are practically no different from other cars. From the factory, the machine is equipped with SAAZ shock absorbers, which have a two-pipe hydraulic (oil) design.
It provides damping of shock loads due to oil resistance to the piston inside the cylinder. In fact, this design resembles a conventional pump, only oil acts as air.
At the front of the Priora there are also oil struts that work on the same principle. They differ from the rear ones only in the size and design of the body. In addition, the front struts have brackets for attaching tie rod ends.
Oil shock absorbers are quite reliable and durable, and in addition, they provide maximum comfort, as they are considered the softest. However, they also have their drawbacks. The fact is that oil is very susceptible to the influence of temperatures, both high and low. When heated, it becomes too liquid, which causes the shock absorber to “soften” even more.
When exposed to low temperatures, the oil hardens, making the racks as rigid as possible. Naturally, this cannot but affect their condition, and it often happens that after a hot summer or cold winter, shock absorbers begin to “sweat”. This is the first sign of their failure.
The procedure for replacing the front struts on a Lada Priora car
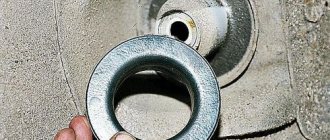
To remove the front strut assembly on a Priora, you must perform the following steps. The first step is to apply penetrating lubricant to all threaded connections, and the main ones - from the bottom. This is clearly shown in the photo below.
And now, using a socket 17 and 19, unscrew the two bolts securing the strut to the steering knuckle:
When the nuts are unscrewed, there is no need to knock out the bolts yet, let them continue to sour in the lubricant. Now we take pliers and use them to align the cotter pin and remove it from the steering tip pin.
And now you can unscrew the nut securing the tip, as is clearly demonstrated below.
Now, using a pry bar and a hammer, press the tip pin out of the hole in the stand:
The result of the work done is shown below.
Now you can begin to remove the lower bolts, knocking them out with the surf if there is a problem with their removal.
As a result, we should get something like this:
Now you can unscrew the rack from above, for which, using a 13mm wrench, unscrew the 3 nuts securing the upper support of the rack.
After which you can remove the entire Priora front suspension module assembled with a spring, strut, support and support bearing, as shown in the photo below.
To replace the strut, you need to tighten the spring using special tools, and then disassemble the module:
- Remove the support with bearing
- Pull out the spring
- Remove the boot with bumper
After this, you can install all these parts on the new rack in the reverse order. The price of a new rack manufactured by SAAZ is about 2,000 rubles per piece. If we consider more expensive options, for example, SS20, then for one rack you will have to pay around 2800 rubles.
Rear shock absorbers on Priora
The rear wheels of the Lada Priora factory also come with non-separable shock absorbers. Their characteristics are similar to the front ones. As many drivers note, these shock absorbers are very soft and do not hold the road well at high speeds.
| vendor code | Rod diameter, mm | Case diameter, mm |
| 21702915004 | 11 | 46 |
Analogs of Priora front shock absorbers
Replacements for shock absorbers on the rear wheels of Priors are slightly less popular than those on the front wheels. Often, many drivers install analogues on the front wheels, and leave original spare parts on the rear wheels. Nevertheless, the most popular analogues of rear shock absorbers are presented below.
| Manufacturer | vendor code | price, rub. |
| SS20 | SS20144 | 5200 (set, 2 pcs.) |
| Fenox | A12288C3 | 1200 |
| Kraft | KT 073542 | 1200 |
SS20144
Fenox A12288C3
Kraft KT 073542
Which shock absorber struts for Priora are better? For moderate driving, and at a low price, it is better to take the original SAAZ. Also, shock absorbers from the Russian company SS20 deserve special attention. They produce high-quality and technologically advanced products at a relatively low price. The range is represented by several lines of shock absorbers (differing in level of rigidity). But the most popular for the VAZ 2170 is the “Comfort” series. They are a little stiffer than the factory ones, which is especially noticeable at speeds up to 50 km/h. But after this mark they perfectly reveal their full potential on uneven roads. When entering the pit, the sound is practically inaudible, and most of the vibrational energy is absorbed.
Also of particular interest are shock absorber struts from the Japanese Kayaba (KYB), the big advantage of which is their versatility. They perform well both on smooth highways and off-road. The company has developed gas-oil shock absorbers labeled Exel-G, especially for Priora. But, due to the novelty of these spare parts, they are now quite rare on sale.
Manufacturers and prices of analogues
- A frequently used analogue of Priora struts is the SS-20.
- SS-20 are sporty, they provide greater “strength” of the suspension, and cost accordingly.
- The front part number is SS20118, they cost 6,000 rubles for two pieces. However, there is one “but” - the SS-20 must be installed together with supports that fit the fasteners.
- The price of Priora struts is not that high, because the SS-20 company sells them as a kit. A set of rear shock absorbers costs 5,200 rubles, article number – SS20144. This company has several model lines - standard, sport, comfort, optimal.
- There is an analogue from Trialli: AH-01159 on the left, AH-01360 on the right, the price is 1,900 rubles each. Front shock absorbers at a low price - from Pilenga: SH-P 2771 - O on the left, SH-P 2770 - O on the right. Cost: 1,600 rubles. In terms of replacing rear components, you can take a closer look at Fenox A12288C3 (1,200 rubles) and KraftKT 073542 (1,200 rubles).
- There is an expensive analogue - Kayaba struts for Priora. They are called KYB EXCEL-G (front), the price of the set is 6,000 rubles, the complete rear set will cost about 6,100 rubles.
- An analogue of Demfi is sold under the article number ITM70-2905002, ITM70-2905003, price - 2,100 rubles (front), ITM70-2915004, cost - 1,300 rubles (rear). The model range is quite wide: gas, hydraulic options, and there is an adaptation for a lowering spring. Branded shock absorber mounts for Lada Priora are for sale.
Shock absorber manufacturing plants
There is a huge selection of companies that are better at producing these parts for Priora. And all of them are highly appreciated by our car owners.
- Koyaba;
- Horses;
- Monroe;
- SS20;
- SAAZ.
If the first three companies are foreign manufacturers, then SAAZ and SS20 are purely domestic enterprises. Moreover, SS20 is named so because most of the engineering employees of this company previously worked in the defense industry, and as you know, those who understand their business best have always worked there. And in honor of the famous missile system, which is distinguished by its amazing reliability, the enterprise was named.
Two and one tube shock absorbers
There is also a division of these unevenness compensators according to one more characteristic. These are the so-called two-pipe and single-pipe devices. From the name it is clear that “pipes” are cylinders filled with a compensating composition. In the single-pipe version, this is the same “syringe” in which the rod with the piston moves. In a two-pipe system, the role of the rod is played by a second, hollow cylinder inserted inside the first, which has a valve system at the end for better movement of the compensating material.
Typically, single-pipe systems use a single material, gas or oil. But double-pipe struts most often have a double filler and are gas-oil.
How to disassemble the front and rear suspension
The chassis consists of 41 parts, so disassembly takes longer and assembly may require additional adjustments. The process looks like this:
- Using a wheel wrench, loosen the bolts on the wheel one by one and pull the car onto an inspection hole or overpass. Be sure to tighten the handbrake - this will lock the rear ones, now remove the front ones.
- Unscrew the nuts from the hubs, now you can remove the steel ball joint rod from the damper strut.
- Disconnect the stabilizer from the lever. Unfasten the ball joints from the steering knuckle and remove them.
- Disconnect the bracket from the body, and then remove the extension. At the same time, loosen the pad holders.
- Tie the brake caliper, leaving it attached to the hose. Removing it is not so difficult, but installing it is much more difficult, so it is easier to leave it hanging.
- Unscrew the nuts from the damper, remove it, and then the protective fist.
- Using socket wrenches, remove the fastenings of the ball joint and steering knuckle. Be careful not to damage the protective cover of the hinge.
- Analysis of the rear chassis looks like this:
- Place the car on the pit (it is better, of course, to use a lift);
- Open the trunk, under the trim (which covers the wheel arches) loosen the shock absorber bolts.
- Gradually loosen the wheel bolts and remove them.
- Unscrew the brackets securing the handbrake cables, then remove them - otherwise they will get in the way. Unscrew the drum mechanisms, cable ends, flanges.
- Remove the brake pipes. Unscrew the drive lever washer, then remove the drive itself.
- Remove the damper supports.
- remove the stand.
- Unscrew the fasteners of the beam (from below), and smoothly lower it to the ground.
Removing and installing front suspension springs on Priora
So, to remove the springs, you must first remove the front suspension modules from the car. More information about this is written in this article on replacing the front struts on a Priora.
When the modules are removed, it is necessary to loosen the nut of the strut rod, holding the rod itself from turning with a hexagon:
After this, compress the springs using special ties.
Compress the spring until it no longer exerts pressure on the support.
When the spring is sufficiently tightened, unscrew the upper rod nut completely.
Next, you need to remove the nut along with the washer, and then lift the support assembly with the bearing:
After which we also remove the cup and rubber gasket:
Now you can remove the spring, since nothing else prevents its removal:
Installing a new spring occurs in the reverse order. Of course, to do this it is necessary to pull it to the same level as when removing the old one in order to put the support with the bearing in place and tighten it with a nut.
The price of a new spring on a Priora ranges from 1,000 rubles for a standard factory spring, and up to 2,500 rubles for various modifications from other manufacturers, such as SS20 or Acomi.
Leave a reply Cancel reply
You must be logged in to post a comment.
Source
How to disassemble an existing structure
- At this stage, you will need pre-prepared spring ties. They need to be installed on the second coil of the spring. The second tie is installed in exactly the same way, only on the other side.
- Reduce the spring by twisting the coupling bolts of the first tie. This must be done until the moment when the second tie begins to move freely on the coils. Repeat all these steps on the second screed.
Replacing the support bearing of a VAZ 2110 with your own hands (without wheel alignment)
The chassis, as well as all its main components, are regularly subjected to heavy loads, which cannot but affect their condition. The struts and support bearings suffer almost more than anyone else. However, everything in a car is interconnected and if you delay in replacing a seal, you will eventually have to change the bearing; ignoring a non-functioning bearing, over time you will have to change the entire strut, etc. Timely repair of a specific part or assembly allows you to avoid major repairs and save your money.
In addition, malfunctions in the chassis are also dangerous, since loss of controllability poses a direct threat to the life of the driver, as well as other road users.
This time we will talk about the support bearing; this photo report will allow you to independently replace the front support bearing of the VAZ 2110 with your own hands without the subsequent need for wheel alignment adjustment.
I once wrote about how to replace a support bearing, so for greater clarity, you can also look at these instructions.
As practice shows, if you make a replacement without unscrewing the camber bolts, you can maintain the correct alignment.
Replacing the support bearing of the front strut of a VAZ 2110 requires certain tools, namely:
- Steering end remover;
- Spring tie;
- Specialist. a device that allows you to unscrew the nuts of the struts;
- Jack;
- A set of keys;
- It is advisable to have an assistant.
Step-by-step instructions - how to replace the front support bearing of a VAZ 2110
1. First of all, you need to remove the hub cap, then loosen the CV joint nut.
2. If you have an assistant, ask him to press the brake, your task is to use a wrench or socket to rip off the CV joint nut.
3. Now jack up the car and remove the wheel.
4. Unsplit the tie rod nut, then press out the pin using a tie rod puller or a hammer and a pry bar.
5. Unscrew the two mounting bolts and disconnect the ball joint.
6. Remove the brake hose from the strut clamp.
7. Using a screwdriver, you need to touch the petals of the washer and unscrew the two caliper bolts. Move the caliper to the side, hanging it on a clamp or wire, this will simplify your task. The most important thing is that it does not hang on the brake hose. It is not necessary to remove the brake hoses themselves.
8. Also, to make it more convenient to work with the removed stand, loosen the stand nut without completely unscrewing it, then unscrew the three support nuts.
9. Unscrew the CV joint nut, try to remove the strut while simultaneously pulling the CV joint from the splines.
10. Using spring ties, retract the spring. This is done as follows: secure the tie to the coils, then use a wrench to gradually tighten each nut. After the spring is compressed, unscrew the support bearing.
11. Replacing the support bearing of the front strut of a VAZ 2110 - remove the old support bearing and put a new “support” in its place.
We perform assembly in reverse order.
Now you know how to replace the support bearing of a VAZ 2110, and I hope that if such a need arises, you can easily do this work with your own hands. It is advisable to have some experience in car repair and a few free hours of time.
Now let's start disassembling the existing structure
1. This is where you will need the previously prepared spring ties. Install them on the second coil (top and bottom) of the spring, as indicated in the picture. We install the second screed in the same way, only on the other side.
2. Now start bringing the spring together; to do this (if anyone doesn’t understand) you need to twist the tie bolts of the first tie. This is done until the second tie begins to move freely on the turns; repeat all of the above in relation to the second tie.
3. Using a “22” socket and a hexagon, unscrew the nut securing the strut rod to the support.
4. Next, remove the bump stop (limiter), as well as the support bearing, compression limiter and support.
5. We replace the old rebound limiter washers with new ones that came with the struts, be careful, they are different - the top one is slightly larger than the bottom one.
6. Remove the spring cup along with the rubber damper, as well as the spring, compression buffer and boot.
Now let's carefully examine the rack.
The cause of the malfunction was discovered almost immediately, after checking the play, I raised the rod to the top point, then simply released it, after which the piston sharply went down without the slightest resistance and “slammed” into the upper part of the cylinder. Here, as they say, no comments... Now it’s clear where the dull knocks were coming from.
Before replacing the front drain, it must be bled.
Rear shock absorbers on Priora
The rear wheels of the Lada Priora factory also come with non-separable shock absorbers. Their characteristics are similar to the front ones. As many drivers note, these shock absorbers are very soft and do not hold the road well at high speeds.
| vendor code | Rod diameter, mm | Case diameter, mm |
| 21702915004 | 11 | 46 |
Analogs of Priora front shock absorbers
Replacements for shock absorbers on the rear wheels of Priors are slightly less popular than those on the front wheels. Often, many drivers install analogues on the front wheels, and leave original spare parts on the rear wheels. Nevertheless, the most popular analogues of rear shock absorbers are presented below.
| Manufacturer | vendor code | price, rub. |
| SS20 | SS20144 | 5200 (set, 2 pcs.) |
| Fenox | A12288C3 | 1200 |
| Kraft | KT 073542 | 1200 |
Kraft KT 073542
Which shock absorber struts for Priora are better? For moderate driving, and at a low price, it is better to take the original SAAZ. Also, shock absorbers from the Russian company SS20 deserve special attention. They produce high-quality and technologically advanced products at a relatively low price. The range is represented by several lines of shock absorbers (differing in level of rigidity). But the most popular for the VAZ 2170 is the “Comfort” series. They are a little stiffer than the factory ones, which is especially noticeable at speeds up to 50 km/h. But after this mark they perfectly reveal their full potential on uneven roads. When entering the pit, the sound is practically inaudible, and most of the vibrational energy is absorbed.
Also of particular interest are shock absorber struts from the Japanese Kayaba (KYB), the big advantage of which is their versatility. They perform well both on smooth highways and off-road. The company has developed gas-oil shock absorbers labeled Exel-G, especially for Priora. But, due to the novelty of these spare parts, they are now quite rare on sale.
To bleed the rack do the following:
Bring the stand to a vertical position, then pull the rod to its highest point and slowly return it to its place.
Repeat these movements 3-4 times. There should be no dips, falls or jamming of the stem. Once bleeding is complete, the posts must be in an upright position before being reinstalled. Bleeding the racks will bring them into working condition.
After this, assemble a new shock absorber, for this you need:
- Set the rack rod to the upper position.
- Put on the boot and compression buffer.
- Install the spring, cup and damper.
- Place the smaller washer first, then the larger washer from the kit. After this, you can install the support with the bearing.
- Install the nut that secures the rod.
- Tighten the nut with a hexagon to “6” while holding the rod. The final tightening should be done after the front strut has been installed in the car.
- Remove the zip ties.
- Turn the support with the pointer forward and slightly inward of the car body.
- Install a new strut into the car.
- Tighten the upper support bolts and place the strut on the steering knuckle. An eccentric bolt with a washer must be secured in the upper hole, a regular bolt in the lower hole. After that, “stretch” everything.
- Pin the finger.
- Place the brake hoses in the holder bracket on the rack.
This completes the replacement of the front strut. You just need to put the wheel back in place and remove the jack. As soon as the car is on the ground, you should tighten all the nuts with a wrench until they stop.
Repeat all steps on the other side. This usually does not cause any difficulties.
After replacing the front struts of your Lada Priora, you need to go to a service station and get a wheel alignment done. If you do not do this, problems may arise: the car will sway from side to side.
How to lower the Priora correctly
There are several ways to lower the landing position on the Priora. Each of them is worth dwelling on in more detail.
Air suspension
Air suspension is considered one of the best, but at the same time expensive, ways to lower a car. The driver can raise or lower the car body as necessary. In addition to the high cost of such equipment, the work must be carried out by specialists who understand the electronics and chassis of the car. Therefore, most Prior owners prefer less expensive methods of undervaluation.
The Priora can be lowered using an air suspension kit, but this option is quite expensive
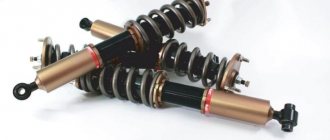
Suspension with adjustable ground clearance
The Priora can be equipped with a special adjustable suspension kit. Height adjustment is carried out by means of struts, and springs with a selected lowering (-50, -70, -90) are compressed or stretched. Thus, the car can be raised for the winter and lowered for the summer. The springs that come with the kit are highly reliable and are designed to constantly change in length. The set in question consists of the following elements:
- front and rear springs;
- screw-adjustable struts and shock absorbers;
- front upper supports;
- spring cups;
- bumpers.
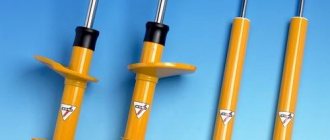
Adjustable suspension kit consists of shock absorbers, springs, mounts, cups and bump stops
The procedure for implementing such a kit comes down to replacing the standard suspension elements with new ones:
- Remove the rear shock absorbers along with the springs.
- We install an adjustable shock-absorbing element.
- We adjust the suspension height with special nuts, choosing the desired lowering.
- Similarly, we change the front struts and make adjustments.
Lowered suspension
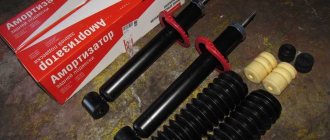
This method of lowering the suspension is less expensive than the previous one. It involves purchasing a set of shock absorbers and lowered springs (-30, -50, -70 and more.). The disadvantage of this kit is the impossibility of adjusting the ground clearance. However, you can install such a suspension yourself. To replace you will need the following kit:
- Demfi -50 racks;
- springs Techno Ressor -50;
- supports Sevi Expert.
To lower the suspension you will need a set of struts, springs and supports from one or another manufacturer
You will also need to prepare the following tools:
- wrenches 13, 17 and 19 mm;
- 17 and 19 mm socket heads;
- breakdown;
- hammer;
- pliers;
- ratchet handle and knob;
- penetrating lubricant;
- spring ties.
Replacement of suspension elements is carried out as follows:
- Apply penetrating lubricant to the threaded connections of the front struts.
- Using sockets 17 and 19, unscrew the fastening of the struts to the steering knuckle.
- Unscrew the ball pin nut and unscrew it.
- Using a hammer and a pry bar or puller, press the ball pin.
- Unscrew the upper support of the rack.
- Remove the stand assembly.
- We install springs and support bearings on new struts.
- By analogy, we change the rear pillars, unscrewing the upper and lower fastenings and installing new elements.
- We reassemble in reverse order.
Video: replacing the front struts on a Priora
Low profile tires
One of the options for lowering the suspension of the Lada Priora is to install low-profile tires. The standard tire size for the car in question has the following parameters:
- 175/70 R13 82T;
- 175/65 R14 82Н;
- 185/60 R14 82Н;
- 185/65 R14 86H;
- 185/55 R15 82H.
Low profile rubber also allows for a lower stance
When lowering the seating position by installing low-profile tires, a small deviation from the standard dimensions should be maintained. Otherwise, the vehicle's performance may deteriorate, which will negatively affect not only driving performance, but also the wear of suspension elements.
Filed the springs
One of the most budget-friendly ways to lower the suspension is to shorten the springs by cutting off a certain number of turns. To carry out such an upgrade you will not need to buy anything. It is enough to arm yourself with a grinder. The procedure consists of dismantling the shock absorbers and springs, followed by the removal of 1.5–3 turns. You can cut off more, the car will become lower, but the suspension will practically not work
Therefore, such experiments should be carried out with caution.
When shortening springs with a grinder, remove 1.5–3 turns
Fluid leak from shock absorbers
Owners of Priora cars often encounter this problem. The front suspension is leaking. This happens due to a worn or failed rod seal. Also, scuffs may form on the element during operation and the chrome layer may be damaged. A leak occurs due to damage or shrinkage of the sealing rings on the housing. The solution to these problems is to replace the element in the assembly.
Features of replacing racks
At the beginning of the two thousandth there was a stage of restyling, which took the car along reformist paths. Now the racks have become more reliable, and the power unit is more powerful. But nevertheless, professionals propose to improve the restyled version by replacing the struts, since then its performance will be significantly improved. Although over time, replacement of parts is necessary in any case.
Before you decide to replace parts, you should be 100% sure of this. You can check the working condition of the racks in a very simple, old-fashioned way. You'll have to rock the corner of the car a little. Now count the number of free jumps. If one, then the system is normal. If there is more than one, then urgent replacement of the racks is required, since the old ones can no longer cope with the task assigned to them.
How to change the front struts of a Lada Priora - detailed instructions
1. First of all, remove the mounting bolts on the wheel, then install the jack on the side from which you are going to make repairs.
2. Next, unscrew the bolts completely and remove the wheel.
3. It is necessary to disconnect the brake hoses, and then remove them from the holder located on the rack.
4. Take pliers and carefully unscrew the locking cotter pin on the steering end pin, then you need to take it out and unscrew the nut with a “17” key.
5. Now it’s the puller’s turn, install it on the steering end as shown in the photo and press it out of the socket.
6. Unfold the support and start unscrewing the fastening nuts on the steering knuckle. If you followed my recommendations and treated all connections with WD-40, there should be no problems with unscrewing.
7. If necessary, use a hammer to knock out the bolts, being careful not to damage the threads!
8. The top eccentric bolt is used to adjust the camber and has a washer on it that often likes to stick to the strut. Do not throw away the bolt itself; it will be reinstalled during the replacement process. There is no point in remembering the position of the eccentric along the axis, since in any case you will have to go to the wheel alignment.
9. Let's move on. Using a wrench set to “13”, unscrew the fastening nuts that secure the front strut to the body; they are located under the hood.
10. We take out the front strut from the wheel well assembly.
practical guide
It is convenient to carry out the work in an inspection ditch. The work is shown on a car with a hatchback body. On a station wagon, the work is performed in the same way. On a sedan car, access to the upper shock absorber mount is through the luggage compartment.
Replace shock absorbers and springs in pairs.
To complete the work you will need:
— inspection ditch or overpass;
— a device for disassembling suspension struts.
We carry out the work with an assistant.
Removal
1. Prepare the car for work and hang the rear of the car on stands.
If there is no inspection ditch or overpass, remove the rear wheel of the car from the side of the shock absorber being replaced.
2. Remove the luggage compartment shelf.
3. Fold down the back seat.
4. In the luggage compartment, use a Phillips screwdriver to remove the four screws securing the upholstery.
5. Use a screwdriver to pry off the trim of the seat back lock.
6. Using a 19 mm wrench, unscrew the lock and remove it.
7. Using a Phillips screwdriver, unscrew the screw securing the luggage compartment lining.
8. Bend down the luggage compartment upholstery.
9. Use a Phillips screwdriver to unscrew the top screw securing the cladding.
10. Using a Phillips screwdriver, unscrew the two lower screws securing the cladding.
11. Move down the luggage compartment lining.
12. Using a 13 mm socket wrench, unscrew the two nuts securing the seat back clamp bracket.
13. Remove the retainer bracket.
14. Using a slotted screwdriver, remove the plug.
15. While holding the shock absorber rod from turning with a 6 mm wrench, unscrew its nut with a 17 mm wrench.
16. Use a magnet to remove the spring washer and the upper support washer from the shock absorber rod.
17. Remove the upper rod mounting pad from the shock absorber rod.
18. Using two 19 mm wrenches, unscrew the nut of the bolt securing the lower end of the shock absorber to the rear axle beam and remove the bolt.
19. Move the lower end of the shock absorber towards the rear of the car and remove the shock absorber.
20. Remove the spring and its gasket from the shock absorber, and also, if necessary, remove the lower cushion and spacer from the shock absorber rod.
Installation
Springs of the same class (with the same color marks) should be installed in the rear suspension of the car.
1. Before installing the shock absorber, secure the rubber gasket 4 to the spring 2 with insulating tape or tape.
2. Install the spring on the shock absorber and fully extend the rod. We put a buffer 1, a protective casing 3 with a cover, a spacer sleeve 5 and a lower cushion 6 (if they are not on the rod) onto the shock absorber rod.
When installing, the shock absorber must be oriented so that the end of the lower coil of the spring faces the wheel.
3. We insert the shock absorber rod into the hole in the body cup, at the same time an assistant puts the upper cushion and support washer on the rod and tightens the rod nut a few turns.
4. Raise the lever until the holes in the shock absorber and beam bracket align. Install the lower shock absorber mounting bolt and tighten its nut (without tightening).
If you don't have an assistant, you can first attach the shock absorber to the rear suspension beam. Then, placing a stop under the rear lever, smoothly lower the car on the jack, making sure that the shock absorber rod enters the hole in the body, and after that, put on the upper cushion with the support washer and tighten the nut.
5. Install the removed wheel (if the work was carried out without an inspection ditch) and lower the car onto the wheels. We press the rear of the car several times to self-install the suspension elements.
6. Tighten the shock absorber rod mounting nut to a torque of 50-61.7 Nm (5.1-6.3 kgcm).
7. Tighten the nut of the shock absorber lower mounting bolt to a torque of 66.6–82.3 Nm (6.8–8.4 kgcm).
How to pump up a rack?
In order to bring the front struts into working condition, they need to be bled. This must be done as follows:
- Place the front pillar vertically;
- Smoothly pull the rod to the top point;
- After that, gently press it back.
Do 3-4 such repetitions, and there should be no failures or falls while moving the rod. After pumping the racks, try to keep them in an upright position.
Frequent mistakes when replacing struts and shock absorbers reduce their life. Recommendations for replacement.
The topic is quite lively. There is a lot of information on the Internet, but as usual, complete information is not available anywhere. In this same article, I would like to talk about the main mistakes when replacing struts and shock absorbers on a car. And also advice on replacement, what to pay attention to. When I sell racks in my store, I always ask clients if they know the basic rules when replacing and usually the answer is no, or the person knows, but not everything. Today I will try to cover the topic completely.
1) Proper bleeding of struts and shock absorbers before installation.
There are so many people and so many opinions. I will tell you about the method that I use myself. I learned about it at a KYB company seminar back in 2010 in Novosibirsk. The procedure for pumping gas and oil struts (shock absorbers) is slightly different, but they have some important points in common.
Shock absorbers are stored in warehouses in a horizontal position. Long-term storage leads to spontaneous flow of liquid, and the freed volume is filled with air. Bleeding the shock absorber is a necessary process; if you neglect these rules, the new strut (shock absorber) will not work correctly, a knock will appear and it will quickly fail.
The procedure for bleeding shock absorbers (struts).
1) Pull out the strut rod as much as possible; if the strut is gas, the rod will come out on its own.
2) Make sure that the rod comes out completely. Turn the stand over with the stem down. Smoothly compress the rod. And fix it in a compressed position for 4 seconds.
3) Turn the stand over with the rod up and smoothly pull it out. We repeat this 2-3 times.
4) Now we place the stand vertically and pump it in this position 2-3 times. Fully compress the rod and pull it out.
5) Check the functionality. The strut rod should compress and come out smoothly without dips or jerks. Next, with sharp, short movements of the rod, we check the smooth movement of the piston.
After pumping the rack, immediately place it on the car; if you are distracted, then leave the rack only in a vertical position as it will stand on the car. Sometimes people pump up a stand and lay it horizontally and do other things, but you can’t do that.
Another important point regarding both oil and gas shock absorbers. During the pumping process, when you compress the rod, you do not need to compress it to the extreme position and knock on the flask.
In the photo above, I indicated that when pumping, we do not compress the rod completely to the extreme position, so as not to knock on the bottom of the flask. We leave 2-3 cm to the extreme position and, when compressing the rod, bring it to this place and unclench it.
2) Replacing struts or shock absorbers only in pairs!
Many people, wanting to save money, change only the rack that has completely failed and forget that the second rack is also worn out. After installing one new rack, most of the load will be on it. Because of this, it will fail much faster and you will have to spend money again, only on buying two racks. The golden rule: “the miser pays twice.” It is also worth choosing high-quality racks from a trusted manufacturer. Cheap struts usually don’t last long, again you have to buy a new spare part, spend money on replacement (if you change it at a service station), spend money on wheel alignment.
There was a case when a practically new Solaris flew into a hole, its wheel disc burst, the strut leaked, the mileage was about 15,000 km. In this case, there is of course no need to change the racks in pairs.
3) When replacing, install a new protective kit.
When installing new racks, it is advisable to install new bumpers and anthers. There were cases when, when replacing struts, the old boots were in good condition, but after 5,000 km they cracked or tore. Therefore, when replacing, it is advisable to immediately install a new set. If you leave the old boot and it breaks after a while, you will need to remove the struts from the car again. The boot and the strut bumper are important components for the long service life of the unit. The bump stop should sit tightly on the rod and not “walk” along it.
4) The final tightening of the shock absorbers is carried out after the car has been lowered onto 4 wheels.
Do not tighten while the car is hanging on a lift. This applies to shock absorbers and struts with silent blocks or bushings. To ensure that the bushing or silent block takes the correct working position, the final tightening is only after the car is lowered from the lift. This rule should be used for all suspension components; after replacing silent blocks in the arms or replacing reaction rods, the final tightening should be done only after the car is lowered and the suspension is in the working position.
5) Along with the struts, we also change the springs.
This of course needs to be considered individually. In our climate with constant reagents on the road, the car is in an aggressive environment, and the chassis components are no exception. If pockets of rust or damage to the coating (paint) appear on the springs, then such springs will need to be replaced. It is necessary to inspect the condition of the springs. It is advisable to place the left and right springs next to each other and compare their sizes. Check to see if the coils are broken; the ends of coils especially often break and this is sometimes not noticed.
6) We use special tools.
When the strut nut is unscrewed or tightened, the rod begins to rotate along with the nut. Especially if you work with a pneumatic impact wrench. Many manufacturers claim that turning the rod in the strut body does not harm the shock absorber. At all car repair shops, I observe that the nut is tightened with a pneumatic wrench and at the same time the rod is spinning at breakneck speed. Servicemen claim that this is normal! I am a supporter of the fact that the strut rod must be fixed when unscrewing and tightening the nut. Another question is that it is not always possible to do this, so if it is possible to fix the rod, then we do it.
Tips for newbies on replacement
- Before you begin replacing a part, be sure to check that all components are present.
- Follow the step-by-step instructions, remember which parts were removed from where, and in what order.
- When tightening the bolts and fastening the parts, there should be no differences from the original: no gaps, tight and even.
- It is better to replace the old ones with hydraulic structures; they can be disassembled, it is easier to replace some parts than to dismantle the entire structure later.
- Don't neglect to use WD-40 before starting work. This will preserve the thread and save effort.
- If you have doubts about whether it will work, it is better to ask an experienced car mechanic to observe and be present.
Sources
- https://gil-service.ru/dvigatel/zamena-perednih-stoek-priora.html
- https://koreec73.ru/uhod-i-remont/zamena-perednih-amortizatorov-priora-2.html
- https://k-SportRacing.ru/neispravnosti-i-remont/zamena-perednih-amortizatorov-priora-2.html
- https://ilifia-club.ru/tehobsluzhivanie/sborka-stojki-priora.html
- https://vaz-remont.ru/zamena-perednix-stoek-lada-priora-svoimi-rukami/
- https://priora-remont.ru/zamena-perednix-stoek/
- https://www.autoposobie.ru/zamena-perednih-stoek-lada-priora-svoimi-rukami/
- https://vaz.today/zamena-perednih-stoek-lada-priora
Replacing a support bearing without wheel alignment
1. Remove the hub cap and unlock the CV joint nut. (My nut was so tight that neither a screwdriver nor any pick could be reached, so I decided to use a drill and a suitable drill bit)
2. Use the head to push the CV joint nut through the wrench until it rotates easily. The assistant presses the brake at this time.
3. Raise the car on a jack and remove the wheel.
4. Unscrew the steering tip nut and unscrew it. Using a hammer and a pry bar, press out the finger.
5. Unscrew the 2 ball mounting bolts and disconnect the ball.
6.Release the brake hose from the strut.
7. Unscrew the 2 caliper bolts, first bending the washer petals. and move the caliper to the side (do not leave it hanging on the brake hose).
8. In order to make it easier to work with it “on your knees” after removing the stand, remove the nut from the stand, but do not unscrew it. Next, unscrew the 3 support nuts.
9. Unscrew the CV joint nut. We take out the rack while simultaneously pulling the CV joint from the splines.
10.Tighten the spring and then unscrew the support bearing.
11. Install a new support. We assemble everything in reverse order.
Don't forget that you need to install a new nut. Tighten and lock with a large torque.
Be careful not to tear off the 3 nuts securing the support, the moment there is small (2 kgf m).
What is not clear, ask!
Lada 2110 2004, petrol engine 1.5 l., 78 l. p., front drive, manual transmission — scheduled maintenance
Cars for sale
Lada 2110, 2005
Lada 2110, 1998
Lada 2110, 2002
Lada 2110, 2006
Comments 100
Please tell me, the nut on the stand has loosened, the rod has started to pull and is turning. As I understand it, you need a special key. Question: is it okay if the rod turns?
Hello, it's okay that he turned around.
Toe-in is necessary if the steering rod (tip) is twisted or changed. always the struts (springs, support) were changed without adjustment
When you replace the strut, the camber will go away!
Toe-in is necessary if the steering rod (tip) is twisted or changed. always the struts (springs, support) were changed without adjustment
This is not new; I managed to change the support without removing the spring, compressing it on the strut!
THERE IS NOTHING BETTER THAN SS20 SUPPORTS, I HAVE OVER 200K, THE MAIN MAIN THING IS NOT TO RUNS INTO A FAKE
You can argue about this for a long time, while I was choosing what to use, I was considering these two options, but for me everything weighed in favor of Asomi and I still consider them the best and most comfortable.
I WENT TO ASOMI, THERE WERE SHOCK MORTS AND SUPPORTERS, EVERYTHING DIE AFTER 40 THOUSAND KM, but you try SS20 preferably highway, in my opinion this series has the best characteristics
I also had an Acomi on gas meat after 50 thousand, one side of the bearing was squeezed out
I WENT TO ASOMI, THERE WERE SHOCK MORTS AND SUPPORTERS, EVERYTHING DIE AFTER 40 THOUSAND KM, but you try SS20 preferably highway, in my opinion this series has the best characteristics
About the ss20 supports, yes, that’s a thing, but the ss20 supports, although they last a long time, are because they don’t work as supports, they are gear crushers. Ps, but I still drive the ss20)) “eternal” ones, and my props died quickly, apparently because of the track.
they are stiffer than the original ones, but this is closer to a sports suspension; in my experience, a VAZ2115 on SS20 struts at a speed of 90-100 km per hour does not notice the open hatch at all, and on regular struts, at least you will bend the wheels and at most you can get killed
It’s tough as you are with the steering tip, and the plastic in it will all crack ((((
Why, I loaded the rod with an assembly and hit the bipod from the end, that’s it, nothing will crack there, there is no large load on the steering tip.
Well, then they use a puller to press on the part where the nut should turn)
improvised means. A shirt remover probably costs 500.
The other day I had a chance to talk with a friend - his chain on a SsangYong Action jumped, so he said that when he was studying this issue, he had the opportunity to meet one “Kulibin”, who changes the chain by pulling with partial disassembly of the engine, he got so used to it that his record is 37 minutes and charges about 7 thousand rubles for this.
It would seem: - 7 thousand per hour - immodest...
But if you compare with any other OD masters who take no less than half a day to do the same thing and the prices are about 35...40 thousand rubles...
Why lower the Lada Priora?
On the roads of our country you can often find “Priors” with a low landing. The main reason why owners resort to this solution is to improve the appearance of the car. Lowering allows you to give the car a sporty look. In this budget way, the VAZ 2170 can be distinguished from the road traffic. When lowering work is carried out correctly, the following benefits can be obtained:
- reduce roll when cornering;
- improve the handling and behavior of the car at high speeds.
Lowering the suspension improves the appearance and handling of the car
One of the main disadvantages of lowering a car lies in the quality of the roads: any hole or unevenness can lead to serious damage to body elements or vehicle components (bumpers, sills, engine crankcase, exhaust system). Due to the low seating position, the owner has to visit a car service much more often to fix certain problems. Therefore, if you want to make your “Priora” below, you need to take into account the following disadvantages of such a procedure:
- you will have to plan your route more carefully;
- incorrect lowering can lead to rapid failure of suspension elements, in particular shock absorbers;
- Due to increased suspension rigidity, the level of comfort decreases.