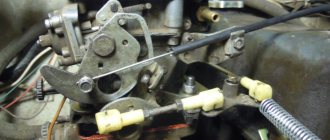
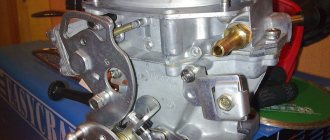
VAZ 2109 carburetor tuning
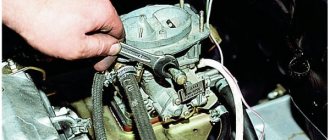
VAZ 2109 carburetor tuning is a popular topic and very in demand lately. From the article we will learn how to do this. On a VAZ 2109, tuning a Solex carburetor or a carburetor from another manufacturer is carried out for only one main reason - to increase the power and dynamic characteristics of the car. To increase power, experts will disagree, it is necessary first of all to refine the power unit itself. Yes, this is true, but if you don't have enough budget, you have to take risks. Modifying the carburetor without improving other important elements is, of course, a risk, but in some cases it is justified.
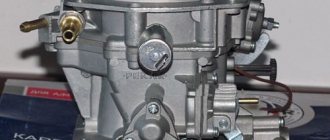
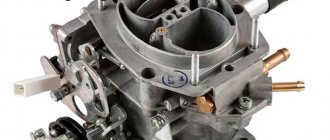
"Solex 21083"
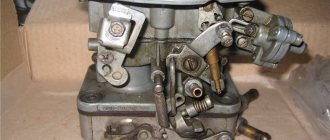
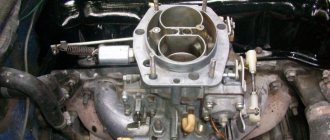
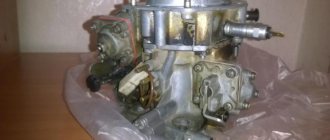
This carburetor consists of two parts. So, the first part is the main body of the device - there are diffusers, the main dosing system, a system for idling the engine, a power economizer and an accelerator pump.
The second part is the lid. It is equipped with an air damper, floats, a starting device, and a solenoid valve.
Two carburetors instead of one
This approach is also considered as effective tuning. This idea has quite sound grounds. It would seem why the engineers themselves didn’t think of this at the design stage of the VAZ 2109, but that’s another conversation.
Note. One of the main reasons for installing two carburetors instead of one, experts and tuners see, is that due to design oddities on the Nine’s power unit, the manifold pipes have different lengths. Because of this not entirely clear situation, more fuel gets into the chambers of the 1st and 4th cylinders of the engine, and less into the others.
This error can, of course, be corrected by polishing the collectors and both chambers from the inside. This procedure will allow more mixture to enter the chambers, as a result of which the flow resistance will drop, the quality will improve and everything will become much more efficient. But, still, this is not an ideal option - installing two carburetors instead of one looks much more attractive.
Important points
Here are the important points to consider during installation:
- Both carburetors must be the same model (in this case Solex);
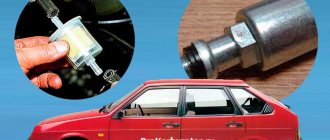
- You also need to install two filters and prepare the appropriate number of fasteners, tees, hoses, and so on;
- After installation, which in itself is not so complicated, you need to start tuning both carburetors, which is considered a more difficult operation.
Note. Carburetor adjustment can be carried out using a vacuum gauge bar or an IKS-1 mixture quality sensor, screwed into place of the spark plug. So, for the adjustment to be correct, you need to observe the color of the mixture at idle and ensure that it turns light blue.
Device
Let's take a closer look at how this carburetor works. Before you start setting up the VAZ-2109 carburetor, you need to understand what and how it works. So, “Solex 21083” is an element consisting of two cameras. Jets for supplying fuel from the main metering system are installed in the middle of the chambers, deep in the main body.
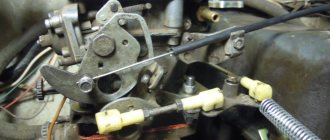
On top, the fuel jets are covered with air elements of the gas pumping station. In the design of this carburetor, the developers have provided a fuel mixture heating system. Hoses through which hot coolant passes are connected to this block. Since there are two chambers in this carburetor, there are also two throttle valves. They are mechanical, and opening and closing is carried out using cables and levers.
The lid has pipes for supplying fuel and returning it back to the tank. The presence of the so-called return line allows you to reduce the pressure that is formed in the fuel system of the car during operation.
What will you need?
As always, you will need all the possible tools from the garage and two intake manifolds from Oka. Regarding which carburetors to choose. In this case, I would recommend Solex 21083. With them there will be less hassle, later you will find out why. However, you can also use Weber.
If the carburetors have heating, then we also purchase hoses and all sorts of tees for antifreeze and gasoline.
Operating principle
There is no point in examining in detail how a carburetor works, so let's study the basic principle of operation. A carburetor is a special device whose main task is to supply the engine with a fuel mixture in different operating modes.
When starting an internal combustion engine, many drivers open the air damper of the first chamber - this allows the mixture to be supplied to the cylinders as rich as possible. The engine should start. Then, as the engine warms up, the air damper is closed and the carburetor returns to its main operating mode.
The fuel mixture is supplied from the pump to the float chambers, which feed the first and second chambers. The gasoline level here is adjusted using a needle valve. Next, fuel is supplied from the chambers through special channels in the device body into the main jet and then into the first chamber. The mixture supply level is controlled by the accelerator pedal. The latter, in turn, regulates the throttle valve. The second camera will be activated if you press the gas pedal more than halfway.
When the engine is idling, the device does not use the main metering system. These carburetors have a separate idle design. Fuel and air are supplied through separate channels in the housing. XX jets are also present. Many owners have problems with setting the idle speed on VAZ-2109 carburetors.
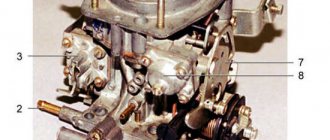
Photo of the location of carburetor parts: Gas consumption
| Fuel consumption VAZ (Niva) 21213 carburetor You can see what cross-section of jets are installed on your carburetor in the section Calibration data and parameters of carburetors 2108, 21081, 21083 Solex and 2105, 2107 Ozone in articles on calibration data. In terms of consumption, I can say the following: in the city I got from eight to ten liters, and on the highway, if you don’t press the accelerator pedal to the floor, 8-8.5 liters per hundred kilometers. |
| Fuel consumption of VAZ 2108 injector and carburetor per 100 km To reduce gasoline consumption with your own hands on a car with a carburetor type engine, you will need to purchase a special repair kit from a store specializing in automobile spare parts, in which the size of the jets will be smaller than those found in the standard carburetor. If temperature sensors, oxygen supply, or air flow sensors do not operate correctly, the electronic control unit is not able to respond to changing conditions. |
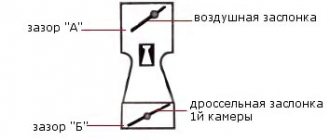
- close the air damper (this is done using the thrust handle located in the car interior);
- check the location of the rod shank, which must be at the end of the groove of the carburetor rod to start the system;
- measure the gap level from the edge of the valve to the chamber wall (measurements are taken when the rod is recessed) - the norm is 5-5.5 mm.
Common faults
A well-maintained and properly tuned carb will not cause any problems to its owner. But often this does not happen. Elements break, and there are fewer and fewer carburetor specialists. Let's look at the main problems with these devices.
Most often, malfunctions occur with the accelerator pump. Its main function is to enrich the fuel mixture. During the operation of the car, as well as due to poor-quality fuel filters, the pump becomes clogged. As a result, dips appear and the car “does not move.” The situation can be corrected by disassembling and cleaning the carburetor (in particular, the accelerator pump).
Problems with idle speed also often occur. Usually the idle jet and solenoid valve are to blame. The EPHH unit also fails. The GDS jets also become clogged.
Dismantling
Before setting up the VAZ-2109 carburetor with your own hands, you need to blow it out and rinse it. This process begins with dismantling the device. It's very easy to do. Simply turn off the ignition and remove the air filter housing. Then remove the spring that is installed on the air damper actuator.
After this, disconnect the throttle cable. The next step is to unscrew the fastening that holds the choke cable. All that remains is to unscrew the nuts that hold the device body in place. After this, you can completely remove the device.
Question 6: The engine stalls, the mixture is lean, why is this?
Excessively rich or lean mixture is the cause of many problems with most carburetors. While a rich mixture may indicate a rebuilt carburetor or a clogged air filter, the reasons for the formation of a lean mixture are as follows:
- clogging of jets and channels in the carburetor, contamination of fuel lines, freezing of water in the power system. In this case, it is necessary to blow out the jets, channels and contaminated fuel lines using a pump to inflate the tires of the wheels, and if necessary, clean them with copper wire by disassembling the carburetor;
- stuck fuel pump valves, clogged strainer or small diaphragm rupture. In this case, first, the stuck fuel pump valves are eliminated, the strainer is washed, and the broken diaphragm is replaced or temporarily restored;
White electrode is a sign of a lean mixture - air leakage at the junction of carburetor parts, the carburetor flange with the intake pipe, the flanges of the intake pipe with the cylinder block due to loose fastenings, as well as damage to the gaskets. The location of the leak can be detected using soap suds. A window will form in the soap suds at the expected location of the leak. Air leaks are eliminated by tightening nuts or bolts, as well as replacing the corresponding sealing gaskets;
- wear of the fuel pump drive lever, clogging of the air hole connecting the fuel tank to the atmosphere, jamming of the air damper. These malfunctions are eliminated as follows: replace the faulty parts of the fuel pump with new ones, clean the air hole of the plug, check and, if necessary, adjust the length of the carburetor choke control cable.
Adjustment
This carburetor has several options for adjusting different parameters.
Typically, setting up a VAZ-2109 Solex carburetor includes several operations. You can adjust the fuel level in the float chamber, idle speed and idle speed itself. The quality of the fuel mixture is also adjusted.
How to properly adjust the carburetor on a VAZ 2105: detailed instructions
A correctly configured carburetor very accurately doses the combustible mixture. For example, the difference between the fuel-air mixture intended for idling the engine and the fuel for cold starting of the internal combustion engine is almost 20 points. Therefore, adjustment of the DAAZ 2105 carburetor or its Zhiguli analogue must be carried out and done skillfully as soon as high fuel consumption or unstable engine operation is detected.
In principle, the process of setting up a VAZ 2105 carburetor is not that complicated. Even a beginner can handle the job, but he has studied the device and the sequence of necessary operations. Before making adjustments, it is extremely important to make sure that the OZ is set correctly. It is necessary to check the condition of the distributor cover, breaker contacts, spark plugs and high-voltage wires.
Idle adjustment
If the idle speed is not adjusted correctly, the engine will suddenly stall, stall, “fail” during acceleration, and consume a lot of fuel. It is advisable for beginners to use the tachometer data; experienced carburetor operators determine incorrect speeds by ear. You will also need a 3mm slotted screwdriver.
Adjustment of the VAZ 2105 carburetor in neutral mode is carried out with the engine running and warmed up to operating condition. First you need to make sure that the main dosing system is not working (it should not be activated in this mode). Look from above, through the throttle holes - fuel is pouring or the chambers are dry. If fuel is supplied, then the XX system requires proper configuration.
Further actions:
- use a screwdriver to increase/decrease the speed of the adjusting screw;
- if the system does not respond to the screw, unscrew the idle jet a few turns, creating a vacuum and thereby clearing this very channel from blockages;
- then adjust the fuel quality screw - as you tighten it, the speed drops and vice versa (the notorious “slide”);
- Now adjust the mixture quantity screw.
As a rule, these actions are enough to normalize the operation of the idle system. The jet can become clogged, and the technique of creating an air vacuum without completely unscrewing the element will help clean it.
“Hump” is a normal condition of the carburetor, in which fully tightening the mixture quality screw leads to the engine stopping or reducing the speed to an unacceptably low level. And with the maximum enrichment of the mixture with the emulsion - unscrewing the nozzle, a decrease in speed should also occur, but for other reasons. In this case, the mixture becomes excessively rich and burns worse. There may even be black smoke coming from the muffler. Thus, checking the carburetor “slide” allows you not only to determine the quality of the mixture, but also at the same time to test the compliance of the fuel nozzle of the XX system with the condition of the carburetor and engine.
Now let's talk more about calibration. On a carburetor that has lost its settings, it is customary to first set the original speed values. To do this, tighten both screws (quality and quantity of the mixture) until they stop. Then lower the quality screw by 3 turns, and the quantity screw by 4 turns.
- increase the gasoline supply by rotating the quality screw counterclockwise;
- increase the total amount of fuel mixture by unscrewing the amount screw;
- check with the mixture quality screw whether the set XX speed is correct - when turning the quality screw, the engine speed should rise to 850-900 per minute, which is the ideal idle value.
1 — throttle screw; 2 — adjusting screws for mixture quality; 3 - screwdriver
The correct RPM mark should be exactly between the zones when the engine stalls when tightening and unscrewing the mixture quality screw. You can find it this way: tighten the screw in one direction until the motor starts to stall. Mark the position on the screwdriver shaft - for example, with red paint. Then turn the screw back, counting the number of revolutions until the engine starts to stall again. Align the screw in the middle: if, for example, there were 8 total turns from edge to edge, then the middle will be 4 turns.
If the idle speed cannot be adjusted using the steps described above, one of the following reasons is likely:
- the fuel and air channels of the main carburetor system are clogged;
- the camera jets are swapped;
- the needle valve is faulty;
- tubes have come off the pneumatic valve (“Ozone”);
- The oil seal of the mixture quality screw has dried out.
Eliminating failures in engine operation during acceleration
“Failure” in this case - the Zhiguli car first bites the front end, and only then begins to gain momentum. There may be several reasons: the “fan” or “beak” is clogged, the accelerator pump system is incorrectly configured.
As a rule, any theorist will start checking with the accelerator pump system, especially on Ozone models, since it is responsible for stabilizing the engine during acceleration. In practice, carburetor technicians who have deep knowledge in this area can check other points first (so as not to remove the device again). However, this is not the point, and the acceleration system must be checked and adjusted in case of problems.
The integrity of the acceleration system is tested with the carburetor removed. Here are the elements that need to be checked carefully:
- clogging of the bypass and inlet holes of the float chamber - the accelerator pump comes into contact with it;
- condition of the bypass nozzle;
- integrity of the diaphragm, its reliable and tight fastening;
- free play of the diaphragm spring;
- tightness of the connection between the cover and the body of the carburetor starting device;
- pump valve performance;
- condition of the sprayer, correctness of the spray jet.
One of the signs of a system malfunction, specifically a broken diaphragm, is gasoline leaking through the accelerator cap. This symptom can be detected even on the car, with the carburetor installed and the fuel system connected to it.
A smooth and good stream of gasoline is the key to trouble-free operation of the carburetor acceleration system. Spraying in this mode must have a strictly correct direction - exactly between the wall of the diffuser and the body of the “helicopter” (on Ozons this is extremely difficult to achieve due to the cast, inactive nose). The mixture should not touch anything, otherwise it will not be enriched, and this is a prerequisite for dynamic acceleration of the car. Also, all connections of the metering device must be sealed, without any leakage of fuel.
Also, the cause of failure is incorrect adjustment of the bolt of the second carb chamber.
Here's what to do:
- Use tongs or pliers to tighten this bolt, closing the secondary chamber of the carburetor;
- start the engine;
- press the gas pedal all the way - dips will be clearly noticeable in idle mode;
- unscrew the adjusting bolt until the neutral speed starts to rise;
- adjust the XX system with screws for the quality and quantity of the mixture;
- check for failures - repeat the procedure if necessary.
On Solex carburetors, the cause of failures during acceleration can be simple clogging. Here's what to do:
- remove the top of the carburetor;
- unscrew both emulsion tubes;
- blow out the jets installed inside the channels with a cleaner, as well as all visible overflow holes;
- also blow out the accelerator nozzle;
- adjust the rise of the floats;
- replace the carburetor top cover gasket;
- Remove and clean the coarse filters.
If the candles flood
It happens that DAAZ and Solex carburetors flood the spark plugs when starting a cold engine. The engine does not start or stalls after a while. This indicates an overly rich mixture, which may be caused by a faulty accelerator diaphragm. And it is precisely responsible for the reliable start-up of a cold internal combustion engine, providing a flow of air into the chamber.
It is advisable, before checking the carburetor directly, to exclude all other causes of flooding of spark plugs. And this can happen due to faulty spark plugs or a fuel pump (pumping) and severe frost, which affects poor fuel volatility.
There are several types of damage to the diaphragm:
- crackling;
- delamination;
- the appearance of scuffs and holes.
It is clear that to correct the situation it is necessary to replace the diaphragm:
- Unscrew the 4 cover bolts with a screwdriver;
- Unscrew the middle bolt with a size 8 wrench;
- separate the lid;
- pull out the spring, then the diaphragm with the rod;
- install a new part;
- assemble everything in reverse order;
- adjust the carburetor starter.
In addition to the diaphragm mechanism, at the same time it is necessary to check the housing of the starting device for leaks. Clogging of the air jets of the main dosing system is no exception.
It is also recommended to check the condition of the float chamber needle valve. It may be worn out or deformed, and thus lead to an over-rich fuel mixture. In this case, spark plugs will also be poured onto a hot engine.
Checking the shut-off needle valve on Solex carburetors should be carried out with the fuel supply fitting closed and the metering device cover in a strictly horizontal position.
If there is a smell of gasoline in the car interior
One of the reasons for the strong smell of gasoline in the car interior may be a faulty or incorrectly adjusted carburetor. This happens due to leaky connections. For example, leaky economizer and accelerator diaphragms, loosely tightened caps, or poorly secured parts of the metering device often leak fuel. Typically, a fuel leak can be easily determined visually. Another reason is play in the fuel supply and return passage fittings.
As for incorrect adjustment, it may be due to the needle valve that pours gasoline into the float chamber. As a result, the fuel level rises, the float touches the walls and fuel begins to flow out from under the lid or the gas pump nozzles in the diffusers.
All the “culprits” for the appearance of the smell of gasoline in the car interior are shown in the photo.
The car suddenly loses speed
This is the same failure discussed above. It is customary to distinguish several types of this unpleasant symptom. More details in the table below.
We clean the jets
Clogged jets are a common problem that leads to a car losing traction and its original technical characteristics. This is the reason for increased fuel consumption and other unpleasant issues.
The performance of these carburetor elements directly depends on the size of the hole and the length of the channel. But that's not all. It turns out that the roughness of the inner surface of the tube, as well as the change in pressure at the inlet and outlet, is also of great importance. Any unevenness will noticeably worsen the throughput, but it will be extremely difficult to determine the degree of smoothness by eye.
Thus, clogged channels reduce their performance. Therefore, any owner of a carburetor car should have a can of cleaning spray or carb cleaner on hand. You also need to have a convenient tool for removing jets and tubes, since by removing them you can carry out cleaning much more efficiently.
Carbcleaner liquid acts no earlier than 5 minutes after application. During this time, the composition will react with contaminants, soften them and wash them away. After this, you can start the engine to check, preferably using a choke. If the jets have not been cleaned for a long time, the cleaning procedure must be repeated several times.
In severe cases, when surface cleaning does not help, it is recommended to dismantle the carburetor. Before this, you can make preparations: swap the two high-voltage spark plug wires and start the engine. It will start to work terribly “sneezing” and “shooting”, which will help to automatically clean out deposits from the canals. After this, the dosing device is removed, the channels and chambers are thoroughly cleaned with carb cleaner or other means. In particularly difficult situations, the channels are drilled out and then washed.
Maintain your car's carburetor regularly. The cleaned jets will “revive” the dosing device, and the machine will start running like a clock.
Table: types of failures and solutions
| Type of failure | Recommended Actions |
| The failure is short-term (1-2 seconds), occurring when the accelerator is smoothly applied during the start of the car or at idle. Acceleration and dynamics of the car are normal. | Clean the output channels of the carb transition system or check the operation of the accelerator. |
| A series of failures with a possible engine stop, occurring at low and medium speeds. And when accelerating, the twitching disappears. | Clean the fuel jet of the main metering system; tighten the fuel nozzle of the main metering system of the first carburetor chamber a few turns; blow out the channels, the emulsion well with the emulsion tube of the main metering system of the first carburetor chamber; replace the fuel nozzle of the main metering system of the first chamber if its marking does not correspond to the required one; check the fuel level in the carburetor float chamber, exclude unauthorized air entry into the carburetor, check the operation of the choke; replace or clean the strainer at the carburetor inlet. |
| Failure or rocking (a series of failures) combined with unstable engine idle. | Clean the fuel nozzle of the idle system and the channels of the idle system; replace the solenoid valve or check the EPH system; replace the solenoid valve O-ring; Tighten the idle air system fuel nozzle holder more tightly. |
| Failure or swaying under high load conditions when driving with the throttle valves of both chambers open, combined with loss of power and throttle response. | Check the carburetor econostat and power mode economizer; clean the channels, jets, emulsion well with the emulsion tube of the main metering system of the second chamber of the carburetor; check the opening of the throttle valve of the second chamber of the carburetor; Check the fuel supply to the carburetor. |
| Failure when you sharply press the gas pedal at idle, when starting from a stop, accelerating and moving the car at different speeds. | Replace the accelerator pump, check the fuel level in the carburetor float chamber. |
If you have any questions, leave them in the comments below the article. We or our visitors will be happy to answer them
We set the quality of the fuel mixture
This carburetor adjustment on the VAZ-2109 can be done with your own hands and it is not necessary to visit specialists. The quality is very easy to set. To do this, the engine is thoroughly warmed up, and then using a screw to adjust the number of revolutions, the idle speed is set to about 900 per minute.
Next, the quality screw is tightened until the engine begins to operate intermittently. Then it is turned away again. It is recommended to unscrew until stable operation, namely until the speed stops increasing. In the position of the quality screw where the speed is highest, you need to stop and remove the high speed with the quantity screw.
Problems when setting idle speed
One of the common problems with these carburetors is idle. Owners are faced with the fact that independently adjusting the VAZ-2109 carburetor does not lead to anything. XX cannot be adjusted. When turning or unscrewing the fuel mixture quality screw, the engine speed does not change in any way.
Everything is simple here. The reason for this operation is that the idle jet, which is installed in the solenoid valve, is clogged. It is also possible that the channel located under the quality screw is clogged. Often everything is solved by replacing a non-functioning solenoid valve.
Checking the solenoid valve is also easy. When the engine is not running, remove the wire from the valve, unscrew the valve itself, and remove the jet. Next, turn on the ignition and connect the wire to the solenoid valve. In this case, the latter should click, and the rod will sink inward. If this click does not occur, then the valve is not working. It needs to be replaced.
You should also immediately blow out and clean the idle jet. Even a small grain of sand is enough for the hole to become clogged. It may not even be visible. But this is enough for the idle speed to disappear. If the channel located under the quality screw is clogged, then it will not be possible to blow it out.
Real fuel consumption of VAZ 2106 1.3l. Gas consumption
turn the carburetor fuel mixture quality screw 2105, 2107 Ozone counterclockwise, thereby increasing the supply of gasoline to the fuel-air mixture. Since the car does not pull due to lack of fuel, you solve the problem by pressing the gas too hard, or even pulling the choke, half closing the air with the damper.
| LADA 2104 | |
| Total information | |
| Manufacturer | VAZ |
| Years of production | 1984—2012 [1] |
| Assembly | VAZ (Tolyatti, USSR) AvtoVAZ (Tolyatti, Russia) IzhAvto (Izhevsk, Russia) RosLada (Syzran, Russia) LuAZ (Lutsk, Ukraine) KrASZ (Kremenchug, Ukraine) AntoRus (Kherson, Ukraine) Suzuki Egypt (Giza, Egypt) |
| Class | small group III |
| Other designations | VAZ-2104 "Zhiguli", Lada Estate, Lada Riva Break, Lada Nova Combi |
| Design | |
| Body type | 5-door station wagon (5-seater) |
| Platform | Fiat 124 |
| Layout | front-engine, rear-wheel drive |
| Wheel formula | 4 × 2 |
| Engine | |
| VAZ-2103 | |
| Manufacturer | AvtoVAZ |
| Brand | VAZ-2103 |
| Type | gasoline (AI-92) carburetor |
| Volume | 1,458 cm 3 |
| Maximum power | 52.5 kW (71 hp), at 5600 rpm |
| Maximum torque | 104 Nm, at 3400 rpm |
| Configuration | in-line, 4-cylinder. |
| Cylinders | 4 |
| Valves | 8 |
| Combined fuel consumption | 9,9 |
| Fuel consumption in the urban cycle | 9,8 |
| Fuel consumption on the highway | 7,0 |
| Environmental standards | Euro 2 |
| Compression ratio | 8,5 |
| VAZ-2105 | |
| Manufacturer | AvtoVAZ |
| Brand | VAZ-2105 |
| Type | gasoline (AI-92) carburetor |
| Volume | 1,290 cm 3 |
| Maximum power | 46.80 kW (64 hp), at 5600 rpm |
| Maximum torque | 92.0 Nm, at 3400 rpm |
| Configuration | in-line, 4-cylinder. |
| Cylinders | 4 |
| Valves | 8 |
| Combined fuel consumption | 9,2 |
| Fuel consumption in the urban cycle | 10 |
| Fuel consumption on the highway | 6,9 |
| Environmental standards | Euro 2 |
| Compression ratio | 8,5 |
| VAZ-21067 | |
| Manufacturer | AvtoVAZ |
| Brand | VAZ-21067 |
| Type | gasoline (AI-92) distributed injection |
| Volume | 1569 cm 3 |
| Maximum power | 55 kW (75 hp), at 5000 rpm |
| Maximum torque | 116.0 Nm, at 3400 rpm |
| Configuration | in-line, 4-cylinder. |
| Cylinders | 4 |
| Valves | 8 |
| Combined fuel consumption | 8,5 |
| Fuel consumption in the urban cycle | 11,3 |
| Fuel consumption on the highway | 6,9 |
| Environmental standards | Euro 2 |
| Compression ratio | 8,5 |
| VAZ-21073 | |
| Manufacturer | AvtoVAZ |
| Brand | VAZ-21073 |
| Type | gasoline (AI-92) central injection |
| Volume | 1689 cm 3 |
| Maximum power | 58 kW (79 hp), at 5400 rpm |
| Maximum torque | 137 Nm, at 3200 rpm |
| Configuration | in-line, 4-cylinder. |
| Cylinders | 4 |
| Valves | 8 |
| Fuel consumption in the urban cycle | 9,5 |
| Environmental standards | Euro 2 |
| Compression ratio | 9,3 |
| VAZ-341 | |
| Manufacturer | AvtoVAZ |
| Brand | VAZ-341 |
| Type | diesel |
| Volume | 1,524 cm 3 |
| Maximum power | 37 kW (50 hp), at 4600 rpm |
| Maximum torque | 92.0 Nm, at 2500 rpm |
| Configuration | in-line, 4-cylinder. |
| Cylinders | 4 |
| Valves | 8 |
| Fuel consumption in the urban cycle | 6,7 |
| Fuel consumption on the highway | 5,8 |
| Compression ratio | 23 |
Setting the level in the float chamber
For stable and uninterrupted operation of the car, you need to adjust the float of the VAZ-2109 carburetor. This will ensure the correct fuel level in the float chamber. To do this, you need to remove the carburetor cover. Then, by bending the plate that holds the float, the position is adjusted.
How to exhibit? There are different opinions on this matter. Some argue that you need to achieve factory settings for the VAZ-2109 carburetor, while others prefer to configure it based on their own experience. It is better to measure the level with a caliper. The distance is determined between the top of the housing and the fuel level. It should be within 24-26 millimeters. Measurements must be taken as soon as the cover is removed. In books on Solex carburetors, there is a template that allows you to configure the floats as correctly as possible. This setting is carried out with the cover removed.
Ignition settings
In order for the car to drive as efficiently as possible, adjustments to one carburetor are not enough. You also need to adjust the ignition. The VAZ-2109 carburetor should work well. Do you know that an incorrectly set ignition angle affects engine performance for the worse?
On front-wheel drive VAZ models, this should be taken very carefully. The ignition angle allows you to obtain normal characteristics such as power, idle speed, fuel consumption, and engine response.
Symptoms of an incorrect angle
What if the ignition setting is incorrect (the VAZ-2109 carburetor works perfectly)? In this case, you can observe high fuel consumption, a decrease in power, failures when pressing the gas pedal, problems with starting the engine, as well as detonation and overheating.
It often shoots at the muffler and carburetor. These are not all possible symptoms. But before you start ignition, you need to make sure that no valve adjustment is required. You already know how to adjust the VAZ-2109 carburetor.
Adjusting the VAZ 2108 carburetor: troubleshooting it yourself
Russian passenger cars VAZ 2108, 2109 and even the first “tens” were equipped with carburetors produced by the Dimitrovgrad Plant (DAAZ) under license from the famous European brand Solex. The units are quite unpretentious and reliable in operation, but still require periodic maintenance and adjustment. Most G8 owners can perform this procedure on their own if they carefully read all its intricacies. It is unacceptable to mindlessly interfere with the operation of the carburetor.
Before you take a screwdriver and start turning the screws of the fuel unit, you need to understand one important point. It is as follows: adjusting the Solex carburetor is not a separate operation, but the final stage of the troubleshooting procedure or its scheduled cleaning. The only exception is if the settings were accidentally or unknowingly changed by you or someone else.
Solex carburetor - general view
The following signs indicate interruptions in the supply of the air-fuel mixture to the engine associated with Solex problems:
- the car began to stall at idle;
- fuel consumption has risen above normal and is accompanied by unstable operation of the power unit;
- a cold engine starts and immediately stalls, you have to make several attempts by manipulating the choke lever and the accelerator pedal;
- when you press the gas, a “failure” occurs, accelerating dynamics are completely absent;
- The car stalls while driving when you release the accelerator pedal while coasting.
Note. Unfortunately, the cause of the listed malfunctions is not always the carburetor. Problems with cold starts also arise when there is no compression in the cylinders, and the “culprits” for failures are often faulty spark plugs.
Wear of spark plugs also leads to increased gasoline consumption and the appearance of failures.
Point two: fixing not every problem ends with adjusting the fuel supply. The issue will be covered in more detail below, along with methods for repairing common breakdowns of the G8 carburetor. But in some cases you can’t do without adjustment:
- after removing or disassembling the Solex for the purpose of repair;
- upon successful cleaning or purging of the unit’s channels;
- after replacing rings or the entire piston group in a car engine;
- as a result of reconfiguring the timing in the ignition system, replacing high-voltage wires or installing new spark plugs.
Advice. Considering the low quality of fuel sold at many gas stations in Russia, it is recommended to remove the entire carburetor once every 20-25 thousand kilometers, disassemble it and thoroughly clean it with a compressor. After which you need to make adjustments.
How to set the ignition angle?
Many people recommend using a strobe light for these purposes. But this is true for new cars. If the motor is already worn out, this angle set by the strobe will be incorrect. It is best to rely on the hearing and behavior of the car.
So, how do you set up the ignition yourself on a VAZ-2109? By the way, we have already examined the carburetor in full. The first step is to start and warm up the engine. Then you need to loosen the nuts holding the distributor and turn it in one direction or the other until the speed begins to increase and the engine starts running stably. Next, the nuts are tightened.
After this, you need to drive the car and look at its reaction. If the car “does not drive,” then the ignition is too early. Next, you need to accelerate to 50 kilometers per hour, engage fourth gear and press the accelerator pedal. If detonation sounds occur, then the ignition is set even later. If the detonation lasted a few seconds, then everything is in order. And if it is not there at all, then the ignition is too late.
It is recommended to set it again. But in this case, the ignition distributor should be rotated in the opposite direction. Please note: the slightest inaccuracy and an error of 1 degree are fraught with detonation. After successful setup, the car will begin to pick up speed normally and consume less fuel (but not below factory settings).
