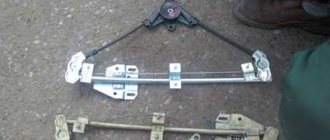
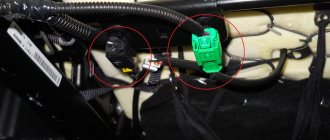
Removing and installing EUR at home
In order to remove the device from the car, you will need to prepare in advance everything that may be useful to you in the process.
In particular, we are talking about flat-head and Phillips-head screwdrivers, as well as a set of socket wrenches. So, how does the procedure for removing and installing the electric amplifier take place:
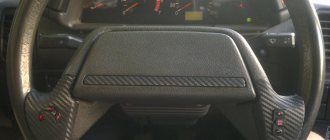
- First of all, you need to turn off the power to the on-board network; to do this, disconnect the negative terminal from the battery. Then dismantle the steering wheel by first removing the plastic cover under it and on the control panel. The steering wheel is dismantled in accordance with the service book for the car.
- Using a Phillips screwdriver, you need to unscrew the four bolts that secure the decorative trim on the steering panel.
- Having done this, you will be able to see the wiring pads - they need to be disconnected from the steering column switch, and the slip ring is also disconnected.
- Using a size 8 wrench, you need to unscrew the screw that secures the wire blocks that run from the ignition switch.
- Next, you need to press on the plastic fixing elements and disconnect the pads with wires at the top and bottom of the column itself.
- In the place where the electric power steering wheel is attached to the column itself, you will need to dismantle the so-called plastic curtain; to do this, disconnect the clamps.
- Using a socket wrench, you need to slightly loosen the nuts that secure the assembly to the bottom of the column.
After completing these steps, the amplifier itself is removed - it is dismantled along with the intermediate shaft. But in order to make it more convenient for you to clean the assembly and then perform the installation in reverse order, it is advisable to disconnect these components from each other in advance. To do this, use a 13mm wrench to unscrew the screw securing the universal joints to the shaft itself. Then you will need to unscrew the two fixing nuts at the ends, after which the steering column itself can be removed.
Then you will need to remove the screw and remove the cardan from the splined pulley of the unit. To make the reinstallation procedure more convenient after removal, it is advisable to make sure that all marks match. We are talking about marks on the protective cover, pulley, and also the starter cover
Cleaning the contact group mechanism and other elements of the system must be done carefully so that all components remain intact and undamaged. If you seek help from specialists in this matter, the cleaning procedure will cost you on average about 30-50 dollars, depending on the region
When to change
The design of the elements is such that they are located at the ends of the steering rods. Hence the name - tips.
The rods themselves have a fairly impressive service life, so they are changed quite rarely. The same cannot be said about the tips.
If you follow the instructions provided in the instruction manual, then replacement should be performed approximately every 40 thousand kilometers. But still the figure is average. Depending on the situations, operating conditions and the quality of the currently installed elements, repairs may be required later or earlier.
The following factors influence the degree of wear of steering system components:
- Vehicle operating conditions;
- The quality of the tips used;
- Driving style of the car owner;
- Quality of roads, etc.
Signs of breakdown
At the first signs of a malfunction of the limit switches, appropriate measures should be taken to eliminate them.
You can determine that the elements are damaged and no longer perform their job as efficiently as before by the following characteristic signs:
- The car is difficult to control. This is especially noticeable when entering sharp turns;
- On tires, the tread pattern begins to wear unevenly;
- Uncharacteristic sounds are heard from the front of the car. Moreover, they can come from one side or from two simultaneously.
These signs of breakdown may indicate not only faulty steering tips. Therefore, mandatory verification is required.
Rubber boot
Yes, in order to accurately determine that the limit switches are the culprit for the uncharacteristic behavior of the car, they should be checked. How to do it? Let's get a look.
- Examine the condition of the node visually. To do this, turn the steering wheel all the way to the right. This will allow you to look at the left tip. To visually inspect the right unit, you need to turn the steering wheel all the way to the left.
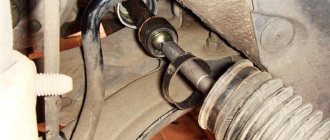
- Look at the rubber boot. It fits onto the tip. The presence of signs of rupture or cracks clearly indicates that the steering element needs to be replaced.
- If you do not do this, dirt will penetrate through the gaps and cracks in the boot, which will ultimately lead to very rapid wear of the part and can harm other components of your car.
- You can also lift the car with a jack by hanging the wheel in the air. Grasp the tip with your hands and shake it.
- If there is play, then the replacement will have to be performed on both sides simultaneously.
The defect is obvious
Experts strongly do not recommend changing tips individually. Even if the second element is intact, it is better to perform a double replacement.
Well, the symptoms of the problems and a direct check of the steering mechanism elements showed that it was the tips that were to blame. Therefore you will have to change them.
Is it difficult to do? If you have at least a little experience, you have already had to disassemble the steering system, then there should not be any difficulties. By doing everything yourself, you can save a lot on the cost of service stations.
Dismantling works
To illustrate the replacement example, we advise you to rely not only on the instructions presented in our article, but also on video materials. Detailed video lessons seriously help you master quite complex stages of work.
To work you will need a set of materials and tools. It includes:
- New high quality steering limit switches;
- The almighty WD40. If you don’t have the money to buy it, use plain brake fluid;
- A set of keys;
- Pliers;
- Brush with metal bristles;
- Puller (if you don’t have a puller, replace it with a small crowbar).
Assembly of the unit
Everything you need is ready, so you can safely get to work.
- Use a jack to jack up the side of the car where you plan to do the work to replace the tie rod ends.
- Unscrew the mounting bolts from the wheel and remove it.
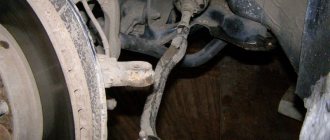
- Use a wire brush to clean the joint between the tip and the steering knuckle.
- If this area is heavily contaminated, the simple force of a wire brush may not be enough. This is where WD40 comes in handy. We repeat, if it is not there, try washing off the dirt with brake fluid.
- Use pliers to remove the cotter pin. It performs the task of fixing a bolted connection. A kind of fixative.
- Unscrew the fastening nut.
- Now arm yourself with a crowbar and a small hammer. Although if you managed to find a puller, it would be much better.
- Using the selected tool, you need to remove the finger of your tip from the fist of the stand. In this way, the damaged element is removed from the retainer.
- The unit to be replaced should be carefully unscrewed.
- We recommend that you first measure the current distance between the squeegee and the center of the tip. When reinstalling, this information will be extremely useful.
- Now it's time for the new kit, which you purchased in a store or ordered online.
- Insert in place of the old unit, secure with traction.
- Return the hinge pin to its rightful place - into the steering knuckle.
- Next, you should screw the nut back, tighten it properly and secure the cotter pin in the correct place.
- This instruction fully corresponds to the features of replacing the tip on another wheel. Therefore, the manual is the same for the left and right front wheel of your VAZ 2110.
- The last stage of repair will still require you to visit a service station. This is necessary in order to check the wheel alignment. The probability of its violation is too high, so do not be lazy to spend a little time and money. They shouldn't charge you much for the check.
If you do everything correctly and consistently, it will take you about an hour to replace the steering limit switches. Experienced craftsmen can do it even in 30-40 minutes. But in any case, there is no need to rush.
Steering of Lada Granta
Communities Lada Priora Lada Priora Club Blog Ignition coil
It is designed to control the car while driving. Structurally, it consists of the following main elements:
The work of the mechanical part is that the driver acts on the steering wheel, the impulse through the steering mechanism and rack transmits force to the front wheels through the levers, and the car turns in the desired direction. A characteristic feature of a passenger car steering wheel is its smaller diameter (compared to a truck). The design of the mechanism also differs. The steering of the Lada Granta is complemented by an electric booster. The steering wheel can be adjusted in height. Unfortunately, there are no settings for departure.
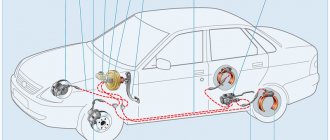
The drive is mechanical, structurally consisting of levers, rods and hinges. For more efficient and convenient control, the Lada Granta is equipped with an electric amplifier. This is a complex mechanism that provides force through the use of electricity. An electric power steering, or simply EPS, is used to improve dynamic characteristics and controllability. And, according to some data, it allows you to save fuel by increasing the vehicle’s maneuverability.
Self-replacement of Lada Priora steering tips
A malfunction of the chassis can cause very serious problems with the vehicle's operation, even leading to loss of controllability. Tie rod ends should be replaced if any extraneous sounds (knocks, creaks) occur. In addition, a malfunction of the steering tips will lead to poor response of the wheels to the steering wheel and the occurrence of its vibrations.
Next we will talk about replacing the steering tip on your Lada Priora .
Required tools:
- set of standard keys;
- puller for steering tips;
- jack;
- penetrating fluid WD-40;
- a brush that will be needed to clean threaded connections.
How to remove the EUR on a Priora with your own hands
Communities Lada Priora Lada Priora Club Blog Trouble check and blinking
In fact, the electric power steering can be removed without any problems, you just have to remove quite a lot of parts first. Namely, you will need to do the following:
After that, using an 8 mm socket and a ratchet, unscrew and remove the contact group.
We remove it from the shaft completely so that it does not interfere.
Now you need to disconnect all the power wires from the power steering control unit, which are clearly shown in the photo below.
Each of the plugs has its own lock, so be sure to first look at the design of the lock so as not to damage it when removing it. When you have dealt with the wires, you need to unscrew the coupling bolt at the fastening of the driveshaft with the steering rack.
Using a chisel and a hammer, we slightly expand the coupling “collar” of the cardan shaft. Then you can begin to unscrew the nuts securing the EUR to the body. Two nuts are located at the front.
And two from the bottom.
Of course, when unscrewing the last fastening nuts, it is necessary to hold the EUR so that it does not fall. Next, we pull it off the steering rack shaft and remove it completely. If necessary, we replace it with a new one. This mechanism is installed in the reverse order and we connect all the necessary wires to their places.
Замена рулевых наконечников
RџСЂРё появленви стуков РІ передней RїРѕРґРІРµСЃРєРµ RЅР° РџСЂРёРѕСЂРµ, стоит обратить внимание РЅР° следующие детали Рё SѓР·Р» WITH<:
- SЃС‚РѕР№РєРё
- RѕRїRѕSЂS‹ Ryo RїRѕRґS€РёRїРЅРёРєРё SЃS‚оек
- шаровые опоры
- рулевая рейка
- SЂСѓР»РµРІС‹Рµ наконечнРеРєРё
Р˜ РІ данной статье РјС‹ рассмотрим именно SЂРµРјРѕРЅС‚, СЃРІСЏР ·Р°РЅРЅС‹Р№ СЃ наконечниками SЂСѓР»РµРІС‹С… тяРi . Если стук RїРѕСЏРІРёР»СЃСЏ Ременно РѕС‚ наконечников, Рё люфт РїС ЂРё поворотах уже превышает допустимыРNo., необходимо заменить наконечники. PSP° PSPsPRIS‹Pµ. RR»СЏ выполнения данного SЂРµРјРѕРЅС‚Р°, RїРѕРЅР°РґРѕР±РёС‚СЃСЏ SЃР»РµРґСѓS ЋС‰РёР№ инструмент Рё приспособления:
- Съемник S€Р°СЂРѕРІС‹С… РѕРїРѕСЂ РѕРїРѕСЂ или SЂСѓР»РµРІС‹С… наконечников
- Монтировка молоток (при отсутствии съемника)
- Плоскогубцы
- Ключ на 19 мм
- Ключ на 13 мм
- Ключ динамометрический
- RџСЂРѕРЅРёРєР°СЋС‰Р°СЏ SЃРјР°Р·РєР°
Removal and installation of the inner tie rod end of VAZ 2170 2171 2172 Lada Priora Lada Priora
Details Parent category: Repair (manual for) Lada Priora cars
2. Pry up the locking plate...
3. ...and remove it from the bolt heads of the steering linkage rods.
4. Loosen both steering linkage bolts...
5. ...unscrew the bolt of the rod being removed...
6. ...move the inner tip by turning the connecting plate...
7. ...and remove the rod through the hole in the wheel arch mudguard.
8. Worn or damaged rubber-metal joints of the inner rod ends can cause increased free play of the steering wheel. Since the operation of replacing the hinge requires skill and special tools, we recommend replacing the hinge assembly with the inner rod end by removing the tip from the adjusting rod.
9. If you are replacing only the rod ends, remove the bolts securing them and unscrew the ends from the adjusting rod.
10. Before installing the tie rod on a Lada Priora car, check the following: distance a from the end of the hexagon of the adjusting rod to the end of the outer tip (it should be 10.6–16.3 mm) and distance b to the end of the inner tip (10 .8–14.2 mm). Maintaining these dimensions of the threaded sections is necessary for reliable connection of the rod with the tips.
11. Install the rod in the reverse order of removal.
How to replace steering tips on a Lada Priora
- Remove the wheel. Loosen the mounting bolts and place the car on a jack. Hang the wheel on the side where you plan to replace the tie rod ends.
- Remove dirt and rust from threaded connections. To make the procedure easier, pre-treat the joints with WD-40.
- Undo the cotter pin and unscrew the nut that secures the tie rod end to the tie rod.
We change the steering tips of Lada Priora on our own
- If there is a puller, install it and start pressing out the steering tip; if not, use a hammer and a pry bar.
We change the steering tips of Lada Priora on our own
The role of the electric power steering in the steering of the VAZ 2170 Priora
It's no secret that the electric control method plays an important role in ensuring safety while driving. EUR or power steering of Priora performs the option of reducing the level of load on the steering wheel while turning it. The key advantage of using such an EUR device on the Priora is comfort when moving as a result of improved feedback between the steering wheel and wheels.
The electric amplifier is a more modern and improved unit, which is not only easier to use, but also does not require the introduction of additional highways to ensure operation. In addition, this device does not take power from the power unit. The main advantage of the EUR is that it does not require frequent maintenance and fluid monitoring, unlike power steering.
But it should be noted that such a system has several disadvantages, one of them is rather weak feedback between the road surface and the control system. As a result, it may become difficult to drive in snow. Unlike Prior, foreign cars are equipped with additional mechanisms and units for blocking and stabilization, so the method of controlling the electric power steering in the domestic version is less reliable. In addition, in practice, a faulty electric booster with poor traction is a fairly common occurrence.
Signs of Bad Tie Rod Ends - The Easy Thing
How to identify symptoms of faulty tie rod ends
Steering is one of the important components of a vehicle. Not only comfortable movement, but also safety during driving, both for the driver and for other road users, depends on its condition. This control unit consists of several components that must be checked from time to time for wear and serviceability. One of these elements is the rod and the steering tip (there are two of them in the steering). These parts allow the car's wheels to turn at the required angle, promoting increased maneuverability. And in order to increase the service life of these levers, it is necessary to promptly recognize signs of malfunction of the steering tips.
Initial examination
It is very important to occasionally inspect not only the external condition of the car, but also look underneath it. Thus, it is possible to promptly prevent the breakdown of any part or assembly as a whole.
Such a check will not take much time and effort, and you do not have to be an expert in cars to do this. To determine the malfunction, it is better to ask a friend to help you, since it takes two people to determine the presence of play. Are you wondering what to do? Visit our website. On the new collection of beautiful videos on an adult theme with beautiful beauties. The category of Russian mint is especially useful. Before speech, girls and women from this site are Russians. You won’t cross the video, it’s Russian. A video with deep blowjob is definitely suitable for a true connoisseur of adult content. And also, in the video, girls and women lick the head of the penis and play with the balls. Chicks deserve appetizing cocks and bring satisfaction to their partner. In addition, you can check the part for mechanical damage.
The rod fails much less often than the tips.
To perform an initial inspection of the steering ends, you need to do the following:
The steering rod and ends are initially inaccessible, as they are located on the bottom of the car. For a more thorough inspection, you need to drive the car into the inspection hole. This will create more open access to all elements of the suspension, bottom and, among other things, will allow you to better check the steering tip. If it is not possible to use the hole, then you can use a jack, but only to lift the car. To increase safety, use stands (stumps). You need to use a rag to wipe the parts from any deposits, this will allow you to examine the surface for defects.
You also need to pay attention to the fastening points, since it is in the connections that a malfunction can most often lurk. Basically, the first part that becomes unusable is the boot
Therefore, you should check it for cracks. To check the play, you need an assistant to turn the steering wheel in both directions, while you watch the work of the tips. If the tip moves along the axis of the pin by more than one and a half millimeters, then this indicates that the steering tip is faulty. The malfunction can be anywhere; when checking, you need to be as careful as possible. After examining one side, you need to check the other. If you wish, since you are under the car, perform diagnostics of other important components and parts. If necessary, some of them can be lubricated or urgently replaced.
Signs of damage
The latter can be called consumables. Their service life, on average, is no more than forty thousand kilometers. To increase this indicator, you need to drive only on a flat surface and drive the car very carefully.
So, let's look at the main signs of a breakdown that can cause a car to malfunction.
- Backlash is a clear sign. If, when driving at low speeds, you begin to notice that the wheels of your car are not turning in accordance with the steering wheel, then you need to check the steering mechanism. This should be done urgently; the presence of backlash can lead to the worst consequences.
- Kickback to the steering wheel. If while driving you begin to notice a strong beating of the steering wheel, this is also a sign to check the steering rod and ends.
- The appearance of abnormal sounds. If the boot is damaged, dust appears and settles at the joint. Thus, when this element operates, sounds appear. In the future, such conditions can lead to premature wear of these parts.
It is very important to respond in a timely manner to the occurrence of abnormal deviations in the operation of your car. Try to spend as much time as possible on the diagnosis
This attitude will allow you to keep your car and its components for a long time.
"Checking the steering rods of the car"
The recording shows how tie rods are diagnosed on a VAZ car, and also provides tips for identifying faulty tie rod ends.
https://mineavto.ru
Which steering tips are best to choose for the VAZ 2110
Car breakdown is a common and commonplace situation. It is not so easy to prevent it, even if you carefully monitor all components and assemblies and carry out preventive work on time.
Each car has its own weaknesses. In the case of the VAZ 2110, these include steering tips. If they are not replaced promptly in case of damage, you may face complete destruction of the entire steering mechanism. It’s hardly worth saying what financial losses you will incur.
How do they look
Prerequisites for carrying out repair work on the steering rack of the nine.
The steering rack of the VAZ 2109, as mentioned above, is the element that is responsible for steering the car. More precisely, the steering rack is part of the mechanism responsible for controlling the rotation of the wheels: this mechanism converts the rotation of the steering wheel into translational movements of the steering rods. Consequently, wear or any other malfunction of the parts of this mechanism increases the backlash, which becomes the result of poor vehicle handling.
What are the prerequisites for repairing an element such as a steering rack? The answer is obvious. Knocking when turning, increased play, tight rotation of the steering wheel, difficulties in adjusting the toe angle - this is the minimum list of those malfunctions that must be eliminated immediately after they are detected.
However, before you start carrying out repair work, do not forget to make sure that these malfunctions are actually a consequence of a defect in the steering rack! I advise you to read my post - DIY steering rack repair.
Video on adjusting the steering rack of a VAZ 2109
The steering rack in front-wheel drive cars is fully responsible for the functionality of the entire steering mechanism. The VAZ 2109 also belongs to this category of car. If it fails, appropriate action should be taken immediately.
The occurrence of signs of malfunction does not always indicate the need to completely replace the unit. Sometimes it is enough to repair the rack using a special repair kit.
Tools for repairs
In order to independently repair Priora steering ends, you will need the following set of tools:
- A set of keys, specifically for “19”, “13” and a cylinder head. Others may be required.
- Pliers, duckbills.
- Jack and support for the car. As the latter, you can use several wooden blocks.
- Wheel chocks or suitable elements for securing the vehicle.
- A set of new tips or boots (depending on what exactly needs to be changed).
- Puller for ball ends.
Be sure to choose only high-quality products; if you doubt the authenticity of the manufacturer or notice a visible defect, it is better to refuse to purchase such spare parts. Be sure to replace the tips on both sides, after which you need to do a wheel alignment, and this procedure is not cheap.
How to check the tie rod end
Self-checking steering rods involves inspecting the control system parts on a lift or in a pit. You can first find out about problems with the steering tips by the knocking noise that occurs when you turn the steering wheel to the sides on a flat section of the road.
Inspection of steering tips and checking traction includes:
- Visual inspection of parts to ensure there are no deformations.
- Checking the protective covers of the ball joint of the tip (there are no cracks through which dust, water, or dirt can enter).
- Definition of tip play - movement along the axis of the fingers should not exceed 1.5 mm.
If you do not know how to check the steering ends on your car, you do not have the ability to properly diagnose, then it is better to contact a specialized car service center.
What to choose?
When starting to replace tips, most owners of domestic tens ask themselves questions: which ones are better?
You have two options to choose from.
Part type
Peculiarities
Good quality, full compliance with the design of your car.
Imported, manufactured under contract
There are different manufacturers, so the quality may vary. If you find a good contractor, the level of tips they produce may be higher than the factory original. But the cost will be slightly different.
As you can see, both options have their own characteristics and advantages. So make the choice yourself.
When choosing tips, pay special attention to the quality and integrity of the rubber boot.
Wiring fault
In the case when the battery is in order, we look at the wiring; weather conditions, frost, rain or heat may be associated factors. If the electric power steering on a Priora turns off when weather conditions change, then this is a clear sign of a wiring fault. Check the soldering and insulation of the winding; a short circuit may occur.
The Priora's electric power steering does not work all the time. The maximum load on the electric motor occurs at low or no speed, and the minimum at high speed. So, in the Priora, at a speed of 110 km/h, the electric booster is completely turned off. At the same time, feedback to the steering wheel becomes maximum. Electric power steering "Kalina" turns off already at 60 km/h.
