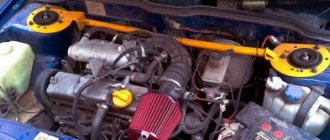
Hi all! Started tripping 2 days ago. In the morning on the way to school, I was driving along the highway and noticed that the car was accelerating quickly and everything was fine, then it was on you and immediately it became a “cow”. I switch to 4 and put the gas to the floor, but it slowly picks up speed and jerks, somehow reaching 100 km/h. Before this, in the city, it stalled several times (when starting off). At idle it did not work smoothly (the revolutions dropped from 1000 to 500), the “oil pressure” light blinked (I stopped, checked the engine oil level, topped it up according to the mark) and did not light up again. I recently changed the spark plugs in December. There was even some kind of glitch, I was driving in 2nd gear in the lane and was ahead of the GAZelle, the car jerked and did not move, and then as soon as it started slipping, I immediately took the pedal off the gas, but it still rushed. I switched to neutral and it started turning until the cutoff. I turned it off while driving, started it again and again until the cutoff. I turned it off again and stopped, stood there for a couple of minutes and started it, it stopped.
Today, I started looking for the cause of the problem. I wanted to check the spark plugs and high-voltage wires. When removing high-voltage wires, the tip of one wire fell off, then I immediately checked the spark plug from there and found that it did not ignite. I bought a set of high-voltage wires MILENA tcb cable and replaced it. I started everything GOOD.
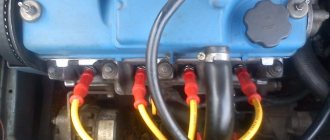
Hello everyone! I once went in wet weather for a drive in a newly repaired Sena and didn’t recognize the car - it was stuck, the revs were floating, it adjusted at idle, it jerked while driving... I opened the hood and saw that over 8 years of service the high-voltage wires had become unusable, the charge was constantly draining from output of the 4 cylinder ignition coil to a nearby mounting bolt. Plus, the insulation on all the wires was damaged in the place where it fits into the clamps of the engine trim... The solution is clear - replacement with new ones. I climbed onto Existence and was literally blown away - a set of high-voltage wires costs from 3,000 rubles, with a two-week wait... A toad crawled out of the corner and began to whisper that original spare parts are of course good, but there is a crisis in the country, and in general there is little money after the holidays... Moreover, that the wires are made in Russia and it’s generally unclear why the hell this price is... I came to the store and bought wires for a VAZ 2110 injector 8 valves. I bought wires from the company HORS - all silicone, reinforced, blue for 380 rubles. I climbed under the hood, began to try it on, and it turned out that these wires are completely similar to the standard wires for the Sens, except for two small nuances: 1- The wire of the second cylinder is slightly shorter in length and because of this it cannot be completely removed into the standard channel of the engine trim. 2- The diameter of the internal connecting part of the protective moisture-proof cap on the ignition coil side is twice as large as required. Because of this, it is possible for water and other nasty things to get into the contact of the coil, which is accompanied by its failure. I thought and thought and decided that the tenfold difference in cost would pay for the existing shortcomings - which turned out to be very easy to eliminate.
Introduction
High-voltage wires of VAZ cars are one of the most important elements in the ignition system. It is the wires that transmit high electrical voltage from the module to the spark plug.
Failure of the wires affects not only the formation of a spark, but also the operation of the entire power plant. This article will talk about how to correctly select and independently replace high-voltage wires on a VAZ car.
Below we discuss the procedure for connecting wires to the ignition module, as well as examples of the highest quality and best wires that can be purchased in terms of price and quality.
Purpose
Gasoline engines operate by burning fuel in the cylinders, ignition is carried out using a spark plug, which generates a spark. The supply and distribution of current is handled by the ignition system, in which high-voltage wires play a very important role. Through them, high-voltage voltage is transmitted directly to the spark plugs from the ignition module. Transporting voltages reaching 15,000 volts is quite a serious task, which the wires must cope with without difficulty.
Operating principle and device
High-voltage wires are the link between the coil (ignition module) and the spark plugs. The voltage generated in the ignition module is transmitted to the spark plug through a high-voltage wire, after which the spark plug produces a spark in the combustion chamber of the internal combustion engine.
The wires have powerful insulation that can withstand enormous voltages without breakdown of the insulation. People quite often hear the name armored wire; high-voltage wires received this name because of their powerful insulation.
Device
A high-voltage wire consists of a core (also a conductor) placed in powerful shielded insulation. The core in the wire is shielded to preserve the voltage pulse from external influences and protect against breakdown.
At the ends of the wire there are tips made of a special alloy with the lowest resistance coefficient to ensure the best contact with the spark plugs and the ignition module.
Location
On VAZ 2110 injection engines, high-voltage wires are attached at one end to the ignition coil, which is located on the front side of the cylinder block slightly to the right of the center, and the other end is connected to the spark plugs. On carburetor engines, the circuit is exactly the same, only instead of a coil, the wires go to the distributor, which is installed to the right of the cylinder head.
Signs of faulty wires
There can be many different signs of faulty high-voltage wires, but there are several signs that, once detected, require the wires to be replaced.
Signs:
- The car jerks when you press the gas pedal. This is due to the fact that with a higher load the engine needs a large amount of fuel and its timely combustion, but since the wires are not able to give a spark at the right time, the car begins to twitch.
- When starting the car, one or more cylinders may not fire. This is due to the fact that when a spark is transmitted, it breaks through to the housing due to breakdown of the insulation.
To check the wires in more detail, you need to remove them from the car and carefully inspect them.
The wires should not contain:
- Gusts;
- Zadirov;
- Insulation breakdowns;
- Cracks in the plastic case;
Rupture of the protective cap of the GDP
If such problems are found on the wires of your car, then they need to be replaced.
Sereshka 05.12.2010 - 18:01
Kiel Blinton (05.12.2010 - 17:56):
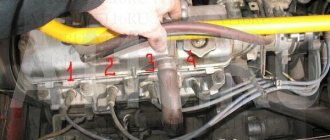
Good day everyone! Forgive me if the topic is button accordion, but there is no one else to ask. Question - I have an engine 2110 engineer, I bought high-voltage wires and foolishly removed the old ones, but I didn’t remember the connection sequence. If I am facing the car, then the numbering of the spark plugs is 1 2 3 4. But how are they all connected to the square ignition module? If anyone knows, please explain or draw a diagram, please.
There should be numbers on the module itself.
Cost and articles
Below are prices and articles for good and high-quality high-voltage wires for VAZ cars, both for 16 and 8 valve engines.
| Manufacturer | Number of valves | vendor code | Price, (rubles) |
| Standard | 16 | 21120-3707080-81 | 990 |
| SLON | 16 | 2112-3707080 | 1450 |
| VOLTON | 16 | VLT-2112005 | 915 |
| TESLA | 16 | Т516M | 1710 |
| LADA | 8 | 21110-3707080-82 | 695 |
| TESLA | 8 | Т514M | 875 |
| Standard | 8 | T684H | 620 |
| Original | 8 | 21110-3707080-12 | 710 |
Recommendations for replacement
Never remove or touch high-voltage wires with your hands while the engine is running, as there is very high voltage that can cause serious harm to human health.
Replacement must be made only with high-quality and reliable wires, and best of all with a new set of spark plugs. Which spark plugs are best for VAZ cars can be read in our article here.
HF wires (stand for high-voltage) are needed as direct impulse conductors from the ignition device to the fuel ignition system (directly to the spark plugs). If the pulse does not flow or does not flow properly, the gasoline will not burn properly in the cylinder and the engine will not operate as it should.
In today's article we will talk about malfunctions, methods for checking resistance and replacing high-voltage (armored wires) ignition of the VAZ 2112
Advertisements on NN.RU - Auto
A specialized company for converting trucks into tow trucks invites you to install a tow truck platform on.
The company offers you to upgrade the Fiat Ducato Fiat Ducato basic version for a solution.
Power take-off boxes Kamaz, Maz, Ural, Kraz, Gas, Zil Dispatch on the day of payment. Sending by transport companies. We work as with. Price: 18,500 rub.
With us you can not only extend the frame to fit a body of 5.1 m, 6.2 m, 7.5 m, 9 m for Maz Zubrenok, Maz, Kamaz, Ural, Zil, Mitsubishi, Nissan.
Today, Nizhny Novgorod fast food lovers have a real holiday: a new worldwide outlet has opened on the renovated Nizhne-Volzhskaya embankment.
An accident occurred in the Moskovsky district of Nizhny Novgorod: a girl was swinging her friend, but the swing suddenly fell. As a result.
A street film festival will be held in Nizhny Novgorod for the second time. Short films by young Russian directors will be available for free.
Imagine, you wake up in the morning, open the curtains, bright sunlight bursts into your apartment, and outside the window is a stunningly beautiful landscape.
Source
What are the armored wires for the VAZ 2112 needed for and what functions do they perform?
Expert opinion: The main task of the high-voltage wires of the ignition system of gasoline engines is to transmit the ignition pulse from the coil (coils) or ignition distributor to the spark plugs of the internal combustion engine.
Along with this, the high-voltage wires on the VAZ 2112 car perform the following functions:
- ensuring high-quality isolation of high-voltage pulses;
- minimizing radio interference;
- protection against failure of ignition system elements.
If the electrical parameters of the high-voltage wire are violated, the car engine begins to “triple”, there is a large loss of car power, and the car’s starting system may fail. Such a malfunction must be corrected immediately, as it can lead to a complete failure of the ignition system, malfunction of the vehicle’s mechanical components due to uneven engine operation.
New armored wires for VAZ 2112
The main signs of a malfunction of the armored wires of the VAZ 2112
High-voltage wires of the VAZ 2112 are subject to some typical faults:
Lost connection. The electrical circuit is often interrupted at the junctions between the metal contacts of the wiring and the conductor (conductive). A break can also happen:
- when disconnecting the wire;
- in case of unreliable interaction of certain components of the ignition system;
- when the vein oxidizes.
Photo: Wear of armored wires of VAZ 2112
Current leaks. The cause of the leak may be:
- dirty wiring;
- dirt on spark plugs;
- distribution cover;
- ignition coil;
- the insulating layer is damaged.
- faulty wiring caps. The voltage drops due to clogging of the wiring, spark plugs, distribution cap, ignition coil, when the insulation and wiring caps are damaged.
Expert advice: A typical prerequisite for connection failure is heat/sparks. This is fraught with burnout of the core/metal contacts.
How to check the spark plug wires of a VAZ 2112 with a multimeter
Before checking with a multimeter, it is worth conducting a visual inspection of the high-voltage line yourself for insulation damage, melting or chips.
Expert advice: Frequent causes of cable breakdowns are careless repairs or contact with hot motor parts. The cause may also be contact with active chemical elements on the insulation.
It is necessary to pay special attention to the contact part of high-voltage wires; they should not show signs of soot and oxidation. During inspection, you can also check for breaks in the high-voltage cable. To check, you need to start the engine and look at the high-voltage line. Sparks will jump at the rupture points.
Checking armored wires with a multimeter
The main problem with wiring is considered to be a problem with the spark plugs due to insufficient voltage. The cause of this malfunction may be:
- broken wires inside the insulation;
- voltage leakage due to poor insulation quality;
- cable resistance is higher than permissible;
- absence or poor contact between spark plugs and high-voltage lines.
In a ruptured high-voltage cable, an electrical discharge occurs, which causes voltage loss. As a result, it is no longer the rated voltage that is supplied to the spark plug, but an electromagnetic pulse.
How often should GDP be changed?
According to the recommendations of Avto-VAZ, replacement of high-voltage wires of the VAZ 2114 should be done every 30 thousand kilometers. In practice, motorists rarely comply with these replacement deadlines, since if the wires do not have any mechanical damage, they can travel about 100-150 thousand km.
When the service life is exceeded, the internal resistance of the GDP increases, which negatively affects the transmission of the electrical impulse. This leads to problems with ignition and acceleration dynamics, since when the supply of current to the spark plugs is delayed, the normal engine operating cycle is disrupted.
Change the wires every 25-30 thousand and everything will be fine
Video: How to check the armored wires of a VAZ 2112 with a multimeter
If there is a large variation, replace the wires. By the way, they are changed as a set, that is, all together. In conclusion, your resistance reading of the most popular high-voltage wires:
- Tesla - 6 kOhm
- Slon - from 4 kOhm to 7 kOhm (4 kOhm - 1st cylinder and up to 7 kOhm - on the last cylinder)
- ProSport - almost zero resistance
- Cargen - 0.9 kOhm
Note! The resistance of high-voltage wires varies depending on the length, thickness, and material from which the wires are made.
Do-it-yourself replacement of armored wires on a VAZ 2112
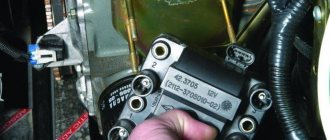
1 – tip of the wire of the first cylinder; 2 – tip of the wire of the second cylinder; 3 – tip of the wire of the third cylinder; 4 – plastic bracket securing the high-voltage wire of the third cylinder; 5 – ignition module; 6 – tip of the wire of the fourth cylinder; 7 – plastic bracket for fastening high-voltage wires of the first, second and fourth cylinders
In order to replace the armor wires of a VAZ 2112, you must perform the following procedure:
- We prepare the car for work (see “Preparing the car for maintenance and repair”) and turn off the ignition.
- Remove the engine decorative trim.
- Remove the wire tip from the spark plug well.
- Disconnect the other end of the high-voltage wire from the ignition module.
- Remove the wire from the first cylinder.
- Similarly, we remove the high-voltage wires of other engine cylinders.
High voltage wires are not interchangeable. The wires must be connected to the ignition module in accordance with the cylinder serial number
Checking the ignition module
Checking the ignition module for functionality is carried out in the following ways:
Replacing the ignition module with a known good one
1. The easiest way is to connect a known working module. In this case, the devices must be completely identical, the high-voltage wires are in good condition, and the reliability of the contacts has been checked.
Checking the contacts on the ignition module
2. Moving the module, which allows you to identify unreliable contacts. To do this, move the wire block and the module itself. If during exposure the engine reacts by changing its operation, then the cause of the problem lies in poor contact.
Measuring resistance at the terminals of the ignition module
3. Resistance measurement. To do this, you will need a tester switched to ohmmeter mode. Measurements are carried out on the paired terminals of the module between cylinders 1 and 4, as well as cylinders 2 and 3. The resistance value should be the same and approach 5.4 kOhm.
Checking the ignition module using a tester
4. Check the voltage with a tester. One probe of the device is applied to contact A of the block, the second to ground. After turning on the ignition, take readings from the device. If the wire is in good condition, it will show a voltage of 12 V; if it is missing, check the fuse protecting the ignition module. Then check the continuity of the circuit with a 12 V test lamp. Apply one end of the wire to contact A and rotate the starter. If the lamp does not blink, the circuit is broken. The procedure is repeated in a similar way with other contacts.
Diagnostics of the ignition module with professional equipment
5. Diagnostics at a service station by connecting a computer with special software to the computer. Malfunctions are detected in the form of errors indicated by an alphanumeric code, after which a more in-depth diagnosis of the malfunction is carried out to make a decision - repair the ignition module or replace it. A similar check is carried out at a specialized service station using an oscilloscope.
Connection diagram of VAZ 2112 armored wires to the ignition coil
Injection VAZ produced before 2004 with an old-style ignition module (4-pin low-voltage connector)
Actually, on the module body it is already indicated which cylinder the pins correspond to - but we duplicated them in red in case the module gets completely dirty, and you might not be able to see it in the photo.
Injection VAZ produced after 2004 with a new ignition coil (3-pin low-voltage connector)
As with the old-style ignition modules, the new coils are also marked with pins corresponding to the cylinders. But the connection order is different from the order on the old-style ignition module. Be careful.
Kiel Blinton 05.12.2010 - 17:56
Good day everyone! Forgive me if the topic is button accordion, but there is no one else to ask. Question - I have an engine 2110 engineer, I bought high-voltage wires and foolishly removed the old ones, but I didn’t remember the connection sequence. If I am facing the car, then the numbering of the candles is 1 2 3 4? But how do they all connect to the square ignition module? If anyone knows, please explain or draw a diagram, please.
Attached images
Post edited by Kiel Blinton: 12/05/2010 - 18:03
