Print this article Font size 16
The factory did not provide for the installation of electric power steering on the VAZ 2109 model and other classics. EURs have become available on more modern models.
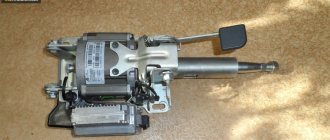
Appearance of the device
What is not provided by the factory can be installed by yourself.
Lada 21099 21126 › Logbook › Installation of EUR Priora on 2109.
I haven’t posted in a while, I haven’t had time for this.
But Valera amplifier - your time has come. I did the installation myself (however, as always, I don’t trust the masters and like to tinker myself), I installed everything relatively quickly.
For installation, I needed a pre-purchased kit consisting of: 1) the actual EUR itself, produced in Kaluga (as I understand from the reviews, they are successful); 2) adapter plate to the column; 3) wiring; 4) cardan. I took an adjustable one so that I wouldn’t have to play around in the garage when there was too much or too little of another cardan; 5) steering wheel and steering column unit; 6) straight arms and tools.
We start by unpacking and checking the parts against the list
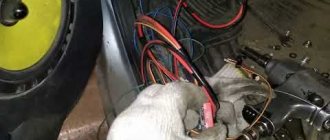
Next, we proceed to dismantling the standard steering wheel and column. The steering wheel came off quickly, but the driveshaft came off in the steering rack only after using a screwdriver, a hammer and someone's mother. It didn’t work individually, but when I combined the three conditions into one action, everything worked out.
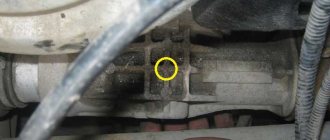
Next, we mount the plate in place, not forgetting to put spacer bushings so that the plate moves away from the body and the steering wheel can be adjusted as high as possible.
We hook the cardan. Difficulties arose here too. He mounted the amplifier without any problems, but problems arose with putting it on the steering rack. But fortunately, the same three guys who filmed the old one helped solve them.
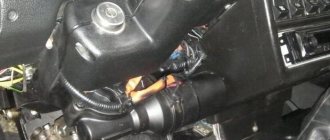
At the next stage, we disassemble the face of the dashboard and take out the instrument panel, followed by removing the blocks with wires from it. Here we need three wires (there are plenty of diagrams on the Internet and here on the drive, so I won’t insert them): 1) engine speed; 2) speed sensor; 3) 12V from the lock, also connected to the tidy.
The wiring from the kit immediately comes with “splitters”, so we simply take the pin out of the block into the device, plug it into the EUR wiring, isolate it, and the other end back into the block.
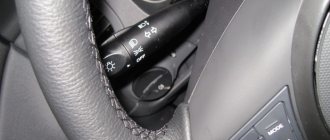
The final stage is the installation of the steering column unit and steering wheel. Everything was installed without any problems, but for some reason I didn’t take a photo at the end. But it doesn’t matter, I’ll buy a steering column cover and take it off right away.
That's all for this. To be continued