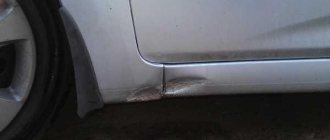
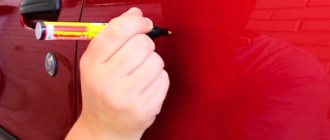
The vehicle coating provides not only a presentable appearance, but also additional protection. But, like other materials, the paint surface has a limited service life. Under the influence of loads, minor damage gradually appears on it. Therefore, it will be useful for car owners to know how to paint over a scratch on a damaged car with their own hands.
Where do scratches come from?
When the varnish deteriorates, the car body loses its original shine. Due to the violation of the protective layer, ultraviolet rays easily reach the paint layer and change its shade over time. The thinner the varnish layer becomes, the more the paint is exposed to atmospheric conditions. Over time, microcracks and delaminations appear on it. If you don't take care of your car's paintwork, these cracks become more pronounced and can lead to paint chips.
In addition to the natural aging process of the protective and decorative layer of the body, scratches can appear on it for the following reasons:
- Dirt, dust, stones. While driving, many small particles hit the car body (they can be thrown out from under the wheels of oncoming or ahead traffic), which scratch the varnish or form chips.
- Careless driving. An inattentive driver may accidentally hit the gate support when leaving the yard or push a nearby car while parking. When going on a picnic in the forest, the car may catch a branch.
- Sloppy washing. Some motorists save on basic things. For example, to wash a car they use dirty rags, sponges and do not use car shampoos, thinking that this is a waste of money. In fact, soapy water eliminates the abrasive effect, and special rags (for example, wet suede or microfiber) easily collect microscopic particles, so that after washing there are no abrasions left on the body.
- Attackers can deliberately scratch the car. A cat can run along it or a bird can sit on it.
In fact, this is not a complete list of the causes of scratches. It all depends on the operating conditions of the car and the situations occurring on the roads. As you can see, not all causes can be prevented.
Pencil instead of polish
Shallow scratches can be “fixed” using a special wax pencil. The advantages of this tool:
- universal – suitable for any type of paintwork;
- the composition includes special polymers that create a protective layer;
- ease of use.
Corrector for covering scratches on a car
There are two types of such instruments:
- marker - the scratch is literally painted over;
- corrector - you need to choose the appropriate color, but there are also colorless models.
The procedure for eliminating a defect using a pencil looks like this:
- you need to prepare the surface - everything is exactly the same as when working with polish;
- Gradually and evenly, the scratch is “painted over.” If necessary, you need to repeat the procedure several times;
- At the end of the procedure, remove excess substance with a microfiber cloth.
The pencil must be tightly closed, as the substance dries quickly in the open air.
How to remove scratches on a car body
Before removing scratches from the car body, you should first wash the car thoroughly (instructions on how to properly wash a car).
Then, on a cleaned body, it will be possible to assess the degree of damage to the paintwork (abbreviated as paintwork) and the depth of the scratches, and then determine how to remove them.
Based on the depth and size of scratches on the car body, the following options for removing them are possible:
- Removing scratches and small chips by polishing the body (manually or using a polishing machine);
- Shallow scratches of the varnish coating and other minor damage are removed using a restoration pencil (for example, Fix it Pro), colored wax or nanocompositions such as RENUMAX;
- Serious damage to paintwork, such as deep scratches down to “living” metal, is almost impossible to remove without painting. In such cases, you will have to spend a lot of money on touch-up paint.
Let's look at each of the methods for removing scratches from a car body in more detail and weigh their pros and cons.
Spray cans with dyes
Using a special can of paint, you can quickly remove scuffs and scratches from the surface of your car with minimal effort. However, to eliminate extensive damage, a can of spray paint will not help; the surface will need to be restored by other means. Automotive stores sell special cans of paint; they are small in size, similar to samples.
These canisters function as aerosols. There is a scratch on the surface of the car, and by pressing the cap of the can, paint is sprayed onto the damaged area. After application, the dye dries very quickly. To select the required shade, use autoflower catalogs.
Corrective cosmetics for the “face” of a car
Scratches that stand out brightly on the polished paint of a car are an unpleasant thing. Even more unpleasant than the rather stupid word “anti-scratch”, which has already taken root in everyday vocabulary to designate means designed to mask these very scratches as much as possible and “preserve” damage. In our rating today we will look at the best anti-scratch products that the market offers us.
What is anti-scratch in essence? In fact, it is a kind of hybrid of abrasive and finishing polishing paste. The abrasive component evens out the damaged area, smoothing out differences in the scratch area, while the wax fills them, at the same time masking them - the anti-scratch is sometimes helped by the dye introduced into the composition, which is selected as close as possible to the color of the car's paint. That is, you will get the same thing with regular polishing with several compounds in turn - just “anti-scratch” will make it faster and easier (but not better!), and it is usually sold in a small package designed for a small amount of work.
Bottles with brushes
Such products make it very easy to cover up a scratch yourself, and containers with brushes are suitable for removing serious damage, even when the paintwork is damaged to the metal. These products consist of special substances, one of which is fiberglass, which helps eliminate scratches; in addition, bottles with brushes are very easy and simple to use. Another advantage is the easy selection of shades from a color catalog.
This product contains special fiberglass components that replace the primer, so the substance is applied very easily and simply. It is important to remember that after a few years the shade of the car changes slightly, so the original color may not match the car catalogue. The negative aspects of the paint in the bottle include the following:
- the brush is thin enough, so when filling scratches with paint, it allows you to cover only narrow damage;
- The product is disposable and dries very quickly after opening the bottle.
Before covering the damage, it is important to thoroughly degrease the surface.
Scratch removal kits
The detailing industry has a lot of good products for successfully touching up chips and scratches. Special touch-up pens for touch-up transfer paint into chips and scratches by capillary action. They can really do the repairs neatly.
Ready-made scratch removal kits are sold. For example, the set (3M Scratch & Scuff Removal Kit) contains everything you need to remove shallow scratches. The set includes sanding paper, polishing paste, sanding block and polishing pad.
Bottles of paint of the desired shade can be purchased from a dealer at an auto center of your car brand, or at a car cosmetics store or at a specialized store that sells body repair products.
Properties of car paintwork
To remove scratches on a car, there are several types of products that can be used at home. But each of them has a specific area of application, properties and features that must be taken into account. In addition, not every composition is suitable for treating small or deep scratches, so the first thing to do is determine the nature and severity of the damage.
The following must be taken into account:
- Small shallow scratches are damage that forms on the upper protective layer of the body. Only varnish removes them. This is the first category of defects. This problem can be dealt with quite simply by polishing.
- Deeper damage causes the destruction of not only the varnish layer, but also the paint. The pigment, the substance that gives the coating color, is damaged, so you will see a gray layer of primer. Even such seemingly shallow grooves are extremely difficult to eliminate at home; in addition, you will have to renew the coating in the area of the chips from time to time. A leveling technique followed by polishing is used.
- Deep scratches remove the varnish, dye, and both layers of protective primer, leaving the frame metal exposed. If it is not protected from corrosion and the problem cannot be solved in time, an impressive rust spot can form, which will quickly destroy most of the affected part. A special tool and composition are required for applying the patch; damaged areas are filled, followed by multi-stage polishing.
How to remove shallow scratches from a car body - polish and pencils
Damage to the paintwork must be dealt with at the initial stage to prevent paint swelling and cracks. We offer proven, proven methods for removing small and medium scratches.
The most common way to get rid of body damage, which is done at car washes, is to polish the car using a polishing machine and specialized products.
Car owners are offered two options to get rid of damage:
- If minor damage to the varnish appears in rare places on the paintwork, then polishing with a non-abrasive paste is suitable. It forms an additional protective film on the body paint and fills scratches. Over time, the film is washed off, so the procedure must be repeated regularly;
- When the car body is completely covered with small scratches that do not reach the enamel, polishing with various abrasive pastes is suggested. Depending on the size of the damage, a suitable remedy is selected. When processing paintwork using this method, the top layer of varnish is erased and the surface becomes uniform. Frequent use leads to wear off of the varnish and loss of body color saturation.
For self-repair, car owners can use liquid polish. There are two types of this product in auto shops - Teflon and wax or liquid ceramics (glass). The effect of application is the same as when treating the body with non-abrasive pastes.
A protective film is created on the body, and small scratches are filled with wax or Teflon. But unlike specialized polishing with a paste, such polishes wash off faster:
- There are enough waxes for a couple of sinks;
- Teflon coating protects paintwork for up to 5 washes.
Plus, it’s worth adding weather conditions to the washes, which also have a negative effect on the protective layer.
Another panacea for car owners from auto chemical manufacturers is considered to be special products in the form of pencils. Depending on the depth of the damage, remedies are offered on a different basis:
- Waxes have the same properties as polishes. But by adding pigment to the marker, manufacturers make pencils for cars in different colors. Therefore, you can choose a wax marker of the desired color and cover the scratch for a month;
- Helium. Among them are the Fix It Pro pencils, which are suitable for cars of any color. But it is worth noting that this product is effective only for minor scratches.
For medium and deep damage, kits consisting of gel pencils and enamel are offered.
Important to know: Similar to liquid glass, we managed to review and make a useful article about pencils. Check out the rating in our Scratch Remover Pencils review.
Body polishing is a cosmetic operation for a car.
First, let's look at the simplest case, when the scratches are very small and insignificant, damaging only the top layer of paint. As a rule, these damages can result from contact with pebbles or small branches.
In this case, you just need to properly polish the damaged area. Based on the tasks to be solved and the functions performed, there are two main types of cosmetic polishing of the machine:
- Abrasive polishing is the simplest method aimed not only at restoring the body, but also giving it its original beautiful appearance. The polish itself is of great importance, because preference should be given only to high-quality products. Otherwise, you can neutralize both the scratches themselves and the protective layer of paint. If you polish your car too much, you will have to perform more complex restoration work.
- Protective polishing - unlike cosmetic polishing, this category of work is aimed exclusively at restoring the paint layer of the car body. In addition to standard polishes and similar compounds, numerous mastics and special car waxes can be added here. The principle of operation of such compositions is that after application to the surface of the car, a film is formed that corrects damage, while perfectly masking it.
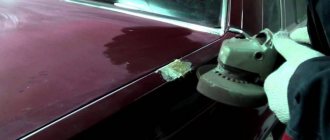
Polishing is carried out after applying polish to the body. Specialists usually use special equipment, for example, a grinding machine or similar equipment. But you can completely do without these devices by using fine-grained sandpaper or even a usually thick napkin if the scratch is very small and unnoticeable.
After applying the composition to the metal, you need to grind the surface using gentle circular movements. The paste must be constantly moistened, since a dry composition when rubbed into the top layer can cause additional damage. Once there is no trace left of the scratch, polishing can be completed. These actions must be performed only in warm, dry rooms where there is no exposure to external factors, including moisture, precipitation or dust.
Preparing to remove scratches
The area to be repaired must be perfectly clean. This means that the repair area must be washed, dried, cleaned of protective coatings (wax), removed rust (if any) and degreased the surface. Rust should be removed dry using P320 sanding paper.
Sometimes it is necessary to sand the scratch before applying paint to create a beveled edge. This way there will be no sharp boundaries between the original and new paint, and the repair area will be less noticeable.
Do not start repairs if the ambient temperature is less than 10–15 degrees Celsius.
To prevent drops of paint from getting onto the area adjacent to the scratch, apply masking tape around it, leaving 2 cm from its edges.
If rust appears
If rust has formed on the surface, work will be required to thoroughly clean the corroded area - using a grinder or sandblaster. Small areas can be cleaned using fine-grit sandpaper.
Further work is carried out according to approximately the following algorithm:
- the cleaned area is degreased and putty is applied;
- after complete drying, the surface is sanded and primed;
- painting and polishing is carried out.
Large areas damaged by corrosion are best removed with the help of specialists at a service station.
The procedure for removing deep scratches from a car body
It is natural for car owners to search for alternative ways to deal with paint damage. After all, painting a car body after every scratch and chip at a service station is an expensive and time-consuming process.
Of course, it will be much cheaper to do local painting work yourself in order to maintain the integrity of the paintwork yourself. But, in this case, the car owner will need skill and a set of special equipment.
Sandpaper
To remove scratches on a car body using the classical method, you will need a set of sandpaper:
- The damaged coating is rubbed over with coarse grain at the initial stage, after washing the car;
- Fine-grained is required for processing putty;
- Use 1200-grit sandpaper to sand the area before painting to ensure a smooth finish.
putty
To uniformly fill the treated area and bring it to the level of the paintwork, the following is required:
- Carefully apply automotive putty;
- Dry the surface and clean.
Primer and degreaser
After obtaining a uniform surface, it is made smooth. To do this, apply the following to the area treated with putty:
- Special primer matching the color of the car body;
- Degreaser for tight paint adhesion.
Paint of the required shade
The main step in removing a scratch is the selection of auto enamel. It must match the color of the paintwork on the body of the car being repaired.
The final result of the repair depends on the quality of the materials used and the professionalism of the performer.
Tools for restoration work
In addition to sandpaper, you must prepare the following list of tools and equipment before painting:
- grinding bar;
- automotive acrylic putty;
- primer mixture;
- varnish;
- dye.
All this will make it possible to hide scuffs and scratches from the surface of the car as much as possible, and these devices will help to completely remove damage of any size. It is important to use automotive paint rather than regular building paints.
Removing and painting scratches on a car
You can only trust scratch repair to true professionals, who we are. Therefore, most car owners try to find a reliable car service center where they will constantly service their car. When choosing a workshop, you should consider how long it operates, how convenient it will be for you to drop off and pick up the car, what services they provide and at what price. The experience of the employees, the availability of tools and modern equipment, and the speed of service also play an important role.
If you need to repair and remove scratches, then you should choose Defects No, ours specializes in removing and repairing scratches without painting. Painting a scratch on a car yourself, straightening or removing scratches without painting is quite difficult. With an inexperienced hand, you can damage the paintwork, after which you may have to repaint the part.
Typically, repairs and removal of scratches from a car body are carried out in order to improve the external properties, sell the car more profitably, and stop corrosion processes; an exposed scratch or chip can lead to rusting of the metal. Scratches and chips on a car appear not only from the negative impact of vandals, but also from small stones, hail, and particles of the road surface. The cost of removing and painting scratches depends on their depth and size. This process begins with washing the car, then it is necessary to limit the affected area using masking tape. Next, our master begins to retouch and then polish the coating, leveling it and removing scratches and chips. If the damage is deep enough, then the technology of local partial painting of scratches is used. Finally, the paintwork is treated with a special protective compound.
Car dent straightening is the process of straightening dents without painting. The purpose of such work is to restore deformed machine parts without resorting to painting the element. It is thanks to repairs without painting that no one will know that your car has been damaged and the factory paintwork will be preserved. Only experienced professionals can carry out work to remove scratches, chips and dents; our center’s specialists use the professional equipment necessary for this. Painting parts is a more labor-intensive process. If you only want to correct some imperfections, but do not plan to completely paint the part, partial painting of scratches on the car body is suitable for you.
Removing scratches without painting is one of our main specializations; we have developed our own unique technology for repairing this type of damage.
Why do damages occur and what are they like?
Typically, chips and cracks occur because rocks and sand bounce off the road at high speeds.
Scratches on a car must be restored immediately , otherwise moisture will get into small cracks and cause corrosion of the metal. The longer the crack remains on the car, the worse the coating will be.
Before cosmetic repairs, inspect the coating around the headlights and radiator - most often scratches appear on the front of the body.
What scratches can be removed using auto chemicals?
Before choosing a removal method, it is important to understand the nature of the impact, the depth of damage, which extends in depth to the following layers of paint:
- Lacquer.
- Enamel.
- Ground.
- Phosphate.
- Metal.
Defects are clearly visible:
Damage to the first layer can be repaired with light polishing or a scratch masking pencil. The latter is also suitable for removing damage from the enamel coating. Mechanical defects and scratches also appear on plastic, including in the interior, but they are usually shallow and easier to get rid of than on LPK.
Varnishing after painting
Layers of varnish may only be applied when the paint is completely dry. Experts recommend using an aerosol can for varnishing, which is shaken before use. If a spray gun is used, the varnish should be supplied under pressure of one and a half atmospheres. Applying varnish is the final stage of restoration work.
Experts recommend varnishing in two or three layers, waiting for each layer to dry before applying the next coat. After the final coat has been applied, you need to wait 24-48 hours for the varnish to dry completely, after which time you can start driving the car.
How to polish a scratch?
Polishing a single scratch is somewhat different from polishing the entire body, although the principles and logic are the same. The most important thing is to determine who will polish: a professional master or you yourself. Polishing a scratch with someone else's hands. Proper polishing of a scratch is polishing by someone else's hands. By the hands of someone who will do this from morning to evening. Someone who has at hand at any given time everything necessary to do it “well”: various polishing machines, various polishing pastes, polishes and many other gadgets, the existence of which the average car owner did not even think about. Well, now I’ll tell you in more detail what you will need, when and for what.
Step-by-step instructions for polishing a regular scratch
1Cleaning and basic preparation
We clean the body of everything that can be cleaned without any polishing.
2Basic abrasive polishing
Polish the scratch with a fur disc and paste with a coarse abrasive. The most dangerous moment of polishing.
3Finishing and final polishing
We polish the body after the previous stage. We remove holograms and even out the shine.
4Control of holograms and application of polish
We check the result and protect the polished area with polish or carnauba wax.
We begin polishing scratches with preparation. Clean the area of the body you are going to polish from dirt and road dust. If you want to take your car to the car wash, you want to wipe it with a wet microfiber. Yes, it gets scratched, but you still need to polish it... Focus on an area 30-40 cm in diameter from the scratch in each direction. Use polishing clay to remove dirt and dust from the area. We told you how to do this and what it is earlier. In the place of the scratch, there may be someone else's paint on the body: from another car, a fence, or another place that was rubbed against. Don’t try to wipe off all someone else’s paint with clay. It's hard and long. Use white spirit or gasoline galoshes. Degrease the completely cleaned area of the body with a regular degreaser or anti-silicone. The preparations are complete. Based abrasive polishing of scratches. The important stage of abrasive polishing must be performed with a confident hand, being sober and inspired. It is this stage that removes a scratch from the body; the rest only correct the overall appearance and clean up traces of abrasive polishing. You will need a regular rotary polishing machine, which is often confused with a grinder. We put a fur polishing pad on the substrate, but, in all honesty, we have to admit that the cheapest orange polishing pad for 200 rubles is also suitable. We use Koch h8 or Koch h7 paste. It is silicone-free and does not scatter in all directions. If the polishing paste has a high silicone content, like Menzerna FG400 or 3 M 417 with a green cap, then each time after passing the disc you will have to degrease the polishing area in order to see and evaluate the result. When there is one scratch a month, it’s no big deal. That's when there are five to seven scratches a day - these wipes with degreaser make you mad. “The crucial stage of abrasive polishing must be carried out with a confident hand, being sober and inspired.” We set the machine at 2500-3000 rpm, put five points of polishing paste on the disk, lean the disk against the body, spread it over the area without turning it on... We silently pray to ourselves and profit start button on the polishing machine. At this speed, the varnish under the disc heats up very quickly and with every second the risk of breaking through or setting it on fire increases. Therefore, try to polish the scratch across, pressing the polishing disc not with the entire surface, but only part of it. Polish at an angle and repeat the motion with the machine as if you were trying to sweep the scratch into a dustpan with a brush. If the scratch does not go away on the first pass, let the surface cool until it stops burning the inner surface of the left hand. Apply new drops of paste to the disc and repeat the procedure. Finishing and final polishing. For finishing we use a two-way polishing machine, a disc for fine abrasive paste and the fine abrasive paste itself. For example, a Rupes machine, a yellow Rupes disk and a Rupes polishing paste with a yellow cap. Degrease the surface after abrasive. We set the machine at 3500-4000 rpm. Spread the paste over the body with a disc, press start and polish. It is necessary to polish not only the place of the former scratch, but the entire surface of the wound, cleared of dirt. This way, at the same time, a local polishing spot is hidden so that it does not shine in a small area on the body. The entire area of the disc must be polished using vertical and horizontal passes. Until the characteristic heating of the varnish. Final polishing is only needed if you don’t have a two-way polishing machine and you have to get rid of holograms the old-fashioned way. We install a soft black polishing disc on the rotary machine, arm ourselves with anti-hologram paste and patience. We set the speed to maximum and begin polishing without skipping and thoughtfully. the car rolled through the sea buckthorn bushes. We don’t know why, it remains a mystery... But all the scratches were polished to a mirror shine.
Control of holograms and application of polish Place all polishing accessories aside. Apply anti-silicone over the entire surface of the body that has been polished. Then wipe again. Shine a flashlight. If streaks resembling clock hands are not visible, then everything is fine. If visible, these are holograms. It's hard to deal with them, but it's possible. There is a whole article on this topic. Polish is a camouflage cream based on paraffin and dye to match the body color. Used after polishing lapped areas to mask scratches down to the metal. If there are no scratches down to the metal, then use a sealant or carnauba wax to fill any grooves left by the scratches. This way you will achieve maximum effect. How to do this is written in detail in the article about carnauba polish. Polishing a scratch with your own hands. I am convinced that it doesn’t matter where the hands come from, as long as they are golden. There is a breed of men who will never pay money to anyone until they try to do it themselves three times. Fortunately, polishing a scratch is not as complicated a procedure as rebuilding an engine or beating rubber with a crowbar in the cold, so with the right level of enthusiasm and greed, polishing a scratch is not difficult. The first, painless option to polish a scratch yourself is to come and rent a box for an hour. The box contains all the necessary equipment and consumables described above. There is also a Master in boxing, under whose supervision it is not so boring to do something. He will always tell you how to do it correctly and warn you before a possible mistake. Now this option of self-polishing resembles an unsuccessfully hidden advertisement, but I assure you that there is no such task. The second option of polishing yourself is classic and familiar to the Russian peasant. We take the process described above and, without changing anything in the sequence, try to replace a professional tool with a household one. Expensive materials for cheap ones. And we stock up on expectation and hope that the result of self-polishing will be as close as possible to the professional result. I assure you this is real. A few tips for polishing scratches yourself: 1. if you don’t have a polishing machine, take a screwdriver with variable speed control and set the speed to 3. 2. if there are no special polishing washers for the screwdriver, buy a Velcro sole and attach a regular orange foam rubber pad to it. It costs 180-200 rubles in any auto store. 3. grinder, felt disc, white polishing pad, dish sponge, derl, drimmer, felt disc, angle grinder - ALL THIS IS NOT SUITABLE FOR INDEPENDENT POLISHING OF SCRATCHES! 4. Polishing pastes are expensive. You can buy 150 ml tubes of pastes for 300-400 rubles. If you don’t find it, ask the guys in the garage or at the car washes. Sometimes they give it for free. 5. To avoid buying anti-silicone, buy a regular degreaser for 50 rubles.
Playerold › Blog › Touch-up of chips and scratches.
Most car owners are faced with the problem of chips and scratches on their car; they can appear due to many factors.
We won’t describe life’s incidents about scratches and chips and how you can get them, but let’s talk about how to get rid of them. There are several options to try to correct the situation. First, it is worth deciding what paint restoration methods can be used.
The easiest. Unfortunately, it is used only for minor paint abrasions; if the paint is stripped down to the ground, it will not help. The advantage is that they even polish cars at some car washes (you don’t have to bother yourself) and it costs several hundred rubles, which is significantly less than the cost of repainting the part.
2. Special pencil
It looks like a glue stick. Basically, you can stock up at an official dealer, or at some large market. Helps with minor scratches (the putty is barely visible) and abrasions. The downside is that you need to periodically tint with the same pencil, since the substance tends to evaporate over time. The cost of a pencil is also several hundred rubles. Before applying the pencil, it is necessary to degrease the surface.
3. Touch-up brushes.
A disposable device that looks like mascara. Disposable because the composition has a bad tendency to dry out after opening. Used for more specific scratches; the coating must also be degreased before use. Cost 100-200 rupees. The advantage is that, unlike simple paint, this tube contains a special composition with fiberglass, which does not require the mandatory application of a primer. (i.e. you can paint live).
4. Directly the can of enamel.
Used for good scratches (possibly to metal). But the whole procedure will be more complicated than all the methods described above.
A. If there is rust on the chip, carefully remove the rust with sandpaper b. We degrease it well (and now it is better to use a special degreaser, since white spirit leaves an oil film because it is made on the basis of kerosene) and let it dry for about 2-5 minutes. V. Apply a primer (preferably anti-corrosion). Apply carefully and in a thin layer, trying not to get on the paint. We wait 10-20 minutes. If the layer turns out to be thin, don’t touch anything and move on. If the primer is too thick, carefully remove the excess with fine sandpaper, remove dust with a dry cloth or napkin and degrease it. d. Apply a thin layer of paint. Let it dry for 5-10 minutes. Making the second layer. Again we wait 5-10 minutes. When painting, it is very important not to apply a thick layer, otherwise it will swell, and not to apply it on existing paint - it can “raise” the edges. Don't be alarmed if the color seems a little darker - it will lighten as it dries. d. If the color of the car is metallic and there is varnish, and there is a desire to make the chip more invisible, we apply varnish. Better universal. Again in a thin layer. Remember - the varnish takes at least 30 minutes to dry. If the chip is large and on a vertical part of the body, it is recommended to drive the car no earlier than after 2-3 hours.
During the day, under no circumstances should the area to be painted be wet. Degreasing is done with a lint-free cloth, soaked in the composition used until damp, but not wet (should not drip!). You can paint outdoors at a temperature of at least 15-20 degrees and better in the sun, but where there is less wind and dust.
Well, now let’s get down to the question of where to get paint, or more precisely, how to find out the VW paint code
There are several specific ways to find out the paint number or paint code of your car, in this case I will talk about only two possible ones:
1. The paint number can be found out from the VIN code of your car, the vin-online website will help you with this, please note that the VIN code of a car can only be found out for Audi, Seat, Skoda, VW and Porsche. 2. The paint number can also be found on the sticker in the trunk of the car.
And so we look for stickers, plates with paint codes...
We found a plate with a code, or found information through the VIN - the car code, let's move on to decoding...
I'll give you an example from my car. I found out the body number and paint number from the first option, that is, through the VIN code.
In the end, here is my data...
A1 (L041) Black And finally, selecting a touch-up kit according to the paint code...
There are two options for touch-up kits: pencil and spray.
- the abbreviation LST is a pencil; - the abbreviation LLS is a spray
0U2 is a non-metallic and pencil color; 0U6 is a non-metallic and spray color;
And the full code for touch-up kits for my color (black):
Set of pencils (18 ml) - LST0U2041, Set of spray (300 ml) - LLS0U6041.
Source
Rating of the best anti-scratch products
CategoryPlaceNameRatingPrice
| The best anti-scratch pastes | 1 | Liqui Moly Kratzer Stop | 9.8 / 10 | 550 |
| 2 | Turtle Wax Anti-scratch | 9.6 / 10 | 240 | |
| 3 | ASTROhim Anti-scratch | 9.5 / 10 | 130 | |
| 4 | Sonax 320100 | 9.3 / 10 | 250 | |
| 5 | Scratch remover RUNWAY | 8.5 / 10 | 150 | |
| The best anti-scratch pencils | 1 | Wax corrector LUX COLOR | 8.5 / 10 | 90 |
| 2 | Fix It Pro | 2.0 / 10 | 1 000 |
Spray for medium damage
Another good scratch remover is spray paint. In stores on the shelf you can find special body paint that eliminates defects. She will be needed. Repair scratches as follows:
- Degrease and clean the defective area.
- To ensure that the paint is applied only to a specific point or area, make a stencil. It is enough to take rough paper and cut a hole in it of the appropriate size. This way you will not splatter paint on other areas of the body.
- The stencil should be kept at a short distance from the work area.
- Start spraying the composition. Do not spray too much, otherwise the paint will form unsightly streaks.
- Let it dry.
- We arm ourselves with sandpaper and clean the surface until the level of the painted area is equal to the original paintwork of the car.
- It may be necessary to carry out the entire procedure again, since it is extremely difficult to level deep chips in one go. Re-painting should be done only after 24 hours.
- Polish the surface.
Instead of aerosol, you can also use special liquid paint; it is sometimes cheaper. The layer will be applied using a brush.
What is LCP?
First, you need to understand what a car’s paintwork is. Everyone knows that this is the coating of a car body using paint and varnish. In addition to adding aesthetics to the vehicle, the paintwork system is designed to prevent premature destruction of the metal due to corrosion.
The paint coating system includes the following categories of layers:
- Primer. The primer contains substances that are resistant to temperature changes and minor deformations. Among this category there are acrylic (used for repair and restoration work on the body), epoxy (have anti-corrosion properties) and acid (used before painting the body and are designed to prevent metal oxidation).
- Intermediate. This layer is responsible for the body color. Among car enamels, there are acrylic (dries quickly, does not shrink, is resistant to mechanical damage, does not deteriorate when changing atmospheric conditions), alkyd (a budget option, less polished, difficult to achieve a mirror effect; car painters recommend them for local work), metallics (in their The composition includes aluminum powder, which gives the body an original shine). Some types of paints do not require the use of varnishes. Special types of paints have been created for rims and bumpers.
- Covering. The purpose of the varnish coating is to protect the base layer from ultraviolet rays and aggressive weather conditions. There is a huge variety of car polishes. The list includes acrylic (requires adherence to application technology, dries quickly), cellulose (practically not used for repair work), glyphthalic (contains synthetic resins that provide elasticity to the protective layer), polyurethane (resistant to brake fluid, gasoline and acid ), acrylic polyurethane (two-component varnishes with the properties of acrylic and polyurethane analogues).
Each manufacturer uses different materials at the stage of treating the body with protective agents, which may differ from analogues in chemical composition. The more durable the coating, the less corrosion the car body will be subject to.
That is why every motorist needs to keep his car clean and be attentive to the appearance of scratches on the paint.
Options for eliminating shallow and severe damage
Car body defects can be removed in different ways, many of them are used in service centers. These include:
- polishing;
- restoration of paintwork;
- use of special tools.
The listed methods of body treatment can eliminate almost any type of damage.
To polish and grout the body, various power tools are used - drills with attachments, screwdrivers and grinders. However, they are used only as a last resort, when it is necessary to deal with obvious corrosion and rust.
Not every car enthusiast can afford to purchase such a tool, so other options for polishing tools can be used, even manual polishing
To eliminate damage to the body, accessories are also used - rough rags, brushes, soft rags. All protective equipment is divided into several types:
- regular or non-abrasive polish;
- special paint;
- colored wax and pencils;
- colorless varnish.
How to prevent defects from occurring
A well-known saying goes: “Prevention is better than cure.” Based on this principle, instead of frequent restoration work, it is necessary to carefully operate the car and use protective agents to treat the body.
Standard precautions include:
- careful care of paintwork (do not rub dry with rough rags, do not treat the body with aggressive agents containing acetone and similar substances);
- careful driving (be careful when parking and driving near large obstacles);
- use of protective equipment (wax coating to protect against dust and moisture).
Compared to repainting a car, caring for it with protective products will cost much less, so you shouldn’t ignore minor scratches on the body. If you have doubts about the quality of the work, you should seek help from specialists.
Post Views: 15,266
Putty and plastering
Car putty.
The surface is cleaned with sandpaper, after which a thin layer of putty is applied. When performing work, use a spatula, which is used to make transverse movements. The composition is left for 30 minutes, after which the coating is sanded. If the surface remains uneven, the putty is reapplied. After drying, sanding is repeated.
Acetone
Surface preparation: wash thoroughly (preferably with a brush), dry and wipe. Remaining moisture will slow down the effect of acetone on the paint.
To eliminate damage, take a clean white cloth and moisten it with acetone. If you don’t have a clean one, any liquid based on it will do (for example, nail polish remover).
Rub the cloth over the damaged area until the scratches disappear. The action of acetone in this case is based on the same effect of softening the paint.
You need to take a white fabric, since under the influence of acetone, the fabric paints can stain the car.
Spot painting of damage
This type of paint application is called retouching by many. This technique includes several options for restoring the paintwork of a car with your own hands. The specific type of retouching is selected depending on how severe the scratches and damage to the car's surface are.
Typically, spot application of paint is used to eliminate small scratches that only affected the paintwork material. Before starting retouching, the car body is carefully inspected to determine where exactly the scratches are, after which paint is applied. Retouching is not suitable for deep scratches; regular paint will not be able to cover the damage down to the metal.
Also interesting: Do-it-yourself all-terrain vehicle made from a walk-behind tractor, photos and videos
But if there are scratches on the car body down to the ground that have damaged both the primer and the paint layer, then you need to use special products that have a local effect. These products include polymer pencils and brushes with special paint contained in a small bottle. Experts recommend applying these products in several layers, in which case the paint will completely cover the damage.
Attention! Before painting over a scratch, it is necessary to thoroughly clean and dry the surface of the car. Once the first coat of paint has been applied, it is important to allow it to dry completely before applying the next coat of paint.
Local application products - fast, cheap and easy
Another way to restore a body is to use special automotive products aimed at masking and completely removing scratches. This group of products includes wax and gel correctors, as well as specific pencils. The color palette of the products presented is very wide, you can easily choose the pencil that perfectly matches the shade of your car.
The main advantages of using these tools include:
- Ease of work.
- High speed of the process.
- Low cost of goods.
The main disadvantage of correctors is that, as you can guess from the name, they do not so much restore scratches as simply mask them. The consequence of this is the need to periodically update the shaded layer. At first, the drying composition perfectly hides any damage to the car, but over time, the paint begins to crack and deteriorate, which leads to the reuse of pencils.
The automotive goods market can please us with many other interesting products that allow us to paint any minor body defects in the shortest possible time. Degreasers, special wipes, car varnishes, masking polymers - all these products make it possible to get rid of minor damage, as well as additionally protect the car body, preventing the possibility of rust.

