Main causes of malfunction
The engine exhaust manifold is a part that operates under high loads.
During the operation of the car, it is affected by such negative factors as:
- high temperature transmitted to it from exhaust gases;
- exposure to gasoline vapors caused by the fact that the VAZ 2114 intake manifold and exhaust manifold have a common gasket;
- exposure to exhaust gases;
- exposure to vibration transmitted from the motor.
All this leads to the fact that almost all cars that are more than 7 years old (with the exception of those whose owners drive a couple of times a year) have a badly worn manifold that requires replacement.
It is immediately worth noting that many car repair shops offer services for argon-arc welding of cracks in worn-out collectors. Such a service, as a rule, costs several times more than a new part, and the durability of such repairs in most cases does not exceed one year, after which new cracks appear.
It is for this reason that you should not think about possible repairs - if the collector fails, it needs to be replaced.
Another problem, which, for obvious reasons, occurs even more often, is a burnt-out manifold gasket 2114. With very active use of the car, it can fail almost every year. You can also replace it with your own hands, and the replacement procedure itself is no different from replacing the collector (its sequence will be discussed below).
Replacement for an 8-valve engine
Device option for eight-valve
Some believe that instead of a failed filter device, you can install a regular corrugated pipe . Also a wrong decision. This will make the noise incredibly loud, and the exhaust gases will very quickly destroy the muffler. You can get by with a budget replacement option - cut out a section of the catalyst, knock out a honeycomb of ceramics from it and perform welding, thereby sealing the body. But be prepared for noise to become your constant companion.
It is best to replace the factory catalyst with an effective flame arrester. They assemble it with their own hands or seek help at a service station, and also purchase ready-made solutions at auto parts stores. Whichever option suits you best, choose that one.
Removing the unit and replacing it with another device is a matter of one hour. At the same time, there is no need to worry about electronics. There is only one oxygen sensor, and it is installed before the catalyst. Therefore, replacing it with a flame arrester will not affect the measurement readings in any way.
What does a faulty collector affect?
There are many stories about the rupture (and even explosion) of a cracked manifold while the car is moving.
Of course, none of them are true, but nevertheless, a leaky manifold is a very serious problem that requires an immediate solution, and here’s why: through burnouts and cracks, air can enter the exhaust system, diluting the exhaust gases.
As a result of this, the lambda sensor will incorrectly determine their composition and incorrectly adjust the composition of the fuel-air mixture injected into the engine, which will lead to tripping, a drop in speed and carbon deposits on the spark plugs.
These same cracks will affect the crankcase ventilation, disrupting it. This will lead to timing problems and increased valve wear. And finally, exhaust gases escaping through the burnouts will enter the engine compartment and, partially, into the interior, causing unpleasant odors and discomfort during trips.
A severely burnt manifold gasket can lead to exactly the same consequences as cracks on the part itself.
Replacement on a 16-valve engine
In the case of a 16-valve power unit, the catalyst is included in the design with the output manifold. Therefore, look for it behind the cylinder block directly in the engine compartment.
The nuance of dismantling the 16-valve engine is the presence of two lambdas.
- The first is located directly on the catalyst. It serves to adjust the fuel mixture;
- The second is located on the flange after the device. It is called ecological. If this lambda is not in place, the sensor will immediately generate an error, the injection will stop working properly, thrust will increase and fuel consumption will increase.
How to make a replacement
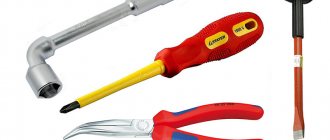
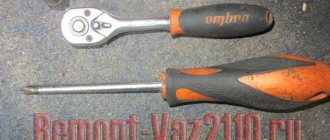
In order to replace the exhaust manifold yourself, you will need the following tools:
- slotted screwdriver;
- open-end wrenches for 17, 13, 10 and 8;
- pliers (pliers);
- socket heads for 19 and 17;
- head knob.
A few days before the expected replacement of the exhaust manifold, all fasteners should be treated with VD-40 or its analogues 2-3 times a day.
Having selected the necessary tool, you should figure out how to remove the VAZ 2114 manifold. The first thing you will need to do is to process all the bolts and nuts with VeDeshka again (before the replacement itself), after which you can begin dismantling, which is performed as follows:
- Remove the negative terminal from the battery.
- Disconnect the cable from the throttle valve.
- Disconnect all fuel line connections.
- Disconnect the throttle position sensor.
- Disconnect the idle speed sensor.
- Remove the brake booster pipes and crankcase ventilation pipes.
- Remove the receiver.
- Disconnect injection control wires.
- Remove the fuel rail (there is no need to remove the injectors themselves).
- Remove the thermal shield protecting the collector.
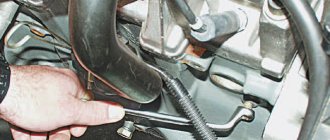
- Remove the exhaust pipe.
- Disconnect the intake manifold and remove it.
- Unscrew the exhaust manifold fasteners.
- Remove the exhaust manifold.
- Remove the exhaust manifold gasket.
Installation of a new gasket and a new manifold, as well as reassembly, should be done in exactly the same order, but in reverse order.
It is imperative to replace the gasket when replacing the exhaust manifold - even if it does not look very worn.
In conclusion, it is worth saying a few words about which gasket is better to install instead of a burnt one, because their choice in car dealerships is quite wide. In addition to the original manifold gasket (catalog number 21083-1008081), Trialli GZ 102 0013 and AJUSA 13065200 gaskets have proven themselves to be good.
All of them are produced in Russia and have an extended service life. In turn, the manifold gaskets from the Bogdan company that are often found on sale have an affordable price, but are designed for only 20,000 km.
That is why they are not the best option - it is better to purchase more expensive gaskets, but they require replacement much less often.
Preparation stages
To replace the manifold or its gasket, in any case you will have to dismantle the VK. But before you get to the element you are looking for, you will first need to go through some preparatory steps. Namely, tighten the fasteners, and then remove the air filter and carburetor if the first stage does not help.
We recommend: Connecting fog lights to the legendary “Nine”
| Stage of work | Your actions |
| Tightening the fastenings | Often, loose manifold fastenings caused the entry of contaminants, which disrupted the performance of the exhaust system. If the tightening did not give any result, then the gasket is definitely burned out or the collector itself is damaged, which is less likely |
| Removing the air filter |
|
| Removing the carburetor | Removing the carburetor is carried out in the following sequence:
|
Dismantling the unit
All dismantling work must be carried out only on a cold engine. To make it easy to unscrew all fasteners, you can pre-treat them with WD40, several hours or even a day before the repair begins.
Exhaust manifold VAZ 2114: characteristics
The exhaust manifold of the VAZ 2114 is an important part of the internal combustion engine of a car. It is designed to remove fuel combustion products from the cylinder block. This device is part of the common exhaust system. To better understand its operation, you need to consider the design of the exhaust system of VAZ cars.
Exhaust system
The main elements of the exhaust system on these cars are the exhaust pipe, additional and main mufflers, as well as a converter. The exhaust pipe on the VAZ 2114 is connected to the converter using a special hinge. A similar design was already used on the VAZ 2109.
To ensure a more reliable and tight connection, there is a graphite ring between the flanges. In order to prevent the car body from heating up, engineers provided a special gasket above the neutralizer. It plays the role of a heat sink element.
VAZ developers installed a special oxygen sensor at the inlet part of the neutralizer. Car enthusiasts know it as a lambda probe. What functions does it perform? Everything is quite simple here. This part is needed in order to determine as accurately as possible the amount of oxygen in the exhaust gases.
So, the information received from this sensor is fed to the ECU and is then used to quickly adjust the amount of fuel that will then flow into the cylinder block. As in many other VAZ models, the mufflers are securely fixed to the underbody of the car. For this, engineers used special suspensions.
The vibration that accompanies the release of gases is significantly reduced with the help of these suspensions. This ensures silence in the car interior.
Features of the neutralizer
Now let's look at the work and functions performed by the catalyst in VAZ cars. It is also called a catalytic converter. This device is one of the most basic parts of the exhaust system of these cars. It is designed to reduce as much as possible the toxicity of exhaust gases that will be released into the atmosphere.
The design of the device consists of a housing, a heat-insulating block and the block itself with the carrier. Special mention should be made of the block carrier. It is this component of the catalyst on the VAZ, and on many other cars, that is equipped with ceramic carriers that are not subject to deformation when operating at high temperatures and with increased vibrations.
The design of this element consists of several longitudinal honeycombs, which are designed to increase the area of work with exhaust gases. Special substances are used to reduce the toxicity of exhaust gases in cars. Platinum, palladium or rhodium are mainly used for these purposes.
Neutralizer device
These chemicals are designed to significantly speed up the reactions that take place in the neutralizer. These substances work in the oxidation of hydrocarbons. The reaction produces ordinary water vapor. Rhodium acts as a catalyst in reduction reactions.
Its main role is to reduce nitrogen oxides into as harmless substances as possible. The block in which these substances are located is placed in a special oblong-shaped housing, and a heat-insulating layer is located between it. Also located in this housing is an oxygen sensor.
Practice has shown that at the operating temperature of the exhaust gases, the catalyst can reliably retain more than 90% of all toxic gases. So, this part has significant efficiency.
A few myths
Installing spacers harms the car and the environment
Some people specifically remove the catalyst, while others do not pay any attention to the faulty unit. As a result, several myths about this device appeared among the people:
- The first misconception is that after getting rid of this unit, the car noticeably increases its power. For what reasons it arose is unknown.
- Secondly, the power unit with the catalyst “suffocates”. Totally absurd. If the catalyst is working properly, the engine functions normally.
- Where the myth came from that a clogged catalyst makes the engine more environmentally friendly is not at all clear. A clogged unit is much more harmful to both your car and the environment.
Based on the above, you should constantly monitor the serviceability of this device and, if necessary, timely replace the catalyst on the VAZ 2114 or replace it with a functional flame arrester. Both of these options are quite effective.
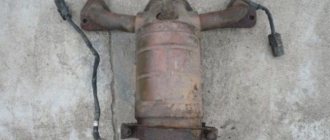
An exhaust manifold
Now let's talk about the exhaust manifold. The collector is designed to collect gases that are formed after fuel combustion. The gases exit through exhaust ports or windows in the cylinder block and are at a very high temperature. After leaving the manifold, they move towards the converter or catalyst, and then into the muffler through the resonator. The combustion products are then released into the atmosphere.
For a more comfortable ride, for efficient operation of the engine, you need to reduce the gas resistance at the outlet as much as possible and reduce noise at the same time. The gases that enter the VAZ manifold can be of very different temperatures. It directly depends on the mode in which the motor operates.
That is why the VAZ manifold must be able to operate in such a way that combustion products can enter it both when the engine is idling and when the engine is operating at maximum power resources. When the power unit operates at maximum power, the exhaust manifold can heat up to prohibitive temperatures and literally glow red-hot.
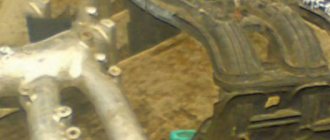
Removing the intake pipe and exhaust manifold: 1 – oil pressure warning lamp sensor; 2 – inlet pipe; 3 – warm air intake; 4 – bracket for the supply pipe of the coolant pump; 5 – exhaust manifold; 6 – gasket
This part is subject to expansion due to high temperatures. To reduce the influence of hot gases and make it easier for fuel combustion products to pass into the exhaust system, the VAZ manifold is equipped with special dividers and reflectors from the inside. Today, two types of these devices are used for use in VAZ family engines.
One manifold is usually located above and the other below the spark plugs. To protect the candles as much as possible from exposure to high temperatures, engineers used special heat reflectors made by stamping. Such parts can easily withstand temperatures up to 900 °C. It is to these temperatures that the exhaust manifold can heat up.
When the engine is idling, the collector practically does not heat up. This part is made by casting, the material being cast iron. After the casting process, the product undergoes firing, and then tempering of those areas that were hardened.
Why are collectors made of cast iron? This material performed well when working under conditions of sudden temperature changes. After all, temperatures in this part very often change from low to extremely high.
Types of elements
Today two types of exhaust manifolds are produced:
- whole;
- tubular.
Solid parts have shorter channels, which are then combined into one chamber. Material: heat-resistant cast iron. The part has low gas removal efficiency. This is because the shorter manifold passages act as a barrier to gas pulses from the cylinder block.
Most parts are produced for mass use, and their quality often suffers. Such collectors do not have a vacuum zone. If they get too hot and then cool, the cast iron can crack. Then you will need to remove the VAZ 2114 exhaust manifold and replace it.
For sports and extreme use, a large number of exhaust manifolds are produced with various shapes and methods of connecting pipes. They are made of stainless steel. Car enthusiasts call these parts spiders. There are short spiders and long ones.
For example, on a 4-cylinder engine, the pipe system is represented by the formula 4-2-1. So, each cylinder has its own pipe. Then these pipes are connected into two, and then into one. This system is used in tuning. It allows you to increase the car's power and torque. The short 4-1 system is used in sports.
Pad
As already mentioned, the VAZ manifold gets very hot during operation. Heating sometimes leads to thermal stress. The consequence of this is the movement of the surface of the part along the surfaces of the cylinder heads. To ensure that the connection between the manifold and the cylinder head is airtight, AvtoVAZ engineers used a manifold gasket. Sometimes the gasket may need to be replaced, and sometimes the manifold needs to be replaced entirely.
The gasket is an important part that serves as a seal. The correct operation of the exhaust manifold depends on its condition. If replacement is not made, the vehicle's performance may noticeably decrease.
The gasket is located between the exhaust manifold and the cylinder head. Its task is to under no circumstances allow gases to enter the space under the hood. The gasket is the weakest link of this assembly. She has to perform her functions in particularly difficult conditions. It is these gaskets that car enthusiasts often have to replace.
When should you change the gasket? Today, seals are made from compressed asbestos, and then they are reinforced with steel. But even such a high-strength material one day becomes unusable. How do you know when it's time to change the gasket? When the vehicle moves, the motorist will hear noise and a clearly distinguishable smell of gases.
In addition, the car will start every once in a while, and from under the hood you can hear sounds that are unnatural for a car. To replace the gasket, you need to remove the air intakes, then you will need to remove the VAZ exhaust manifold. Sometimes this requires dismantling the thermal screen. Now you need to unscrew the bolts that connect the exhaust manifold to the engine.
Next, the VAZ exhaust manifold is removed. Immediately below it you can see the remains of the gasket. It will be necessary to work hard, because what is left of the gasket is strongly stuck to the cylinder head. First you need to remove the carbon deposits, and then clean the area where the VAZ manifold is adjacent to the cylinder block. Next, you need to apply a special graphite lubricant to the surface, and then you can install a new gasket.
Manifold dismantling procedure - step-by-step instructions
The dismantling process itself is not so complicated; access to some nuts is difficult, so it is advisable to carry out the work on a lift or in an inspection pit. The algorithm of actions for the injection VAZ-2114 in this case looks like this:
- Remove the negative terminal from the battery or turn off the mains switch.
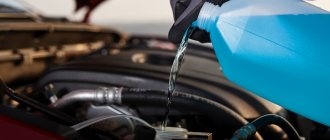
Remove the terminal from the battery - Drain the antifreeze from the system.
This point should not be neglected, despite the fact that the factory does not oblige you to empty the cooling system of liquid. Drain the coolant from the system - Disconnect the fuel pipes.
Removing the fuel pipes - We find the throttle position sensor, idle speed sensor and remove the wires from them.
Disabling the throttle position sensor - We remove the crankcase ventilation hoses and the hose from the vacuum brake booster.
Unscrew the pipes - We dismantle the receiver, disconnect the injector wires and remove the fuel rail assembly. We dismantle the receiver. We disconnect the electrical connector of the fuel rail. We dismantle the fuel rail.
- We get full access to the collector.
We dismantle the thermally reflective screen. Removing the thermal shield - Unscrew the muffler exhaust pipe from the manifold.
Disconnect the muffler exhaust pipe from the manifold - Unscrew the manifold mounting nuts from the studs in the block head.
Dismantling the exhaust manifold mountings - We dismantle the collector.
Removing the exhaust manifold
Replacement of gaskets and installation of manifold
After dismantling the manifold, it is rarely possible to remove the gasket intact. It changes in any case , but parts of the destroyed gasket will definitely remain on the mating plane on the head side and on the manifold side. They must be carefully removed.
Changing the manifold gasket
To do this, you can use a special spray that softens the gasket residues; you can carefully remove them with a blade. In this case, the plane must not be damaged, otherwise the tightness of the connection will be broken.
Also, when installing new exhaust manifold gaskets, it is not recommended to use sealants . They can be of different quality, and during crimping they can form particles that get into the crankcase, which is extremely undesirable.
Video about replacing the exhaust manifold gasket on a VAZ-2114
Tuning the exhaust system, replacing the spider
There is an opinion among car enthusiasts that if you remove the VAZ exhaust manifold, which was installed at the factory, and replace it with a “spider” type part, you can significantly increase the power of the car. Tuning the exhaust system is a big topic. As part of tuning, you can carry out many activities.
And if you carry them out correctly, you can significantly improve the power characteristics of the machine. One of the actions is to replace the manifold. To increase power, you need a competent approach to the exhaust system. Many are sure that the VAZ factory manifold almost prevents the engine from opening completely; it delays the process of releasing combustion products.
To unlock the potential of the power unit, you just need to remove the VAZ exhaust manifold, and then install a spider with the 4-2-1 formula. The Spider can be purchased at automotive stores that offer tuning parts. Let us remind you once again that there are 4-2-1 and 4-1 spiders, but for the VAZ 2114 the 4-2-1 scheme is more suitable.
There are many models of these parts of various modifications and from different manufacturers. You can purchase an exhaust manifold without an oxygen sensor or with one. In order to make a replacement, you need to remove the VAZ exhaust manifold. To do this, you need to install the machine on an overpass or inspection hole.
Then you should wait until the collector has cooled completely. Next, you need to dismantle the installed standard elements that were supplied from the factory. Here it is necessary to remove the exhaust pipe and exhaust manifold of the VAZ. To prevent this process from taking much time, you can disconnect both the collector and the pipe together.
Many car enthusiasts are faced with sticking nuts. Therefore, it is better to use the popular WD-40 mixture.
Next, we proceed directly to the replacement. The spider should sit securely on the cylinder head studs. You need to do everything very carefully and make sure that the heated spider does not touch the wires or other parts. Now we need to determine how well this part follows the curves under the bottom of the car.
Here contact of the collector with the stabilizer is possible. This can be fixed with a hammer. You can even do this modification alone, but it is better if the car enthusiast has an assistant for this work. This way you can save time.
Tips for replacing the intake manifold
Also, do not neglect the procedures for repairing and cleaning the intake manifold. The stability of the VK is very important for the normal functioning of the car. A certain vacuum is formed in the intake manifold, which is the source of drive force for many systems: cruise control, windshield wipers, vacuum brake booster. In the event of a collector malfunction, this threatens the failure of one or more of the above systems.
To avoid the appearance of cracks and distortions, you must use a torque wrench to tighten the nuts on the manifold and follow the tightening order of 20.9-25.8 (2.13-2.63) N_m (kgf_m). As a rule, it is recommended to start tightening the nuts from the center and gradually move towards the periphery, alternately tightening the nut on one side or the other.
When installing the receiver, it is necessary to replace the sealing gasket.
To work on removing and replacing the VAZ 2114 intake manifold on an 8-valve engine, we will need:
- keys “for 8”, “for 10”, “for 13”, “for 17”;
- “cardan” type nozzle and socket heads “17”, “19”;
- magnetic screwdriver;
- screwdrivers, pliers;
- new intake manifold.
By the way, the price for an intake manifold from a VAZ (article 21110100801420) will be 1,350 rubles.
The cost is indicated for spring 2022 in Moscow and the region.
1
Loosen the clamp and disconnect the crankcase ventilation hose.
2
Drain the coolant. Remove the hose from the cylinder head cover pipe.
3
We remove the air filter housing from the car by disconnecting the mass air flow sensor.
4
Remove the supply hose to the vacuum fuel pressure regulator.
5
Unscrew the two nuts securing the fuel pipe bracket to the receiver and remove the bracket.
6
Disconnect the vacuum booster hose from the receiver.
7
In order not to confuse the connection of the fuel pipes, we mark one of the fuel lines with a marker.
8
Using two 17mm wrenches, unscrew the fuel line fittings.
9
We unscrew the six nuts securing the receiver to the intake manifold and the stud on the receiver, and then remove the receiver itself.
10
Disconnect the wiring harness connector from the crankshaft position sensor.
11
Unscrew the two bolts and remove the fuel rail.
12
We unscrew the seven nuts in front securing the manifold to the thermal shield...
13
... and one at the back.
14
Unscrew the two nuts securing the thrust rods, first on the left side...
15
...then on the right side.
16
To avoid losing the washers from the manifold studs, remove them using a magnetic screwdriver.
17
Let's remove the intake manifold and replace it with a new one. We assemble everything in reverse order.
The exhaust system of a VAZ-2114 car with an injection engine is not particularly complex, however, sometimes you have to spend a lot of time, and maybe money (if the work is done at a service station) to bring it to normal condition. Today we will look at the exhaust manifold of the VAZ-2114, with the features of its dismantling and installation.
Exhaust manifold for VAZ 2114
The exhaust manifold is a unit that is responsible for ride quality, without which comfort is impossible. This is silence and the absence of exhaust smell under the hood, which can be drawn into the cabin through the hole in the cabin filter. Fixing a leak in the exhaust manifold of a VAZ 2114 is a necessary repair. Fortunately, it is not urgent; you can prepare in advance and choose a convenient moment.
Exhaust manifold for VAZ 2114
Popular myths
Varieties
Some people deliberately get rid of the catalyst, others deliberately ignore the clogged unit. All this caused the spread of myths.
- By removing it, the engine gains power. A misconception that arose for unknown reasons.
- The engine cannot “breathe” normally due to the catalyst. Absurd. It functions quite well if the cat itself is in working order.
- A clogged element ensures a more environmentally friendly ride. Another myth, the origin of which can only be guessed at. Rather, on the contrary, a clogged device harms nature and your car even more.
Therefore, monitor the condition of the catalyst on the VAZ 2114, check its functional condition, and if necessary, replace it with a new one or replace it with a flame arrester. Both options have shown their effectiveness.
A catalyst is a unit that promotes the destruction of nitrogen compounds, which in turn have a rather negative effect on the environment. Using this device, nitrogen compounds are converted into water, nitrogen and carbon oxides, which are completely harmless to the atmosphere.
Principle of operation
Like any unit, over time it can fail, and then replacing the catalyst on the VAZ 2114 is inevitable. Depending on the year the car was produced, a catalyst that complies with Euro 2 (2003–2008) or Euro 3 (2008–2013) standards is installed on it.
Causes of malfunctions
The key factor that causes 90% of exhaust manifold malfunctions on VAZ 2114 cars is high temperature and poor quality materials from which the parts are made. During operation, the steel repeatedly heats up and cools down, which leads to the appearance of cracks in the body. This is a common occurrence for VAZ cars older than 7-8 years.
Auto repair shops offer crack welding services using argon welding. However, for a number of reasons, this activity is useless for cars older than 7 years.
1) Just removing and installing the exhaust manifold will cost about 2.5 thousand rubles. Taking into account the work of the welder and other actions, the cost of repairs can be 4-5 thousand rubles. If you do the work yourself, buying a new part will cost less.
2) Welding, even argon welding, disrupts the structure of “tired” metal. A boiled part rarely lasts longer than a year, after which new holes appear. The older the car, the faster the problem returns, and the collector has to be removed again.
If the car is older than 8 years and there are problems with cracks in the manifold, it is better to remove the part and replace it with a new one.
Signs of trouble
Exhaust manifold gasket
One of the main signs of a leak in the system is a “sporty” growling sound when the engine speed increases. This may be a symptom of various exhaust system problems. To check, it is better to take an assistant and go to a garage with a pit or to an overpass. Most often, you can determine by eye whether the problem lies in the muffler, resonator or exhaust.
Gasket wear may become apparent during planting. Open the hood and start the car - white or grayish smoke rising from the manifold during warm-up indicates a leak for this reason. VAZ car owners usually encounter this problem once every 3-4 years. When using low-quality spare parts and before. The solution may be to manufacture a custom-made steel gasket. It can last as long as the entire collector.
Service specialists, when attracting clients, like to tell scary stories about the explosion of the exhaust manifold on VAZ 2114 cars due to cracks. In reality this is nothing more than a myth. But the real problems are no less serious, so there is no point in putting off repairs. A cracked exhaust manifold or worn gasket can cause your engine to run rough. 1) A lambda probe is installed in the exhaust manifold, which affects the operation of the injection system. Strong air suction disrupts the oxygen mass content in the exhaust; the lambda incorrectly adjusts the quality of the mixture, causing tripping, uneven idling, loss of power, and “black” spark plugs.
2) Another function is crankcase ventilation. Impaired air circulation causes disturbances in the operation of the gas distribution mechanism, increased wear of valves, the formation of carbon deposits on the pistons and other “joys”.
If increased noise and unpleasant odors during engine operation are combined with dirty work, the car needs urgent repairs.
Replacing a device on a 16-valve engine
Catalyst for 16-valve engine
In this case, the catalyst is located together with the exhaust manifold, and you should look for it under the hood of the car, in the immediate vicinity of the cylinder block. To replace the unit, we need a catalyst with zero resistance, or – as it is popularly called – a “spider”. It is quite possible to replace the device in your own garage. The first nuance when replacing a unit is dismantling the fuel rail. The second is the presence of two lambda probes. The first is located directly on the catalyst and is responsible for setting up the fuel system. The second one is located after it, on the flange. Very often it is called “ecological”. If the lambda malfunctions, the sensor generates an error and fuel injection begins to work incorrectly, resulting in an increase in traction and, accordingly, fuel consumption. There are also two ways to solve this problem. The first is to purchase a “spider” with one regulator and flash the electronics unit from Euro-3 to Euro-2. But there is one BUT, there is only one thread on such a spider, and it is on the flange. This means that to install the device you will have to assemble an extension cord consisting of wires and two connectors, popularly called “male and female”. The second is to purchase a “spider” with two regulators and simply install it in its regular place. In this case, there is no need to reconfigure the electronics.
What tools and parts are needed
To remove the exhaust manifold on a VAZ 2114 in order to replace the gasket or entire part, you will need the following tool:
- open-end and ring wrenches for 8, 10, 13, 17;
- wrench with heads 17, 19;
- screwdrivers, pliers.
It is also a good idea to have tools such as a Dremel, nut saw or nut pick on hand. As a rule, the fasteners on the exhaust system parts stick tightly.
A few days before your planned repair, begin treating accessible nuts with WD-40 or another penetrating lubricant. Repeat the operation 2-3 times. This will make the task of removing the manifold a little easier.
The question often arises: is it worth using a sealant after removing and replacing the gasket? Experts believe that if you apply sealant to the gasket, it should only be high-quality silicone. A bad sealant can bring a lot of trouble to a VAZ 2114 engine: when it burns out, it turns into “pellets” that are pulled into the crankcase. And this is unnecessary contamination of the piston system.
Required tool for replacement
Before you begin the process itself, you need to decide on the necessary tools. So, what will you need: a ratchet and sockets for 17, 19; screwdrivers with flat and Phillips tips; a set of keys and the gasket itself.
We recommend: How to change the alternator belt on Kalina with your own hands
Now that everything is prepared, you can start working directly. In order for the manifold to be removed without any problems and rusted bolts not to create trouble, everything must be lubricated with WD-40 before performing the operation. It is advisable to do this several times. Before performing the operation, you need to think again, weigh everything and calculate your strength.
Step-by-step instructions (algorithm with photo)
If, nevertheless, the car enthusiast makes up his mind, then we will consider step-by-step instructions for replacing the gasket:
- Remove the negative terminal from the battery.
Remove the terminal from the battery
- We remove the accelerator cable.
Removing the throttle cable - We are dismantling the fuel pipes. More precisely, they need to be disconnected and taken to the side.
Remove the fuel pipes shown in the photo
- Disconnect the throttle position sensor connector.
We disable the TPS
- Disconnect the idle air control wire connector.
Disable the IAC sensor
- Unscrew the crankcase ventilation pipes and brake booster.
Unscrew the pipes shown in the photo
- We are dismantling the receiver.
Dismantling the receiver
- Remove the wires of the injection control unit (injectors).
- We dismantle the fuel rail without dismantling the injectors.
Removing the fuel rail
- Remove the thermal shield from the manifold.
Removing the heat shield
- Disconnect the exhaust pipe.
Dismantling the exhaust pipe
- Remove the intake manifold.
Removing the intake manifold
- After unscrewing the fastening nuts, remove the exhaust manifold.
Unscrew the fastening nuts and remove the exhaust manifold
- We are replacing the gasket.
We are replacing the gasket
- We carry out the assembly in the reverse order.
As you can see, the replacement of the intake and exhaust manifold gaskets takes place simultaneously and, by and large, is the same gasket material.
Part selection
21083-1008081 – original catalog number of the gasket for the intake and exhaust manifold. It consists of two parts or, on newer models, one. This part is produced at the AvtoVAZ plant. The average cost is 250 rubles per piece (if there are two of them) or 450 rubles (for a whole one).
One-piece manifold gasket
Gasket, which consists of two parts
In addition to the fact that there is an original part, you can also find a number of analogues that are recommended for installation. Let's consider which gaskets can be installed under the VAZ-2114 manifolds:
- Trialli GZ 102 0013 is a well-known Russian manufacturer that produces a wide range of analog parts for domestically produced cars. The cost of the gasket is 200 rubles per piece.
- AJUSA 13065200 is another domestic manufacturer that has won consumers over the quality of its products. The cost of the product is 450 rubles.
- Ukrainian also produces and supplies this gasket. But, if you look at it, the quality of the product leaves much to be desired, since the resource is designed for only 20,000 km.
We recommend: Manual transmission and robotic gearbox Opel Astra: oil change
Causes of malfunction
Bent valves due to incorrect valve timing
When all processes have been considered, you can proceed directly to determining the reasons for the failure of the manifold gasket. So, let's look at the main ones:
- Wear . During operation, the car emits hot gases that destroy the surface of the gasket, as a result of which it can tear or delaminate.
- Since there is only one gasket for the intake and exhaust manifolds, gasoline entering through the first channel can get on the gasket, which also affects the integrity and structure of the material from which it is made.
- The quality of the part is not always high, even original, so when choosing, you should pay special attention to this.
Exhaust manifold removal procedure
Before removing the exhaust manifold yourself, think 7 times. Having this work done by a service center is not cheap, but the inaccessibility and difficulty of unscrewing some nuts can be a serious problem.
Unscrew the bolt securing the intake pipe
It is important to drain the coolant before removal, as antifreeze may enter the cylinders during the process.