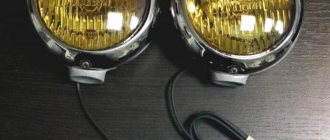
What are fog lamps for?
The main task of the PTF is to illuminate the space in front of the car. Correctly adjusted “fog lights” can illuminate a section of road 10–15 meters long. This distance is quite enough for safe movement by car in poor visibility conditions. The switching on and off of such lighting devices must be fully controlled by the driver.
Adjustment of fog lights is carried out during their installation. The procedure does not take much time, but requires care and precision. You can install the rear and front PTFs yourself.
Car electrical equipment
1 — headlight block; 2 — gearmotors for headlight cleaners*; 3 — fog lights*; 4 — ambient temperature sensor; 5 — sound signals; 6 — engine compartment lamp switch; 7 — electric motor of the cooling system fan; 8 — VAZ 2114 generator; 9 — low oil level indicator sensor; 10 — washer fluid level sensor; 11 — front brake pad wear sensor; 12 — wire tips connected to the common windshield washer pump**; 13 — windshield washer pump; 14 — headlight washer pump*; 15 — wire ends for connecting to the rear window washer pump on VAZ 2113 and VAZ 2114 cars; 16 — low oil pressure indicator sensor; 17 — engine compartment lighting lamp; 18 — wire lug for connection to the wiring harness of the engine management system or to the wiring harness of the ignition system on carburetor vehicles; 19 — windshield wiper gearmotor; 20 — VAZ-2114 starter; 22 — coolant temperature indicator sensor; 23 — reversing light switch; 24 — low brake fluid level indicator sensor; 25 - battery; 26 — sensor for insufficient coolant level indicator; 27 — relay for turning on fog lights; 28 — mounting block; 29 — brake light switch; 30 — plug socket for a portable lamp; 31 — lamp for illuminating the headlight hydrocorrector scale; 32 — parking brake warning lamp switch; 33 — backlight lamp connection block; 34 — switch for instrument lighting lamps; 35 — steering column switch; 36 — alarm switch; 37 — front seat heating element relay; 38 — ignition switch VAZ 2114; 39 — rear fog light circuit fuse; 40 — fuse for the front seat heating elements circuit; 41 - door lock circuit fuse; 42 — front ashtray illumination lamp; 43 — ignition relay VAZ-2114; 44 — cigarette lighter; 45 — glove box lighting lamp; 46 — glove compartment lighting switch; 47 — heater fan electric motor; 48 — additional resistor of the heater electric motor; 49 — heater fan switch; 50 — heater switch backlight; 51 — lamp for illuminating the heater levers; 52 — gear motors for electric windows of the front doors; 53 — right front door power window switch (located in the right door); 54 — gearmotors for locking front door locks; 55 — wires for connecting to the right front speaker; 56 — gearmotors for locking rear doors; 57 — wires for connecting to the right rear speaker; 58 — door lock control unit; 59 — wires for connecting to radio equipment; 60 — headlight cleaner switch; 61 — rear window heating element switch; 62 — relay for turning on rear fog lights; 63 — block for connection to the heating element of the right front seat; 64 — switch for rear fog lights: 65 — switch for the heating element of the right front seat; 66 — fog lamp switch; 67 — switch for external lighting lamps; 68 — left front seat heating element switch; 69 — block for connection to the heating element of the left front seat; 70 — wires for connecting to the left front speaker; 71 — left front door power window switch; 72 — right front door power window switch; 73 — wires for connecting to the left rear speaker; 74 — side direction indicators: 75 — lamp switch on the front door pillars; 76 — lamp switch on the rear door pillars; 77 — lampshade; 78 — canopy for individual interior lighting; 79 — block for connecting to the wiring harness of the VAZ 2114 electric fuel pump; 80 — trunk light switch; 81 — instrument cluster: 82 — trunk lighting lamp; 83 — display unit of the on-board control system; 84 — trip computer (not in all models); 85 — block for connecting the wiring harness of the engine control system; 86 — rear external lights of the VAZ-2114; 87 — rear internal lights; 88 — block for connection to the rear window heating element; 89 — license plate lights; 90 - additional brake signal located in the spoiler.
How can you install PTF on a VAZ 2113, 2114, 2115
Installation of fog lights on a car can be done in different ways. The car owner chooses a specific option based on his own capabilities, preferences and wishes. There are three main ways to install PTF:
- Purchasing a bumper with pre-installed fog lights. Similar parts are presented in a wide variety at tuning studios, where they can be purchased and installed immediately. Adjustment and connection are carried out by service specialists. The disadvantage of this method is that the cost of the work is too high.
One way to install foglights is to buy a bumper with already built-in PTFs
- Buying a bumper with holes for headlights. A bumper model with holes for fog lamps and a set of headlights are purchased. In this case, only the PTF is installed and the bumper is mounted.
Front bumper VAZ 2115 with holes for fog lights - Purchasing a set of “foglights” and facing elements. The most popular and simplest method - installation is easy and quick, does not require large expenses, both financially and in terms of labor costs.
Purchase and subsequent installation of a set of “fog lights” from the PTF kit
Lighting devices
7.18.
Ignition circuit for headlights and fog lights: 1 - headlight blocking; 2 — mounting block; 3 — headlight switch; 4 — ignition switch; 5 — external lighting switch (fragment); 6 — fog lights in the rear interior lights; 7 — fog light switch with warning lamp; 8 — indicator lamp for high beam headlights in the instrument cluster; K8 - high beam relay; K9 - relay for low beam headlights; A - the order of conditional numbering of plugs in the headlight block; B - to power supplies To turn on the headlights, relays of type 90-3747-11 or 904.3747-10 are used, installed in the mounting block. The same relays are used to turn on the horn, heated rear window and the engine cooling fan motor.
The relay switching voltage at a temperature of (23 ± 5) ° C is no more than 8V, and the winding resistance is (85 ± 8.5) Ohm.
The headlight switching diagram is shown in Figure 7.18. The main and low beam headlights are switched on via auxiliary relays K8 and K9. The control voltage is supplied to the relay coil by the headlight switch 3 if the right button of the exterior lighting switch 5 is pressed.
Regardless of the position of the switches 5, the high beam headlights can be switched on briefly by pulling the headlight switch lever 3. In this case, the voltage at pin 30 of switch 3 is supplied from pin 30 of ignition switch 4.
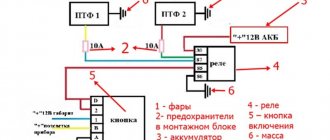
7.19. Ignition circuit for fog lights: 1 - fog light; 2 — relay for turning on fog lights; 3 — mounting block; 4 - fog light switch with warning lamp (left) and backlight lamp (right); 5 — external lighting switch (fragment); A - to power supplies; B - to the instrument lighting regulator
Fog lights can be installed on the front bumpers as an option on vehicles. The diagram for switching on fog lights is shown in Figure 7.19. The headlights are turned on by switch 4 through auxiliary relay 2 type 113.3747-10, installed in the engine compartment on the left wing. The fog lights can only be switched on if the external lighting is switched on with switch 5.
7.21. Diagram of direction indicators and hazard warning lights: 1 - direction indicators in the headlights; 2 — mounting block; 3 — ignition switch; 4 — alarm switch; 5 — side turn signals; 6 — direction indicators in side rear lights; 7 — instrument cluster with turn signal lamps; 8 — direction indicator switch; K2 - relay switch for direction indicators and hazard warning lights; A - to power supplies
The diagram for switching on direction indicators and warning signals is shown in Figure 7.21. The direction indicators on the right or left side are turned on by switch 8. In emergency mode, all direction indicators are turned on by switch 4. Flashing of the lights is ensured by relay switch K2 in the mounting block.
The domestic car VAZ 2114 (Samara-2) is built on the VAZ 21093 platform and is its improved version. The interior features a new instrument panel, new steering wheel, tilt steering column, power windows and a new heater. All diagrams are taken from open sources and are intended to help with self-repair of the electrical equipment of this car. Enlarge images in one click. The VAZ 2114 fuse box is located in the car interior under the instrument panel. When checking the electrical circuit of a VAZ-2114 car, it is impossible to check the functionality of the circuits for a “spark” - this can lead to depletion of the current-carrying paths of the mounting block.
Installation diagram of fog lights
The connection of fog lights is carried out according to certain rules. They, first of all, relate to the placement of PTF on the car. The locations for installing headlights are strictly defined.
Layout of daytime running lights
Manufacturers of modern car models pre-mark the PTF installation locations on the bumpers. As a rule, such lighting elements are most often available in the luxury version of the car. If the headlights themselves are missing, then their installation sites are closed with special plugs.
Distance at which fog lights can be placed
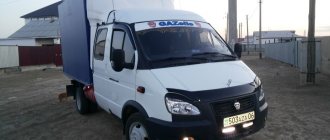
Fog lights on VAZ 2114: installation and connection diagram
Fog lights or simply PTF are an important element of the lighting system for a car. Alas, not all manufacturers equip their cars with these devices. AvtoVAZ with its model 2114 is no exception. PTFs for the fourteenth are available only for an additional fee and in the most expensive configuration.
Not everyone sees the point in buying the most complete version just to get PTF. An excellent solution is to install foglights yourself.
Beautiful and effective
Installation methods
There are several options to equip your car with a fog light system. The choice depends on your personal preferences and capabilities.
| Way | Peculiarities |
| Buying a bumper with built-in PTF | Such bumpers are bought at a tuning studio, where everything will be connected and connected for you. The disadvantage of this option is the high cost |
| Buying a bumper from a VAZ 2115 and installing it yourself | To do this, you will have to buy a bumper from an older model, which has holes for fog lights. All that remains is to find a suitable set of PTFs and install them |
| Purchase of PTF and facing elements - glasses | Today this method is in greatest demand because it allows you to do the installation yourself for little money. |
The standard PTF kit includes several elements:
- Headlights;
- Light bulbs;
- Switching relay;
- Set of wires;
- Connection diagram;
- Button to turn on/off PTF.
When choosing a set, pay attention to the fact that the headlights match the shape of the glasses, that is, the facing elements.
Standard kit
Today, for VAZ 2114 owners who want to install fog lights, it is recommended to choose rectangular kits from the Kirzhach company. It is used for factory installation of PTF on expensive versions of the model.
Xenon in PTF
Many car owners are thinking about installing xenon lamps in their fog lights. Is it good? Not really.
The thing is that when installing xenon in the PTF, focusing is disrupted. The operating principle of xenon is somewhat different compared to conventional Kirzhach type lamps.
Standard PTFs are designed for certain types of lamps, so they cannot cope with xenon. As a result, excessive reflection is observed in the reflector, rays are refracted, and the light is blurred. Where does this lead? To blind oncoming drivers.
The xenon option is not a practical or successful solution. Therefore, we recommend that you avoid it.
Another option is a combination of xenon and yellow fog lights. You will need H1 xenon bulbs, which are mounted in a bottle cap and only then placed in the headlight. This way the light beam has smoother boundaries, does not blind oncoming traffic, and better illuminates the roads in bad weather. Only after installing this combination lighting, be sure to make sure that your headlights really do not blind oncoming cars.
If oncoming cars stubbornly continue to shine their high beams on you, try adjusting the light beam. If this does not help, it is better to abandon xenon.
Criterias of choice
To decide which fog lights to install on the VAZ 2114, you need to know the correct selection criteria.
Durable housing. In the conditions of Russian roads, the headlight housing must be made of material resistant to damage and temperature changes. It is better that the design includes plugs. Reliable fastenings and the presence of wires, relays and fasteners included. Wide light spot, uniform light distribution and minimal losses due to scattering and refraction. Adjustment and adjustment of the light spot vertically and horizontally. No dazzling of oncoming drivers. Easy replacement of a burnt out lamp
When purchasing, pay attention to the lamp replacement instructions section. The easier and faster it can be changed, the less time will need to be spent if the lamp burns out at the most inopportune moment. Ideally, after replacing the lamp, no further adjustment is required. Economical
When choosing headlights, try not to put unnecessary stress on the wiring and generator. In most cases, lamps up to 55 W will be sufficient. Thick durable lenses. Good aerodynamic performance. Compliance with machine design.
Ideally, after replacing the lamp, no further adjustment is required. Economical. When choosing headlights, try not to put unnecessary stress on the wiring and generator. In most cases, lamps up to 55 W will be sufficient. Thick durable lenses. Good aerodynamic performance. Compliance with machine design.
LED PTF VAZ 2114.
Installation
The PTF installation process can be divided into three main stages:
- Installation of headlights;
- Network connection;
- Functionality check.
So now we will talk about each stage separately.
Installing headlights
We will consider the option of installing PTF on a standard bumper. Therefore, it does not have holes for new optics. You will have to do them yourself.
To work you will need a certain set of tools and materials:
- File;
- Drill and drill bits;
- Electric jigsaw;
- Roulette;
- Marker.
Connection elements
Now directly about work.
- First of all, remove the bumper. Work is performed only if it is disconnected from the seat.
- Remove all dirt from the bumper.
- Make markings for the installation of future fog optics.
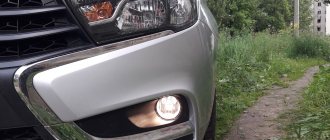
- It is best to mount the headlights slightly to the side of the lower air intake. Try to place the PTF strictly under the main optics of your car.
- For decorative glasses that have outer and inner halves, make markings. The outer half is decorative, and the inner half is designed to fix the outer part and headlights.
- The outer part of the glasses has a protrusion on the inside. With this mounting protrusion, the element should fit into the hole made in the bumper.
- To determine the optimal dimensions, you should measure the landing protrusion. This way you can make the appropriate markings on your bumper.
- Using an electric jigsaw, holes of the required size and location are cut.
- Use a file to file the cut areas.
- The outer part of the glasses should eventually fit tightly into the hole.
- Fog lights are mounted in the resulting holes. For this purpose, the kit includes special mounting bolts.
- Attach decorative glasses to the top of the headlights. The bumper can then be returned to its place.
Connection
Together with the PTF, a diagram for connecting the devices must be attached. It is not complicated, so even a beginner will be able to understand all the nuances of connecting the components to each other.
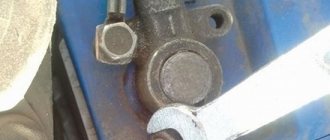
You will need to embed the wiring from the foglights into the mounting block, which is located in the engine compartment to the right of the windshield. To do this, just unscrew the bolts from the block, lift it and find the pads marked Ш7 and Ш8.
These blocks are used to connect fog lights, although these lighting devices are not installed standard at the factory. Wiring from the headlights and from the fog lamp relay, which is provided in the purchased PTF kit, is connected to these blocks.
Your job is to make the correct connection. This is done according to the following scheme:
- The output wire from pin 87 is ground, so you need to connect it to the car body;
- Pin number 85 goes to the block marked Ш7 and is connected to connector number 17;
- Pins numbered 30 and 86 go to block Ш8. In this case, connect pin 30 to connector 8, and lead 86 to connector number 1;
- Having installed the headlights, stretch the positive wire through the engine compartment, as they are connected to the Ш8 block. But these wires need to be inserted into connectors numbered 2 and 3;
- Now connect the block to the mounting block, and return the block to its place;
- Select an area near the block where the fog light relay will be installed.
Connection result
Button
Now all you have to do is connect the control system for your PTFs. Included with the fog lights is a corresponding button, which will stand on the panel in the seat provided by the manufacturer.
PTF button
The manufacturer, that is, AvtoVAZ, provided for this. Therefore, under the panel you will find a control block. The panel is removed, the corresponding block is located and the button is connected to it. That's it, the controls are ready.
Examination
The last stage is to check the functionality of your PTFs.
To check the efficiency of the lighting devices, turn on the headlights on your VAZ 2114, then press the button to turn on the fog lights. When the lights are turned off, even if the fog lights button is pressed, they should still go out.
The importance of PTF is difficult to overestimate. They help you see the road better during fog, rain, and snow. Moreover, fog lights are designed to improve the visibility of your car to oncoming and behind vehicles. Therefore, we strongly recommend installing PTF not only in front, but also in the rear.
The main causes of PTF malfunction
The most common reasons why the VAZ 2114 fog lights do not work are as follows:
- fuse is blown;
- burnt out light bulb(s);
- oxidation of contacts occurred;
- lost contact with the “mass”;
- the button is faulty;
- the relay has failed.
In addition, some other, rarer reasons are possible, which we will also consider below.
And so, the very first and most common reason is a blown fuse.
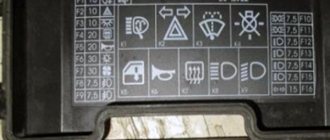
Each of the fog lights has its own fuse, namely F9 and F8 in the block, each of which is designed for a maximum current of 7.5 Amperes. In some cases, it happens that there are no fuses responsible for protecting the fog lights in the common block.
This happens when a car is purchased second-hand, and the PTFs were installed independently by its previous owner. In this case, you should inspect the entrance and the board on which the headlights themselves are located. Very often, during self-installation, the fuse is attached in this place.
VAZ 2114 fuses
When replacing, you should use a fuse exclusively for a current of 7.5 A. A fuse designed for a higher current simply will not be able to protect the headlights from a voltage surge, and one designed for a lower one will often burn out.
If both fog lights do not light up at once, then the problem is most likely not in the fuse, since the failure of two protective elements at once is quite rare.
The next reason why the fog lights on the VAZ 2114 do not light up may be the usual burnout of the light bulbs. In order to check this, just unscrew the old lamps and screw in new ones in their place.
Another, no less common reason (especially in the middle climate) is the oxidation of the contact connectors of the headlights themselves. Very often this causes blinking or intermittent operation of the light bulbs. In order to eliminate this nuisance, it is enough to remove oxides by cleaning the headlight contacts with fine-grain sandpaper or wiping well with WD-40, White Spirit or kerosene.
PTF VAZ 2114 with cartridge
Also, the contact running from the battery negative to the housing (to ground) often oxidizes. If this happens, the joint should be thoroughly cleaned, as described above.
Oxidation of PTF contact
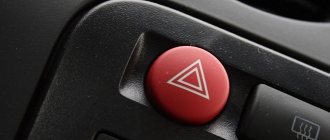
Another reason why the fog lights may not turn on is the failure of the button located on the front panel of the car, which is used to turn on the PTF. You can check its functionality in two ways: connect a new button (if you have one) and try to turn on the headlights, or ring the button with a multimeter. If the button turns out to be damaged, it should be replaced with a new one, since it is practically not repairable.
PTF power button
Failure of the relay may also be the reason why the rear fog lights of the VAZ 2114 do not work. It is checked in the same way as a button - by testing the contact legs or replacing the relay with a new one. If it turns out that it has become unusable, it should also be replaced.
PTF relay VAZ 2114
Often the cause of headlight failure can be the headlights themselves. During long-term use, the reflective layer can be destroyed, chipped and fall on electrical elements, thereby interfering with their proper operation. That is why it is worth periodically checking the internal condition of all headlights (not just PTF).
If all of the above reasons have been checked, and none of them have been identified, then the problem is in the wiring itself. In this case, you should ring all the wires used in the fog lamp connection circuit, and also check the correctness of the connection itself.
This can be done using the diagram given at the beginning
In this case, special attention should be paid to the correct connection (to the correct connectors) of the button and relay
Didn't find the information you are looking for? on our forum.
We recommend reading:
VAZ 2109 fuses, carburetor, high panel
How to connect fog lights to a VAZ 2107, installation features, which ones are better to choose, connection diagram
What kind of oil to pour into the VAZ 2115 engine
Lada Vesta which gasoline is 92 or 95. Recommendations from the manufacturer
How to replace the gearbox drive seal on a VAZ 2110
How to connect an alarm system to a VAZ 2107
Ignition switch VAZ 2101. Design, diagram and description of possible malfunctions. Replacement video
How to remove the window regulator on a VAZ 2114, step-by-step description with photos
Installation methods
Fog lights for the “four”
You can install fog lights on the VAZ 2114 using three methods:
- Buy a special tuning bumper in which PTFs are already installed. As a rule, the production of such bumpers is carried out by specialized tuning studios, where they can also be connected. This procedure is not cheap.
- Install on the “four” bumper from the 15th VAZ model with the seats available for mounting VAZ headlights. All you have to do is buy a set of lights and install them yourself.
- Purchase fog lights for a VAZ 2114 with so-called glasses - facing components for the lights, and install them. This method will be discussed in more detail.
The fog light kit includes lamps, activation relays, necessary wires and a connection button. The kit should also include a connection plug. When buying new PTFs, you need to take into account their shape, otherwise difficulties may arise in terms of installing the optics. As reviews show, the best option for the “four” is to buy optics from (the author of the video is the CAR LIFE GENDOLH BELIY channel).
see also
Comments 29
I'll tell you which ones later
I connected the wires and they also get hot
Hello I have a VAZ 2112, I want to change the instrument panel From Priora I can’t find the exact connection diagram Please send the diagram Thank you in advance
It’s easier to take it to an electrician)) and it’s a molorik))!
I connected everything according to your diagram. But my front PTFs don’t work. I don’t know why. And when I rearranged the main wires (Fig. 1), I was left with green wire 56. It went along the old block to the front PTF. But on the new PTF button there is no longer room for this wire. Where did you connect it?
Having connected according to your diagram (low and side) I got this - when you turn on the side, the ignition and side turn on, there is no front... maybe I mixed something up... I can’t figure it out ((((
Look at contacts 58,X X-ignition is on 58-gabor 30-constant plus When the button is turned on, the ignition goes from 30 to 58 and the side light is ON When power comes to X, you can turn on the low beam and the power goes to 56, the low beam turns on
Having connected according to your diagram (low and side) I got this - when you turn on the side, the ignition and side turn on, there is no front... maybe I mixed something up... I can’t figure it out ((((
the problem was in contacts 5 and 6, I swapped them and everything worked
very useful information, I will try your scheme and connect over the weekend)
Guys, thank you very much for the information, the diagrams really saved me! I'm replacing the 2112 panel with a Euro one, using viburnum as the donor. The tidy is already connected, button crap with 10 is difficult to redo without pads
The circuits are real, I developed them myself for two weeks, by mistake and error, everything was connected in my previous car, everything worked like stock.
And were the button lighting illuminated when the dimensions and low/high beams were on?
Yeees! The backlight did not turn off after turning on the dimensions until the dimensions were turned off =)
Do your double button lights come on after ignition?
no, when you press the taillights button, all the interior lights and the parking lights in the front and rear come on.
Well, there’s a feature of these buttons - you turn on the ignition and the button icons of the double button are highlighted, that’s what pin 4 is there for
haha, what a feature in a Russian car)) it’s illumination of the buttons, as well as the instrument panel, heater and cigarette lighter flaps, as well as the inclusion of side lights in the front and rear headlights. And after turning the key, you turn on the ACC function - this is the fuel pump, there is a backlight on the route computer or computer, a light in the driver's compartment, the ability to lower and raise the windows.
There is no trick in a Russian car, just like in foreign cars, after turning the size button on the turn signal brush, we turn on the backlight.
But if everything suits you, then let it remain that way. It won’t make it any worse, you just won’t be able to turn on the backlight, for example, without a key, and you won’t be able to turn on the light in the trunk without a key.
And what’s even worse is that you feed all the elements, at night, in order to look at the instrument panel and illuminate it, you’ll be idling the gasoline, pumping it in and then sucking it out. and this can lead to the rapid death of the fuel pump)
In general, good luck to you, think for yourself.
Do your double button lights come on after ignition?
The white and black wire that came to the light bulb before, look at the black one, this is ground. and white comes from fuse F1, and to fuse F1 a plus comes from Relay K1 - a relay for monitoring the health of the lamps, but to K1 a constant plus comes from the battery
Headlight installation
How to connect fog lights? The installation and connection procedure is described in detail below. Let’s make a reservation right away - if necessary, you can install xenon lamps in the fogs. Xenon in PTF will burn much brighter when compared with traditional incandescent lamps, but its cost will be an order of magnitude higher. Since the bumper on the VAZ 2114 does not have appropriate places for installing fog optics, the car owner will have to make them on his own.
All work on installing optics is carried out on the dismantled bumper. If you don’t know how to remove this body element, then you just need to unscrew the fasteners that secure it. The bumper itself needs to be cleaned; it is advisable to install it at the level of the lower air intake, under the headlight optics. Installation of lights must be done in specially designated places on the bumper - the so-called glasses.
These glasses must be marked in accordance with the dimensions of the optics themselves, after which the corresponding holes must be made in the bumper. The holes are cut using a jigsaw, and it is advisable to sand the sharp edges on them with sandpaper or a file. The PTF should fit into the hole as tightly as possible, so they must be securely secured with clamps. When the installation of the optics is completed, the bumper can be put back on the car.
Experience of car enthusiasts
There are buttons with both lamps and diodes, there is a choice. The resistors are soldered directly into the diode, this is AvtoVAZ know-how. You can see it under a magnifying glass. And change it to a regular one, that is, a small one, they are durable. And the small diodes I bought for tuning ended up almost all flying off too.
Zbugz
https://www.lada-forum.ru/index.php?showtopic=16929
LEDs with a built-in resistor are sold in buttons for sidelights, fog lights, etc. (cost about 30 rubles). The light bulb is simply replaced with an LED. The light filter is removed from the button.
Killer Speed
https://www.autolada.ru/viewtopic.php?t=60935
Everything is very simple in fact))) I held my head until I opened it and figured it out!))) My car is 9 years old. Even these buttons have diodes or whatever they are called, instead of light bulbs. So, I sat and thought and just took a drill with a small drill and drilled the hell out of there and soldered what I needed to the antennae, that’s all))))) And the backlight for the low beam is complete garbage. Even I, a person who doesn’t understand anything about car electrics, figured it out.
MillerLight
https://www.2114.ru/forum/showthread.php?p=154984
Having decided to relight the buttons on a VAZ 2114, it is not necessary to contact the service: you can do the modifications yourself. The procedure is not complicated and requires a minimum list of tools and basic knowledge in electrical engineering. By following the step-by-step instructions, relighting the buttons will not be difficult.