Good afternoon, dear reader.
This article will review the rules of the road that apply to the use of vehicle headlights and lights in various driving situations.
Lighting devices are designed both to illuminate the road ahead of the car (to avoid collision with an obstacle) and to indicate the car itself (to avoid collision with other vehicles).
Unfortunately, many drivers do not know the rules for using headlights and flashlights, and therefore do not use all the opportunities provided to them.
External car lights
At the beginning of this article, a few words about what external lighting devices a car may have. This information is primarily intended for those who are studying at a driving school and do not yet understand what these or other headlights or lanterns are intended for.
Note. The topic “lighting devices” is one of the most difficult in a driving school, because... It is difficult for a driver candidate who has never driven before to remember the similar names of light devices and the rules for their use.
parking lights
Dimensions are small light devices located approximately at the corners of the car (4 pieces in total). They do not shine very brightly and are primarily designed so that drivers of other cars can understand in the dark where your car begins and ends.
As a rule, the car is designed in such a way that when you turn on the low or high beam headlights, the dimensions turn on automatically. That is, low beam without side lights does not work.
Daytime Running Lights
DRLs are light devices in the front of the car (2 pieces), which shine quite brightly. They are designed to improve visibility of the car from the front during daylight hours.
Daytime running lights should not be used at night because... at night, they can blind oncoming drivers due to their high brightness. However, they do not illuminate the road.
In 2022, most cars are equipped with daytime running lights, but such lights are quite rare on cars manufactured before 2010.
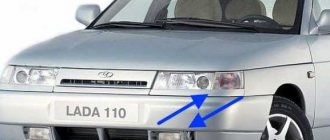
Low and high beam headlights
Low beam (2 bulbs) and high beam (2 bulbs) headlights are the main lighting devices that are designed to illuminate the road in front of the car.
In this case, the low beam illuminates the area directly in front of the car, and the high beam illuminates a more distant area. It makes sense to use low beam at low speeds, high beam at higher speeds.
Fog lights
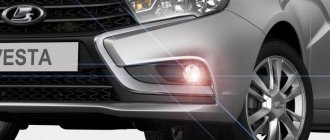
PTF - 2 headlights in the front bumper of a car, designed to illuminate the road in poor visibility conditions.
Fog lights are optional for 2022, so not all vehicle trim levels have them. That is, the car may not have PTF.
Fog light
Fog light - a red light at the rear of the vehicle, designed to improve visibility of the vehicle in poor visibility conditions. This light device is very bright and in good weather it can blind drivers of cars behind.
This lamp is required to be installed on all cars.
When can you use the emergency lights?
Hazard alarms are also considered a lighting device, and traffic regulations clearly regulate the possibility of their use. So, the emergency lights need to be turned on:
- if you get into an accident along with a warning triangle (2.5 traffic rules + 7.1 traffic rules);
- if a situation arises where your car poses a danger;
- when forced to stop in a place where stopping is prohibited (together with an emergency stop sign);
- when towing on a towed vehicle;
- if you are blinded by oncoming traffic.
Driving during daylight hours
In good visibility
When driving during daylight hours, the vehicle must have one of the following lights on:
- low beam;
- Daytime Running Lights;
- fog lights;
If the car has all the listed devices, then it makes sense to use DRL. These lights are brighter and use less electricity.
When driving, the following can also be turned on:
In case of insufficient visibility
One of the following lighting fixtures must be used:
- low beam headlights;
- high beam headlights.
In this case, the main beam cannot be used:
- in populated areas on illuminated roads;
- when oncoming vehicles pass;
- when blinding drivers of passing or oncoming cars.
Additionally, the car may include:
- fog lights;
- fog lamp;
- parking lights;
- Daytime Running Lights.
Note. The rear fog light is specifically designed for use in conditions of poor visibility, but in practice no more than 10 percent of drivers use it. The rest, apparently, do not know the relevant rules.
Control block
The simplest and most reliable connection method is the use of a control unit and the abandonment of a relay. This is a fully thought-out unit that does not require any complex manipulations.
But the big problem is that most often motorists come across a Chinese controller. They do not comply with GOST and have low build quality.
If you use control units, then only these:
These manufacturers have proven themselves to be excellent, and the units they offer really work efficiently and effectively. Moreover, the first one on the list is a domestically produced solution.
The second two blocks are German, sold complete with DRLs, and therefore cost significantly more.
How do you solve the problem with connecting DRLs, which have actually become a mandatory element?
Thank you for your attention! Subscribe, leave comments and ask your questions!
(11 ratings, average: 3.64 out of 5)
Daytime running lights (DRLs) in headlights, fog lights, turn signals, installed separately, and wherever they are not installed. Are there any rules at all that govern the installation of DRLs? Can I install DRLs myself? They also say that they consume several times less energy, and therefore you save on gasoline.
What are DRLs and what are they for?
“Daytime running lights” have nothing to do with side lights. This new concept appeared in the rules due to the fact that modern cars began to be equipped with them. This term refers to external lighting devices designed to improve the visibility of a moving vehicle from the front during daylight hours. On new European cars you can often find lights in the headlights that stand out structurally. Most DRLs are LED bulbs. When using daytime running lights, it is not necessary to turn on additional light signals (fog lights or low beams).
DRL installation rules
Requirements for daytime running lights APPROVED by Decree of the Government of the Russian Federation dated September 10, 2009 No. 720 Extract from the technical regulations ON THE SAFETY OF WHEEL VEHICLES
6.19 Daytime running lights
6.19.1 Installation Optional on vehicles. Prohibited on trailers. 6.19.2 Number Two. 6.19.3 Installation diagram No special regulations. 6.19.4 Placement Rules for placing DRLs (GOST) 6.19.4.1 Width - the point of the surface visible in the direction of the original axis, furthest from the average longitudinal plane of the vehicle, must be no more than 400 mm from the edge of the overall width of the vehicle. The distance between the inner edges of the two visible surfaces must be at least 600 mm. This distance can be reduced to 400 mm if the overall width of the vehicle is less than 1300 mm. 6.19.4.2 In height - at a distance from 250 to 1500 mm above ground level. 6.19.4.3 In length - on the front of the vehicle. This requirement is considered fulfilled if the emitted light does not interfere with the driver directly or indirectly as a result of reflection from rear-view mirrors and/or other reflective surfaces of the vehicle. GOST placement of DRL 21106.19.5 Geometric visibilityHorizontal angle beta = 20° outward and inward. Vertical angle alpha = 10° up and down from the horizontal. 6.19.6 Direction Forward. 6.19.7 Functional electrical diagram If installed, daytime running lights should turn on automatically when the engine start/stop control is turned to the “on” position. It must be possible to activate and deactivate the automatic daytime running lights without the use of a tool. The daytime running lights must turn off automatically when the headlights are turned on, except when the headlights are turned on for a short period of time to signal road users.6.19 .8 Control signal Optionally in closed loop form. 6.19.9 Other requirements None.
Requirements of UNECE Regulations No. 48 and No. 87: the area of luminous elements must be in the range from 250 to 2000 mm², luminous intensity - from 400 to 1200 cd (for Russia - up to 800 cd).
In the end, taking all this into account, I got it like this: - turn on automatically from the ignition - turn off when you turn on the low beam.
Driving in the dark
One of the following lighting fixtures must be used:
- low beam headlights;
- high beam headlights.
In this case, the main beam cannot be used:
- in populated areas on illuminated roads;
- when oncoming vehicles pass;
- when blinding drivers of passing or oncoming cars.
Additionally you can use:
- fog lights;
- fog lamp (only in case of poor visibility);
- parking lights.
Settings
If it is not possible to set up the system at a car service center, you can do it yourself. To do this, you will need a flat area with a wall or a solid fence opposite it. This is a prerequisite for any adjustment option.
Low beam
In this case, it is easier to use a universal method, which is almost the same for all cars. Only the distance from the wall to the car can differ, most often it is 7.5 meters, but some models are placed 5 meters away; it is better to clarify this point separately in order to correctly adjust the light. Next you need to prepare the markup.
- The car is driven close to a wall or fence, then marks are made on the surface clearly in the middle of the low beam headlights and opposite them. These will be the main guidelines.
- Then you can drive the car away and start drawing. Two more marks are placed 5 cm below the center of the headlights and connected by a horizontal line. Vertical lines are also drawn through the points to provide a clear reference point.
- The central axis of the machine is determined and also marked on the wall. The end result should look something like the diagram below.
All parameters are determined individually, since the size of the cars and the location of the headlights are always different.
Next you can start setting up
It is important that at least half a tank of gasoline is filled in the car, and that a person is sitting in the driver’s seat or there is a load approximately equal in weight to the driver. The easiest way to adjust headlights near a wall is this:
The car is located at a distance of 5 or 7.5 meters, and the center line should coincide with the middle of the hood
It is important to position the car correctly. The hood is opened and a screwdriver or other tool is prepared for adjustment. The light is turned on and one headlight is covered with cardboard or any other opaque element. The upper edge of the light flux (it is clearly visible) should be located along the line
If it is displaced, adjustment is made with the corresponding screw that regulates the light in the vertical plane. Adjustment in the horizontal plane must be done so that the place where the luminous flux begins to rise is at the vertical mark opposite the headlight.
This is what the adjusted light output looks like.
The second method is in many ways similar to the first, but in this case you will need to place the machine at a distance of 10 meters from the wall. In this case, the horizontal line is drawn 12 cm below the center. Some argue that increasing the distance allows for greater tuning accuracy, so if you have the space, you can try this option.
Video: A visual example of setting up the headlight.
High beam
The high beam headlights do not have clear lines, they distribute the light evenly, so the adjustment will be much easier. The preparation process is almost the same as with low beam, the main guideline will be a horizontal line 5 cm below the center of the headlights and vertical lines opposite the bulbs.
In this case, you need to adjust the light so that the center of the beam falls at the intersection of the vertical and horizontal lines of the corresponding headlight. Here accuracy is not so important, since long-range lighting is used only when there is no oncoming traffic. If the low and high beam are combined in one bulb, then adjusting one option is enough for the headlight to work as it should.
High beam is distributed differently than low beam.
In the video they set the high beams on a Hyundai Tucson.
Fog lights
In this case, there are no screws for adjustment and the position of the light flux can only be changed in the vertical plane. Before you begin, you should loosen the fog lights. They often oxidize, so it is advisable to treat them with a penetrating lubricant in advance.
A line is drawn on the wall; its height should be 10 cm below the location of the fog lights. After this, the car needs to be driven 7.6 meters, positioned opposite the markings and the headlights turned on. In this case, the upper limit of the light flux should coincide with the line; only this position will ensure normal visibility in fog.
Fog lights also require adjustment to function properly.
Rules for using lighting devices
The rules for using headlights and flashlights in various situations are discussed in detail above, but remembering them is not so easy. Therefore, we will consider them in a more compact form.
- use the rear fog lamp when visibility is good;
- use high beams in populated areas on illuminated roads, when passing oncoming traffic, when blinding passing or oncoming drivers;
- do not use low or high beams at night, with insufficient visibility, in a tunnel;
- do not use DRLs, low beams or PTF during the day;
- Do not use clearance when parking in poor visibility conditions or on an unlit section of the road at night.
Read also: Speakerphone in a car
All other options and combinations of lighting devices are not a violation.
In conclusion, let me remind you that fines for improper use of lighting devices are discussed in a separate article:
On many modern cars, automatic headlight switching, also called “Eurolight”, has long become the norm. In countries where legislation obliges car owners to drive with low beam headlights on (and Russia is one of them), this function is very convenient, and a number of car owners who lack this function are thinking about implementing it.
Pros of automatic headlights
- The factor of driver forgetfulness is eliminated (in any case, the headlights on a moving car will be on, and you cannot forget to turn them off).
- If there is a sudden change in illumination, for example, when entering a tunnel, the car will illuminate the road immediately, without delays in the driver’s reaction time.
Possible options for automatic headlight switching
- Switching on/off synchronously with the ignition
. This method is the simplest, but has a certain disadvantage: if you need to park with the ignition on, the car battery can be easily discharged. - Automatic switching on of headlights when the car engine starts.
This option can be called optimal.
Independent connection of Eurolight
Depending on the design of the car, the solution may be different; we list the most characteristic points:
Important points
First of all, soberly assess your skills and experience, especially when it comes to the situation described in the third paragraph of the previous subsection. It is better to part with a certain amount of money for the qualified work of an auto electrician than to stubbornly try to do it on your own and create unnecessary problems for yourself.
It is better to carry out all interventions in electrical circuits inside the cabin,
to protect tie-in points in standard wiring from environmental influences.
Properly executed and insulated twisting, contrary to popular belief, is not only not inferior to soldering as a connection, but also surpasses it in vibration resistance. The additional relay you use must be firmly fixed
.
The power supply circuits of the power contacts of the backup relay and its control winding must be protected by fuses
. This can be guaranteed by connecting the relay after the fuse box.
Wiring branches should not have interference
an insulating polyvinyl chloride tube
(tubing) is mandatory
You can often hear that the same result can be achieved without the use of additional relays by inserting a jumper into the desired location on the car's mounting block. You should be extremely skeptical about such advice, since often their authors do not have any qualifications as an auto electrician and following their recommendations can lead to dire consequences, for example, if in reality this jumper leads to the headlights turning on, bypassing the fuse.
In most cases, introducing “Scandinavian light” to a car is not a big deal and can be done independently. It is important to remember that, like any intervention in the electrical wiring of a car, this work requires great care and attention to detail, and only in this case will it be complete success.
Locate the headlight controls.
The location will vary depending on the make of vehicle, but there are several generally accepted locations for controls. Pay attention to the dashboard or control lever near the steering wheel.
- Some manufacturers place a separate headlight control panel directly below the dash to the driver's left. Most often, this design is found in large cars with a larger dashboard area. Find a small panel with a rotary knob. Standard headlamp indicator symbols should be spaced at varying distances around the circle.
- Other manufacturers place headlight controls on levers attached to the base of the steering wheel. The lever can be located to the left or right of the steering wheel, and the rotary headlight control knob will be located closer to the edge of the lever. This headlight control knob will have standard symbols.
Find the "OFF" position.
By default, the headlight control is set to the OFF position. Pay attention to the symbol indicating this position, as well as its position on the handle, so that you can turn off the headlights at the right time.
- The "OFF" position is usually located on the far left side or at the bottom of the rotary knob. The symbol is an open or unshaded circle.
- Today, many vehicles are equipped with "parking lights" that automatically turn on when the engine is turned on and the main headlights are turned off. If you still see light in the front of the car with the headlights off, these must be the side lights.
- Always turn off the headlights before turning off the engine. If they remain on while the engine is off, the battery will drain and you will not be able to start the engine. If you forget to turn off the headlights and completely discharge the battery, you will only be able to start the car by pushing it or using someone else's battery.
Switch the pen to the correct symbol.
Grip the rotary control knob between your thumb and forefinger and rotate to the desired position. The positions are indicated by different symbols and you should feel a clicking sound when switching between different positions.
Practical test.
If in doubt, test how your car reacts to changing the handle to different positions.
- If you have a helper, ask him or her to stand in front of the car. Open the window so you can hear the assistant, then move the rotary knob to different positions. After each position, pause and ask your assistant which light is on.
- If you don't have a helper, park near a garage, wall, or other structure. Then move the rotary knob to different positions and watch how the light reflects on the surface in front of you. You can determine all positions by the brightness of the reflected light.
Proper use of light.
Headlights should be turned on when visibility is low. If you cannot see a section of the road at a distance of 150-300 meters in front of you, then it’s time to turn on your headlights.
- At night, headlights should always be on. In heavy traffic, use low beams, and in other cases, high beams.
- Also turn on your headlights at dawn and dusk. Even with some natural light, dark shadows from buildings and other structures can make it difficult to see other vehicles. During these hours, you must turn on at least low beams.
- Turn on your fog lights in bad weather: rain, snow, fog or dust storms. Do not turn on your high beams, as in these conditions the reflection and brightness of the high beams may blind other drivers.
We turn on the high beams at night, when there is insufficient visibility and in tunnels. At the same time, the Rules allow the use of low beams in these cases.
Read also: Speed sensors, types of sensors and their design
We switch far to near in the following cases:
When passing oncoming traffic (150 meters before the oncoming car);
When passing oncoming traffic at a greater distance, if the driver of the oncoming car “blinked” his headlights at you;
In all cases when your distant light can blind oncoming drivers;
In populated areas, if the road is lit.
You can use your high beams when overtaking. Paragraph 19.11 of the traffic rules allows the driver to “blink” his headlights to warn of overtaking.
Low beam
Controversial issues
Let's look at typical cases when a traffic police inspector accuses a driver of violating the rules for using lighting devices.
The Code of Administrative Offenses of the Russian Federation provides for liability for such a violation in the form of a warning or a fine of 500 rubles (Article 12.20).
1. You see a traffic police crew in an ambush and warn other drivers by “blinking” your high beams. Such actions are not prohibited, since there is no direct prohibition on them in the traffic rules.
2. At night, when entering a populated area along a lighted road, you did not switch to the near one. For this, you will be reasonably held accountable, since the need to switch to a nearby vehicle is established by clause 19.2 of the traffic rules. If the road is not lit, you can continue driving with high beams.
3. During daylight hours, to indicate a vehicle on the road, you drive with front fog lights and also drive through a tunnel. As you exit, an inspector stops you. The punishment will be fair. Indeed, according to paragraph 19.4, fog lights can be used instead of low beams, while paragraph 19.1 speaks of the need to turn on high or low beam when driving through a tunnel.
By the way, the same situation occurs when driving with DRLs. When entering a tunnel, you need to turn on the low or high beam. You cannot drive through the tunnel with DRLs.
4. If you do not switch from high to low when driving oncoming in the dark, the punishment will be fair. Even if people you meet don’t ask you to do this, clause 19.1 of the traffic rules states the need to switch to the next one at least 150 meters from the oncoming car.
5. During the day in a populated area, you drive with high beam headlights. In this case, there is no violation, since there is only one direct ban on the use of high beams in a populated area - darkness and a lit road.
6. Driving around the city at night with DRLs will incur a fine. In this case, traffic regulations clearly require that either the low beam (if the road is lit) be turned on, or the high beam if there is no lighting in the populated area.
7. If one headlight on your car does not work (it doesn’t matter whether it’s low beam or high beam), you will be held accountable under another article - Part 1 of Article 12.5 of the Code of Administrative Offenses of the Russian Federation (the punishment is the same - a warning or a fine of 500 rubles).
PS
This, of course, is not all situations that occur on the road. If you have your own options, write in the comments and we’ll discuss.
High beam headlights are necessary on poorly lit sections of the highway, when driving at high speed, it helps to see obstacles long before approaching them. These could be potholes, road works, sharp turns, animals running onto the road outside the city. However, it is worth remembering that high beams will not help, but rather will worsen visibility during fog, heavy precipitation and snowstorms.
The high beams turn on differently on different vehicles. When a person gets behind the wheel of a new car for the first time, he may have a lot of questions about using the car's control functions. Especially when he just starts driving or changes from driving a domestic car to driving a foreign car. Let's first consider the process of turning on the high beams in domestic VAZ cars. First you need to turn on the low beam and side lights. The buttons are located on the left or right of the steering wheel. They are indicated by special graphic symbols. First, the dimensions are turned on, and then the low beam headlights. The high beam headlights are turned on using a lever located to the right of the steering wheel. Push the lever away from you until it clicks. The high beam headlights are on; in this case, the blue indicator light on the dashboard lights up.
In foreign-made cars, all the necessary functions are located on one lever. For left-hand drive cars it is on the left, and for right-hand drive cars it is on the right. Dimensions and headlights are turned on by turning the tip located on the lever. To turn on the high beam, push the lever away from you. In foreign cars, turning on the high beam is also accompanied by the turning on of a blue indicator light.
And in order not to disturb oncoming and passing traffic participants, it is necessary to turn off the high beams at least 150 m before the vehicle.
As you know, low beams must be turned on when driving a vehicle, not only in the evening and at night, but also during the day. In a situation where the running lights do not work, the traffic police officer has the right to issue a fine to the driver. Of course, this is a small amount, but it creates a headache. In this regard, most motorists have encountered a number of inconveniences due to the fact that many simply forget to turn on the low beams when getting into the car, or do not turn off the lights when leaving the car, which is why they find the battery completely discharged in the morning.
In order to get rid of such problems, many decide to modify the process of turning on and off the headlights. Thanks to the simplest circuits, the headlights can turn on simultaneously with the ignition or when the engine starts. In this case, during the daytime the low beam headlights will light up, but not the headlights, and at night everything will work as usual. Let's consider both options.
Automation options
It is quite possible to install an automatic switch and switch that will be responsible for the low beam with your own hands. But first you need to decide which method of implementing the scheme suits you best than the others.
There are 3 current options available:
- switching on when ignition is activated;
- Automatic switching on of the optics after starting the engine;
- using a special light sensor.
Each low beam automation scheme can be implemented in a garage. But if you do not have the necessary skills, doubt your capabilities, or simply want to get a guaranteed result, seek help from specialists.
Light sensor
On many foreign-made cars, the factory equipment already includes a special device that automatically turns the car's optics on and off. They work in tandem with a light sensor.
The device responds to changes in lighting levels. If the sensor detects darkening, the headlights turn on. When the car is on a bright section of the road, it automatically turns off. In many countries this function is very useful and convenient. But not quite suitable for the Russian Federation.
It's all about the requirement to constantly, day and night, drive with low beams or daytime running lights on. Therefore, in this situation, the operation of the sensor has to be adjusted.
Turning the low beam on and off should become a habit for drivers in the absence of an automation system. If you forget about the lighting before you start driving, you may be fined. If the automatic shutdown does not work or is simply absent, the turned on headlights on a parked car will drain the battery by the morning.
Drivers who cannot train themselves to turn lights on and off as needed are best off using an automation tool. One of them is considered a special sensor.
Motorists are offered the option of making the device themselves, or purchasing a branded device. Here we definitely need to stick to the second option. The following recognized companies offer automatic headlight switching and switching devices:
Most devices are based on a light sensor. And this, as you already remember, does not comply with the traffic rules in force in the Russian Federation. This is not a problem, since some devices are reconfigurable, allowing you to adapt them to slightly different work.
Automatic switching on of headlights upon ignition
In order to organize such operation of the lighting elements, it is necessary to connect them to the ignition power source, and as many know, some devices can be connected at any position of the ignition switch, while others begin to function only when the ignition is already on. Based on this, the most convenient place to connect the headlights is the heater switch button (the rightmost switch block).
For this scheme you will need:
- any standard five-pin relay;
- diode;
- wires.
- Remove the size switch (switch block on the leftmost side).
- Disconnect the positive wire from the key block responsible for the low beam operation (usually this is a green double wire) and connect it to the relay.
- You need to insert an additional wire into the positive wire that goes to the heater switch and also connect it to the relay.
- Connect the wire that powers the headlights to the relay.
- Throw the wiring to minus (to the body).
Read also: Average car mileage per year in Russia
The connections can be soldered, but for full-fledged work, an ordinary insulated twist will suffice. As a result, automatic low beam headlights will work as soon as you turn on the ignition.
However, this method is considered not the most economical, since the headlights start working immediately, which is not very important in winter, when the engine needs to be warmed up or when repairing a car.
To avoid such inconveniences, you can complicate the circuit a little so that the low beam turns off while parked, regardless of whether the ignition is working or not.
Causes
There are several common reasons why the optics do not go out after the ignition is turned off. Let's take a closer look at the low beam relay malfunction, the power button sticking, and the steering column switch failing.
Low beam relay
Low beam relay
In most cases, this happens due to a stuck relay. Experienced drivers simply tap it with a screwdriver and it comes off. If it does not help, then the element is replaced with a new relay.
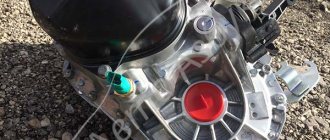
The device for opening and closing the wiring of car lights is located in the installation - a special block, along with fuses. At least on the latest VAZ cars, it is located in the compartment on the left side of the driver.
This decorative plug must be removed to see the mounting block.
And here is the mounting block in the photo.
Mounting block
According to the VAZ scheme, the relay device responsible for the optics is located in this location.
Relay on the diagram
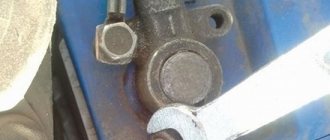
To remove any type of relay, the mounting block contains oval red tweezers.
After removal from the mounting block, the relay looks like this.
Button or key for turning on the dimensions and lights
The button may also be broken or there are problems with the wiring. In the case of the button, the size and light keys get stuck. The contacts simply close internally and it does not turn on.
It is noteworthy that this button is never actively used by motorists. A priori, it is left on, but when it gets stuck, it naturally does not perform its functions normally.
Optical keys in cars
The key is called a light switch, and is initially considered a flimsy thing and not entirely reliable.
Often this particular key becomes the favorite upgrade option for “handy” motorists. Noticing that the key is missing only an indicator that could turn the button into a useful thing, they improve it. This modernization makes it possible to significantly simplify the life of the driver, who was previously constantly worried about whether I turned off the headlights or not.
To carry out the upgrade, just use an LED. You also need a donor button, a soldering tool and a heat gun.
You need to do the following:
- disassemble the donor button, remove the contact legs and the light filter for the window;
- insert an LED and additional contacts along with a light filter inside the key.
Here's how to connect:
Connection
- additional (new) contacts are introduced from above;
- plus is taken from pin 6, minus is taken from pin B.
The LED is soldered here:
Where to solder the LED
An LED is embedded in the slot on the right.
In the end it turns out like this:
Tuning button
Green light – clearance, white – low beam.
Automatic switching on of headlights after engine start
To organize such a work scheme, you can go in two directions: connect to the oil pressure sensor or to the handbrake.
Method 1: Connecting to the oil pressure sensor
To make this connection you will need:
- relay;
- transistor (2 pieces);
- wires;
- microcircuit K561TP1.
All parts are placed in a small relay housing, after which the device must be connected to an oil pressure sensor. When the pressure in the engine lubrication system normalizes, that is, when the engine is turned on, the sensor will open, and the power from it will go to the capacitor. Ultimately, the voltage to the relay will be supplied through the transistors included in the headlight power supply. When the engine is turned off, power from the sensor is supplied to the desired lamp located on the dashboard. At this time, the capacitor that is included in the headlight control unit begins to discharge and the power supply to the relay stops.
In this case, you can also control the headlights manually if you use a parallel connection. In order to set the time to turn off and turn on the headlights, just select the resistance on the board. The higher this parameter is, the longer it will take the headlights to turn on and off.
True, not everyone likes this method, since this scheme is much more complicated (you need to pull wires and make 3-4 connections).
Method 2: Connecting to the handbrake
This method is much simpler, since in this case it is enough to just slightly modify the headlight connection diagram for ignition, which we talked about at the very beginning. To do this, just add another relay and a short wire (about 25 cm) to the standard contact of the handbrake button.
Thanks to this method, the headlights will turn off as soon as you pull the handbrake, and light up when you release it.
Lighting system
The vehicle lighting system can be divided into side lights, warning lights (turns, stop lights), and the headlights themselves. We’ll talk about the difference between side lights and other lighting, and when they need to be turned on, another time, today – headlights. These systems work separately: you can turn on the dimensions, you can turn on the dimensions and headlights, and so on. The main thing: when moving, you must have sufficient visibility. Under no circumstances should you compare yourself to other cars. As soon as you realize that visibility is insufficient, turn on your headlights. This brings up another question: low beam or high beam?
Different cars have different buttons to turn on the lights. For example, on domestic cars, the first click of the lighting button turns on the dimensions, and the second click turns on the low beam. Switching to high beam is done using a lever under the steering wheel.
Selecting the lighting mode
Structurally, the headlights are divided into low and high beams. What is the difference? When the low beam is turned on, the light beam is forcibly cut off vertically, in order to prevent blinding oncoming traffic. The high beam does not have this feature. Because of this, when driving on high beam, you see the road a little further than when driving on low beam.
Here's what the rules say about choosing a lighting mode:
Rules. Section 19. Clause 19.2. High beam headlights should be switched to low beam: - in populated areas, if the road is illuminated; - when passing oncoming traffic at a distance of at least 150 m from the vehicle, and also at a greater distance, if the driver of the oncoming vehicle periodically switching the headlights indicates the need for this; - in any other cases to eliminate the possibility of blinding drivers, both oncoming and passing vehicles.
If blinded, the driver must turn on the hazard warning lights and, without changing lanes, reduce speed and stop.
And now in practice.
For beginners, you can switch at a greater distance: when the lighting changes, visibility deteriorates, and if you switch in advance, your eyes will have more time to adapt, which will reduce the likelihood of an accident. Fog. Remember: when driving in fog, forget about high beams. When you turn on the high beam, in the fog, a white wall appears ahead. Driving only on low beam, or even better, use fog lights with a special light spectrum. In all other cases, you can safely turn on the high beams.
Requirements for installing fog lights
The purpose of fog lights is to illuminate the roadway in poor visibility conditions: during fog or precipitation. During fog, the head light is reflected from water droplets, forming a white wall in front, which makes it impossible for the car to move further. If the fog lights are adjusted correctly, the light from them will be pressed against the road surface, and the road in front of the car will be illuminated at a distance of 10-12 meters. The driver has the right to decide for himself whether to turn on additional lighting or not.
Despite the fact that PTFs are optional lighting equipment, when installing them you need to comply with certain requirements and know how to connect fog lights. If accepted standards are violated, problems may arise during a technical inspection or an administrative penalty may be imposed.
When installing fog lights, the following standards must be observed:
- there must be a distance of at least 25 cm from the road surface to the headlights;
- PTFs must be located symmetrically at a distance not exceeding 40 cm from the side plane of the car (along the outer edge of the side lights);
- You can turn on the fog lights only together with the dimensions;
- if xenon is used in the headlights, then they must be marked “D” and have an automatic leveler installed.
After installation, you need to adjust the headlights along with the fasteners. It is necessary to ensure that the light beam falls correctly, at the desired angle to the road surface.