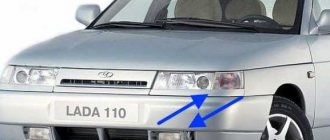
Replacing headlights for a VAZ 2110 is a relatively common occurrence. This is usually due to one of the following reasons:
- mechanical damage to headlights;
- breakdown of old lighting system components;
- desire to change the appearance of the car.
Headlight for the VAZ 2110
The choice of headlights for the VAZ 2110 is small - there are 2 types of lighting system components for it:
- components from the German company Bosch;
- components from the Russian one in the city of Kirzhach (“the popular” name is simply Kirzhach).
It would seem that in terms of quality comparison, the domestic analogue should lose to the German one. However, due to its features, many car enthusiasts, despite the price, choose “Kirzhach” for their 2110 car model.
The lighting complex from the Russian company consists of:
- glass;
- reflector;
- hydrocorrector;
- lenses;
- curtains;
- lamps;
- various fasteners (screws, springs for hydraulic corrector).
Headlight lighting "Kirzhach"
Model features
Experts assessed possible headlight options for VAZ according to several parameters:
- ensuring excellent visibility at night. At the same time, the light should not blind oncoming drivers. In this parameter, both Kirzhach and Bosch are approximately the same;
- features of reflectors. The German analogue of the headlight has reflectors for low and high beam, while the domestic one has a lens for low beam and a reflector for high beam. This ensured almost the same level of illumination during the tests. The lens, which is installed in the headlights of the Russian manufacturer, provides better brightness (helps create clear lines of light, and is also suitable for installing xenon optics). In addition, some drivers note that the illumination is not very high-quality when the low-beam headlights are on; the product, due to the reduced lighting area, does not have such a drawback.
Differences between the “Kirzhach” headlights
Another feature of the “Kirzhach” headlights is that you can easily buy it in stores in the city, because the sales market for such headlights is in Russia. This and other features of the headlight make it more attractive to VAZ 2110 drivers and determine a slightly higher price for components from this company.
Sometimes it happens that, having purchased new headlights from a Russian one for your VAZ, you notice that their glow is not very good. Inexperienced drivers may attribute this to a defect or poor quality of the purchased product.
However, most often the problem is in the usual setting of the headlights. It is advisable to adjust the new lighting components that you install in place of the optics you just removed.
To do this, you will need, in addition to the skill of a draftsman, a flat surface. But if you do not have the necessary skills and time, entrust the adjustment of the Kirzhach headlights to specialists.
Removing a headlight from a VAZ 2110
Lensed xenon: 2110 (Kirzhach) + Morimoto Mini H1
#1 DaY
- Users
- Posts: 143
Xenon everyone, let's go! We love the pictures, don’t be shy, they’re all clickable!
Owners of Kirzhachev headlights suffer greatly from virtually absent headlight light. There is only one way out - to install xenon, but in the standard lens it is not fully implemented in the matte reflector and turns into a headache for passing drivers - the halogen daw successfully blinds.
I offer the cheapest modification option, which consists of replacing the lenses with Chinese ones, specially designed for a xenon light source.
So, there are dozens of headlight conversions using Morimoto Mini H1 lenses.
Carefully peel off the glass and remove the decorative mask. We get this picture:
Comparison of standard lenses and Morimoto Mini H1
In the modification I use M3x50 screws, nuts with a nylon insert and enlarged M3 washers. I move the lens 35mm from the plane of the reflector bracket:
The screws are adjusted and ready for adjustment:
General plan of the new lens in the headlight:
Exposed and tightened lens:
I run the electrics from below the headlights to make the ignition units less visible. At the same time, replacing the lamp will not be difficult:
Then I simply glue the headlight together with sealant, put in the clamps and secure it with paper tape just in case.
General view of the resulting headlight. As you can see, the lens turned out to be very recessed (strange, but this is exactly how it was on the original), for the future it is clear that it can be safely extended to 45mm: “Grains of sand” are glass defects from time to time. So far they are not critical and there is no need to polish the headlights.
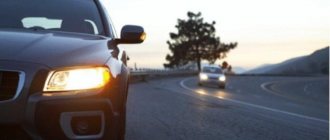
Well, as usual, the result. General view of the car with low beams on:
Projection of the neighbor on the wall. Xenon 4300K:
Long range - xenon + halogen H1 55W:
The alteration is not complicated, the adjustment of the near beam is made to the far beam, which in the end turns out to be enchanting, but what’s strange is that in the Kirzhach both the high beam reflector is matte, and the reflective halogen high beam fades against the background of the lensed xenon.
Headlight modernization
Despite the slightly higher performance indicators for the 2110 model, many car enthusiasts want to improve its equipment. The improvement requires disassembling the headlights, which occurs as follows:
- Remove the glass from the headlight, which is attached using sealant. Use the utility knife;
- remove the reflector. To do this you will have to unscrew a few bolts;
- on the back side of the headlight, remove all the wires, as well as the spring that secures the hydraulic corrector;
- remove the module from the headlight by pulling it towards you.
The most popular ways to improve headlights on a VAZ 2110 are:
- shifting the lens closer to the reflector. This is done to reduce the area of the lens on which the light stream is located, which avoids dazzling drivers who are driving in front (through their rear-view windows);
- modernization of curtains. Provides better light distribution;
- changing the shape of the reflector. This is done to change the width of the light stream. Since the reflector is made of sheet metal, it can easily be given, for example, an oval shape;
- adjusting the light flow. It can be done by tightening several screws on the headlight housing, which will change the angle of inclination of the optics of your car and its horizontal and vertical location.
Tips for improving lighting on a VAZ-2110
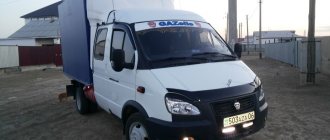
The history of the VAZ 2110 brand is very interesting and fascinating. This car can easily be called one of the most popular on the domestic market. And you shouldn’t be surprised, because the car is inexpensive and completely unpretentious to use. At the same time, many owners of “ten” complain about their light. In this situation, you should know that this problem can be easily corrected by at the same time slightly modernizing your car. To do this you need:
- Wash the headlights. Often it is the adhering dirt that is the main reason for the deterioration of lighting. If you do not have the opportunity or simply do not want to always wipe the headlights yourself, then you can install washers. The factory version of the car is not supplemented with this function. Volga washers are well suited for the “ten”. To install them, remove the bumper, make the appropriate holes, then insert the washer modules there and tighten them tightly with the bolts. Next, you need to connect the hose to the washer reservoir. Be sure to connect a button in the cabin that controls the washer. It should only be connected via a fuse.
- Next, carefully examine whether the headlight glass is intact. It is possible that it is cracked. In this case, you need to install a new one. To do this, remove the headlight unit, but before doing this, disconnect the negative terminal from the battery. Next, wash the headlight. Afterwards, you can take a hair dryer and, using it, heat the edge of the glass in a circular and smooth motion to soften the sealant. Then pry up the glass and remove it. Old sealant must be removed from the case and glass. After degreasing the body and edge of the glass, apply a layer of sealant to it. The glass should then be carefully pressed against the body.
- If the old reflector has peeled off, it can be replaced. To do this, you must first remove the glass from the case. Next you need to unscrew and remove the light bulb. Remove the reflector to be replaced, install a new one and reassemble the headlight in reverse order.
- You can also replace the “original” light bulbs with halogen ones. They will shine much brighter. Cost-effectiveness and durability are their main characteristics. However, in addition to halogen devices, you can also install xenon. Similar lamps come in different wattages, and the subsequent brightness of the glow depends on this. You only need to install bulbs that have been recommended for use on a specific car.
What to choose?
It would seem that we are talking about German quality products, which by definition should be better than their domestic counterpart. But in reality things are somewhat different.
Let's look at the key features of Kirzhach and Bosch headlights to determine which ones you should choose for your VAZ 2110 model.
- The purpose of any low beam is to provide good visibility of the roadway at night, while at the same time avoiding dazzling oncoming traffic. Headlights from German and domestic manufacturers cope equally well with these functions.
- The headlights from Kirzhach have a low beam lens, and a reflector is provided for the high beam. German products have two reflectors - for low beam and high beam. The lighting is ultimately the same, but Bosch has better brightness.
- Lenses are actually better than reflectors. They create a clearer line of light and allow the installation of xenon optics.
- As a study of reviews of VAZ 2110 owners using German devices shows, they are characterized by worse illumination in low beam mode.
- Bosch headlights have a very important advantage for many - when the car is driving in cloudy and rainy weather, it provides a better quality glow compared to Kirzhach devices. It's all about the larger surface of the low beam reflector.
- This Bosch plus also comes with a minus - you are deprived of the opportunity to install xenon optics.
- Note that, regardless of the manufacturer, these headlights contain H1 format lamps.
- If we take into account all other characteristics, then the undisputed leader here will be the products of the domestic manufacturer.
It is noteworthy that this is one of the few exceptions when domestic products turned out to be better than foreign ones. Sad but true.
Suggested options
Left headlight Kirzhach on VAZ 2110
Not all motorists know which headlight unit is provided on the VAZ 2110. But in fact, there are 2 options:
- Domestic Kirzhach headlights for VAZ 2110;
- Foreign Bosch headlights for VAZ 2110 (manufacturer - Germany).
As for the cost, a kit from Bosch will cost about 2.2-2.4 thousand rubles, but Kirzhach is more expensive - from 2.5 to 2.8 thousand rubles. And this despite the fact that we are talking about a domestic manufacturer.
The problem with new headlights
It happens that after installing new headlights, purchased for a lot of money from a reliable, excellent manufacturer, the quality of the glow leaves much to be desired.
Inexperienced drivers attribute everything to a defect or the purchase of a fake disguised as a trusted company. But in reality everything is completely different.
Disassembling headlights
Before you start modifying the headlights in a VAZ 2110 car, you need to perform the following simple steps:
- Their removal and disassembly. Using a utility knife, the glass is carefully removed from the headlight, and since it is secured using a special sealant, extreme caution is required so as not to break it. But if it breaks, then this is not a problem, you can buy it separately;
- Next, the reflector is removed, unscrewing several bolts.
- The next step is to remove all the wires from the back of the headlight and the spring from the place where the hydraulic corrector is inserted, and only then is it possible to remove the frame with the module itself from the headlight housing.
- Remove the low beam module using a screwdriver and disassemble it completely.
Finalization
In order to make the glow better, they are refined, which includes the following steps:
- Shifting the lens closer to the reflector;
- Modernization of curtains;
- Changing the shape of the reflector.
These are the main stages that will ultimately lead to the complete modernization of Kirzhach headlights on a VAZ 2110 car. Now it is necessary to consider each individual stage.
Lens in the headlight of Kirzhach VAZ 2110
Shifting the lens closer to the reflector
The alteration begins with shifting the lens to reduce the area of the lens onto which the light flux falls. As a result, the curvature of the lens will also become smaller.
- Disassembling the module and removing the lens from it. Carefully mark the cut at the intended location of the module. It is imperative to ensure that the lens curtain does not move from its place, but remains at a distance of 50 mm due to the focal length of the lens;
- Cut off the lens at the marked location and attach it to the module. It is attached using the cuts that were made earlier, but the module itself will become shorter. The main thing in all this is that the closer the lens is, the more heating will occur due to its small area. In order not to miss the distance, the most optimal would be to approximate the lens by 10 mm.
Carrying out modernization of curtains
To carry out modernization and modification at the highest level, good and high-quality light distribution is done. The curtain is made straighter so that the light does not blind passing drivers driving in front of the VAZ 2110 into the rear mirrors. This type of curtain was developed according to the European GOST standard and is very successful.
To do this, you will need cardboard from which the curtain template will be made. The prepared cardboard template is transferred to a plate of metal material. To cut it out, metal scissors are used and the finished curtain is attached to the module. Also, if desired, it can be wrapped in foil to provide better light dispersion; it can also be used to install fog lights.
Under the lens on the module body, the edges are cut off. If they are cut correctly (no more than one millimeter along the ring), then the edge of the ring will not interfere with the correct flow of light.
Choosing an optical system for Lada 2110
One of the most popular models of optical systems on the market today is the “Pro sport” system.
However, this model of headlights has a number of disadvantages that cannot be left unnoticed, since the safety of both the driver and passengers directly depends on the quality of the lighting emitted by the car. Based on reviews on the Internet, we can conclude that the “Pro sport” headlight emits low quality lighting and is unable to properly provide visibility of the track at night. Therefore, it is worth considering purchasing a Kirzhach headlight.
Example of headlight packaging
After unpacking the headlights and checking the package, the question arises: “Where to start?” In this case, You Tube will be your best assistant. On this site you can find many interesting videos on the topics of tuning headlights, fine-tuning lights, etc. Even if these videos differ from your vision of the work process, do not be upset, since each master uses a variety of approaches and materials in his work. Your task in this case is to emphasize for yourself the basic principles and approaches to installing headlights and get a high level of motivation, since without it it will be very difficult to achieve the desired result.
see also
The price for headlights of this model ranges from 2350 to 2550 rubles and largely depends on the dollar exchange rate. Also, to the initial costs it is worth adding the cost of a can of paint 200 rubles and masking tape 48 rubles. The approximate amount of initial costs is 5148 rubles.
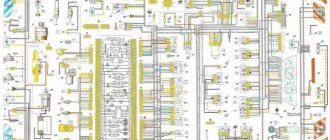
Adjusting the luminous flux
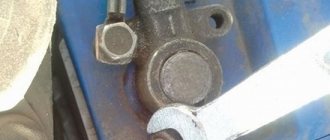
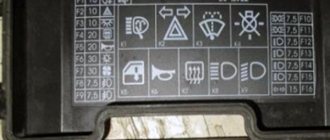
In order for the VAZ 2110 to be driven comfortably, all the rules of correct light supply must be followed so as not to blind oncoming drivers. There are special screws on the headlamp housing that are used to adjust the light supply.
When you turn the left screw, the angle of inclination of the optics changes vertically, respectively, turning the right screw changes the optics horizontally.
To correctly set the luminous flux, a horizontal line is drawn from the ground to the center of the headlights and another similar horizontal line is drawn 65 cm below it. After all the preparation has been completed, you can proceed directly to the adjustment:
- the right headlight of the car is covered with cardboard paper and the low beam is turned on;
- Using the adjusting screws, the center of the light beam of the left headlight is set, which is done in the same way with the right one.
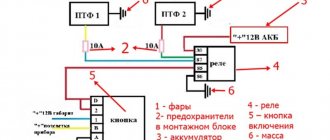
We install “foglights” with our own hands
Fog lights are a very useful attribute of every car when you need to drive in bad weather conditions. These headlights on the presented model are provided in the “Lux” configuration. As a result, their installation falls entirely on the shoulders of the car owner.
First, decide where on the machine you want to install them. The best option is the bottom of the bumper. There are holes here where they will fit perfectly. Next, you should choose their type: with transparent or corrugated glass. The first ones shine with spots, so it is better to refuse them. The second option perfectly diffuses light, illuminating the entire surface of the road. Next, you need to purchase frames for them, a set of wires, a relay and a power button. Route the wires that are located in the dashboard directly into the engine compartment. Connect the wires to the connectors on the headlights and insulate them well with electrical tape. Next, install the headlights in the frames and secure them firmly in the appropriate place on the bumper. Connect the wires. If you need the headlights to be turned on from a button, then you need to install it in the gap of the corresponding power wire. When the work is completed, adjust the headlights.