The nuances of turning on running lights
The basic requirements regarding installation, technical parameters and connection of navigation lights are listed in paragraph 6.19 of GOST R 41.48-2004. In particular, the electrical functional circuit of the DRL must be assembled in such a way that the running lights turn on automatically when the ignition key is turned (the engine starts). In this case, they should automatically turn off if the headlights are turned on.
Clause 5.12 of this standard states that headlights (FGS) should be turned on only after the lights are turned on, with the exception of short-term warning signals. When connecting DRLs yourself, this feature must be taken into account.
Correct connection of DRLs is not limited to a well-thought-out functional diagram. It's time to think about the stabilization unit for LEDs. In the running lights themselves, resistors act as a current limiter; however, due to voltage drops, resistors cannot limit the current to the same level. That is why a voltage stabilizer in the running lights connection circuit is extremely necessary. Otherwise, the service life of LED DRL modules is significantly reduced due to constant changes in on-board voltage. Some car enthusiasts claim that it is possible to connect running lights without a stabilizer.
Connecting and installing an LED driver is a waste of time, because the DRLs on LEDs shine regularly for months without any stabilization...
However, this statement is easy to dispute. The fact is that with each voltage surge, more than 12 V appears on the LED module, the forward current through the LEDs exceeds the nominal value, which leads to overheating of the emitting crystal. The brightness of the LEDs decreases, such DRLs will no longer be able to fulfill their immediate task - to warn oncoming drivers from afar, and over time they will begin to flicker and fail.
Using LED DRLs without a voltage stabilizer means spending at least several hundred rubles every year on new modules and wasting time replacing them.
For ease of understanding, the circuits below are shown without using a stabilizer.
Possible causes of interior vibration
Drivers of VAZ models 2114, 2115, and sometimes 2109, after several years of quiet driving, often begin to experience inconvenience due to a sudden vibration in the interior and steering wheel. There are no signs of trouble: the car is working normally, no anomalies are observed, and then the problem appears almost in the middle of a busy highway. For the hundredth time, the car service has offered to change the spark plugs or even convinced me that this is normal. In this case, you should take matters into your own hands.
There are several common problems that can cause vibration throughout the cabin. This:
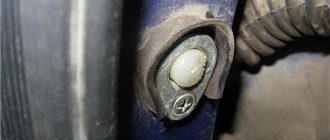
- Problems with engine mounts.
- Malfunction of the mass air flow sensor.
- Problems with the vacuum brake booster.
- Breakage of the notorious candles.
- Other minor technical flaws of the car.
The engine mounts should be checked first. Diagnosing and replacing them will not take much time, and it will also be inexpensive. Anyone can cope with such an operation, even a beginner who bought his first car. Candles should also be inspected first. If you do not change them within the recommended period, the engine may begin to “trouble,” which will be especially noticeable at idle.
The vacuum brake booster can also affect the stability of the car. Signs of a malfunction of this part can easily be confused with wear of the spark plugs, because the engine begins to twitch in the same way when driving. Therefore, do not rush to change spark plugs; it is better to carefully study the vacuum booster. The problem may lie there.
A breakdown of the mass air flow sensor causes disturbances in engine operation, which cause vibrations throughout the car's interior at idle. In this case, the controller may signal a malfunction by turning on the CHECK ENGINE light. Timely replacement of the air filter can contribute to the normal operation of the mass air flow sensor.
Switching on through dimensions or low beam
The second version of the DRL connection diagram involves using the power circuit of the side light bulb. To do this, the positive wire from the running lights is directly connected to the “+” from the battery. In turn, the negative wire is connected to the “+” of the side light, which is currently electrically neutral. As a result, the following current flow path is formed: from the “+” of the battery through the LEDs to the size, and then through the light bulb to the body, which serves as the minus of the entire circuit. Due to the low current consumption (tens of mA), the LEDs begin to glow, and the lamp spiral remains extinguished.
If the driver turns on the side lights, then +12 V appears on the positive side of the side lights, the potentials on the DRL wires are equalized and the LEDs go out. The circuit goes into normal mode, that is, current flows through the side light bulbs.
This circuit solution has several disadvantages:
- running lights remain on when the engine is turned off, which is contrary to current regulations;
- the circuit will not work if LEDs are also installed in the dimensions;
- the circuit will not work correctly if the DRLs contain powerful SMD LEDs, the rated current of which is comparable to the current of a light bulb;
- For safety reasons, an additional fuse must be installed.
This connection method can be improved by connecting the positive wire of the LED module not to the “+” of the battery, but to the “+” of the ignition switch, thereby eliminating the first drawback.
Some motorists use schemes for turning on running lights through a low beam lamp. That is, when the low beam is turned on, the DRLs automatically go out, but in other cases they work. In addition to the above disadvantages, this method does not comply with GOST R 41.48-2004 and traffic rules.
- Installing DRLs (daytime running lights) on a Lada Largus with your own hands: video and connection diagram
When parking a car at night, side lights are used to indicate it; the use of DRLs is prohibited.
What are the benefits of installing DRLs in turn signals?
Using a separate daylight illumination saves a lot of battery energy, and this is the main advantage of this solution. It consumes a maximum of 15 W, versus about 100 W for the headlights, and this is a very noticeable difference. The battery holds its charge longer, the generator charges it faster, and in general its capacity drops longer, that is, its service life is extended.
A side effect of less load on the generator is reduced fuel consumption. And this is direct monetary savings. Considering that installing running lights is relatively inexpensive, it will quickly pay for itself due to the saved gasoline.
Connection via a 4-pin relay from a generator or oil sensor
The following two methods have a common basis and imply the operation of daytime running lights only after the engine is started. The circuit for switching on DRL from the generator is based on switching a four-contact relay and a reed switch.
The DRL relay contacts are connected as follows:
- 30 – to the positive terminals of LED modules;
- 85 – to the positive wire to the dimensions;
- 86 – to any reed switch output;
- 87 and the second terminal of the reed switch - to the “+” of the battery.
After checking the reliability of all contacts, proceed to setup. To do this, start the engine and, by moving the reed switch near the generator, achieve its activation and a stable glow of the DRL. Then the reed switch is hidden in a thermal tube and fixed in the found place using nylon ties.
At the moment of starting the engine, and then the generator, the contacts of the reed switch and relay close, supplying power to the LED running lights. In this case, the side lamps remain turned off, since the current through the relay coil is small to light them.
In the absence of a reed switch, you can power the DRL from the oil pressure sensor. In this case, pin 86 is connected to the oil pressure lamp. The rest of the circuitry is duplicated.
Both schemes have a common drawback. They cannot be used if LEDs are installed in the dimensions.
LEDs for the Philips model
LEDs for Philips DRLs have high conductivity. Their brightness indicator is 30 microns. As experts say, problems with overheating occur very rarely. In this case, the output voltage is at the level of 10 V. The sensitivity indicator on average reaches 5 mV. The light output of the models is low. Current consumption does not exceed 3.3 A.
The minimum permissible temperature for operating LEDs is -10 degrees. The transceiver in the device is of the operational type. In total, the model has one filter. The trigger in the LEDs for Philips DRLs is of a two-pin type. The maximum resistance indicator is at 45 ohms.
Connection via 5-pin relay
Now it's time to learn how to connect running lights via a five-pin relay. The scheme is the most universal, and was assembled to eliminate the disadvantages of previous options.
First, about connecting the relay for DRLs:
- 30 – to the positive terminals of LED modules;
- 85 – to the positive wire of the side lamp;
- 86 – on the car body;
- 87a – to “+” from the ignition switch;
- 87 – do not connect (isolate).
The circuit with a five-contact relay works as follows. When you turn the key, +12 V is supplied to the DRLs, thereby turning them on. If you turn on the side lights or headlights, the relay will open contact 87a and close inactive contact 87. As a result, the DRLs will go out and the side lights will turn on. The circuit fully complies with the requirements of GOST and traffic regulations and can work with side lights even based on LEDs.
However, the circuit still has one negative point - the DRLs will turn on immediately after turning the ignition switch. That is, if you turn the key in the ignition but do not start the car, the DRLs will light up.
Despite the existing drawback, the circuit is quite successful, but in order to correctly connect the DRL via a five-pin relay, you will need to supplement the circuit with a voltage stabilizer.
This switching option is interesting because the path of current flow through the running lights is independent. This allows you to install light sources of any type and power in headlights and DRLs.
How to connect the DRLs so that they turn on when the engine starts?
April 06, 2022 Category: Car tuning and accessories
This article will be very useful for those who have already forgotten to turn off their car lights several times, only to discover in the morning that the battery is dead. Yes, on some brands of cars it is possible to turn off the low beam when the ignition is off, but we repeat, on some cars.
There is also a fine for driving with the headlights off, so it’s worth thinking about a system that would turn the low beams or DRLs on and off when the engine starts. To be fair, it is worth noting that such a system already existed in the domestic automobile industry. During Soviet times, many domestic cars automatically turned on the low beam when starting the engine. In this article we will talk in more detail about how to connect the DRLs so that they turn on when the engine starts.
DRL control unit
The most reliable and simplest option is to connect DRLs without a relay, but using a special running lights control unit. It ensures that the DRL turns on after starting the engine, guarantees safe operation, protects against overloads and can be installed on cars with any type of lamps, including LEDs.
- We install DRLs on Renault Duster with our own hands
Unfortunately, among the variety of industrially manufactured DRL units, the vast majority do not comply with GOST and have mediocre build quality.
This applies, first of all, to products from AliExpress, which do not meet the requirements in almost all respects.
Among all the diversity, only 2 options can be noted: the Russian DayLight+ DRL control unit and German products from Philips and Osram. The DayLight+ control unit was developed by Russian radio engineer Fedor Isachenkov, taking into account all the features of the vehicle’s on-board network and has a number of positive aspects:
- there is built-in voltage stabilization;
- full compliance with GOST;
- the maximum long-term load power is 36 Watts (significantly less is required for DRLs);
- simplest connection diagram.
In addition to the points described above, the DayLight+ unit is universal and is suitable for all cars with an on-board 12-volt network, and also has good build quality and a high degree of protection from moisture and dust.
German products from Philips and Osram also have all the above-described advantages of the DayLight+ unit, however, German control units are supplied only together with daytime running lights and are more expensive.
Daytime running lights (DRLs) are lighting devices used to improve the visibility of a vehicle during daytime use.
Depending on the vehicle's configuration, DRLs can be pre-installed in the vehicle's standard optics or mounted additionally. Self-installed DRLs use factory-produced or self-made light sources.
DRLs are not provided as standard on the VAZ-2110, so the question of installing them is relevant for many owners of this car model.
Contents: 1. How to make it yourself 2. What can you find on the market? 3. Connecting DRL to the vehicle electrical circuit 4. Legal requirement
How to connect daytime running lights?
Many motorists have wondered how to connect the DRLs so that they turn on when the engine is started. Garage craftsmen have found 10 ways to turn daytime lights on and off, as an example:
And each of the methods requires money, as well as good knowledge of wiring diagrams.
Let's watch a video on how to install and connect daytime running lights via the control unit:
One of the main schemes is to connect the DRL via a 4-5 contact relay; some craftsmen connect the wires to the pressure sensor. Since when the engine starts, the pressure sensor on the dashboard automatically lights up, which means that when the DRLs are connected to it, the lights themselves light up.
We connect the DRL via a 5-pin relay
To work we will need:
The first way to connect DRLs is as follows:
Another video, installing DRLs using a five-contact relay on a VAZ 2111, be sure to watch:
That's all, check your installation to see if it works. Turn on the engine and see how the daytime lights function. Then turn on the low beam, the lights should turn off. After turning off the lights, the DRLs should light up again, and after stopping the engine, they should go out. In order for the decay to occur smoothly, it is worth placing a good capacitor in the circuit in parallel.
Connecting DRL without relay
If you don't have a relay on hand, you can do without it. DRLs are very simple in electrical terms. At the output we have only two wires, red and black. By all rules, red is a “plus”, and black is a “minus”. Open the hood and look for a “+” on any of the car systems that starts when you turn the ignition key. As an example, these could be the wires going to the fuel sensor or any others. Connect the red DRL wire to the positive terminal of your chosen vehicle system. And connect the negative wire to another contact of the same charge.
The result of such a connection scheme will be that when the ignition is turned on, the DRLs light up, and when they are turned off, they go out. Be careful, after installing the lights, check the functionality of all electrical appliances. And do not drive on the road if there are any malfunctions in the car.
Remember, not every car can have DRLs installed. And if installed incorrectly, you will be fined for changing the intended design of the vehicle.
On the Internet you can find many other solutions on how to connect the DRLs so that they turn on when the engine starts. This article described only two of the most popular and less expensive methods. Other connection schemes require deeper intervention in the car’s electronics and the purchase of various materials and accessories. And, as you know, not everyone can understand intricate schemes.
Source
How to make it yourself
The option of making your own DRLs allows you to customize your car at low financial costs, and the main key to success in this case will be the ability to work with hand tools, the availability of free time and the desire to do this work with your own hands.
- How to turn on daytime running lights on a Kia Rio: illumination in detail
The following can be used as a light source when making DRLs yourself: LED strips, individual LEDs and an aluminum profile.
Option for placing daytime running lights on the VAZ-2110
Making DRLs using an LED strip
An LED line is a lighting product manufactured in a factory and consisting of an aluminum base on which LEDs are placed.
Manufacturers of LED products produce LED lines designed for different operating voltages. Therefore, when manufacturing DRLs, you should use models operating at a voltage of 12 Volts DC, corresponding to the voltage of the vehicle’s on-board network.
For manufacturing, you will need LED bars 150–200 mm long and fog lights (FTL), and you can use used ones. The length of the rulers used must correspond to the width of the PTF, and the number of rulers that can be placed in one headlight housing depends on its height.
Expert opinionAlexey BartoshSpecialist in repair and maintenance of electrical equipment and industrial electronics.Ask a question to an expertFor your information! The presence of an aluminum base in the design of the LED line allows for effective removal of heat generated during operation of the LEDs.
LED strips that can be used when performing work
Work on the manufacture of DRLs using PTF and an LED line is carried out as follows:
- When using several LED strips, they should be placed on a solid base that allows the strips to be secured in the same plane. To do this, you can use transparent plastic and adhesive sealant;
- the leads from the LED strips are connected in parallel to each other and soldered, and the output conductor is soldered to the common end;
- PTF is being sorted out. To do this, using a construction hair dryer, the junction of the protective glass and the headlight housing is heated, after which the sealant with which they were connected is removed;
- The standard socket intended for installing the light source is removed from the headlight, and a base with LED strips placed on it is installed in its internal space;
- the leads from the strips are brought out of the PTF body, and a diffuser (protective glass) is glued to the front side.
Important! In a similar way, you can make DRLs using an LED strip, but in this case it is necessary to further consider the issue of ensuring cooling of the LEDs.
Option for manufacturing DRLs from LED strip
After manufacturing the product, the reconstructed PTFs are installed in standard locations.
Manufacturing DRLs using an aluminum profile and individual LEDs
This manufacturing option is suitable for creative people, because in this case it is possible to make DRLs of an original shape. The main indicator limiting the author’s flight of imagination will be the regulated requirements for such light sources, which will be discussed a little later.
So, to manufacture DRLs of this type you will need:
- LEDs - from 5 to 7 pieces per DRL unit, power up to 3.0 W;
- lenses for LEDs;
- aluminum profile;
- connecting wires of the PV, PuGV, PVS brand or analogues.
DRLs made of aluminum profile and LEDs
A base is made from an aluminum profile on which the LEDs are placed using thermally conductive glue. Lenses are mounted on top of them, providing the required luminous angle of the light source.
Important! When connecting LEDs to each other using connecting wires, it is necessary not to confuse the polarity of the light sources.
DRLs made in this way can be placed on the car bumper, having previously cut holes in it corresponding to the dimensions of the manufactured product, or in the PTF, as in the previously discussed case.
What can you find on the market?
Due to the fact that, in accordance with the Road Traffic Rules (SDR), the use of daytime running lights is mandatory for all categories of vehicles while driving, this is definitely reflected in the service life of the light sources installed in the standard optics of this equipment. This state of affairs is due to the fact that in the absence of DRLs, the driver must turn on the low beam or PTF, which leads to rapid failure of the lamps located in these lighting devices.
Manufacturers of lighting equipment for cars have not avoided this issue, and the automotive spare parts market offers a fairly wide selection of factory-made DRL models.
When purchasing such products, the car owner only needs to install the purchased device, which can be done in a repair shop or on their own.
Rectangular pre-fabricated daytime running lights
Connecting DRL to the car's electrical circuit
When installing DRLs in a specialized workshop, the car owner does not have any questions, since these operations are regulated by regulatory requirements and rules.
If you do the work yourself, there may be several options for connecting the DRL to the vehicle's electrical circuit:
- Using an additional button installed inside the car.
Expert opinionAlexey BartoshSpecialist in repair and maintenance of electrical equipment and industrial electronics.Ask a question to an expertFor your information! In a similar way, you can connect daytime running lights to the PTF control key if DRLs are placed instead of these lighting devices.
- Using a 5-pin relay, standardly located on the car, and a stabilizer.
Legal requirement
The placement of DRLs on a car is regulated by GOST requirements and determines both the location of the headlight in relation to the road surface and the car body, and the parameters of the emitted light during its use.
Requirements for DRL are given in the table below:
| №p.p. | Index | Unit _ | Magnitude |
| 1 | Distance between headlights | mm | not less than 600 |
| 2 | Distance from the edge of the body to the DRL | mm | no more than 400 |
| 3 | Distance to road surface | mm | not less than 250 |
| 4 | Vertical luminous angle | degree | 25 |
| 5 | Vertical luminous angle | degree | 55 |
| 6 | Minimum luminous surface area of each DRL | cm2 | at least 40 |
| 7 | Luminous flux strength | Kandel | 400–800 |
Schematic representation of GOST requirements for the placement of DRLs on a car
Daytime running lights, or so-called DRL lighting devices, are popular among domestic car owners because it helps reduce the load on the vehicle’s on-board network and increase the life of standard optics. The issue of installing additional DRLs is relevant for all older models of VAZ cars, including owners of the VAZ-2110.
The content of the article
Hello, dear friends! I think many people are interested in an effective connection diagram for DRLs, that is, daytime running lights.
For several years now, there have been rules in the country according to which, when driving a car during the day, you should indicate your presence with the help of appropriate headlights. Fog lights, low beam headlights and the DRLs themselves are used as such lamps.
The use of fog lights and headlights has objective disadvantages. Therefore, it is best to connect the DRLs from the generator or battery yourself.
There are various ways and schemes for implementing the idea. Some do this without a relay, others combine DRLs with turn signals, others even control the daytime lights with a separate button, etc. To do everything right, you need to know some important points. And then automatic activation will be carried out without violating traffic rules.
Nuances of using lights
There is a special GOST that defines and regulates installations, technical parameters and the connection itself of daytime running gears.
Thresholds on Niva: do-it-yourself installation options, photos, drawings Category: Tuning
The regulations state that the circuit should be used in such a way that the drive wheels turn on automatically when the key is turned in the ignition switch. That is, when starting the power plant. But DRLs are also required to turn off automatically as soon as the main beam headlights come on. Here, as you understand, we are talking about the headlight unit (low or high beam). There is also a rule indicating that the head light should turn on only when the headlights turn on. The exception is short-term signals to warn other drivers.
Based on the above, we can safely say that you should not output the DRL through the button. The same as through the handbrake. But you can install it in turn signals, but you will need to connect 2 additional wires from each turn signal.
All this is extremely important to take into account when connecting the movers. After all, you should be concerned not only with the fact that the light bulbs do not burn out. Although this is an extremely significant point.
Without a well-thought-out and competent scheme, you will definitely not be able to install DRLs yourself. After all, everything should work with a shutdown when the high or low beam is turned on.
There are a number of schemes according to which, in theory, you can install DRLs on your car if they are not included in the standard configuration of your vehicle. The only question is which scheme is better to use.
An important role is played by the voltage stabilizer, which is a subject of much debate when using diode running lights. The DRLs themselves are equipped with resistors that act as a current limiter. But during voltage surges, they are not able to maintain the voltage at a single level. Therefore, it is correct to assume that the use of a stabilizer in such a scheme will be mandatory and necessary. Otherwise, the service life of the DRL will be significantly reduced due to regular voltage drops. Although some still believe that the connection can be made without a stabilizer.
It is worth considering several schemes separately, drawing appropriate conclusions from them and making a final decision for yourself.
Recommendations
Comments 86
Hello. Are they still working? didn't burn out?
how long did you work?
And where are they at night?
Almost like low beam!
accepted thx saw them still on wish lists
Does your hazard warning light work? I installed the same DRLs + turn signals and ran into the problem that the ice does not work when the emergency lights are turned on!
Everything is working! Did you connect correctly?
Connected correctly, already changed - + result 0. After manipulating the rear turn signals, I discovered that if I turn off two bulbs, the emergency lights buzz, that is: in front of the turn signals, ice + side halogen repeaters = works, + I connect the rear 1 halogen light, = it works, but the ice turns on later and the resistance heats up, then + I connect back 2 light bulbs and the ice does not work, and the resistance gets hotter and hotter! The hike cannot be done without an electrician.
What about the fuse? Where to attach it?
No, but it’s a must! They won’t work for long without stabilization!
DRL with turn signal function. The connection principle is simple: a standard chip is connected to the turn signal connector and the third wire is connected to “+” (for example, dimensions). But here's how I started dancing with a tambourine: In the evening, I just decided to check how it works in the yard. So far without any stabilizers. So: I plug the turn signals into the standard connector, turn on the turn signal - it doesn’t blink. OK. I throw the third wire to the “+” of the battery and voila - the white one lights up. Without touching anything, I turn on the turn signal - and the white one begins to blink as it should, as if opposite the turn signals, but the yellow one does not blink (does not turn on). OK. I think the yellow LEDs are faulty. I open the trunk, connect the rear lights to the turn signals and voila - the yellow one blinks. Now the dilemma is - what is it? The design itself is in good order, because The driver works as it should, all LEDs are also working properly, because everything is on fire (in the rear light). The car chain is working properly, because Both minus and both plus are supplied to the DRL driver. What's the catch? Why doesn't the yellow one blink when installed from the front?
It couldn't be simpler
This is the simplest scheme, which involves connecting to a battery or generator as a power source.
Springs for a passenger trailer: which ones to choose and how to install them yourself Category: Passenger trailers
The scheme provides that the DRLs will be activated simultaneously with the engine starting. The point is to connect the plus to the positive terminal from the ignition switch of your Renault Logan or the same Lada Largus, and fix the minus on the car body in any convenient place. Everything looks simple and extremely logical. But you should not rush to conclusions, nor should you make such a connection. After all, it has an obvious drawback.
If the system is assembled according to this scheme, the diodes from the DRLs will start working constantly while the key is in the ignition switch. There is no question of any coordination with other headlights here. Therefore, such a connection contradicts GOST and traffic regulations.
Low beam or dimensions
You can also connect to the side lights or low beam headlights. In theory, everything here also looks quite simple, interesting and promising.
The first of the schemes under consideration provides that you will use an electrical circuit that powers the size lamps. Here the plus from the DRL is connected directly to the battery as a power source. But the minus goes to the plus of the dimensions. At such a moment the latter will be electrically neutral. Thus, the current flows from the plus of the battery through the diodes to the dimensions, and then through the lamp to the housing, where the latter acts as a minus of the created electrical circuit.
Since the level of current consumption will be small, the diodes will start to work, but the size lamp will not turn on.
As soon as the driver switches to the dimensions, a voltage of 12V will appear on its positive side, the potentials will be equalized on the DRL wiring and the diodes will go out. The circuit will begin to operate in normal mode, supplying current to the dimensions.
Everything seems to be fine. But again, conclusions were drawn hastily.
The scheme is simple and working. It just has a few drawbacks:
- The drive trains will remain active when the engine is switched off. This directly contradicts current laws;
- If the dimensions are equipped with LED lamps, such a circuit will immediately become inoperative;
- Operation will not be correct when using powerful SMD diodes as part of DRLs;
- To provide additional safety, you will have to add a fuse to the circuit.
To avoid the first drawback, the circuit is slightly altered. The positive from the LED module is taken not from the positive of the battery, but through the positive of the ignition switch.
The second scheme involves activating the DRL using a low beam lamp. The point is that when the low beam is turned on, the walkers are turned off, and the rest of the time they work.
There are the same disadvantages here as for the previous scheme. That is, it contradicts GOST and traffic rules.
Controller for DRL without microcontroller
This is such a tautology. But nevertheless, what is written, according to syntactic, spelling and semantic rules, has the right to life. Author's Note: A controller is an electronics control device; microcontroller is a miniature part of a controller based on an integrated circuit.
If your car is not equipped with standard daytime running lights, and the use of main headlights is too wasteful for you, the Traffic Rules of the Russian Federation allow the use of fog lights to indicate a vehicle during daylight hours.
But this option is rational only if the power of the light bulbs in the fog lights is less than the power of the lamps in the main headlights. If this is not the case, then installing DRLs cannot be avoided. In general, at the moment, the installation of DRLs on a vehicle in use is not mandatory, but by 2022 all vehicles must be equipped with daytime running lights.
As a result, the conclusion suggests itself - definitely install DRLs.
To do this, you can use the services of a specialized auto center, or you can perform this not very complicated operation yourself. Of course, a lot depends on the car (the complexity of removing the dashboard and bumper) and on the origin of the DRL kit itself (factory production or homemade). It should be recalled that independently installed running lights must comply with the requirements of GOST R 41.48-2004 (UNECE Regulations No. 48 and No. 87) or clause 1.3.29 of Appendix No. 5 to the “Technical Regulations for the Safety of Wheeled Vehicles”.
Relay based DRL controller
Most vehicles have standard factory fog lights. But not all drivers use them. The reasons are different: there is no need, the headlights are too power hungry or simply ineffective. So they can be converted into running lights. Naturally, the light bulbs will have to be replaced with LED analogues. This will give good savings
energy and, importantly, will allow you to neglect the consumed current when calculating the electrical mnemonic diagram
Next, you will need to change the standard switching circuit. This is where you will need (with a high degree of probability) to remove the dashboard and bumper. According to workers' reviews, this is done in just over an hour. After gaining access to the on-board electrical wiring, we switch everything as follows:
It is important to ensure the correct operation of the running lights: they must turn on when the ignition key is turned to a position that allows the engine to operate, and turn off when the main headlights or parking lights (dimensions) are turned on for the low/high beam. To do this, the size signal can be taken directly from the button illumination
This way you will never forget to turn off the DRLs. This scheme has been tested by many car owners and has no complaints.
But what to do if in a car, access to the wiring inside the cabin is extremely difficult or even impossible? For a lazy car enthusiast with an inquisitive mind, this will be a real obstacle. We need another solution. Let's consider the following option.
Option on ATmega8
DRL lamps can be purchased separately, without a control module, at a very reasonable price. There are already holes in the bumper (from the fog lights), if not, we cut them out. The entire installation consists of fixing the lamps with four self-tapping screws. It's up to the controller. In the proposed version, we will consider the use of the good “old” ATmega8, an 8-bit microcontroller from Atmel.
By the way, with its help it is also possible to implement additional functions, for example, an indication of the operation of the firewall, which tends to turn off when the car is running. The operating algorithm of the ATmega8 circuit is as follows: if the car is turned off, the voltage on the battery is less than 13.5 V, if it is started, charging is in progress, and the voltage is above 13.5 V.
The running lights turn on automatically.. Of the connections, there are 2 wires to the battery and 2 wires to the DRL. With careful installation, mid-price DRLs will fit very harmoniously into the exterior of the car.
There is also an option for assembling a DRL control controller based on a comparator.
DRL controller circuit on comparator LM358
In this circuit, the comparator is implemented based on a low-power two-channel operational amplifier LM358. The circuit turns out to be very cheap, and besides, there is no need for a voltage stabilizer, the LM358 single-pole power supply is designed for 3 - 30 V, again, saving money. The schematic diagram is below, everything is simple and clear.
Setting up this controller comes down to setting the circuit's response threshold with a trimmer when the generator is operating, i.e. when the voltage in the on-board network is above 13.5 V.
Everything comes together very quickly and works reliably even in severe frost.
archive for the article..