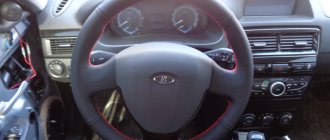
Electric power steering is a component used to provide more comfortable driving. Not so long ago, domestically produced cars began to be equipped with EUR, in particular, in this article we will talk about Lada Kalinas. What malfunctions can occur with the Kalina EUR and what troubleshooting methods are there? Find answers to these and other questions below.
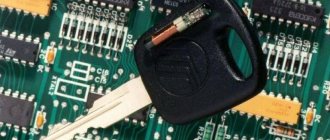
Causes of EUR failure
Why does the electric power steering on the Lada Kalina not work, turns off and refuses to work, what are the signs of a steering wheel with power steering knocking, jamming, biting or squeaking? To repair the system yourself, you need to know how diagnostics are carried out and what causes precede the breakdown. Most often, the failure of the amplifier is caused by a breakdown of the unit itself and the amplifier fails. Problems of this type are resolved by thoroughly checking the system to identify the exact problem.
As practice shows, often the inoperability of the electric amplifier (failure) is associated with a breakdown of the speed controller.
Consequences:
- the steering wheel is jammed,
- jams
- becomes tight
- and others
Because the speed controller sensor ensures activation and deactivation of the electric power steering under different driving modes. The amplifier on Kalina works if the car is moving at low speed. When the speed begins to increase, the booster automatically turns off, allowing for safer machine control when driving at high speeds.
So, briefly about the reasons for the inoperability of the EUR:
- The speed controller has failed or the control unit does not receive or disappears a signal from it. In this case, the reason may lie in either a breakdown of the sensor, damaged wiring, or poor contact of the controller with the on-board network.
- The voltage in the vehicle's electrical network has decreased. The reasons can be different, ranging from a dead battery and an inoperative generator to the use of inappropriate electrical equipment in the car.
- The permissible crankshaft speed has been exceeded.
- Incorrect operation or failure of the control module. Depending on the cause, the control unit may need to be repaired; more detailed diagnostics need to be done.
Where to look for the reason
Electrical problems may occur due to oxidized connector contacts. The ingress of moisture and dirt impairs the conductivity of the contacts, and as a result, errors in the operation of the EUR.
Failures in the electronics may be due to loss of signal from the torque sensor. For example, on domestic cars the contacts are poorly soldered. Over time, they “go away”, and problems with the electric booster begin. It is enough to clean them and solder them well and the problem will disappear. If the speed sensor does not work, the EUR will generate an error and refuse to work.
Fuse . Even if it looks intact, you need to examine it carefully. There were cases when the amplifier turned off and generated error 1058 “Engine, phase windings shorted” (relevant for VAZ models) due to burnt fuse contacts. Cleaning the contact surfaces or replacing the fuse eliminated the malfunction of the electric amplifier.
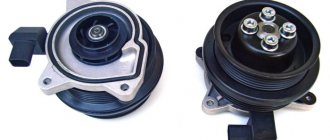
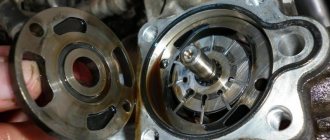
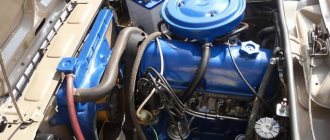
The reason for the failure of the amplifier may be in the mechanical part. This applies to the gearbox and steering rack. The first one may jam due to water and dirt getting into the planetary gears or their physical destruction - read “Design and principle of operation of the electric power steering.”
Damage to the rack boots leads to water, dust and dirt getting inside. This destroys the rack from the inside, the bearings are damaged, and the steering mechanism jams. There were cases when the ridges were licked onto the slats, the “worm” of the shaft rotated, and the connection between the car’s wheels and the steering wheel was lost.
Diagnostics
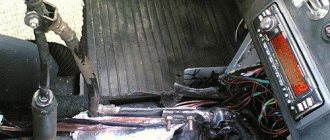
To check the amplifier in a car, you need to remove the plastic trim on the steering column; to do this, unscrew the bolts securing it from the bottom.
Then you will need to get to the 8-pin plug, its pinout is as follows:
- The blue contact is connected to the ignition switch, this is 12 volt power;
- the red-brown contact is the connection cable to the tachometer;
- the gray contact goes to the car speed controller;
- white and pink wire - amplifier control indicator;
- black-yellow contact is a diagnostic line;
- the next contact is empty, the wire is not connected to it;
- brown contact is ground;
- empty.
More accurate results will be obtained by checking the amplifier using a scanner. But since such equipment can usually only be found at service stations, you can try to check the operation of the system with a paper clip.
To check you need to do the following:
- First the ignition is turned off.
- Then, using a paper clip, you need to close contacts numbered 6 and 7 of this plug, while the plug itself does not need to be removed.
- Next, the ignition must be turned on.
- After completing these steps, the EUR failure indicator located in the dashboard will begin to blink; by the number of blinks, you can determine whether the system is broken (the author of the video is Gosha Vakhromeev).
How to understand where to look for the cause by the blinking indicator icons:
- one long signal and one short signal - the electric amplifier is working;
- one long and two short - no engine speed signal;
- one long and three short - the torque controller is out of order or there is no power supply;
- one long and four short blinks—problems in the operation of the electric power steering motor;
- one long and five short - the steering shaft position controller has failed;
- one long and six short - the motor rotor position controller has failed;
- one long and seven short - problems with the electrical network - the voltage is either too high or very low;
- one long and eight short - the control module of the electric amplifier has failed;
- one long and nine short - the speed controller is broken.
Error codes
c1044 - incorrect sequence of the rotor position sensor (RPS)
c1621 - incorrect voltage 5V
c1622 - speed signal circuit failure
c1011 - car engine speed signal circuit, no signal - the signal from the idle sensor (or the standard tachometer through a voltage limiter) is divided by 4 and applied to the tachometer input,
c1022 - error, voltage of the main output of the torque sensor - it is possible that the shaft cover has rubbed the insulation and the middle, green wire shorts to ground
Error codes for EMURU "Lada Kalina"
So, we have studied the general circuit of the Lada Kalina electric power steering; now we will consider possible digital error codes and briefly describe their meaning. Note that equipment can be diagnosed using a DST-2M scanner with an installed VAZ-IZH cartridge or MT-10 software.
• C1000 – no error detected. • C1011 – no signal (engine speed circuit). • C1012 – no signal (speed sensor circuit). • C1013 – the voltage in the on-board network has dropped. • C1014 – the voltage at the ignition switch has dropped. Torque sensor: • C1021 – voltage (main output). • C1022 – voltage (control pin). • C1023 – incorrect output signal. • C1024 – no signal. Steering shaft position sensor: • C1031 – circuit malfunction (main signal). • C1032 – circuit malfunction (control signal). • C1033 – lack of power. Engine rotor position sensor: • C1041 – phase A circuit – malfunction. • C1042 – phase B circuit – malfunction. • C1043 – phase C circuit – malfunction. • C1044 – incorrect sequence. • C1045 – lack of power. Power circuits: • C1050 – short to ground. Motor, overcurrent: • C1051 – phase winding A. • C1052 – B. • C1053 – C. Broken phase windings: • C1054 – broken windings. • C1055 – winding A. • C1056 – B. • C1057 – C. Closing of phase windings: • C1058 – closing of windings. • S1059 – winding of phase A. • S1060 – B. • S1061 – C. • S1070 – unidentified. ECU - electronic control unit: • C1071 - RAM error. • C1072 – ROM error. • C1073 – EEPROM error. • C1074 – block relay. • C1075 – the radiator temperature is exceeded. • C1076 – ECU supply voltage. • C1077 – voltage for power capacitors. • C1078 – capacitor charging time. • C1079 – excess current in one of the windings. • C1080 – breakdown of the power transistor. Currently, DST-2M scanners are no longer produced; their place has been taken by more modern and advanced devices of the DST-12 model. With this equipment, you can diagnose not only faults in the Lada Kalina electric power steering. The DST-12 scanner is universal; it is used to service many cars - both those manufactured by AvtoVAZ and models from other manufacturers.
Dismantling and disassembling the electric amplifier
Before removing the amplifier, you need to remove all the steering column switches. Remove the steering rack cover and dismantle the devices, remembering to disconnect the connectors from the power supply.
How to remove the EUR with your own hands:
- After removing the switches, you will need to dismantle the lower cross member of the dashboard. To do this, you need to press the fasteners that secure the connector with wires, and then disconnect the wiring from the control module. Once these steps are completed, you can disconnect the connector from the switches.
- The system bracket is secured with nuts; you will need to unscrew them with a wrench.
- After this, the steering rack will need to be carefully lowered down. To do this, you will need to find the bolt that secures the driveshaft to the booster shaft. This bolt must be unscrewed, but when unscrewing, you will need to fix the nut, this will prevent it from turning. When the bolt is removed, the fastening will need to be loosened, after which the intermediate shaft will be carefully removed. At this stage, we recommend marking the position of the shaft and gears; you can use a marker for this. This step is very important because doing it will prevent possible installation problems in the future. If the marks on the shafts do not match, this may cause problems with the amplifier. When dismantling, be careful not to damage the wiring, as this will also lead to the inoperability of the ESD.
- When the unit is dismantled, it will need to be disassembled and the failed elements replaced. Further editing is done in reverse order (the author of the video is Murzik Bely).
We remove the EUR on the Priora and install a new one
When the EUR on your car either works or doesn’t, and you have identified the reasons why it is clear that repairing the device is useless, you need to replace the amplifier with a new one. You can do this with a little time and effort, but still with your own hands.
Tools required to replace the ESD on a LADA Priora:
- A Phillips screwdriver is the most common.
- Head on "13", the main tool.
- An “8” spanner will also come in handy.
Step-by-step instructions for replacing the EUR on a Priora:
The first step is to disconnect the battery; it will be enough to “throw off” the negative terminal. We remove the plastic covers from the steering column, to do this we unfasten a couple of clamps and unscrew a couple of screws. We unscrew the 4 bolts and loosely but carefully separate the lower part of the plastic closing cover. At this stage, the lock and switch levers, of course, the wipers and turns, are in the way. Slowly, disconnect all the wires and use the “8” key to loosen the clamp securing all of the above devices. They come off the shaft casing easily. Disconnect 2 connectors from the electronic control unit. Remove the plastic cover from the special pin. The lower nuts do not need to be unscrewed, just turn them just a few turns. Next, remove the hinge pinch bolt. Unscrew all remaining fastening nuts. We remove the EUR. We install the new amplifier and assemble everything in the reverse order
It is important not to confuse anything
How to tighten the electric power steering rack?
The appearance of a knocking sound in the operation of the electric power steering is associated with the need to tighten the steering rack.
How to do it right:
- First you need to disconnect the battery; to do this, disconnect the terminals from it. Unscrew the battery mount; to do this, you need to unscrew two more nuts located at the edges. After this, the battery is removed and put aside.
- Then you need to lift the plastic stand, there are four more screws under it, they can also be unscrewed.
- Having done this, it is necessary to move this stand forward until the platform is disconnected from the air filter housing retainer pad. After this, the trim can be moved back, this will provide freer access to the rail itself.
- At the next stage, you will need to crawl your hand under the rail. Directly below it, as shown in the photo, there is a rubberized cap; it will need to be removed, this will allow the key to access the adjusting nut.
- To perform adjustment work, you will need a special wrench to tighten the rack; without it, the adjustment procedure will not be possible. Using this wrench, you need to crawl under the car rail to install the tool in the required hole.
- When adjusting, be careful not to overtighten the rack. If its tightening is very strong, then when cornering the rack will bite, and this, in turn, may affect the safety of movement. The angle of adjustment is always different, it depends on how much the nut is loose, but usually when performing such work the nut is tightened by approximately 30 degrees. This should be enough to get everything right. After the adjustment is completed, it will be necessary to check that this task was performed correctly. That is, you will need to make sure that the steering wheel turns normally to any position all the way and there is no knocking. If the knock remains, then the adjustment continues.
Photo gallery “Adjusting the steering rack”
1. Slide the stand and detach it.
2. In this place under the rail there is an adjusting washer.
3. Adjustment is made with a special key.
4. Location of the adjusting nut.
Electrical faults of the electric booster
When troubleshooting electrical problems, be sure to remove the terminal from the battery. This procedure must be performed during any electrical work in the car.
It happens that when you turn the key in the ignition switch, the icon indicating a malfunction in the EUR turns on again. A possible malfunction is a breakdown of the amplifier drive motor. It is possible to fix such a malfunction yourself if you have electrical knowledge. If you are unable to repair the electric motor, it is recommended to replace it with another one.
Operation failure may also occur in the following cases:
- The fuse has blown. However, it is recommended to replace the fuse only after eliminating the cause of its blown. The fuse is designed to protect the electrical circuit from short circuits. When the wires are shorted, they heat up and the fuse link melts, breaking the electrical circuit. There is probably an overlap of wires in the circuit and their further short circuit. Eliminate the cause and only then change the fuse.
- Poor contact at the connections, resulting in a lack of power in the amplifier circuit. Correct the contacts or clean the wire connections.
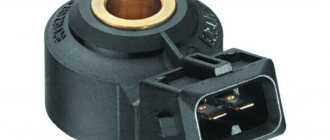
One of the most vulnerable elements of the system is the speed sensor. This is an electrical device that is designed to control the electric drive of the amplifier at various speeds.
The fact is that using ESD at high speed can cause an accident, since the slightest rotation of the steering wheel will lead to the car being driven off the road. This sensor reads the speedometer and, as speed increases, weakens the power steering effect. Thus, it turns out that at high speed the power steering operates in the same way as when using a mechanical amplifier.
The main malfunction of the sensor is its failure. If the sensor fails, the amplifier circuit does not receive speedometer readings and the amplifier is turned off. After this, a special icon on the instrument panel lights up (steering wheel with an exclamation mark). In this mode, the amplifier operates without an electric drive and does not interfere with the steering. In this case, you just need to remove fuse F31 in the block to the left of the steering wheel to completely disconnect the circuit before replacing the speed sensor.
Ultimately, to fix this problem, you just need to change the speed sensor.
Mechanical problems
Mechanical failures of the power steering include various damage to the amplifier structure, jamming, deformation and fracture. In cases with mechanical faults, the electric amplifier must only be replaced.
How can I lubricate and adjust the EUR?
How and with what to lubricate the amplifier?
Litol can be used as a lubricant; the procedure is performed as follows:
- First you need to remove the plastic casing; to do this, unscrew the bolts that secure it. To unscrew, use a Phillips head screwdriver. It is also advisable to remove the lower cross member of the instrument panel, located under the steering wheel.
- Next, unscrew the two bolts that secure the amplifier itself; for this you will need a 13mm wrench. After this, the column can be released down.
- Unscrew another bolt, after which you can do the actual lubrication.
- First, the steering wheel is turned to the left until it stops. The lubricant is poured into a 10 cc syringe, which needs to be sprayed into the hole formed. You need to throw out all 10 cubes.
- Then the steering wheel is turned to the right until it stops - the syringe is again directed into the hole, all the lubricant is sprayed out.
- After this, the steering wheel should be turned to the middle position and again sprinkled with lubricant into the hole.
- Next, the steering wheel must be turned in different directions until it stops several times. The lubrication operation is repeated again.
- Then all the components are assembled in reverse order.
Unpredictable steering behavior
The driver is driving on a flat road, the position of the steering wheel does not change, and suddenly the car turns to the side. Such unpredictable behavior of the power steering requires urgent diagnosis, since at the most inopportune moment the electric power steering of the Lada Priora can send the car to the side of the road or into the oncoming lane.
To remove this fuse, you need to do the following:
- The mounting block cover is located at the driver’s left foot;
- We turn the clamps and unclip the fasteners;
- You will find the block where the required fuse is located near the expansion tank;
- Feel free to take out fuse F5 (50 A) - it is responsible for providing the power supply circuit to the power steering unit.
The reason for this behavior is a malfunction in the electric amplifier device. This could be a torque sensor, control unit, clogged contacts or mechanical damage. It is recommended that diagnostics be carried out by professionals, since in a garage you will not be able to check the control unit; replacement can be done with your own hands.
Electric power steering connection diagram with icons
Diagnostics using third-party devices
For a more detailed check of the vehicle's performance, scanners and computers are used. They are connected to the diagnostic electrical connector (socket) located on the standard panel. Malfunctions are issued in the form of a standard set of alphanumeric codes, consisting of one letter and four numeric designations. The letter indicates specific nodes in which the malfunction occurred.
B - detects problems with electronics inside the cabin;
C - indicates defects in the chassis design;
P - errors in the engine control module or transmission;
U - loss of communication between electronic modules.
The letter designation is followed by four characters:
- the first character indicates a standard code established by engineers at the Automobile Association;
- the second character records personal codes set by manufacturers;
- the third character indicates which system the malfunction occurred in:
1-2 - in the fuel and air system;
- in the ignition system;
- in a secondary emission control system;
- in the speed control controls or when the load is off (XX);
- on-board computer system and wiring;
7-8 - errors in the operation of the gearbox;
9.0 - reserve;
the fourth and fifth symbols are considered together to more accurately locate the point of failure.
About qualified electric amplifier replacement
If there is a need to replace the mechanism when the ESD does not work, we recommend contacting experienced technicians. When the car is under warranty, the most rational measure would be to contact the dealer network to resolve the problem.
There are situations that do not allow you to resort to these two methods of eliminating an amplifier malfunction. Then the only solution will be to manually replace the mechanism that has become unusable.
Let us immediately make a reservation that the replacement process if the EUR does not work is characterized by sufficient complexity. To carry it out successfully, you will need experience and the possession of special tools. Unqualified replacement actions can aggravate the scale of the breakdown, which will entail a significant waste of money on more expensive repairs in service conditions.
Before the actual replacement procedure, we recommend that you carefully study the entire list of features and actions if the ESD does not work. Here you will need to delve into the connection diagram of the unit, which will avoid damage to the electrical components of the mechanism.
To remove the amplifier, partial disassembly of the front panel of the Lada Kalina is necessary. After this, the device itself must be disconnected from the entire list of supply wires. Sometimes owners repair the electric power steering, avoiding the need to replace it with a new unit. As a rule, after a complex of restoration work, standard devices work no worse than their new counterparts.
A common malfunction is the occurrence of a knock that clearly comes to the driver from under the panel or the amplifier turns off. This phenomenon may be accompanied by a characteristic squeak that occurs during rotational actions with the LADA Kalina steering wheel. This situation is usually solved by using a special lubricant. If such an action does not bring the expected result, then a more detailed diagnosis of the amplification mechanism will be required.
To install the electric power steering in the seat of the Lada Kalina, you will need to be attentive and patient. All cable connectors must be tightly seated, and the device itself must be firmly secured. Only after this can you proceed to the reassembly of the previously dismantled front panel components.
Electric power steering Kalina significantly simplifies the car's movement and makes its operation enjoyable. Lada Kalina appeared on the modern automobile market not so long ago, but has already become widely known and has gained enormous popularity among the population.
This fact is due to the practicality of this machine and its convenience. In addition, the cost of such a brand sets it apart from other cars. This effect was achieved thanks to the presence of many additional parts included in the design of the machine, which not only simplify the use of the machine, but also make this process more comfortable.
How to keep the EUR in working condition longer
Very often the Priora's ESD does not work and fails due to careless driving. In order for the repaired electric amplifier to work as long as possible, you should follow simple rules:
do not leave the steering wheel in the extreme position for a long time; do not make sudden movements with the car when it is in an extreme position; when turning a car or parking it, you cannot hold the steering wheel in the extreme position for more than five seconds; regular scheduled inspections of the EUR; While driving, pay attention to extraneous sounds emanating from the electric booster. Follow these rules, and you may not have to deal with EUR repairs for a long time.
Follow these rules, and you may not have to deal with ESD repairs for a long time.
https://youtube.com/watch?v=VwHI8zwxn4o
In modern cars, including the Lada Priora, you can turn the steering wheel with at least two fingers, even while the car is parked; before, if anyone doesn’t know, this didn’t happen. Thanks to modern technology, electric power steering has appeared. However, as many people know, Priora, like any domestic car, often presents surprises, so ESD malfunctions of various types occur
In this material, we propose to understand why such an extremely important device as electric power steering does not work and what are the ways to eliminate troubles associated with this
Repairing the EUR on-board computer
As for the “brain” and internal sensors, the procedure is as follows: to fix broken sensors, it is better to go to a service station, but you can change the computer at home. Tools that need to be used to work with the equipment:
- socket wrench 8;
- socket wrench 13;
- shaped screwdriver.
It is necessary to first remove the steering wheel.
How to repair the electric power steering of a Priora? Initially, the linings located on the steering column are removed. To do this, just unscrew the two screws and unfasten the 2 latches. The second step is to unscrew the bolts, there should be four of them. After this, with a slight movement, the lower part of the lining is separated, and all wires are disconnected. This can be done as follows: press the connectors on the antennae. You can loosen the clamp using a size 8 wrench. Afterwards, two connectors are disconnected from the EUR ECU - this allows you to remove the trim located there.
The nuts located at the bottom do not need to be completely unscrewed; just turn them using a socket wrench. The next step is to get the Priora EUR. If you cannot repair the device at home, contact a specialist. If the operations are performed correctly and there are no results, components may need to be replaced.