Electric power steering is a component used to provide more comfortable driving. Not so long ago, domestically produced cars began to be equipped with EUR, in particular, in this article we will talk about Lada Kalinas. What malfunctions can occur with the Kalina EUR and what troubleshooting methods are there? Find answers to these and other questions below.
Causes of EUR failure
Why does the electric power steering on the Lada Kalina not work, turns off and refuses to work, what are the signs of a steering wheel with power steering knocking, jamming, biting or squeaking? To repair the system yourself, you need to know how diagnostics are carried out and what causes precede the breakdown. Most often, the failure of the amplifier is caused by a breakdown of the unit itself and the amplifier fails. Problems of this type are resolved by thoroughly checking the system to identify the exact problem.
As practice shows, often the inoperability of the electric amplifier (failure) is associated with a breakdown of the speed controller.
Consequences:
- the steering wheel is jammed,
- jams
- becomes tight
- and others
Because the speed controller sensor ensures activation and deactivation of the electric power steering under different driving modes. The amplifier on Kalina works if the car is moving at low speed. When the speed begins to increase, the booster automatically turns off, allowing for safer machine control when driving at high speeds.
So, briefly about the reasons for the inoperability of the EUR:
- The speed controller has failed or the control unit does not receive or disappears a signal from it. In this case, the reason may lie in either a breakdown of the sensor, damaged wiring, or poor contact of the controller with the on-board network.
- The voltage in the vehicle's electrical network has decreased. The reasons can be different, ranging from a dead battery and an inoperative generator to the use of inappropriate electrical equipment in the car.
- The permissible crankshaft speed has been exceeded.
- Incorrect operation or failure of the control module. Depending on the cause, the control unit may need to be repaired; more detailed diagnostics need to be done.
Signs of wear on the crosspiece
Often, motorists do not pay attention to insignificant signs that it is time to make repairs, and wait until the problem makes itself known publicly and this is fraught with consequences, especially when it comes to loss of vehicle controllability.
The first signs of wear on the crosspiece appear as:
- the presence of noticeable resistance to the steering wheel when rotating at speeds above 80 km/h;
- delayed wheel turning and loss of sensitivity (delayed response of wheels and steering shaft);
- increased free play angle of the wheels (popularly this symptom is also called “Steering play”);
- uneven rotation of the steering wheel, the steering wheel moves with sharp jerks;
- obvious grinding or knocking noise that occurs when the steering wheel is rotated; the grinding becomes especially noticeable and obvious on an uneven road.
Most often, motorists turn to a car service center to replace the steering shaft crosspiece mechanism only when the last sign of a malfunction appears, but in vain, because in the event of an emergency, the steering control will not be able to adequately respond to the driver’s efforts, and sometimes, the steering control may even fail, this is already fraught with very big troubles.
Repair of the shaft cross is carried out every 50 - 100 thousand, it is better more often, otherwise it will have to be completely replaced with a new one.
To replace, you will need to purchase a crosspiece - on average 150-300 rubles, some car services claim that for the steering to work correctly, you need the entire steering shaft (4 - 7 thousand rubles), but on most cars it is enough to change only the crosspiece.
Diagnostics
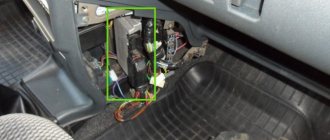
To check the amplifier in a car, you need to remove the plastic trim on the steering column; to do this, unscrew the bolts securing it from the bottom.
Then you will need to get to the 8-pin plug, its pinout is as follows:
- The blue contact is connected to the ignition switch, this is 12 volt power;
- the red-brown contact is the connection cable to the tachometer;
- the gray contact goes to the car speed controller;
- white and pink wire - amplifier control indicator;
- black-yellow contact is a diagnostic line;
- the next contact is empty, the wire is not connected to it;
- brown contact is ground;
- empty.
More accurate results will be obtained by checking the amplifier using a scanner. But since such equipment can usually only be found at service stations, you can try to check the operation of the system with a paper clip.
To check you need to do the following:
- First the ignition is turned off.
- Then, using a paper clip, you need to close contacts numbered 6 and 7 of this plug, while the plug itself does not need to be removed.
- Next, the ignition must be turned on.
- After completing these steps, the EUR failure indicator located in the dashboard will begin to blink; by the number of blinks, you can determine whether the system is broken (the author of the video is Gosha Vakhromeev).
How to understand where to look for the cause by the blinking indicator icons:
- one long signal and one short signal - the electric amplifier is working;
- one long and two short - no engine speed signal;
- one long and three short - the torque controller is out of order or there is no power supply;
- one long and four short blinks—problems in the operation of the electric power steering motor;
- one long and five short - the steering shaft position controller has failed;
- one long and six short - the motor rotor position controller has failed;
- one long and seven short - problems with the electrical network - the voltage is either too high or very low;
- one long and eight short - the control module of the electric amplifier has failed;
- one long and nine short - the speed controller is broken.
Error codes
c1044 - incorrect sequence of the rotor position sensor (RPS)
c1621 - incorrect voltage 5V
c1622 - speed signal circuit failure
c1011 - car engine speed signal circuit, no signal - the signal from the idle sensor (or the standard tachometer through a voltage limiter) is divided by 4 and applied to the tachometer input,
c1022 - error, voltage of the main output of the torque sensor - it is possible that the shaft cover has rubbed the insulation and the middle, green wire shorts to ground
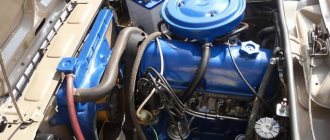
Power steering (hydraulic system)
It’s worth starting with this option, because it was the first to appear on cars and has still not lost its relevance.
Operating principle : Very simple, here the main working fluid is a special fluid, often ATF , which is poured into the automatic transmission of the car . The steering rack itself is a hollow cylinder into which a piston goes, attached to the steering shaft (to exaggerate it, it looks very much like a pharmaceutical syringe). A special pump pumps oil pressure in one direction or the other, and this piston begins to deviate in one direction or the other, accordingly helping you turn the steering wheel. There is approximately 0.5 - 1 liter of oil in the system, it is pumped by a pump that is driven by the engine crankshaft, that is, they are connected by a belt drive. Of course, the system contains metal and rubber tubes through which the working fluid actually pumps.
Due to the rigid connection, the motor power is reduced, because part is simply eaten by the pump!
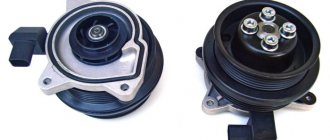
A few words about EGUR . That's why electric power steering is now starting to appear. What does it mean? The differences are few, but they are significant - here, instead of a belt pump, an electric motor is used, that is, electricity is simply supplied and it pumps oil in the system. Thus, taking much less power and saving up to 0.5 - 0.7 liters per 100 km. Well, now it’s time to think about the pros and cons of this device
Pros of GUR
- Controllability. The driver has good feedback from the road; in terms of response accuracy and response, power steering comes first
- Great effort. Such amplifiers are installed on many HEAVY trucks; all electrical systems are not yet fully adapted
- Comfortable handling at both low and high speeds
- Now there are new generation devices with electric pumps that do not use a belt drive and save fuel
- There are no complex electronic sensors, we can call this system analog (except for power steering)
- Reliability is at a fairly high level; if you take care and change the oil in the system , it can last a very long time
In general, there are not many complaints about this system; it still works stably, accurately and, importantly, can “turn” heavy truck racks. However, there are also a lot of negative aspects
Cons of GUR
- Takes up quite a lot of space under the hood (pipes, pump, rack itself) all this is quite cumbersome
- It has a special oil that needs to be changed after a certain number of kilometers, otherwise it may break down. Because oil seals can wear out faster
- If the model is old (belt), it increases fuel consumption by up to 10% (if compared with the opponent). Because it additionally creates a load on the engine (pressure is built up thanks to a belt drive that comes from the crankshaft, respectively, part of the engine energy is spent on the hydraulic booster). Even at idle
- At low temperatures, you need to use it more carefully, it is advisable to warm it up together with the motor
- If there is a leak or oil has leaked out, then you cannot operate the car! Or very limited mileage. Otherwise, the pump itself that pumps the oil may break.
- Repairs are sometimes very expensive. Although almost all service stations do this, there is nothing particularly complicated here
Dismantling and disassembling the electric amplifier
Before removing the amplifier, you need to remove all the steering column switches. Remove the steering rack cover and dismantle the devices, remembering to disconnect the connectors from the power supply.
How to remove the EUR with your own hands:
- After removing the switches, you will need to dismantle the lower cross member of the dashboard. To do this, you need to press the fasteners that secure the connector with wires, and then disconnect the wiring from the control module. Once these steps are completed, you can disconnect the connector from the switches.
- The system bracket is secured with nuts; you will need to unscrew them with a wrench.
- After this, the steering rack will need to be carefully lowered down. To do this, you will need to find the bolt that secures the driveshaft to the booster shaft. This bolt must be unscrewed, but when unscrewing, you will need to fix the nut, this will prevent it from turning. When the bolt is removed, the fastening will need to be loosened, after which the intermediate shaft will be carefully removed. At this stage, we recommend marking the position of the shaft and gears; you can use a marker for this. This step is very important because doing it will prevent possible installation problems in the future. If the marks on the shafts do not match, this may cause problems with the amplifier. When dismantling, be careful not to damage the wiring, as this will also lead to the inoperability of the ESD.
- When the unit is dismantled, it will need to be disassembled and the failed elements replaced. Further editing is done in reverse order (the author of the video is Murzik Bely).
Dimensions of the standard radiator of the Lada Kalina stove
At one time, I was never able to find either the dimensions or a clear image of the radiator of the Kalina stove ; one might say, I had to select the radiator blindly, agreeing to return it if it didn’t fit. Therefore, I hasten to share this information with you, dear readers. I hope it will be useful, for example, if you decide to install a heater radiator from another car.
So, the dimensions of the Kalina stove radiator : 240 x 195 x 50 mm
You may also find the dimensions of the niche in which the Kalina heater radiator is installed useful: 54x198 mm. However, if you are planning to install a heater radiator from another car, keep in mind that the edges of this niche are strongly rounded:
How to tighten the electric power steering rack?
The appearance of a knocking sound in the operation of the electric power steering is associated with the need to tighten the steering rack.
How to do it right:
- First you need to disconnect the battery; to do this, disconnect the terminals from it. Unscrew the battery mount; to do this, you need to unscrew two more nuts located at the edges. After this, the battery is removed and put aside.
- Then you need to lift the plastic stand, there are four more screws under it, they can also be unscrewed.
- Having done this, it is necessary to move this stand forward until the platform is disconnected from the air filter housing retainer pad. After this, the trim can be moved back, this will provide freer access to the rail itself.
- At the next stage, you will need to crawl your hand under the rail. Directly below it, as shown in the photo, there is a rubberized cap; it will need to be removed, this will allow the key to access the adjusting nut.
- To perform adjustment work, you will need a special wrench to tighten the rack; without it, the adjustment procedure will not be possible. Using this wrench, you need to crawl under the car rail to install the tool in the required hole.
- When adjusting, be careful not to overtighten the rack. If its tightening is very strong, then when cornering the rack will bite, and this, in turn, may affect the safety of movement. The angle of adjustment is always different, it depends on how much the nut is loose, but usually when performing such work the nut is tightened by approximately 30 degrees. This should be enough to get everything right. After the adjustment is completed, it will be necessary to check that this task was performed correctly. That is, you will need to make sure that the steering wheel turns normally to any position all the way and there is no knocking. If the knock remains, then the adjustment continues.
Photo gallery “Adjusting the steering rack”
1. Slide the stand and detach it.
2. In this place under the rail there is an adjusting washer.
3. Adjustment is made with a special key.
4. Location of the adjusting nut.
Preparing to replace the heater
It is recommended to start work on your own only if you have a garage and a set of tools. Complete disassembly and assembly of the front panel will take the whole day; the simplified method will require at least 3 hours. Tool for work:
- a good set of screwdrivers and wrenches;
- set of heads for 7,8,10,13;
- pliers;
- hacksaw for metal;
- sharp knife;
- Bulgarian;
- reinforced hoses with a diameter of 20 mm;
- container and hose for draining coolant;
- new radiator.
There should be good lighting at the workplace, and during disassembly it will be convenient to put all small parts in separate boxes. After the engine has cooled down a little, begin replacing the heater radiator. This is possible in two ways: by removing the entire panel and by partially disassembling and cutting off the wall of the heater housing.
Attention! You should not pour special sealing compounds into the cooling system. Together with a small leak, they are highly likely to clog the narrow channels of the stove radiator.
How can I lubricate and adjust the EUR?
How and with what to lubricate the amplifier?
Litol can be used as a lubricant; the procedure is performed as follows:
- First you need to remove the plastic casing; to do this, unscrew the bolts that secure it. To unscrew, use a Phillips head screwdriver. It is also advisable to remove the lower cross member of the instrument panel, located under the steering wheel.
- Next, unscrew the two bolts that secure the amplifier itself; for this you will need a 13mm wrench. After this, the column can be released down.
- Unscrew another bolt, after which you can do the actual lubrication.
- First, the steering wheel is turned to the left until it stops. The lubricant is poured into a 10 cc syringe, which needs to be sprayed into the hole formed. You need to throw out all 10 cubes.
- Then the steering wheel is turned to the right until it stops - the syringe is again directed into the hole, all the lubricant is sprayed out.
- After this, the steering wheel should be turned to the middle position and again sprinkled with lubricant into the hole.
- Next, the steering wheel must be turned in different directions until it stops several times. The lubrication operation is repeated again.
- Then all the components are assembled in reverse order.
Replacing the steering cardan on a VAZ 2110 on your own
Replacing the intermediate shaft of the VAZ driveshaft
As many motorists know, the VAZ 2110 often has such a defect, especially after long-term use, as steering play. In this case, only replacing the steering cardan on a VAZ 2110 helps to establish normal operation. You have to dismantle the column and carry out repairs. Replacing the VAZ 2110 steering cardan, despite its apparent complexity, is an operation that can be carried out on your own.