Product delivery options
Note! Below are the shipping methods available specifically for this product. Payment options may vary depending on the shipping method. Detailed information can be found on the “Delivery and Payment” page.
Parcel by Russian Post
Available payment methods:
- Cash on delivery (payment upon receipt)
- Using cards Sberbank, VTB, Post Bank, Tinkoff
- Yandex money
- QIWI
- ROBOKASSA
Shipping throughout Russia. Delivery time is from 5 to 12 days.
Parcel by Russian Post 1st class
Available payment methods:
- Cash on delivery (payment upon receipt)
- Using cards Sberbank, VTB, Post Bank, Tinkoff
- Yandex money
- QIWI
- ROBOKASSA
Shipping throughout Russia. Delivery time – from 2 to 5 days. More expensive than regular delivery by Russian Post, approximately 50%. Parcel weight up to 2.5 kg
Express Parcel EMS
Available payment methods:
- Cash on delivery (payment upon receipt)
- Using cards Sberbank, VTB, Post Bank, Tinkoff
- Yandex money
- QIWI
- ROBOKASSA
Article on the topic: How to vacuum a refrigerator
Shipping throughout Russia. Delivery time – from 3 to 7 days. More expensive than regular delivery by Russian Post, approximately 100%.
Transport companies
Available payment methods:
- Using cards Sberbank, VTB, Post Bank, Tinkoff
- Yandex money
- QIWI
- ROBOKASSA
Delivery is possible to any locality where there is a representative office of the transport company. Delivery time – from 2 to 10 days. Sending large parcels is approximately 50% more profitable than by Russian Post.
Courier delivery in Togliatti
Available payment methods:
- Cash upon receipt
- Using cards Sberbank, VTB, Post Bank, Tinkoff
- Yandex money
- QIWI
- ROBOKASSA
Delivery time from 1 to 12 hours.
Pickup from our warehouse
Available payment methods:
- Cash upon receipt
- Credit, installments
- Using cards Sberbank, VTB, Post Bank, Tinkoff
- Yandex money
- QIWI
- ROBOKASSA
Pickup times must coincide with store opening hours.
The VAZ-2109 was produced quite a long time ago. Over the years of service, its radiator grille was exposed to an aggressive environment in the form of salts and moisture. It is for this reason that more and more often motorists have to change it. Replacing a VAZ-2109 TV yourself can only be done if you have a welding machine.
Similar services
| Painting the front fender of a car | from 2 500 |
| Painting the rear fender of a car | from 2 500 |
| Painting the front car door | from 2 500 |
| Car rear door painting | from 2 500 |
| Car hood painting | from 4 000 |
| Car rear bumper painting | from 2 500 |
| Car front bumper painting | from 2 500 |
| Car trunk lid painting | from 2 500 |
| Car roof painting | from 3 500 |
| Painting the front panel of a car | from 2 500 |
| Painting the rear panel of a car | from 2 500 |
| Painting the rear panel of a car | from 2 500 |
| Painting the car trunk floor panel | from 2 500 |
| Car exterior mirror painting (with installation) | from 1 000 |
| Full car body painting | from 30 000 |
Replacement
To carry out repair work, you need to prepare tools, materials, power tools:
- complete set of keys;
- locksmith - chisel, hammer;
- electric welding machine;
- electrodes dia. 2 mm;
- drill;
- drill dia. 5-6 mm;
- a grinder with a grinding wheel, have a metal disc in stock;
- primer;
- paint;
- solvent;
- aerosol can with anti-gravel composition in black Body 950;
- cotton gloves;
- canvas mittens;
- rags;
- fire extinguisher – you need to check the expiration date;
- plastic containers for 6-7 liters, they can be made from 10 liter canisters;
- safety glasses;
- tassels;
- moisture-resistant sandpaper.
Preparing the machine
Replacing the lower cross member of the VAZ 2109 radiator frame
Article on the topic: TV for the kitchen, how many inches?
Place the vehicle on a level surface:
- Open the hood.
- Open the expansion tank cap.
- Place a container under the cooling radiator and open the drain plug.
- Drain the antifreeze.
- Place the second prepared container under the engine and drain the antifreeze from it.
- After this, install and tighten the plugs.
- Disconnect both terminals from the battery.
- Remove the battery.
- Place wheel chocks under the rear wheels.
Tip: before lifting the front end, it is advisable to remove the rims. Since when carrying out welding work, a spark may fall on rubber cylinders.
- Raise the front of the car with a jack.
- Install standard supports.
- Align the front part of the body level. You can apply a level.
- Remove the front decorative grille.
- Unscrew the headlight mounts from the engine compartment and disconnect the terminals.
- Take them out and put them on a rack in the garage.
- Unscrew the upper radiator mounting. First remove the electrical wiring terminals from the fan and remove the wires as far as possible from the intended work area. If possible, wrap the wires with tarpaulin.
- Tilt the radiator towards the engine and unscrew the clamps securing the pipes.
- Remove the pipes. Move them away from the front end.
- Remove the radiator and fan assembly.
- Remove the radiator inserts from the lower channel.
Preparing the frame
VAZ 2109 radiator frame panel
When carrying out work by one car enthusiast, it is necessary to prepare the purchased parts:
- Clean the frame parts from transport primer. Pay special attention to welding points and bends.
- Use welding to weld the joints.
- Clean with a grinder. If necessary, straighten.
- Apply a solvent with a brush to degrease the metal.
- It is necessary to prime the internal parts first, since after they are installed from the engine they become inaccessible.
- After checking these parts on site, mark them.
- Connect them together with clamps.
- Carry out welding work to connect them. Start welding parts from the top and gradually move to the bottom.
- Clean welded joints.
- Strip the front of the frame down to metal.
- Cover with primer, then paint with one coat of paint.
- The sealant is applied.
Article on the topic: How to watch dvd9 on TV
While the parts are drying, you need to cut off the old frame.
Removing the old frame
Note: before cutting, you need to select a flat piece of wood and cut it to fit the space from left to right. Make marks on the block for the frame, at the installation sites and in the middle of the frame. To prevent welding sparks from hitting important parts, place a sheet of metal in front of the engine and cover the engine itself with a tarpaulin. After this, start cutting.
- Using an electric drill, drill out the spot welds at the fastening points. The outer part of the frame is welded to the side members (see Replacing the front side member on a VAZ on your own).
- Now use a chisel to cut off the remaining weld seams.
Note. If it doesn’t lend itself well, put a cutting disc on the grinder. Carefully, taking great care when cutting, trim the welding areas.
- Remove old frame.
Cost of the kit and work with it in the service
The service station carries out the full range of work to restore the body. You can weld the bottom of a VAZ 2115, the price of work without the cost of dismantling, materials and components starts from 15,000 rubles. It is also permissible to change rotten jacks, sills and replace part of the bottom, the cost of work is up to 10,000 rubles.
Repairing the underbody, like any other part of the body, is classified as labor-intensive and complex. The cost of the repair kit must be added to the cost of the work.
- original floor from AvtoVAZ - from 3,000 rubles;
- bottom with thresholds ─ from 5,000 rubles;
- sound insulation ─ from 500 rubles per 1 sq. meter;
- anticorrosive ─ from 600 rubles per 1 kg.
Simple calculations show that self-repair will cost three to four times less, but only if the driver understands the complexity of the work and has minimal skills in using electric welding and working with metal.
Important points regarding replacement
- When removing the right side of the console, be careful. Behind it are wires that can easily get caught on the side and be damaged. So before removing this cover, you should remove the negative terminal from the battery. You should also turn off the car radio by removing its connector from the common wiring harness located behind the upper instrument panel;
- Removing the plastic handles from the stove levers can cause serious difficulties. The fact is that there are protrusions on the stove levers (top and bottom), and holes on the handles. When you put the handle on, it snaps onto the lever. The only way to remove it is to pry it off with a flat screwdriver as shown in the picture. But when prying up the handle with a screwdriver, you should not bend it too much: the plastic breaks very easily;
The handles on the levers of the VAZ 2115 stove can be removed using a flat screwdriver
So, a novice car enthusiast is quite capable of removing the dashboard from a VAZ 2115 and other cars in this line. All that is required is patience and attentiveness. If, after unscrewing all the fasteners, the dashboard stubbornly refuses to come off, you should inspect everything again: it is quite possible that some tiny screw was missed.
Article on the topic: Which is better: window air conditioner or split system
Purpose of the spar
The spar is a load-bearing body element, which is a beam, serves as the basis for fastening the components and components of the car, and also plays the role of a shock absorber, softening the impact, absorbing deformation. The “nine” is equipped with paired front and rear spars; these body elements experience significant load.
If a car can move without problems with a dented fender and a rusty door, then the car should not be driven with a deformed front spar (PL). If this part is damaged, quite serious problems may arise:
- tires will quickly begin to be eaten away;
- the car is poorly controlled;
- the body loses strength and collapses.
If the condition of the spar is not the most critical, it can be welded, the geometry can be corrected on a special stand (slipway); in case of severe deformation or if there are cracks, the body element should be replaced. But it should immediately be noted that it is very difficult to do such work with your own hands - here it is important to accurately install the part, you must use welding. If the body element is installed incorrectly, the geometry of the body will be disrupted and the work will have to be redone.
How to change a TV on a VAZ 2114
2114 The TV burst below the bumper, should I weld it or replace it and the price?. There is a TV under the bumper.
Similar articles
35 comments on “There is a TV under the bumper. 2114 below the bumper the TV burst, weld or replace and price”
In short, you saw metal like paper there, I once had the same thing, I screwed a corner in there myself, and if you change a new one, it will soon tear, believe me on my words
I cooked, 9 and 14 have the same disease. Replacing the TV will cost 7 rubles.
Brew and let it go and drive, don’t worry
I COOKED FOR KASAR AT A FRIEND'S)
It depends where the guys are, I welded for 2500, it’s better to brew a yard and a corner as an amplifier, the guys say it
It won’t take long to brew a new one
Thanks guys, is there an alternative to TV from 14??
Install a subframe and stop cooking
Install a TV amplifier. Metal pipe. Metal crabs. Change the racks too. And you won’t have any problems. I did this to myself on 99, there are no problems with the front end at all.
Konstantin, it’s better to put the crab plain
Ilnur, Simple, it is silumin. And my roads here are not very good. But I don’t want to change crabs every 2-3 months. I installed steel ones. I plugged in the injection engine! It became a fairy tale and not a machine. The front and rear struts are new. It holds the road remarkably well and absorbs bumps. I made a car for myself and for myself. What I advise others to do is make cars for yourself and for yourself. Take into account the roads of your region or region, or region.
Protective polishing of the body
Protective polishing of the body from 3,000 2. Jig work. installing a car on a slipway from 3,000 elimination of simple distortion of the car body from 3,000 elimination of medium distortion of the car body from 6,000 elimination of complex distortion of the body of foreign cars from 8,000 removal of the front bumper of a car assembly from 500 installation of the front bumper of a car assembly from 500 car rear bumper removal Under the bunch of 500, the rear bumper of the car for a 500 -time bumper bumper is pushed 500 bumper of the rear car - assembled 500 -front bumper disassembly 500 bumper of the front car - assembled 500 door of the car front - to disassemble, collect the rear car of the car - disassemble, assemble 1,000 -door front foreign lands in front, dwarf - dull, dwell replacement with fittings overhaul from 1,500 car front door, rear assembly - replacement with adjustment to the opening from 1,500 side mirror of foreign cars without electric drive - replacement from 500 side mirror of foreign cars with electric drive - replacement from 500 replacement of front headlight from 500 replacement of rear headlight from 500 Replacement of car hood from 1,000 Replacement of roofs car trunk kifrom 1,000Fender replacement Front removalot 1,000 -way of the roof of a car without a rack of 6,000 replacement of a vehicle roof with a hatch assembly 7,000 recaps of the front longer with a spray -shaped 3,500 recovery of the rear panel of the front panel of the car assembly 2,000 Capasals of the threshold of the side of the lining of the car assembly of 3,000 sons of the middle rack with part threshold assemblyfrom 6,000Repair No.1 of the side of a car - sedan7,000Repair No.2 of the side of a car -sedan8,000Repair No.3 of the side of a car -sedan9,000Repair No.4 of the side of a car - sedannegotiableRepair of the side of a car - station wagon No.17,000Repair of the side of a car - station wagon No.28,000Repair of the side of a car - station wagon No. 39 000 Repair of the side of a car - station wagon No. 4 negotiated Repair of the front car mudguard No. 11 000 Repair of the front car mud flap No. 22 000 Repair of the front car mud flap No. 32 500 Repair of the front car mud flap No. 4 negotiated Repair of the front car door No. 19 00 Repair of the rear car door No. 19 00 Repair of the rear car door No. 21 5 00repair of the front door of car No. 21 5 00repair of the front door of car No. 32 500repair of the rear door of car No. 32 500repair of the front door of car No. 4 negotiablerepair of the rear door of car No. 4 negotiablerepair of the hood of car No. 19 00repair of the hood of car No. 21 5 00repair of the hood of car No. 32 500repair of the hood of car No. 4 negotiablerepair front fender of car No. 15 00repair of front fender of car No. 21 000repair of front fender of car No. 31 500repair of front fender of car No. 4 negotiablerepair of roof panel of car No. 11 0 00repair of roof panel of car No. 22 000repair of roof panel of car No. 33 000repair of roof panel of car No. 4 negotiablerepair of roof No. 1 of cover car trunk, 5th door9 00repair No. 2 of the car trunk lid, 5th door1 5 00repair No. 3 of the car trunk lid, 5th door2,500repair No. 4 of the car trunk lid, 5th doornegotiablerepair of the rear panel of the car No.11 500repair of the rear panel of the car No. 22,000repair of the rear panel of a car No. 33,500repair of the rear panel of a car No. 4 negotiablerepair of the sidewall threshold of foreign cars 1,000 Restoration of cloudy plastic headlights of foreign cars 1,000 Abrasive polishing of the car body from 4,000 Protective polishing of the car body 5,000 - 10,000 Replacement of the windshield RUB 2,500 Replacement of the front fender RUB 1,000 Replacement of front fixed wing 3,000 RUR Replacement of the hood 1,500 RUR Replacement of the front spar 9,000 RUR Replacement of the roof 15,000 RUR Replacement of the side threshold 4,000 RUR Replacement of the door 3,000 RUR Replacement of the trunk shelf 4,000 RUR Replacement of the rear arch 4,500 RUR Replacement of the floor (bottom) 12 500 rub. Restoration using tinning sq. see 500 rub. Replacement of the rear fixed wing 12,000 rub.© 2022 Filinn car service network. All rights reserved.
Hello everyone, I wanted to know. Approximately how much does it cost to digest the front TV, and how much does it actually cost? The engine sagged, the TV was torn off, please advise something... TV for VAZ 2110.
Similar articles
32 s on " TV for VAZ 2110. How much does it cost to digest the front TV "
son, first they write the make of the car... and then they ask a question.
here it’s clear that it’s front-wheel drive, most likely 9
Son? Wake up uncle. VAZ 2115 car
Konstantin, around 5k, the TV itself is a ruble, but for the work they will charge almost 4
son, this is for fun, not an insult... I understand that it’s front-wheel drive... but there are people who actually have a TV in front...
Artyom, Thank you very much)
TV on the front, we have about 1 mower...and the work is about 2 mowers
Konstantin, no wonder, it’s too damn expensive, I did it simpler and cheaper. Moreover, even if the new body is standing there with thin metal, it is better to digest the old one and, plus the channels and corners, screw it up for strength
Artyom, Well, my budget is only 6 thousand. I was afraid that I wouldn't make it. Well, brewing with plates probably won’t last long either
and after the channels what consequences do you know no Artem Kuzmin....at the construction site please
...and in life you will deprive others of life
Konstantin, don’t tell me)) I’m telling you, my native metal is initially thin, but if you weld it like that, even scratch the lying ones - don’t give a fuck
Artyom, What if you change the TV and make it stronger?
Alfir, are you crazy?? A Russian-made car was originally a coffin, and what does construction have to do with it? Humor? This is my second year on this topic.
Konstantin, well, this will be the most sex) I just didn’t have enough money for it, it’s possible this way, it will even be better, depending on the state of the bodies of course
Artyom, the TV is dead right now. Well, the top is excellent. And the bottom is broken and even sagging. It sagged and moved a lot.
Alfir, what are the consequences after the channels? They will rot longer
Konstantin, it was like that, I was holding the engine strut, the car was shaking at speed, the gearbox was difficult to shift, I had to cook it, it seemed like a buzzing)
Artyom...why swear...we’re not arguing, we’re discussing
...and if they screwed up, it’s because the fucker was smashed against a piano....I know many who screw up the bars under the bumper...the body doesn’t bend in an accident...but those who fall under these bars get a lot of injuries
….
Konstantin, the crab is sagging, the saber is gone, do the alignment later, look at the pillows at the same time, at the engine and gearbox
Artyom, I changed all the pillows yesterday. How long will it all come out?
but mostly the one who has the channels is to blame... because he is confident in himself due to the reinforcement in the car
Konstantin, well, consider it a nickel for a new body, but a collective farm with xs reinforcement, I cooked it in a friend’s garage
Alfir, what does the channel have to do with it? I welded it onto the bumper?? Or what? Or if you get hit by a car without a channel, will you still live? There will still be an effort, there is no effort, the wheels are already there,
you started about the channel, so finish it....
Alfir, of course, I don’t argue, those who are damn confident in themselves and later end up in accidents in their car, I didn’t cook it for confidence, but just so that it doesn’t fucking fall apart) just creating a threat to themselves and others
Artyom, and I’m not arguing... I welded the TV on a 21093i in its place as it was from the factory... I didn’t fasten it with anything... even much better than it was... before... the former owner welded it with reinforced plates... because the welder took the grinder and swore for a long time when I was redoing the whole thing. and this was my first time dealing with a nine... I thought it came from the factory like this... amplification...
Alfir,
Well, yes, that’s how they gain experience, the auto industry is such an auto industry... Russian...
5000 here I am changing))))))))))) also the TV fell off)))0
they’ll do it if everything is ok, I can recommend the master’s standards and it’s not expensive)
Konstantin, it’s better to change it, if you weld it next to it it will break... I passed
This is definitely going to change. It's better not to joke with this matter. It will cost you more
You can see all the prices for repairing major TV breakdowns. Our company has a policy of accurate prices. If the dispatcher was able to determine that the TV was broken, then the quoted cost will not differ by more than 5% from the actual price for repairs. The company has a discount program.
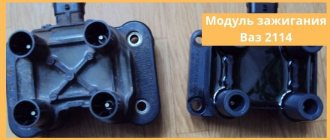
Replacing fuses on a VAZ 2114
An automobile fuse is a protective device that prevents the failure of electrical components of a car. Models of the Samara-2 family (as well as other AvtoVAZ models) use low-voltage fuses. They are a housing with two contacts connected to each other by a protective element made of a metal alloy.
Article on the topic: How to make pizza from what you have in the refrigerator
For VAZ 2114 fuses, repairs include their replacement. The fusible elements are clearly visible, and the fact of fuse failure is easily determined visually. This element melts and is destroyed when the limit value of the passing current is exceeded. Depending on this limit value, fuses vary in color.
| Limit value of passing current. | Color. |
| 5 A. | Orange. |
| 10 A. | Red. |
| 20 A. | Yellow. |
The VAZ 2114 relay and fuse box is located in the engine compartment. It is located directly under the windshield on the left in the direction of travel of the car. The operating instructions state that on the cover of the unit (on the inside) there is a diagram of the location of the fuses. Using it you can determine the location of the required protective element. In the upper right corner of the block there is a bracket for special tweezers. These tweezers make it easy to remove and install fuses.
After replacing a burnt-out element, do not forget to stop by a workshop so that the cause of the problem can be determined and eliminated.
Strengthening and modernization
Strengthening or tuning the body of a VAZ 2109 according to the instructions should be carried out only if the owner is well versed in the design features of the car, has an appropriate understanding of the device, and knows the technical data on weight and other parameters. Otherwise, it is better to entrust the modernization work to professionals at the service station. True, the price of their services in these matters is too high, but you will be satisfied with the result.
So, tuning a VAZ 2109 car is, first of all, upgrading its body. The process always begins with this, and only after that the power unit and other components of the machine are brought to the desired state.
The need for reinforcement at “nine” and the quality of life indicator
It’s interesting that many owners of the “Nine” install modern amplification components more for the sake of beauty. This cannot in any way be a plus for reinforcement, since for the most part such elements can only provide decorative benefits.
On the contrary, if the goal of tuning is primarily to strengthen the body, TK*, spacers, rods and gussets can be selected accordingly. They will significantly strengthen the frame and increase its ability to withstand external influences.
TK* - tubular roll cage
Strengthening, as mentioned at the beginning of the article, is a mandatory procedure. By installing longitudinal and transverse reinforcing elements into the body structure, you can achieve a significant increase in the rigidity of the body frame, and this is already very good. The integrity of the original design obtained at the factory will be maintained and at the same time the corresponding torsional rigidity parameters will increase. At the same time, the weight of the car will practically not increase.
No matter how rigid the body is, it will have weak, vulnerable areas. Even if, under the influence of external forces, these places receive only microscopic damage, over time this will inevitably develop into a big problem.
You can verify the weakness of the “nine” body using a simple example:
- Raise the car on a jack (you can do it on one or both sides at once);
- In 80-90% of cases, car doors jam in the openings, which indicates deformation of the body.
How to amplify a new TV on a VAZ-2109
In the process of self-repair, you can strengthen the structure.
To automate the process, the old TV is removed using a drill. Therefore, the upper and lower parts are often removed separately. During the process, monitor the condition of the bottom - the place where the part is attached to the body. You will need to join two sheets of metal. To do this, leave the width only 2 millimeters, many masters leave 5, which is wrong. Carefully, slowly, remove the metal to leave the desired sheet width. It is necessary to drill holes around the perimeter of the new TV to help secure the part more securely. Through them you can fasten the grille with self-tapping screws. Next, install the headlights, look at the gaps and weld the structure. Clean the weld spots.
To strengthen the structure, weld a profile pipe at the bottom. Weld it to the walls, and then install the second part of the TV. The pipe profile should be square 50x50 millimeters. Thanks to this profile, the structural parts will not rotate. On 16-valve engines, it is imperative to use a pipe, since this power unit is heavier in weight. After you have made the first welding points and secured the part, remove the screws and weld the structure again.
Article on the topic: Why the elenberg TV does not work
If you find an error, please select a piece of text and press Ctrl+Enter.
Sequencing
First, we’ll tell you how to replace this part yourself. You will need to prepare the car - sequentially disassemble it from the engine compartment so that you have access to the radiator. Dismantle it and the old part.
Next you need to do:
- Sand the new part (it is covered with shipping primer) and re-paint it with automotive primer. Do this only in advance, since later it will be impossible to do this work from the engine compartment.
- Use a chisel and hammer to remove the old grate.
- Clean the welding points, putty and coat with primer. Take measurements and weld the new frame. Place the weld points where they were.
- Paint the outside of the structure. It is advisable to additionally cover it with anti-gravel.
- Reassemble the car in reverse order.
Replacing the TV is extremely important, as if it is weak, it may sag and break. The cost of this work at a service station is quite high, so car enthusiasts often try to make the replacement themselves.
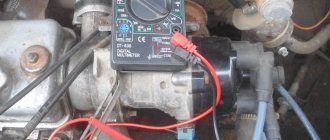
Where is the mass of the ecu for the VAZ 2114
The first ground pin from the ECU on cars with a 1.5 engine is located under the instruments on the power steering shaft mount. The second terminal is located under the instrument panel, next to the heater motor, on the left side of the heater housing.
On cars with a 1.6 engine, the first terminal (mass of the VAZ 2114 ECU) is located inside the dashboard, on the left, above the relay/fuse block, under the sound insulation.
The second terminal is located above the left screen of the center console of the instrument panel on a welded stud (fastened with an M6 nut).
All studs have no corrosion protection other than factory paint. When the paint comes off, the stud rusts. Pay attention to the condition of the stud and treat it with protective lubricant.
Design Features
Model 2114 was built on the basis of the VAZ 2109, it is a restyled version. The hatchback received a new steering column, a modernized dashboard, an updated one and a half liter engine, redesigned for Euro 2 protocol. The VAZ 2114 shares the same wheelbase with the Nine, 2460 mm. The configuration of the bottom panel is the same for the models.
Are there any differences between 2114 and 2115
The VAZ 2115 model is considered a related model. The hatchback is built on the basis of the VAZ 21099 with various transport sizes and shares one wheelbase with the entire Lada Samara family. The standard dimensions of the bottom and sills for VAZ 2108, 2109, 21099, 2113, 2114, 2115 models are the same and interchangeable.
The bottom of the VAZ 2114 structurally consists of the following parts:
Step-by-step guide on how to connect an Android to a radio
- central reinforced panel;
- driver's side panel;
- side passenger;
The factory stock bottom is a one-piece stamped part, primed and painted black. The polyethylene coating acts as protection.
Possible problems
When installing music devices, vehicle owners face various problems. Because of them, the radio for the VAZ-2114 does not turn on or any of the functions do not work.
Most common problems:
- Burnt fuse. This situation occurs due to connecting additional amplifiers or any other equipment to the radio, as well as listening to music at high volume.
- Network short circuit. It appears due to errors made during wiring.
- Oxidized contacts. During operation of the device, moisture may enter its housing. It will damage the contacts and prevent you from using the radio.
A radio is a useful device that should be in every car. Even a novice car owner can connect it on his own. To do this, he will need patience, the correct implementation of all the provided actions and several hours of free time.
Preparation for repair
Repairing the underbody of a VAZ involves a set of measures:
- preparation of the necessary material and tools;
- interior dismantling;
- installing the car on a lift or repair plane;
- cutting out rotten elements of the bottom during partial or complete replacement of a part, if it is necessary to completely digest the body;
- patch welding or bottom welding;
- anti-corrosion treatment;
- installation of interior, replacement of sound insulation, additional work.
To repair the body yourself, you will need to prepare the following materials and tools:
- A new bottom or part of it for a complete replacement, metal patches for a partial repair. It is recommended to take industrial steel with a thickness of up to 1-1.2 mm. The standard metal on the body of the VAZ 2114 has a thickness of 0.9 mm for the bottom, 0.8 for the sills.
- Angle grinder, grinder with a set of replaceable discs from metal, for processing a weld seam, stripping metal from corrosion, to a soft attachment for grinding soil.
- Welding machine. For self-repair, it is recommended to use a semi-automatic machine using wire in a carbon dioxide environment.
- Electric drill, set of drills.
- Sound insulation sheets.
- Metal brushes, coarse and fine sandpaper, chisel, set of screwdrivers.
- Zinc-based primer, putty, set of spatulas, anti-corrosive agent for final processing.
The first stage of work is dismantling the interior and lifting the car onto the overpass.
Dismantling the interior
The bottom 2114 is a stamped part that is welded to the reinforcements of the side members and hinged panels along factory lines. Original replicas require no trimming and are ready for installation. Description of replacement in stages:
- The fuel is drained from the car and the battery is removed.
- The electrics are turned off, the front and rear doors are dismantled.
- The chairs and flooring are pulled out, and the sound insulation is removed.
- All plastic lining of the pillars is dismantled, the dashboard must be covered with a thick piece of rags.
- The glass is sealed on both sides with thick paper.
- An inspection is carried out from the inside, rusty areas are tapped with a hammer, and the scale of work is determined.
CO elements
The cooling system used on the VAZ 2109 operates at low pressure. After studying the components, you will learn about their functions and features.
Element
Peculiarities
It ensures efficient, stable operation of the system. The pump is used to pump cooling liquid, which facilitates its movement along a small or large circuit. The pump consists of a housing, an axle with a pulley located on it connecting to the timing belt, and a plastic impeller. The latter allows the coolant to move. A bearing lubricated with antifreeze is installed between the axle and the housing. Because of this, the presence of water in the system is unacceptable. Otherwise the bearing will collapse
Plays an important role, although in practice the CO can do without it. The system works in such a way that the engine first warms up to operating temperature (about 90 degrees Celsius), after which it is necessary to further cool the liquid. First, the coolant moves along a small circuit - through the jacket into the stove radiator, and then the excess is returned to the expansion tank. But when the operating temperature is reached, the thermostat begins to move the coolant flow into the radiator. A thermostat can be called a mechanical valve that automates the operation of the CO. Hot liquid acting on the bimetallic plate of the thermostat deforms it, which is why the coolant supply valve to the radiator can open or close
The SO VAZ 2109 has a pair of radiators - a stove and a main one. Their design is the same regardless of whether you have a carburetor or an injector. At the same time, there is a noticeable difference between the main and stove radiators. The main one is larger in size, they perform different functions, plus the main one has holes for a sensor that turns off the fan. If the stove radiator can be connected to operation at any time by pressing a button, then the main radiator operates in automatic mode when certain operating parameters of the CO are achieved
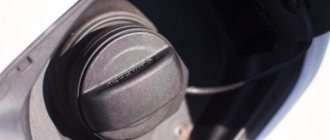
Expansion tank with plug
A constant pressure is maintained inside the CO, which ensures efficient coolant circulation. On the VAZ 2109, the system is designed so that at high pressure the liquid does not boil when it reaches 100 degrees, but at higher parameters. This increases engine reliability. Pressure support is provided by an expansion tank with a cap and a pair of mechanical valves - inlet and outlet. The inlet valve is activated if the pressure drops to 0.13 atm. The second one comes into operation at the moment when the pressure is above 1.3 Atm.
Do not underestimate the role of pipes and clamps in the CO, since it is through them that the coolant is supplied to the required points. When replacing, under no circumstances use cuttings from other pipes that do not correspond to the parameters used previously. Plus, if at least one pipe is damaged, everything will have to be replaced as a set, and not separately
When repairs are required
For all VAZ models, the body was made of black or low-carbon steel of class 08Yu, 08KP. The parts were not galvanized, but were coated with a polymer anti-corrosion composition; the film protected the bottom from moisture for up to 6 months, then natural oxidation processes began. After the purchase, drivers had to carry out thorough anti-corrosion treatment of the metal.
Repair or complete over-welding of the bottom of the VAZ 2114 will be required in the following cases:
- It is impossible to jack up the car; the jacks fall through.
- The floor in the car became uneven, the metal sagged from corrosion.
- The driver's seat cannot be adjusted; when the doors are closed, increased gaps appear.
- Noticeable areas of corrosion on the sills and wheel arches. If you lift the car onto an overpass and check it with an awl, the anti-corrosion layer from the bottom will fall off, and traces of rust will be clearly visible.
Radiator frame
Replacing the radiator frame on a VAZ 2109
The radiator frame has two parts:
- external,
- internal.
Note: When purchasing frames, you must inspect them. They do not have packaging, and loading and unloading is done manually. Therefore, they may have concavities and damage to the metal.
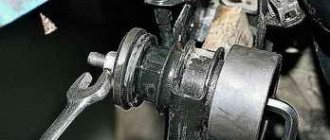
The practical part is removing the generator, disassembling it, repairing it and reinstalling it.
Due to the fact that the generator is located under the hood of the car, it is necessary to turn off the engine, turn the steering wheel to the right all the way and open the hood. The electric generator on VAZ 2108 - 15 cars is installed in front of the engine, in the lower left corner of the engine compartment, between the engine and the cooling radiator.
Before dismantling the generator, it is necessary to disconnect the ground from the battery, i.e. negative contact.
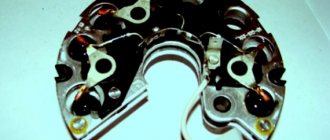
Replacing VAZ generator brushes
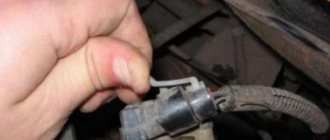
Before removing the generator itself, in order not to do unnecessary work, we remove the charging relay from the generator housing and check the production of the generator brushes.
The charging relay is installed in the rear of the generator housing, and is attached to it with two bolts. To unscrew them you will need a Phillips screwdriver. When unscrewing the bolts, be careful not to drop them on the crankcase guard, otherwise getting them out of there will be one big problem. To remove the relay, you need to disconnect the wire, the “female” contact. After removing the charging relay and visually inspecting the brushes, we decide to purchase a new generator voltage regulator relay or reinstall the dismantled one, depending on the wear of the brushes. For their normal operation, a brush length of at least 4 cm is required. Now we proceed directly to removing the electric generator from the engine.
- We disconnect the wires from the generator - as a rule, they are red and consist of two groups of wires, red. One group consists of two wires and is attached with a nut to a bolt on the rear wall of the generator. The other group consists of one wire and is connected to the generator terminal via a male-female contact, also on the rear wall of the generator.
- To remove the generator from the engine, you need to unscrew two nuts and one bolt in the following sequence: unscrew the nut attached to the generator belt tensioner bar (at the top of the generator), unscrew the bolt securing the tensioner bar to the engine block and remove it. The last step is to unscrew the nut from the bolt securing the generator bracket to the engine block.
- The generator mounting bracket is located at the bottom of the engine block, directly below the generator. After unscrewing this nut, you need to remove the generator belt from the generator pulley itself.
- The generator mounting bolt should be pushed to the left, out of the bracket, until it stops against the body shell or the generator’s mud protection.
- On the right wheel side, you need to unscrew the two screws that secure the dust protection of the generator to the car body.
- If the generator mounting bolt still rests against any body parts, you should press on the engine with one hand, and at the same time pull out the bolt with the other hand.
Bringing the radiator to life
As a rule, it is not the entire system that becomes unusable, but only some part of it. The first signs that it is necessary to intervene are a specific smell in the cabin, the appearance of steam from the exhaust vents, and very rapid evaporation of coolant. First of all, you need to check the radiator. You should not bother with checks when the engine is running or has not yet cooled down. The problem most often lies in the radiator, in the area of the heater tap or in the electrical circuit. Let's look at these weak points in more detail.
Replacing a faucet or electric motor is not the first step; first you need to carefully inspect the radiator for leaks. Then you will have to remove it and check the tightness. The radiator is removed in the following order. First you need to disconnect and (preferably) remove the car battery, completely drain the antifreeze from the cooling system and disconnect the wires from the sensor that turns on the fan motor. Then you will have to remove the fan casing fasteners, disconnect its bracket and wires, and tilt it to the side. This will allow you to remove the protective cover. All that remains is to disconnect all the hoses, slightly tilt the radiator to the side and remove it out.
Replacing the electric radiator motor
It should be noted that it would not be superfluous to replace the rubber shock absorbers located on the radiator holders.
After the unit is removed, it is necessary to put tight plugs on the pipes or holes (except one) to which they are connected. Through the remaining inlet it is necessary to pump air into the radiator. Just be careful: do not allow air pressure to exceed 0.2 MPa. After this, lower the radiator into a bath of water, preferably so that it completely covers it. If air bubbles appear, the seal is broken and replacement is necessary. If there are no bubbles, there is a chance that it is simply clogged. In this case, it is necessary to flush the device.