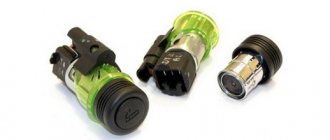
I’ll start with the seal... I’ll say right away that the photos are not mine, but everything will look the same for everyone. There was no opportunity to take photos.
I’ll say right away, it’s easier to find this spare part in a store and buy it. Easier and cheaper
Installing a seal from a Priora on a VAZ 2110 - 12
A very useful modification. Many have probably already noticed that in rainy weather, the side windows on dozens of cars are always dirty. So here’s a solution to the problem. The seal is from Priora. But that’s where the advantages end... The well-known native seal of the VAZ 2110 wipes through the paint while driving , water accumulates and the roof literally rots through.
At Priora, this issue was corrected and the seal there does not touch the paint in any way, much less rub it.
I corrected the consequences quite recently.
ATTENTION! To install this seal, the car must have either a new type frill or a frill from Priora!
With an old-style VAZ 2112 frill, the seal will rest against the frill and simply won’t go into place!
Installation.
According to the instructions, this seal is placed on the removed windshield and then glued in. I didn’t want to change my original windshield just because of the seal and pay 3k for it. There was also our favorite collective farm version.
For simplicity, I’ll show you in the photo:
Refinement of gutters on the windshield from Priora
In order to install gutters from LADAPriora on a VAZ 2110 without modifications, two conditions must be met:
If there is rust under the windshield rubber on your VAZ 2110, then the process of removing it can be combined with installing gutters.
If you are not inclined to remove the windshield from your ten, then to install drains you will need to make minor adjustments to the car:
- First, you need to remove the standard rubber side seals of the windshield;
- Secondly, you will need to trim at a slight angle that part of the drain that will later extend behind the glass (shown in the figure below);
- The next step is to apply silicone sealant to the inside of the drain, extending behind the glass;
- At the last stage, we snap the gutters from LADAPriora.
If necessary, in order to avoid detachment of the upper corner of the edging, it may be necessary to trim or glue in certain places (depend on the situation).
If your VAZ 2110 car has an old frill installed, then the bottom of the drain will rest and it will need to be cut in place (although it is better to replace the old frill with a new frill - no alterations are required for this).
Causes of the problem
As soon as it is discovered that the windshield is leaking, find out why this is happening:
- Incorrect installation. A leak may appear if during installation the technician slightly moves the glass from its normal position. In this case, even with a high-quality sealant, the seam will experience significant loads, and over time, cracks will appear in the sealed layer.
- Violation of body geometry. The body gradually bends due to corrosion of the bottom, pillars and immediately after an impact or collision. As a result, the seam also deteriorates. You can fix the problem yourself if the driver is an experienced straightener and has the necessary tool (laser level) in the garage.
- Poor quality sealant. If the windshield comes off without deformation, they solve the problem themselves or contact a service station.
- The drain is clogged. If debris has accumulated in the drain hole, the leak can be fixed by simply cleaning it.
- Mechanical damage. A crack or hole in the seal or glass is one of the most common causes.
Tools and materials
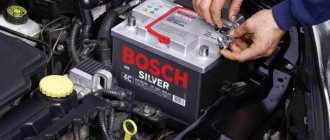
In order for the replacement of the VAZ 2110 windshield to be as high-quality as possible, you should prepare a set of necessary tools, as well as some chemicals.
To work, you will definitely need a new glass to replace the damaged one, and a mounting string with two handles. You should also prepare a repair kit - it is necessary for gluing the windshield. This kit must contain a special glue - “Sicaflex”, “Dinitrol” or “Terasol”. You will also need a primer, without which special glue cannot be used - this is a primer. An activator is also needed. It is used to glue glass. Additionally, for degreasing you will need white spirit, a plastic spatula and plumbing tools. It should be noted that replacing the windshield of a VAZ 2110 alone is almost impossible - experts recommend using help.
Dismantling works
The entire glass replacement process should begin by removing the damaged glass. First, using a plastic spatula, remove all decorative elements, as well as panels located in the car interior. It is necessary to remove the windshield wipers from the outer part, as well as the frill - for this, the plugs and fasteners are removed. At this stage, the VAZ 2110 windshield washer nozzles can also be replaced.
Next, open the hood and remove the rubber glass seal. To easily remove the sealing element, you need to lightly pull the molding by its edge. Once the molding is removed, it will be possible to remove the rubber triangular gaskets. During the installation of new glass, the rubber band on the windshield of the VAZ 2110 will be replaced.
Rubbing body parts
To increase the life of the rubbing parts of the body, they should be lubricated at every maintenance. If creaks or jamming are detected, the body fittings must be cleaned before lubrication.
Lubricate the rubbing parts of the doors
:
- Side door hinges (silicone spray lubricant).
- Door limiter rods (silicone lubricant in aerosol packaging).
- Driver's door lock cylinder (silicone lubricant in aerosol packaging).
- Door locks (silicone spray lubricant).
Lubricate the hood
:
- Hood hinges (silicone spray lubricant or motor oil).
- Hood latch (silicone spray lubricant or motor oil).
Lubricate the trunk lid
:
- Trunk lid hinges (silicone spray lubricant).
- Trunk lid lock cylinder (silicone lubricant in aerosol packaging).
- Trunk lid lock (spray silicone lubricant or motor oil).
Lubricate other body parts
:
- Hinges of the gas tank filler hatch (silicone aerosol lubricant or motor oil).
- Windshield wiper arm joints (silicone aerosol lubricant). Cover the glass with paper.
- Exterior mirror bracket hinges (silicone spray lubricant).
How a windshield is cut
This way you can get to the adhesive layer that holds the glass to the body. To remove the windshield, the layer of glue is literally cut out using a special tool - a string with handles. The most effective tool will be one that has a square cross-section.
The sawing process is performed in a special way. The layer of old hard glue is pierced with any sharp object. One end of the string is inserted into the hole, and the other is pulled into the car interior. Handles are then attached to this tool.
How to fix the situation yourself
In half of the cases, repairs are possible with your own hands. This should be done if:
- the drainage channel is clogged;
- crack in the seal;
- The rubber seal has come off due to poor quality or old sealant.
How to eliminate a leak if the drainage channel is clogged - use a toothpick or thin wire to clear the gap, rotating the device, as if clearing a sewer pipe.
If the reason is a loose seal, then it’s easy to seal the leak with sealant:
- Wipe the elastic band where the glue layer has come off with alcohol.
Do not use acetone or acetone-based liquids as a degreaser.
- Use a spatula to pry off the seal.
- Coat the gap with sealant.
- Press firmly.
- Remove excess glue from the glass.
It is not recommended to use construction sealant. The material takes a long time to dry, leaks, and is difficult to remove from the surface.
If you need to replace a worn rubber band, you cannot do without dismantling it. You will need suction cups to remove the glass, or a qualified assistant:
- Use a knife or thin string to cut through the sealant and pull out the glass.
- Clean the opening, wash and degrease the shield before re-gluing.
- Apply sealant.
- Install the transparent part.
- Dry and check for leaks.
Two people are more effective
One person must be outside and the other person must be inside the vehicle. To effectively cut glass, you need to remember a two-handed saw - this is how you should run a string along the edge of the glass. In this case, it must be pulled at an angle to the cutting site. The second person should move his end of the tool slightly upward - this will not only allow you to safely remove the glass, but also not damage the paintwork of the car body. The glass is cut from below under the hood. Here you should show maximum attention and accuracy so as not to damage the torpedo in the process of sawing the glue.
When the old adhesive layer is cut off along the entire surface of the edges, the window is completely dismantled. You can begin the process of preparatory work on the now free opening. Then, after preparation, the windshield will be replaced on a VAZ 2110 car.
Preparatory work in the opening
Now that the old broken windshield has been completely removed, you can begin installing a new one in its place. However, the opening must first be prepared. First, it is recommended to remove the old and heavily dried glue that used to hold the glass. If rust has formed under it, it must be removed immediately using sandpaper or any other convenient method. The area that has been stripped to bare metal must be primed. This operation should be performed very carefully. When cleaning glue, experts recommend not removing the entire layer. It will be good if a thin layer remains, which will subsequently help the new composition to better connect to the mounting parts.
After cleaning the glass surface from glue is completed, everything that remains should be very thoroughly degreased. It is also recommended to treat the edge on new glass. After the white spirit has dried, an activator is applied to the grease-free areas. In the future, it will contribute to better adhesion. Before applying the glue, you need to warm it up slightly - then it will become softer and more comfortable. Thus, replacing the windshield on a VAZ 2110 car will be much easier. The glue is packaged in a tube - by lightly pressing the tube, it is applied along the edge of the frame of the car. As for the thickness of the layer, there are no specific recommendations - it all depends on the manufacturer and brand of glue. This is usually indicated in the instructions for the product.
Lubricate body seals
To prevent doors from freezing in winter and extend the service life of rubber seals, we apply silicone grease to the external and internal seals:
- Door seals
- Glass guides
- Trunk seal
An example of cleaning the drainage holes on a Lada Vesta car:
How often do you clean the drainage holes and lubricate the rubbing parts of the body? Do not forget to follow other recommendations during regular maintenance (see plan for XRAY, Vesta, Largus, Granta/Kalina, Priora, Lada 4×4).
AvtoVAZ recommendations: the standard protective complex (anti-corrosion treatment) is sufficient to protect the body from corrosion during average vehicle operation. It only makes sense to use additional anticorrosion protection (2 years after purchase) if you intend to use the car for 8-10 years.
Water under the passenger mat of a VAZ 2114 can appear for various reasons. Every owner takes care of his own car, and as soon as even a small malfunction occurs, he immediately begins to sound the alarm, trying to quickly “cure” the car. It would seem that water under the passenger mat of a VAZ 2114 does not cause much concern, but this must be eliminated immediately so that there are no more serious problems in the future.
Installation of a new
On VAZ 2110 cars, replacing the windshield can be done using a special tool - these are suction cups, but you can do without them. Before you begin installation work, it is important to remember: it is strictly forbidden to disturb the layer of just applied glue. New glass is laid on any surface so that its outer side faces up. Then the VAZ 2110 windshield seal is replaced: the seal itself, as well as the molding, is very carefully placed on the edge. Usually these parts are replaced, but it happens that these elements are preserved in good condition. Then they can be used with new glass. If the seal adheres to the glass with insufficient density, it can be additionally secured with tape.
Then the glass is turned over and laid so that its inner side is at the top. The edges of the panel are thoroughly degreased using white spirit. Before installing the glass in its place, the edge must dry thoroughly.
Advised by professionals
To ensure that the installation process is carried out efficiently and is as convenient as possible for those who perform it, it is recommended to open the hood slightly and lower the front door windows. Hold the bottom of the panel with one hand, and pull it inside the cabin with the other and calmly control the installation process. Then the glass is brought with its lower part onto the frame of the opening and carefully lowered onto the frame with the edges treated with glue. Next, special stops are installed under the lower edge. They will help fix the correct position of the windshield and give it the most symmetrical position. It is also recommended to make sure that the element is installed as level as possible in the vertical and horizontal planes. You can check this by looking at the gaps. If replacing the windshield of a VAZ 2110 with your own hands is done correctly, then they will be the same on all sides. If the glass is positioned correctly, you need to fix its position with tape. You need to pull the glass to the roof of the car. As for the glue, it is important to remember that it dries completely only in 12-15 hours, not earlier. Only after this can you operate the car.
How moisture accumulates in a car
She gets there in several ways:
- The first way moisture gets in is the absence of rubber plugs in the lower part of the body that cover the drainage holes. Any trip in the rain will result in water in the lower parts of the body.
- Sunroof. A poorly closed sunroof during rain or car washing will also lead to water in the cabin. The rubber bands that seal the hatch can dry out from age, so water can seep through them.
- If the trunk seal is not doing its job, water will accumulate under the spare tire.
- Another way water forms in body cavities is through condensation. But in order to harm the car, there must be a lot of condensation, and it forms only under certain conditions.
- Water also gets into the car when the drain holes under the windshield are clogged. Rainwater is collected like in a bathtub and poured into the air intake of the stove. Through the filter it enters the passenger compartment on the passenger side.
All car enthusiasts are well aware of how water affects body parts. In those places where water stagnates, rust forms, and then corrosion. If nothing is done, the car will rot from the inside.
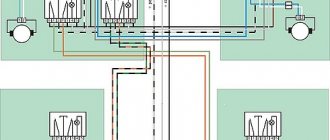
Where are the drainage holes located?
Drainage holes are located in the lower part of the body. There are small holes at the bottom of each door (including the trunk). Photo: drive2.ru
Some of them are closed with a rubber seal, while others are closed with small rubber plugs. These are the drainage holes on the doors.
There are also drainage holes at the bottom of the thresholds. The largest drain is located in the trunk under the spare tire. It is located in the center. There are smaller drains in the side compartments of the trunk. There are drainage holes under the windshield in the body that are supposed to drain water from the wipers.
Here you will find detailed information about the presented Maybach Ultimate Luxury
You will learn about the features of checking a car through the automobile registry of pledges from this material.
How often should drain holes be checked?
As a rule, holes should be checked at least twice a year - in spring and autumn. In the fall - a must! But if this happens, the driver drove along shallow rivers or deep puddles, then the car must be checked immediately after the trip.
Not all drainage holes are sealed with plugs. Small ones are left open specifically to allow moisture to drain. But such holes are also worth checking, as they can become clogged with dirt, dust, leaves and not perform their function.
How to tell if the drain holes are not working
There are several signs that can help you determine that there is something wrong with your drainage holes.
- Wet floor in the cabin after every rain.
- Spread of mold and mildew throughout the lower part of the cabin.
- Unpleasant, musty smell.
- Fogging of windows at any time of the year and in any weather, despite the fact that the stove cannot cope.
- Strange squelching sounds when driving that shouldn't exist.
- Excessive spread of corrosion throughout the lower parts of the body.
- Water in the passenger's feet during rain or after washing.
- The smell of mustiness and rot after turning on the stove.
Necessary tool
To ensure that the replacement of the VAZ 2110 windshield goes smoothly, you should get a gluing kit. When purchased through an online store, the TEROSON PU kit will cost approximately 1,150 rubles, but it will quickly pay for itself. Its composition:
- adhesive-sealant 8596;
- cartridge nozzle;
- primer;
- applicator;
- surface cleaning cloth;
- cutting string;
- instructions for use.
In addition, you need to have other devices on hand:
- a set of flat screwdrivers and spatulas;
- several stationery knives;
- solvent for nitro paint;
- new consumable.
With an assistant, changing a part is easier and faster.
Price is not a guarantee of quality! But you shouldn’t take the cheapest materials either: fakes are not uncommon.
Types of damage
The structure of the windshield is triplex - an impact-resistant material in which there are two layers of glass and a thin film in the middle. This allows the spare part not to crumble upon impact.
Masters divide damage into two types:
- Chips. Only the top layer was damaged. No immediate replacement is needed.
- Cracks. In this case, supply new material as quickly as possible. The film holds the fragments, but not as firmly as before, and in case of potholes, which are not uncommon on our roads, they will fly apart. This will lead to an accident.
If you can’t change it soon, you can resort to several tricks:
- Make perpendicular cuts along the edges of the “web”.
- Drill holes with a diameter of 5 mm along the edges of the crack.
- “Brew” the damage.
All measures will give a temporary effect, and the spare part will still need to be replaced.
Body drainage holes
Condensation may form in the internal cavities of the body. To prevent moisture from causing corrosion, drainage holes are provided in the car body. Over time, they can become clogged with dirt. Check the condition of the drainage holes regularly (preferably after each wash) and clean them if necessary.
There are two drainage holes at the bottom edge of each door. To clean them, remove the edge of the rubber seal. The drainage holes in the trunk lid are also located at the bottom edge.
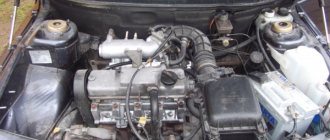
Regularly check the drainage holes in the engine compartment, which are located around the edges:
How to remove and install
We have everything we need, we can get to work. We remove everything unnecessary: wipers, trims, etc. Accessories will interfere with the dismantling of damaged material.
Windshield
We start removing the windshield from the top. From any angle, carefully squeeze it out along with the rubber bands. From inside the passenger compartment we pry up the seal with a screwdriver - this makes it easier to dismantle the front glass on the VAZ 2110.
We work with gloves! If the glass shatters, you will need to remove the shards manually. Take precautions!
We clean the grooves from dirt and small fragments. We put a rubber seal on the new glass. If it has dried out and cracked in places, it is better to buy another one.
Removing old glass
Before removing the old windshield from your VAZ, you need to dismantle the mechanisms that interfere with this:
- Remove the frills and wipers so that they do not bother you.
- Remove the plugs and glass fasteners.
- Find two nuts near the ventilation grille and unscrew them.
- Start removing the rubber seal from the engine compartment. Do this carefully. Remove the screws that hold the sound insulation and windshield seal.
- There is a lock in the center of the seal - your task is to pull out the rubber so that it remains in place.
- Under the frill there is a washer hose and a clamp. You need to cut the hose in an inconspicuous place, and then you will mark the adapter there.
- Now you can completely remove the seal, because nothing is holding it in place.
- All that remains is to remove the decorative molding and the glass is ready to be removed.
It is best to dismantle the glass with a partner who will sit in the cabin. You should not knock it out, even if it is almost completely covered with cracks. It's best to use it in a safe way. Remove the handle from the string and push one of its ends into the interior (to do this, use any suitable gap).
You should cut the glass, placing the string at an angle to it. The person on the outside will guide the cutting string, and the person on the inside will pull it through with rhythmic movements. To do this, you need to install handles on the string. Once you have gone all the way around the glass, work with an assistant to carefully pull it out. If you handle the edge, wear thick gloves.
Direct replacement begins with preparing the seat and the glass itself. For this:
- Remove most of the old adhesive, leaving only a thin and rough layer of it for better adhesion of the installation agent.
- Inspect the frame. If you notice traces of rust on it, you will need to remove it and apply a primer to the cleaned area.
- The edge of the new glass and the seat must be degreased. After this, you can apply the activator.
The glass itself must also be prepared before installation: wipe off dust, degrease, and clean its edge with fine-grained sandpaper. You have to install the molding, and if it does not fit tightly, secure it with tape. Mark along the entire length of the molding the places where the glue will be applied.
Why does water get under the passenger's carpet?
Water may appear under the rug if the heater leaks, and then moisture will pass through the engine into the cabin.
The air intake of the stove can also bring a lot of trouble, since in order to eliminate constant puddles under your feet, you will have to clean the technical drain holes, which are located in the niche under the hood. Then it will be necessary to carry out additional repair work - seal the joints of the air duct and the body with high-quality sealant. It’s better not to waste money on it so that it lasts a long time.
When moisture constantly appears in the direction where the stove is located, it is advisable to figure out whether it is ordinary water or antifreeze. In this case, a damaged faucet is often to blame, and this can be determined by the steam that appears in the cabin; the antifreeze level sensor will also indicate a breakdown - it will definitely light up. Here are other reasons why puddles may form:
Air conditioning is good to have in the cabin, but it can affect the accumulation of water under the passenger mat. The air conditioner has such a device - a condensate drain pipe, and sometimes it can simply fall out of its place, and then water will begin to get behind the seat trim. The consequences are not noticeable - constant dampness, you have to remove the seat, change the upholstery and seal.
A crack may appear in the fuse box, causing water to appear under the mats. You need to check the pedal from which the cable runs to the motor.
In any case, the leak must be eliminated, otherwise corrosion of the body will begin, which will be difficult to stop.