Photo report on the removal and installation of the VAZ 2110 electric window
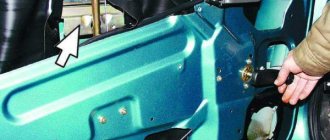
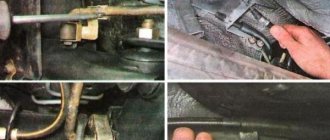
So, before you do anything, you will first need to remove the front door trim. Then, lowering the glass to the required height (so that the bolts securing it to the rail become accessible), unscrew everything with a 10mm head, as shown in the photo:
And the glass can be raised as high as possible so that it does not create problems when dismantling the window regulator. After this, unscrew all the nuts securing the VAZ 2110 electric window, which are shown in the photographs below:
Electric window repair/Replacement of the motor on a VAZ
Enjoy watching everyone, I hope my video helped someone with their choice or technical issues) Spare parts.
Replacing the electric window of VAZ 2110, 2111, 2112 and Priora
Video review on replacing a power window
on
VAZ 2110
-2112 and Lada Priora cars with your own hands.
- Top rack mount
- Bottom mount
- Three lift nuts
Now you can stick your hand into the hole in the door and disconnect the plug with wires from the motor:
Now you need to move the rail together with the mechanism (motor) all the way back, that is, to the back of the door. The result of the work done is clearly shown below:
And then we carefully try to remove the entire structure through the upper hole in the door.
When installing, follow the reverse sequence.
In terms of cost, I can only give an approximate price, and it is about 500 rubles for the motor and about another hundred for the rack and cable.
Good material. It’s a pity that I didn’t say so from the very beginning.
And yet, after watching the video, I decided not to go there.
Thanks to the author of the video.
I had to change the electric window lifter motor on a VAZ 2112, right door. After seeing that the window regulator was on a cable, I tried it and got the following:
Without unscrewing the window lift mechanism itself, I unscrewed the 3 nuts securing the electric motor.
Then, moving the electric motor aside so that the pins would come out of the door body, I removed the lower pin along with the plastic base, pulling it down along the motor body. After that, I bent the electric motor to the right, since the cable allows this, and unscrewed the remaining 2 studs by hand. And having pulled the electric motor from the gear on the cables, he took out the electric motor. I reassembled it in reverse order. It may not be very convenient, but there is no need to unscrew and lower the glass too much. It will lower slightly when the studs are aligned when installing the electric motor into the gear.
Installation procedure for glass lifting devices
With such a kit you can replace the electric window regulator of a VAZ, but it is better to purchase complete kits. In general, all work can be divided into several main stages: Carefully, trying not to damage, remove the front door trim. Otherwise, the entire operation will not be possible. In principle, that's all. Don't pay attention to the orange wire in the photo - it's a mass for heating the mirrors. Depending on which company produced the product in question, it can be installed in the car door as standard, or, if it does not fit in size or other technical characteristics, it can be altered without unnecessary problems. Attach the glass frame with bolts. The speed of glass movement is very slow; if it freezes, the cable may break and the motor may fail.
It is advisable that the device be in a folded state, because, otherwise, it will be difficult to install and connect the window regulator to the on-board network of the car. If you haven’t decided which ESP for VAZ to buy and at what price, then you can read tests and reviews of electric windows, or read reviews from car owners who have already installed ESP in their cars.
Power window lifter.
You can use a button from Kalina, it is more beautiful and a little more expensive than from a VAZ. Their cost is low, so the purchase will not hit your pocket hard.
Then you don't have to read further. After some time, after a lot of walking, it was finally decided to buy the first car I liked and finally go home.
The performance of this component can be determined by replacing the problematic relay for testing with a guaranteed working one. It starts with disconnecting the battery. Very often there is a break between the body pillar and the door. Connect the wiring harness blocks in accordance with the connection diagram. The new VAZ window lifter does not work
Possible malfunctions and ways to eliminate them
Now we suggest that you familiarize yourself with the causes of the main malfunctions that can occur in the operation of a joint venture. If there is a problem, the window regulators will either refuse to work at all, or will function incorrectly or be noisy. Main causes of problems:
- Malfunctions in the operation of the electrical circuit, that is, wiring. If the wiring is damaged, the control motor of the joint venture will no longer receive a signal about the need to raise and lower, and accordingly, the operation of the joint venture will be impossible. The wiring may be damaged, in some cases the reason lies in insulation failure or oxidation of contacts. Damaged sections of the electrical circuit must be replaced, oxidized contacts must be cleaned or replaced.
- Inoperability of the gear motor. Electric motor failure usually occurs after several years of intensive use. If the unit fails, normal operation of the joint venture will be impossible, the drive must be repaired or replaced, here the specific nature of the breakdown must be taken into account.
- Damage to the control module with keys. If all the power windows do not work at once, then most likely the reason lies in the inoperability of the control unit. Perhaps the contact with the car's electrical network has been broken or the board itself has failed. The board itself must be replaced. If only one or more lifts do not function, then the reason may lie in poor contact of the control button with the network. Again, you need to get rid of the oxidation and reconnect the button.
- Mechanical wear of the gear. This problem is usually caused by long-term and intensive use of the joint venture; the gear teeth can be damaged as a result of wear. Repair is impractical; the gear must be replaced.
- The fuse responsible for the operation of the joint venture has blown. The fuse element may be located in the mounting block with all other fuses and relays. But if you installed the joint venture yourself, then the fuse may be located next to the battery. A failed device must be replaced (the author of the video is the V Village Life channel).
FakeHeader
To be honest, I didn’t manage to start making money right away, until I understood all the mechanics of options, I lost about rubles, but as it turned out, it was a precious experience.
Conclusion: In order for the power windows to work without an ignition key, you need to jumper contacts 30 and 87 of relay K5 as in the figure below.
Often, power windows are installed only on the front doors.
Preparing for the installation of electric windows Before starting work, you must purchase all the elements for repair. How to do this is shown in the photo report. After this, be sure to clean the inside of the door so that there is no dust and dirt there. Let's move on to practice: I will not impose on you any specific method of making a jumper; I will describe only the most common ones. You can choose any of these methods that seems most simple and convenient to you.
We recommend: Electrolaboratory is
Replace the fuse with a new one. The sequence of actions is as follows: Remove the glass seal while the work is being performed.
Then I cut off the sides on two buttons, respectively, one on the left side and the other on the right. Next, install the power window in the door through the upper technological hole. The electric motor itself is part of a gearmotor, which also includes a worm gearbox.
Stories from our readers
Preparing for the installation of electric windows Before starting work, you must purchase all the elements for repair. Hi all! It starts with disconnecting the battery. Diagram of electric windows of a VAZ Electric windows are used to raise and lower the door windows and are installed on a part.
Remove the window lift mechanism through the door window. Connecting electrical equipment Now, in order for the power windows to work correctly, you need to connect them. We insert the black wire into socket 1 of the button connector. Black and white - into socket 7. Installing buttons from Granta on 2110 (the simplest diagram)
Sources used:
- https://portalvaz.ru/steklopodemniki-vaz-2110-snyatie-ustanovka-remont/
- https://masteravaza.ru/salon/steklo-salon/zamena-elektrosteklopodemnika-vaz-2110-526
- https://tokzamer.ru/bez-rubriki/shema-podkljucheniya-steklopodemnikov-vaz-2110
Why did the window regulator stop working?
There are quite a few reasons for the breakdown of power windows on VAZ-2110 cars. The most obvious of them are a mechanical malfunction of the mechanism itself or a broken cable. These breakdowns can be identified by visual inspection, after which they can be easily repaired with the appropriate tools.
If the problem does not lie in the mechanism at all, you will have to diagnose the electrical part, which indicates the following reasons for the breakdown of the window regulator:
- failure of the switch itself. To identify this problem, car services use special monitoring and measuring equipment, which makes it possible to determine even minimal deviations of the device’s operating parameters from the norm. At home, you can act by the notorious “trial and error method”. Simply install a new, known-good switch. If the problem disappears, then its cause was precisely the breakdown of this part, which now needs to be replaced;
- electrical circuit break. This problem, which negatively affects the normal operation of the window regulator, can occur due to the disappearance of contact in the block. In addition, the cause of a circuit break is often contamination of the contact groups or damage to the electrical wire;
- short circuit. It can be caused by incorrect operation (or failure) of the gear motor, as well as the power window switch. You can independently identify this problem as follows: replace the fuse and turn on the mechanism. If the new part burns out immediately, then the short circuit occurs exactly on the side with which we experimented. Such a simple and rather primitive diagnosis will avoid the need to disassemble both window regulators;
- problems with the relay. The failure of a given part is determined by replacing it with a known good one;
- fuse blown. The cause of this problem may be either the short circuit already mentioned above, or voltage drops caused by the incorrect operation of any devices. Replace the fuse with a new one - if it also burns out instantly, a complete diagnosis of the mechanism and electrical circuit is required.
Removing the decorative door trim of a VAZ 2110
Before directly repairing the window regulator, you will need to remove the decorative door trim, for which it is recommended to follow the following sequence of actions:
- 1. Unscrew the lower door pocket, held in place by three self-tapping screws, and remove it from the grooves;
- 2. If a speaker is attached behind the panel, unscrew it too and disconnect the power terminal block;
- 3. The VAZ door handle is secured with two self-tapping screws hidden under a removable trim;
- 4. Unscrew the door latch. Now the plastic decorative trim of the VAZ door is held in place only by latches around the perimeter, which we consistently undermine.
At this point, the first stage of door disassembly can be considered completed.
Removing and replacing the window lift mechanism
Replacing the cable without dismantling the entire window regulator is quite problematic, therefore it would be more convenient to remove the entire mechanism. First, you need to lower the glass so that you have access to the brackets securing the glass to the window lifter; unscrew the two fastening bolts with a “10” head.
Next two options
, it would be more convenient to completely remove the glass by turning it slightly counterclockwise, but removing it from the door can scratch or damage the tinting; to avoid this, simply secure the glass with tape.
Next, with the same head, both nuts of the middle fastening, one nut of the lower, and one of the upper fastening of the guide of the lift mechanism are unscrewed.
The plastic socket is removed from the slot of the handle, and the three fastening nuts are unscrewed with an “8” socket head. Now you can remove the window lift mechanism assembly through the door access window.
If the glass was removed completely and the guides were turned away, its correct position in the opening is regulated by moving the bolts in the oval holes of the bracket.
Many VAZ 2110 cars are equipped with electric windows; to dismantle such a mechanism, the principle is the same
, with the only difference that first of all it is necessary to disconnect the switch from the gearmotor, then the lift is removed and the gearbox itself is disconnected.
After removing the entire VAZ 2110 window lifter mechanism, the drive cable is easily replaced with a new one. Assembly is carried out in the reverse order of disassembly. If you have provided new holders (pistons) in advance, no problems will arise.
When installing the glass lift handle, pay attention to the tightness of the fit; if it is loose, you can wrap the slot with a layer of electrical tape or fume tape, pressing it into the grooves of the slots
Work progress
- Remove the door trim (see Removing and installing the door trim).
- Lower or raise the glass so that you can access the glass frame mounting bolts through the top hole of the door. Unscrew the two bolts securing the glass frame to the window lifter slider. Special bolts are used to secure the holder.
- Lift the glass up with your hands until it stops and secure it with wooden or plastic wedges.
- Lower the window slider all the way down.
- On the front door, unscrew the four nuts securing the guide and the three nuts securing the window lift mechanism...
- ...on the rear there are two nuts for fastening the guide and three nuts for fastening the window lifter mechanism.
- Remove the window regulator from the door through the service window.
- Install the window regulator in the reverse order of removal. After installation, check that the glass closes tightly and without warping. If this is not the case, loosen the screws securing the glass frame to the slider and adjust it to the desired position using the oval holes in the slider.
You can purchase all the necessary spare parts and components for your car at a car dismantling center. Excellent prices and quality at the highest level!
In the life of VAZ 2110 car owners, there may be situations when the window regulator may need to be replaced. Below are instructions for its removal and installation, as well as recommendations for repairs (if necessary).
How the mechanism works
A car window regulator consists of the following elements:
- Grooves. Installed on the inside of the door frame. Their purpose is to hold the glass in a certain position.
- "Rails". They are fixed in the door body and are motionless. Their task is in the direction of the glass sheet.
- Seal is a part designed to limit the movement of glass at the top and bottom points. Made from soft rubber.
When replacing the window regulator, consider one more important point. Such mechanisms, regardless of type, consist of a drive and a lifting device.
What types of drives and window lifters are there?
The VAZ 2110 drive can be of two types:
- Mechanical. This mechanism consists of a simple set of parts, a handle and several gears. To move the glass up or down, you need to rotate the handle, clockwise or in the opposite direction, respectively. The forces that are applied when performing manipulations are transmitted to the drive roller.
- Electric. In this case, the glass lifting mechanism has a more complex design. The device includes a drive drum or gear, as well as an electric motor with an internal worm gear.
When replacing a window regulator, it is worth knowing that such devices are classified according to the lifting mechanism and come in several types. By the way, there are various options in VAZ cars. For example, the “sevens” have a rack-and-pinion window lifter, just like the VAZ 2110. The advantage of these mechanisms is that they are easy to install, repair and operate. Of the shortcomings, only one stands out - low reliability. In addition, the rack and pinion window regulator periodically requires lubrication.
Rack and pinion window lift
The second type of window lifter is a cable lifter. It is installed on the “ten”. The advantages of the mechanism include the absence of the risk of glass distortion during the lifting process. As is the case with rack and pinion devices, the level of reliability leaves much to be desired. Despite their affordability, window regulators made of galvanized metal have a good reputation.
The most common causes of malfunction
Window lift repair
On a VAZ 2110, it is advisable to regularly lubricate the velvets with silicone or a penetrating lubricant such as WD-40. Poor glass movement can cause the window lifter to skew during operation, as well as failure of the electric motor due to overload caused by friction forces.
Often the cause of a VAZ window regulator malfunction is directly related to the electric drive. The main problem is the commutator brush mechanism. The brushes may become skewed or stick. In this case, just knock on the door in the area of the electric motor.
Window lift repair
By the characteristic sounds during operation of the VAZ 2110 window lifter mechanism, you can fairly accurately diagnose its mechanical malfunctions. A characteristic growl or crackling sound heard during operation indicates problems with the motor gears. And crunching sounds hint that the VAZ window lifter cable has become frayed.
DIY repair
Sometimes it turns out that it is not possible to purchase a new device, if the cable gets tangled, or the electric motor fails, then there is always the opportunity to repair it all with your own hands. Only obvious mechanical fracture of any part cannot be repaired.
If the electric motor fails, most likely your brushes or windings are simply clogged; just remove the motor, disassemble it and clean it carefully with an alcohol-soaked cloth or gasoline; you can buy special products (enough for more than one time). It is advisable to lubricate all mechanisms during disassembly.
The actual process of dismantling VAZ window regulators
First, we disconnect the glass fastening to the rail. To do this, lower it to the required amount and unscrew the fastening bolts. Next, it is recommended to raise the glass higher and fix it so that it does not interfere with the further disassembly process.
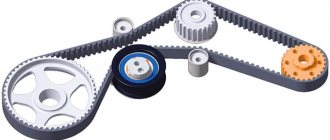
The VAZ window lift mechanism is mounted on the metal frame of the door in three places: the rail is held by a pair of bolts in its upper part, as well as in the lower part, and the lift itself is held by three bolts.
By disconnecting the power plug of the electric motor, you can remove the glass control mechanism through the hole in the top of the door. At this point, the short process of dismantling the VAZ 2110 window regulator can be considered completed.
Thus, VAZ window regulators may not work both for mechanical reasons and due to problems in the electrical circuit. The process of disassembling lifts and troubleshooting is not very complicated, and therefore is preferable to repair at a service station.
Removing the power windows
As mentioned above, the design of the front, rear, right, and left window lifters is different, but the operating principle is similar.
To dismantle, you need to arm yourself with two screwdrivers: a Phillips and a flathead, as well as two keys, 8 and 10.
- First of all, we remove the window lifter handle, for which you will first have to pull out the stopper located under the lever washer of this very handle. Using a screwdriver, move the latch to the side, removing the stopper from the plate. Now you can remove the handle. If the handle is too tightly seated in the seat, you can help it with two screwdrivers, hooking it onto the base.
- Remove the armrest handle. Using a flat-head screwdriver, we unscrew the plugs that hide the two screws that hold the handle, and with a cross-head screwdriver, we unscrew the screws themselves.
- The handle of the exterior rear view mirror is removed, as well as the handle trim.
- Carefully, slowly, the door trim is removed, along with the compartment for things.
The preparatory work is completed, now we proceed to the main stage
- We lower the glass to gain access to the fasteners connecting the device to the glass panel. The device is held on by two bolts, which are unscrewed with a 10mm wrench.
- Now you can either completely remove the glass, or, fixing the glass with tape, continue working, and the second option is more expedient.
- Remove the socket from the slot.
- Using a 8mm socket, unscrew the nuts and pull out the window regulator.
How to install a new window lifter handle?
To do this, you need to take the washer that comes with the new handle and install it in place of the previous one. To insert the new handle, hold the washer with your hand. It is advisable to turn the newly installed handle several times. Thanks to this, better adhesion to the splines of the window lifter gears will be achieved. There should be no sudden movements when raising and lowering the glass. The glass should go down and up smoothly, without jamming or grinding.
If the glass sticks in the middle, it means that there is a foreign body in the mechanism or the set was defective. Also, as mentioned above, the problem may lie in the mechanism itself.
Electric windows for VAZ 2110
Replacing the power window of a VAZ 2110
Today, many car owners are trying to save money on repairs, especially for owners of VAZ cars. Instead of contacting an authorized dealer, they carry out the repairs themselves. In this case, it is recommended to buy new electric windows in specialized stores.
Right choice
When producing the “nine” or “ten”, the plant did not equip them with electric windows; this could only be allowed in the most rare cases. Before moving on to the process called replacing a power window on a VAZ 2110 or installing power windows, you need to choose them wisely. Many car enthusiasts most often give preference to the well-known “Berkut”. There are three types of such parts:
- The cheapest option is cable power windows. This is perhaps the oldest method of lowering and raising windows, which has many disadvantages. Firstly, the glass moves very slowly. In winter, the glass may freeze, causing the cable to break and the drive to fail;
- As for rack and pinion windows, they also often break, especially when the glass freezes. In this case, you need to lubricate the mechanism more often so that it does not jam;
- The most expensive and best option are articulated-lever window regulators. In this case, the glass moves relatively quickly, no noise is heard during the movement, and such mechanisms practically do not fail, even if the glass is frozen.
Replacing a window regulator on a VAZ-2110
This car is practical, has good dynamics and a cozy, quite comfortable interior atmosphere. But this pretty car has a number of technical shortcomings, which, if you don’t know how to eliminate them yourself, can negate all the advantages of the model.
One of the minuses of the dozen is that the window regulators quickly fail.
It would seem such a simple detail, but when it becomes inoperative, it destroys the entire ideal pyramid of comfort, because how can you drive in the stifling heat if you can’t open the window properly?
Today we will talk about how you can replace the window regulators on a VAZ-2110 with your own hands, and possibly repair it. So, let's go.
A window lifter is a device used to move window glass and hold it at the desired point. Currently, the range of window lifters is quite wide, it includes not only many brands, but also differences in target orientation:
- front doors
- rear doors
- left doors
- right doors.
Moreover, the design for each device will be different. But in each of the listed cases there are common points; each window regulator consists of:
- grooves installed on the inside of the door frame, the purpose of which is to hold the glass sheet at a certain point
- “rails”, which are statically fixed in the door body and act as guides for the movement of glass
- seal, damper, made of soft rubber, limiting the movement of the glass sheet up and down.
