I spent a long time on Drive and Google and found several posts about connecting buttons. Of course, there was no option for me, so I had to figure it out myself.
here is the radio pinout sent by a kind Chinese
we are interested in the key1 and key2 wires
Depending on the type of buttons, the connection varies. in the case of an outback, it is connected like this: key1 and key2 are twisted together. further in the standard wiring we look for this connector
There are two wires responsible for the buttons: lilac/white and orange/white. Since the buttons are resistive (each button has its own resistance), we connect one of the wires to ground (I connected it to the negative wire of the radio), and the second wire to key1 and key2 twisted together. we isolate everything well and enjoy))) the buttons are configured in the “buttons on the steering wheel” program, using it you can assign two functions to one button (short press and long press)
Adapter for connecting multifunction steering wheel
In order for the buttons on the steering wheel to start working on the Android radio, you need to make a special adapter and connect it according to the following diagram:
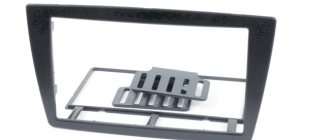
- The dotted line highlights the part that is added to replace the standard MMC.
- The dotted line on the outside is the standard layout, which remains unchanged.
We connect the Android radio through the adapter we made. All that remains is to train the buttons on the steering wheel in the radio settings.
Car audio head unit
Devices for this purpose have four control options.
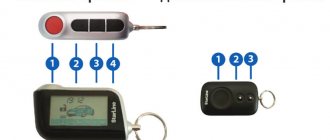
- Control from a remote control (remote control).
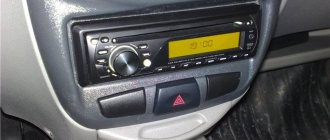
- Push-button control. The buttons are located at the bottom of the front panel of the radio.
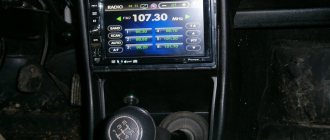
- Touch control of functions and options with one touch to the symbols on the LCD screen, if available.
- Push-button control from the steering column or directly from the steering wheel of the car.
It is the fourth option that we will consider in detail in our article.
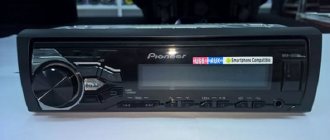
Nissan X-trail, BMW E46 and an aftermarket Pioneer radio will be used as examples.
How to connect a rear view camera
The standard multimedia system, when reverse gear is engaged, supplies a camera supply voltage of 6.2 V to pin C7 (mini-ISO connector). And the Mekede radio on Android only receives 12 volts to pin 6 (section K) and does not supply the power supply voltage for the camera. To connect a 6V camera, you will have to make a voltage level converter using a 7805C stabilizer and two 1N4148 diodes. As a result, a voltage of 6.6 V is formed at the output of the converter. You can also get by with one 6 V stabilizer 7806 (KR142EN5B) without using two additional diodes.
Diagram of contact wires by colors and functions from Nissan X-trail owners
- The blue and purple wires are responsible for adjusting the increase in volume level and switching music tracks or radio stations.
- Orange and green wire - switching stations and tracks. Decrease volume.
- Gray and black - a lot.
- The red wire is voltage.
Having achieved the operation of all the buttons on the control wheel, we move on to synchronizing the steering wheel buttons with a non-standard device through an adapter specially purchased for this purpose.
In this case, all operations are performed according to the instructions supplied by the manufacturer, which are completely true.
After completion of the work, a full check of all functions of the radio control from the steering wheel is carried out.
Connecting the Pioneer radio to the steering wheel of a BMW E46 car via standard buttons
When changing the make of a car, the process of installing and adapting the head unit with steering control is similar to what we have given for Nissan and the Pioneer device. If you still have the desire to carry out all these operations yourself, then you can perform them using this article as a guide. We have not found any clear information from the manufacturers, other than assurances that it is uncomplicated.
We will also not describe installing the button block on the steering wheel and then connecting it to the player. Because this is a topic for a separate article.
And our advice to you, if you set yourself the goal of controlling the radio without taking your hands off the steering wheel, without having buttons on the steering wheel (that is, with their preset), then purchase a ready-made multifunction steering wheel with control buttons. This will save you money and nerve cells. Although, of course, not to the same extent as contacting a specialized car audio center.
Preliminary work
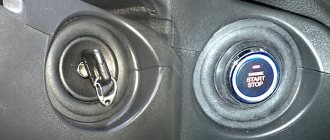
What should you consider during installation? It is necessary to ensure that when parked for a long time, the head unit does not discharge the battery. It is important for many drivers to be able to use their equipment even with the ignition off.
- If there is an old radio in the car, it must be removed. For this you will need a screwdriver. To ensure safety, disconnect the battery.
- Remove the decorative trim (in most cases it is more convenient to do this from right to left, opening the glove box).
- Remove the screws that secure the head unit and the air duct cover. The cover can be removed (not necessary, but this will increase ease of use). But the “Emergency Stop” button does not have to be disconnected from the power supply.
- Remove the radio and turn off the on-board computer screen. Remove it from the bracket. Done, you got rid of the old device - you can install a new one.
Video: dismantling an old radio in a car without special tools
Dimensions and connectors
Radio tape recorders are available in single-block and double-block (1 and 2 din). European manufacturers, as a rule, produce 1 din equipment. Japanese, Korean and American usually work with 2 din - such models have 2 times the height, so the car must have a niche of the appropriate size.
Different radios and cars have different connectors. Most often, the head unit is connected via ISO 10487. Before purchasing, check whether the car has it. Yes, no, it’s okay, the problem can be dealt with in two ways:
- use adapters that allow you to switch from conventional pads to ISO;
- connect directly (the method requires at least a little experience in working with wires).
ISO connector pin assignments
Marking of tape recorder wires
Before starting installation, examine the wires on the new radio. Typically, two ISO connectors are supplied with head units for easy connection. They consist of a group of contacts (each with 8 pieces). One connector connects to the power supply, the second to the sound reproduction system. If your car does not have a corresponding port, disconnect the connector from the wires and connect the equipment using the twisting method.
The wire insulation is colored differently for easy identification. Each of them has its own functions.
- The wide yellow wire is designed to connect to the battery. It must be connected to power only through a fuse.
- The wide red wire is connected to the battery through the ignition switch. In this case, the radio will only work when the ignition is on. Attention! Some car enthusiasts connect the yellow and red wires, but this is not recommended - the battery may quickly discharge.
- The wide black wire is negative. It is attached to the car body.
- The white wire with a blue stripe allows you to use a subwoofer, amplifier and antenna.
- The gray one is for connecting to the “+” terminal, which is located on the front right speaker.
- Gray with a black stripe is connected to the same speaker (terminal “-”).
- White is the “+” terminal of the front left sound element.
- White with black - the same speaker, “negative” terminal.
- The green one must be connected to the “+” terminal of the rear speaker.
- Green and black are the same, but at a minus level.
- Purple - to the one located behind, on the right side, on the “+”; its “brother” with a black stripe - also with dynamics at “-”.
Diagram: where to connect wires of different colors
What features do our adapters have?
- Volume up Volume down Track forward Track reverse Fast forward Fast reverse Mute the sound Switch audio sources (Radio, USB, AUX, Bluetooth.) Turn the display backlight on/off Move back and forth between “folders” Receive a call Reset a call
If necessary, we will configure the adapter according to your wishes!
We can include any of the presented functions in the adapter with:
1) Briefly (quickly) press the button;
2) Long (for example, 3 seconds) pressing the button.
Also, if necessary, we can implement any other functions for the buttons on your multifunction steering wheel, if they are supported by the radio!
Problems you may encounter
Car radio in Opel
In the process of replacing the car radio with your own hands, you may encounter common problems with the Opel Astra and other German models:
- The head unit loses all settings after the ignition key is removed. This problem is very unpleasant and none of the drivers would like to encounter it;
- The car radio can pick up radio channels, including the most powerful and popular ones, but with interference;
- For head units that have the ability to display the date and number on the display, this function is blocked and does not work.
Note. In addition, in the process of replacing a standard unit in an Opel, a problem may arise with the ISO, which was simply cut off by the former owner or missing for some other reason.
KIA Rio -хХх › Logbook › Connecting the standard steering wheel buttons to the “Pioneer AVH-X4550DVD” radio
Good evening! I took the replacement of the standard audio system seriously, namely, I collected all the material on this topic. This must be a civil transition frame, a mandatory connection to a standard USB, and a correct connection of the steering wheel buttons to the radio. At the beginning, I just wanted to buy a steering wheel button adapter. Having read various reviews on the Internet and not entirely positive (the buttons are not programmable, the volume works instead of switching tracks, etc. of course there were ideal connection options), but due to the high cost of the adapter (from 2000 - 4500 rubles) I did not want to experiment, I needed a 100% positive result.
There was another option on the Internet, resoldering the resistors of the steering wheel buttons, it sounded “foreign” at first, but then I decided to experiment (in case of failure, I would order new buttons through AliExpress) I’m not a professional and not a radio amateur, so I’m writing everything in my own words, not judge strictly)))
After reading through various options for wiring buttons, I decided not to complicate things and make a more clear and simpler option.
Not everyone can see the circuit on the drawing and compare it on the board, so I am attaching my photos to facilitate the implantation process.
I bought suitable resistances at a radio store, almost all of them corresponded to the rating of the new circuit (the run-up is allowed, but small, but it’s better to choose exactly so as not to fly over) *********************** **************************************** ************************************** To successfully complete the operation, you will need a little strength, a soldering iron, and attentiveness , good eyesight, resistors, heat shrink tube, minimal experience and of course accuracy! **************************************** **************************************** *********** I placed the new resistors in such a way that when closing the button housing, nothing would interfere. Having purchased, I immediately got to work! Since I like to do everything in a comprehensive manner, I removed the steering wheel to reupholster it with leather and, upon completion of the process, began to work on the buttons. I won’t describe how I removed the steering wheel and buttons (this operation takes 20 minutes), since there is plenty of information on the website. To better digest the process, I signed everything in the photos so as not to get confused. Having laid out two circuits of buttons in front of us, we unsolder the old resistances and solder in six new ones with a higher value (we do everything as in the photo, do not forget to check the values before soldering), be sure to break the circuit as in the photo. A 3.5mm minijack was included with the radio, we just soldered it to connector “B” (this is the mother of the standard connector of the radio) “+” of the minijack is contact No. 4 and “-” is contact No. 17, after replacing the resistors, before How to assemble everything, you need to measure the resistance of all buttons in operation, it must correspond to the nominal value of the circuit.
If all parameters match, feel free to insert the minijack into the radio, assemble everything and enjoy the operation of the buttons. The costs are ridiculous to the point of indecency, only 6 rubles, I’ve been using the buttons for 8 months now, everything works great. I deliberately wrote everything to the minimum to make it clearer, I just need to repeat everything without delving into the theory.
What functions do not work in the standard radio?
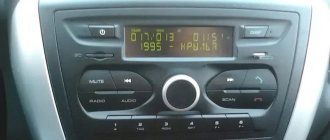
- You can listen to the radio, but due to the mismatch of bands, you need a converter so that there are not 2-4 radio stations, but all broadcasting in your region.
- You can also listen to music from a USB Flash drive or SD Card , but this also has its limitations. The storage capacity is no more than 8 GB and the number of songs is no more than 2000 .
- To view the video, the file must be in MP4 and the bitrate is 360 rubles .
- Bluetooth connection supports up to two devices.
- The menu is only in Japanese, there is no way to Russify it. Few car radios have the ability to switch the language from Japanese to English, but half the functions will be lost.
Setup menu
- Because Honda uses its own Honda InterNavi navigation system, which only works in Japan, we have no use for it.
- Well, I don’t see much point in talking about the television format and its paid subscription - it doesn’t work for us.
- One of the most frequently asked questions is how to change the time? In most radios - no way. Date and time are synchronized via GPS from the satellite. Due to the “closedness” of the operating system manufacturers, installation of third-party applications is impossible.
What could be on the steering wheel?
On our roads you can find vehicles of various classes; naturally, the electronic components of such cars will be significantly different. Multifunctional steering wheels will also differ depending on the class. So, for example, in an inexpensive car, at best the steering wheel will control the audio system, and even then only the function of turning it on or off. Sound adjustments and other settings will most likely have to be made as usual.
If the car is of a slightly higher class, then the steering wheel will most likely also have controls for adjusting the climate system, controlling the on-board computer and cruise control.
In even more advanced versions, you can find the ability to control a mobile phone from the steering wheel. This feature is called “hands free” or “hands free”. Today, many smartphones have the ability to access car audio systems, and by controlling the smartphone from the steering wheel, you can also control the multimedia system.
In addition to the listed functions, the multifunction steering wheel buttons can control:
- Operation of manual and automatic transmissions.
- Monitoring transmission functions in vehicles with all-wheel drive.
- Adjusting the operating modes of the suspensions, which changes the ground clearance and their rigidity.
Multifunctional steering wheels in cars with very expensive equipment, most of the prestigious brands, usually have all these capabilities.
Selecting the necessary parts and tools
First of all, you need to select the buttons. As a rule, they are standard; their size and type depend only on the year of manufacture of the model. The purchased kit should contain two sets of buttons - left and right. As always, such parts are divided into original and non-original. Since the original is very difficult to find - this can be done at various Toyota disassemblies, many people buy non-original parts. They will work perfectly, their only drawback is that over time they will rub considerably. Therefore, it is better to look for original ones.
We couldn't find them at the disassembly site and therefore had to order buttons from the online store. You can see them in the photo below.
No additional adapters are needed, but it is worth finding out whether your car is designed for audio steering or not. If yes, then you can safely install them.
As for spare parts, we will need: a screwdriver - flat and Phillips. This is where the list of tools ends.
Do-it-yourself installation of a 1 din radio
The necessary tools are a screwdriver and a set of plastic clamps.
If you work according to the standard scheme with ISO connectors, then no problems will arise - you just need to follow the rules described above and connect the connectors to the mating parts.
If your car does not have the ability to use the conventional option, you will have to resort to a more complex wiring procedure. It works as follows.
- Using a screwdriver, remove the decorative panel from the mounting location.
- We remove the plugs from the wires and connect the wires with the mating ones in the right places, according to the color scheme.
- We insulate each connection point as carefully as possible to prevent short circuit damage.
- To increase reliability, it is recommended to connect the wires with clamps.
- If your radio comes with steel plates with eyelets, place them on the sides of the head unit. This will make it possible to easily remove the equipment from its seat.
Other advantages of Chinese car radios with 2 din size
Let's look at the main advantages of these car radios:
- Often such car radios are equipped with additional interfaces. So, on the modern market you can find Chinese models that have a built-in GPS module. It’s no secret that this only attracts the admiration of vehicle drivers, who kill two birds with one stone. If previously they had to buy a GPS module, which costs a lot of money, separately, now they can receive it as a gift when purchasing a car radio.
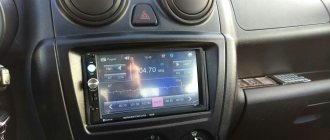
- A high-quality color display is the next big plus of 2-din car radios. This allows you to watch videos on a high-quality color display.
Note. Today, 2 din car radios can be divided into two groups. These are universal and standard radios. The former can be installed in almost any car, the latter - only in specific models. Both have their own specific advantages and disadvantages.
- Another advantage of modern 2 din radios is the ability to connect third-party devices. For example, it could be a rear view camera, which today is an alternative to the entire parking sensor system.
- Not only the rear view camera, but also other additional devices can be easily connected to these car radios. This is explained by the fact that the device’s universal display is adapted to display a wide variety of information.
The advantages of Chinese 2 din radios are undeniable, which makes them very popular not only in the West, but also in our domestic market.
( 2 ratings, average 5 out of 5 )