Comfort in a car is everything for the driver. The neatness with which he keeps the cabin of his car can say a lot about him. But if, in principle, everything is clear with the panels, dashboard and steering wheel, then with the shift knob everything is not so smooth. It is she who gets rubbed off the most. You can hardly handle the panel with your hands, you wipe it, and it’s like new again. You can put a special cover on the steering wheel. But they don’t sell covers for gearbox knobs, and reupholstery from craftsmen will be expensive. In this material we will tell you how you can retighten the gearshift knob yourself.
What will it take?
Both leather and high-quality leatherette are equally suitable for reupholstering the gearshift knob. It is worth paying attention to the word “quality”, since when stitching the edges of a loose and fragile material will simply tear. It is also necessary to pay attention to the covering of the front side of the leatherette. It should be dense and thick so as not to fray from constant hand touches during the first months after reupholstery.
So, when you have chosen a suitable piece of leather (we will focus on it), you should take care of the tools and other consumables. To carry out the work, in addition to leather, we will need:
- Glue "Moment".
- High-quality nylon thread.
- Small, sharpened scissors.
- A sewing needle with an eye suitable for the thickness of the nylon thread.
- Awl.
- Construction tape.
- A table knife or a not too sharp screwdriver.
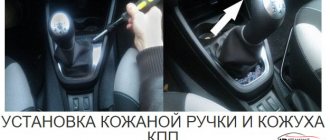
When everything is collected, you can start working. We will tighten the handle of the Lada Vesta car. Re-upholstering the gear knob with leather from Vesta with your own hands will be the easiest thing to do, especially for those who are going to do this for the first time. Let's prepare two patterns, which will subsequently be pulled together (sewn) by us in front and behind the handle.
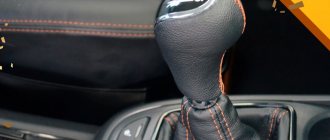
Leather-covered protective cover and lever knob
A fairly popular type of improvement of the gear shift knob is replacing the protective cover and knob with a leather one. What will it take? Leather or high-quality leatherette, thread, scissors, needle, awl and preferably a thimble.
First of all, remove the cover and handle. As a rule, the handle is unscrewed or removed with a slight upward force. The protective cover itself is secured with four latches.
First you need to make a pattern. To do this, you can use your old case. Considering the hardness of the leather, you can pierce holes for the seams with an awl or use a large needle. Also, in order for everything to turn out beautifully, when stitching, you need to make sure that the stitches are even. The fastening plastic at the bottom of the case can simply be glued. After this, the protective cover is installed back and secured using the same 4 latches.
Next, move on to the handle trim. Before cutting out leather blanks for stitching, it is advisable to make patterns. To do this, you can wrap the handle with something, for example, regular film, and then cover it with adhesive tape. Next, make markings with a regular felt-tip pen and cut into 2 parts. This will give you the shape for the pattern. Next, transfer the entire paper, tracing the shape along the contour, cut it out, and only after that transfer everything to the skin. After cutting out the leather workpiece, use an awl to make holes for the stitches and sew them on the handle.
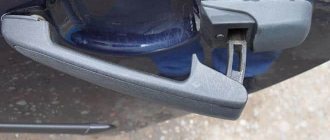
Dismantling the handle
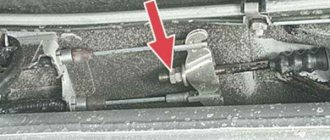
The gear shift lever housing on the handle side is held in place by special high-quality and long-lasting electrical tape. In principle, during assembly, if desired, it can be changed or reinforced with a plastic clamp. What are we doing:
- In the bottom panel, the casing is held in place by a plastic frame snapped into a groove along the perimeter. It won't be difficult to free him. You just need to pull the casing harder, and the frame itself should freely come out of the groove.
- Then we turn the casing inside out and unscrew the handle from the main lever.
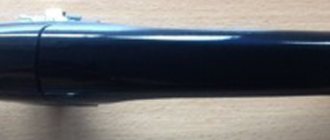
- Now that we have the handle in our hands, we should remove the plastic decorative panel from it, on which there is a diagram of the gear arrangement. This can be done using a dull screwdriver or a table knife, the blade of which is rounded and not too sharp so as not to damage the socket. You can use a hard, sharpened piece of plastic. We insert it into the gap, pry up the panel and pull out its fastenings from the slots. We do the same with the lower part, applying some force. Now the handle is ready for re-upholstery.
Material selection
To restore the aesthetic appearance of the handle of a manual transmission or automatic transmission located in the passenger compartment, you will need to perform the process of re-stretching the product.
The following materials are used to cover the transmission handle:
- Genuine Leather;
- artificial leather;
- faux suede or Alcantara.
All of the above materials are characterized by high performance characteristics, so when choosing, they are often guided by aesthetic indicators. With intensive use, the coating will not break, and if you take care of the selector, this will increase its service life. Each material has properties and features that set it apart from others. Below we will analyze the characteristics of natural and artificial leather, as well as Alcantara, in order to understand what to make a cover for the gearbox lever of a car, no matter what kind of car we are talking about - Ford Focus, VAZ or Mercedes.
Genuine Leather
This material is high quality and expensive. Genuine leather is used for upholstery of car interior elements. If you cover the gear lever with this material, you will ensure an excellent appearance of the selector, and the car owner will get a pleasant feeling from contact with the device.
The main characteristic of leather is wear resistance. As a result of processing during the production of the material, it becomes more resistant to mechanical and chemical damage. The skin is characterized by resistance to ultraviolet rays. It will not fade in the summer sun. When choosing leather for upholstery, give preference to material with a thickness of 1.3 mm. If it is thicker, you will not be able to replicate the shape of the gear lever.
If desired, you can purchase perforated leather. This material differs from the traditional one by the presence of many small holes.
Perforated leather upholstery is characterized by:
- high elasticity;
- softness;
- as well as vapor tightness.
If you decide to choose this material, then choose it carefully. If there are too large holes in the area of the skin, dust and dirt will begin to accumulate in them. Because of this, the gear lever will have to be cleaned more often and thoroughly.
The price of leather is always higher than the cost of other materials. But its use is considered the best option in terms of quality and price ratio. The service life of the leather is long, it will be 7 years with careful use of the gearshift lever. In addition to the high cost, genuine leather also has disadvantages. For example, the chemical elements that are used to harden the material cause a serious allergic reaction in some drivers. In this case, it is better to give preference to eco-leather.
From Dmitry Zaikin's video you can learn how to make a new leather cover to cover an old gearbox lever.
Artificial leather (eco leather)
A special feature of eco-leather is that the material does not emit chemical elements harmful to the human body. It is considered a hypoallergenic fabric. Eco-leather will not deteriorate as a result of temperature changes. The fabric is characterized by high wear resistance and moisture resistance. Faux leather is not leatherette.
The difference between the materials is significant:
- Compound. Leatherette is produced on the basis of polyvinyl chloride. And artificial leather is made from cotton or synthetic fabrics with a polyurethane layer.
- Production technology. In the production of eco-leather, technology is used that allows the material to “breathe”, unlike dermantine.
In appearance, eco-leather does not differ from natural leather. It has the same relief and softness. The cost of the fabric is lower; many car owners choose this material to cover and restore the gearbox selector.
Alcantara
This is an artificial suede made from synthetics. It has a soft and velvety surface, and in terms of characteristics and properties is close to natural leather. The fabric is elastic and durable, characterized by high wear resistance. Alcantara does not fade when exposed to sunlight; it is difficult to burn through. If ash from a cigarette or a spark from a cigarette lighter gets on the fabric, it is not damaged, and its original appearance is not lost even after a long period of use.
The main advantage is Alcantara's ability to retain heat. If you get behind the wheel in the cold season, when negative temperatures prevail outside, you will not touch frozen skin, but warm fabric. The cost of Alcantara is low, it can easily be found on sale, and using this material for covering is much more convenient and easier than leather.
User Garik Silantos showed in his video how to tighten the transmission lever on a car.
Making a pattern
This is the most important step in re-tying the gearshift knob with your own hands. The parts must be cut to the ideal dimensions. And this is achieved by the accuracy of the pattern made. To do this you will need construction tape. The procedure in this case is as follows:
- We draw lines on the front and back of the handle dividing equal right and left sides.
- We completely cover the right half of the handle with pieces of tape, making sure that the edges of the tape fall exactly on the edges of the dividing lines and with an overlap of 3-5 mm in the places where the panel and the lower part of the handle will be located.
- Then carefully remove the tape. This will be the pattern for the leather on the right side of the handle. The left one will serve as a mirror image of the right one.
- Our original pattern has a convex relief. In order to make it flat, carefully use small scissors to cut its edges to such a depth that it becomes completely flat.
- We place the pattern on a piece of prepared leather and outline its outline. There are gaps in the places of the cuts; we fill them, smoothing out the overall contour. The leather for the right side of the handle is ready.
- We turn the pattern over and make a blank for the left half of the handle.
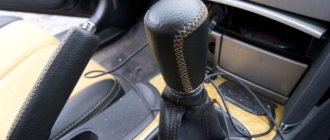
Photo gallery
Below are options for stretching leather on a gear knob with your own hands.
Option 1
Option 2
Option 3
Option 4
Option 5
Option 6
Stitching of cut parts
If you have a machine that can sew on leather, great. If not, the edges of the blanks will have to be sheathed by hand. You need to sew the edges with a simple shuttle stitch, which looks like a regular dotted line. The process includes the following stages:
- We draw straight lines at a distance of 2 mm from the edges of the right and left parts of the workpieces and at an equal distance (steps of no more than 3 mm).
- We make holes in the lines with an awl.
- Then we sew a stitch along the holes using nylon thread of the selected color.
- We make knots at the edges so that the seam does not unravel.
DIY reupholstery process
Reupholstering the interior yourself is a painstaking task that can take you more than one day. All work can be divided into several stages:
- car seat reupholstery;
- ceiling reupholstery;
- door reupholstery;
- front panel reupholstery;
- armrest reupholstery;
- re-upholstering the steering wheel and gear knob.
In order for the work to go faster and better, you should follow several general rules that apply to both large parts with complex shapes and smaller elements of the car.
- All parts must be dismantled, even the smallest and most inconspicuous ones. It may seem to you that pasting, for example, a gearshift knob can be done inside the cabin, but this is not so. The seams will turn out crooked, and the space around will be covered with glue.
- Don't forget to wash the parts and remove any old coating.
- If there is serious damage to the surface to be pasted, for example, dents or deep cracks, they must be restored. To do this, you will additionally need a special putty composition and primer for plastic.
- Leather, both natural and artificial, is an elastic material, so it must be stretched well. If you don't do this, the coating will end up sagging unsightly. To make the leather stretch better, soak it for 20–30 minutes in hot water, but not boiling water. You can determine the required temperature without a thermometer. Use water that you would bathe in yourself.
- During the process of covering the material, warm it up with a warm stream of air from a hair dryer. If you don’t have it in your arsenal, you can replace it with a powerful household one. However, this will affect the elasticity of the skin, so it is better to use a special tool.
- It will be quite difficult to perform some operations alone. So call a reliable friend for help.
When cutting material, be economical. Remember school labor lessons and crafts made from colored paper. You need to arrange the parts patterns so that there is as little empty space between them as possible. This will reduce the amount of trimming.
Now let's look at the reupholstery of each element of the car in more detail.
We recommend: The starter on the “Nine” does not turn: we are looking for the cause and a way to eliminate it
Upholstering the seats
To ensure that the seats are in harmony with the rest of the interior, you can simply sew covers for them. This work is perhaps one of the most difficult, since you need to be able to make patterns according to the parameters of the chairs, and also use a sewing machine. It is best to contact a car workshop for this. But if you are determined to do everything yourself, then read the instructions carefully.
- Measure the height and width of the seat cushion and backrest, as well as the headrest.
- On paper or transparent polyethylene, make patterns of the parts, taking into account all measurements. For greater accuracy, apply the polyethylene directly to the seat and trace the contours.
- Cut out the resulting parts.
- Attach the patterns to the wrong side of the material and outline them with chalk. Leave about 2-3 cm as a margin for later sewing together.
- Using sharp scissors, carefully cut out the leather pieces.
- Before sewing the elements together with a machine, process them with a hand basting stitch. This will ensure that you receive the correct form. Do not pull the parts tightly together. All you need at this stage is to combine the material to get an idea of what the finished product will look like. In case of alteration, such a seam is easy to rip out. To prevent the elements of the product from falling apart, secure them together with pins.
- Carefully try on the resulting covers. If the shape matches and no changes need to be made, start working with the machine.
- If you chose thin leather, but want your covers to be thicker and more durable, use this trick: make similar patterns from thick mattress fabric, and then sew them with leather back to back. If desired, the internal space can be filled with foam rubber. This will make the covers even softer.
- Don't forget to add hooks and garters to secure the cover to the chair.
- If the seats have airbags installed, do not sew these areas on the cover with a sewing machine. It will be much easier to rip a hand stitch.
During the fitting phase, make sure that the covers do not interfere with the operation of the seat belts.
Carefully measure the length and width of all seat components Make a pattern for the front seat, based on the diagram Make a pattern for the rear seat cushion, based on the diagram Make a pattern for the rear seat back, based on the diagram Connect all the parts as shown in the figure
Let's move to the ceiling
Despite the fact that the ceiling has a fairly large surface area, it is quite easy to cover it with material. This is due to the lack of a pronounced relief, such as on the front panel.
- First of all, remove all hanging elements from the ceiling, and then dismantle it. The dismantling principle will vary depending on the car model. This usually requires removing the front seat. The correct procedure is described in detail in the vehicle's operating manual.
- Take a stiff sponge and remove the old coating.
- The old glue will remain on the ceiling. It should also be removed. The easiest way to do this is with a degreaser.
- In order to prepare the surface for applying glue and improve adhesion, the ceiling must be sanded. Use fine grit sandpaper.
- Pasting begins from the center of the ceiling. You need to apply a 10 cm long strip of composition to the central part of the surface.
- Take a piece of material of the required length and attach it to the ceiling. Press the central part and then smooth it with a rubber spatula.
- In order to glue the rest of the skin, you need to apply glue in a similar way at intervals of 15 cm. After each strip, the material must be pressed and smoothed. Don't forget about tension. This way you will avoid sagging.
- Make sure that no folds form. When the material is completely glued, iron it further and then dry it with a hairdryer. When the glue hardens and the leather dries, the product will take its final shape.
- To complete the work, the edges need to be wrapped on the back side of the ceiling and glued, and the excess should be cut off.
Before you start gluing the ceiling, remove the old coating with a hard sponge. Apply thin strips of glue at regular intervals and stretch the material. Press the material and dry it with a hair dryer.
Due to the impressive volume of the ceiling, you may need an assistant during the process of reupholstering it. Have one person stretch the leather while the other applies glue and presses the material to the surface. This way the work will go much faster, and the result will be of better quality.
Armrest reupholstery
In the cabin, only the upper part of the armrest is visible, so it is enough to cover only it. It's very easy to do.
- Remove the armrest cover.
- The new sheathing can be glued directly on top of the old covering.
- Cut a piece of material long and wide enough to completely cover the part.
- Apply a thin bead of glue to one of the edges of the armrest and adhere the material to it.
- Heating the skin with hot air from a hairdryer, stretch it and glue the opposite edge.
- Stretch the leather over the sides of the lid and glue them.
- Cut off the excess.
Glue the skin first to the top and then to the sides
If you want to cover the side parts of the armrest with material, then you will have to make a pattern. There are two ways to do this. The first is to measure the length and width of each of the edges of the armrest, and then draw up a pattern using these measurements. The second method is simpler and more accurate; we will describe it below.
Gearbox knob trim technology
The easiest way to tighten the gear knob is. However, this process uses a certain method, which will also be useful to you when pasting the steering wheel, doors and front panel. In addition, you can use it by covering the entire armrest.
- Wrap the dismantled gear knob with cling film.
- Cover it tightly with masking tape on top in several layers.
- Use a marker to mark the locations of future seams. To do this, you need to trace the curves of the handle.
- Use a utility knife to cut the tape along the lines. If the handle has a standard shape, then you will most likely end up with two parts.
- Attach the resulting patterns to the wrong side of the material, and then trace them.
- Cut out the leather pieces and then sew them together.
- Turn the resulting product out and then pull it onto the gearshift knob. To make the leather stretch better, do not forget to soak it in hot water.
There is another method of covering this part with leather. For it you do not need to sew the material after cutting. Using a sewing machine, make stitches along the edge, retreating 3 mm into the part. The stitches can be made with threads to match the skin tone, or they can be contrasting to create a certain image. Next, you will need to place the parts on the glue, and then use a needle and strong thread to lace the resulting cover, passing the needle under the stitches.
Cut the masking tape along the lines Cut out the leather pieces Sew each piece at a distance of 3-5mm from the edge Pass the needle and thread under the stitches and pull the pieces together
There are various lacing methods: macrame, sports, herringbone and others. Choose the one that seems most aesthetically pleasing and easy to implement.
Choose the type of lacing that is most convenient for you
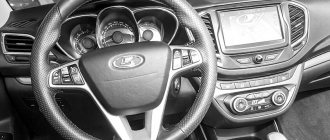
Improving the steering wheel
Making a pattern for re-upholstering the steering wheel is done in the same way as described in the previous section: the surface is wrapped with film, and on top with tape. Lines are drawn with a marker at the seams. They need to be done on the inside of the steering wheel, as well as on the edges of the spokes.
- The resulting parts need to be transferred to the material, retreating about 2 mm inward so that the skin does not sag. Cut out the resulting elements and then sew them together.
- Sew the edges of the parts on a sewing machine, just as described in the alternative option for covering the gearshift knob.
- Attach the cut out parts to the steering wheel. To prevent the material from creeping, place it on a thin strip of glue. There is no need to achieve strength at this stage. In any case, you have lacing in front.
- Take the needle with the thread threaded, and then, passing it under the stitches, lace the braid. You can use different types of lacing for this.
- It is best to start lacing from the bottom of the handlebar and then move counterclockwise.
- Don't forget that you are working with leather. It needs to be constantly straightened and tightened.
- Dry the completely laced braid with a hairdryer. After this, it will take its final form.
We recommend: What to do if the VAZ-2110 fuel pump does not work?
Cover the steering wheel with masking tape in several layers. Remove the masking tape from the steering wheel. Transfer the contours of the parts onto the material. Sew the parts together. Attach the resulting cover to the steering wheel. Pass the needle under the stitches on one side and the other of the cover and pull the sides together.
To make the interior look more stylish, use threads of the same color and the same seam for lacing the covers on the steering wheel and gear knob.
Door reupholstery
The pattern for covering the doors is also made using masking tape. Be sure to mark the locations of the door handle, as well as the window handle. You will need to cut out these areas. The patterns are traced on the material, and then the resulting parts are cut out.
- Before applying glue, all plastic elements must be thoroughly sanded and then degreased.
- Along the line bordering the glass, apply a thin strip of glue and press the material to it.
- Directing a stream of hot air onto the skin, stretch it across the entire door. Watch the holes for the handles.
- Glue the middle and edges of the product in this way.
- To make the coating adhere better, smooth it with a rubber spatula.
- Cut off the excess edges.
- When the door covering is finished, wait for the material to dry completely.
Cover the surface of the door that you will cover with tape with tape. Draw lines on the places of future seams, and then cut the tape along them. Cut the fabric in accordance with the shape of the surface to be covered. Before applying glue, the plastic surface must be sanded and degreased. Press and smooth the leather.
Front panel reupholstery (torpedo)
Reupholstering the front panel is one of the most difficult processes when upholstering the interior, so it is best to do it last. If the part has many curves, then first you need to make a pattern. This is done using masking tape, according to the same principle as when making a cover for the steering wheel and gear knob.
- Trace patterns from masking tape onto the sheathing material and add about 10 mm for the seams.
- Connect the parts with a basting stitch in the same way as you did when making chair covers.
- Try on the resulting product. If its shape matches the shape of the panel, process the seams using a sewing machine.
- Since plastic is used to make the panel, it must be sanded with a fine-grain abrasive, and then the surface must be degreased.
- Apply several strips of glue to the prepared surface and attach the resulting cover.
- Smooth out the material using rubber spatulas or rollers. Make sure all seams are in place.
- Dry the product with a hairdryer.
Cover the front panel with a thick layer of masking tape Cut out the parts from masking tape Transfer the contours of the parts onto the material and cut them out Sew the parts together and glue the material to the panel
If the torpedo has a simple rectangular shape, then the re-upholstering process can be significantly simplified and the step of making a pattern can be skipped. Simply cut a piece of material that is long and wide enough, then glue the leather to the top and stretch it over the entire panel. At the same time, help yourself with a stream of air from a hairdryer and smooth the material with a spatula.
Gluing parts to the handle
Another important point in the process of reupholstering the gearshift knob with leather with your own hands. “Moment” we lubricate the handle completely on one side, we also lubricate the leather blank corresponding to this half on the back side and glue the leather to our half of the handle. It is glued strictly along the drawn dividing lines. Then we repeat the same with the other half.
The slouched edges on the side of the panel and below will puff up. It's okay, that's how it should be. We cut out small corners (cuts) in them, so that later it will be easier to bend these edges and glue them to the inside, on the side of which the panel with speed switching will be mounted, and from the bottom, where the decorative rim will be pressed against the handle.
Assembling and installing the gearshift knob in place
The final stage of reupholstering the gearshift knob is inserting the panel, the lower part and installing the knob in its place. All this is done as during disassembly, only in reverse order. If everything is done correctly and in size, the appearance of your gear shift knob will become many times more impressive and aesthetically pleasing.
If you wish, you can watch the video, which clearly shows all the stages of reupholstery.
Video “Detailed instructions for restoring the gear lever”
The MIS7Ter channel video provides a step-by-step guide to re-upholstering a car transmission selector, indicating the nuances of the process.
Do you have any questions? Specialists and readers of the AUTODVIG website will help you ask a question
Was this article helpful?
Thank you for your opinion!
The article was useful. Please share the information with your friends.
Yes (100.00%)
No
X
Please write what is wrong and leave recommendations on the article
Cancel reply
Rate this article: ( 6 votes, average: 5.00 out of 5)
Discuss the article: