Comfort in a car is everything for the driver. The neatness with which he keeps the cabin of his car can say a lot about him. But if, in principle, everything is clear with the panels, dashboard and steering wheel, then with the shift knob everything is not so smooth. It is she who gets rubbed off the most. You can hardly handle the panel with your hands, you wipe it, and it’s like new again. You can put a special cover on the steering wheel. But they don’t sell covers for gearbox knobs, and reupholstery from craftsmen will be expensive. In this material we will tell you how you can retighten the gearshift knob yourself.
What will it take?
Both leather and high-quality leatherette are equally suitable for reupholstering the gearshift knob. It is worth paying attention to the word “quality”, since when stitching the edges of a loose and fragile material will simply tear. It is also necessary to pay attention to the covering of the front side of the leatherette. It should be dense and thick so as not to fray from constant hand touches during the first months after reupholstery.
So, when you have chosen a suitable piece of leather (we will focus on it), you should take care of the tools and other consumables. To carry out the work, in addition to leather, we will need:
- Glue "Moment".
- High-quality nylon thread.
- Small, sharpened scissors.
- A sewing needle with an eye suitable for the thickness of the nylon thread.
- Awl.
- Construction tape.
- A table knife or a not too sharp screwdriver.
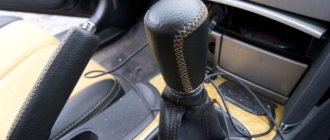
When everything is collected, you can start working. We will tighten the handle of the Lada Vesta car. Re-upholstering the gear knob with leather from Vesta with your own hands will be the easiest thing to do, especially for those who are going to do this for the first time. Let's prepare two patterns, which will subsequently be pulled together (sewn) by us in front and behind the handle.
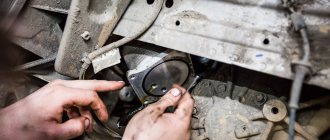
Why do you have to repair the gearbox link?
Failure of the link can be caused by many factors. Different car models are equipped with different types of mechanisms. First of all, it is important to understand what can cause this structure to fail. Sometimes the reasons may lie in your driving style, which will have to be changed if you want to use the car further and longer. Most often, problems with gearbox elements are caused by:
- abrupt gear changes, unnecessary effort, significant load on the mechanism during vehicle operation;
- installation of a low-quality backstage - even in a store, sometimes you can buy not an original spare part, but a fake;
- incorrect installation of the part - if there is a misalignment of even a couple of millimeters, the entire assembly can fail after just a few hundred kilometers;
- displacement during operation, causing uneven loads and pressure on the elements of the unit, the application of forces to change gears;
- failure of nearby parts - often the working elements of the rocker are located in close proximity to the transmission and are exposed to the influence of parts located nearby.
The cause of failure of this complex but fragile unit can be any mechanical impact. Therefore, regular maintenance and inspection of the gearbox is the key to trouble-free driving and avoids additional costs for repairing the gearbox rocker. Early diagnosis of the problem and taking preventive measures are more effective and less expensive than repairing a failed structure.
In most cases, the link does not break suddenly; this is only possible if it is subject to unexpected mechanical damage. Most often, the weak points of the assembly, such as plastic connectors, hinge joints, bearings and other elements, depending on the design of the scenes, will gradually fail.
An impending breakdown can be judged by the following signs:
- difficulties when switching certain gears, the need to apply force to move the gearshift lever to the required position, the feeling of an obstacle when moving the transmission handle;
- the appearance of a crunching sound when changing gears, louder when engaging first and reverse gears (this is due to the fact that the need to engage them occurs after the car has stopped, and in silence the sounds are heard better);
- vibration of the selector lever while the car is moving (this sign may indicate problems with the gearbox, but may be associated with the design features of the vehicle);
- difficulty in switching gears, possible slippage when driving, inability to shift caused by blocking the lever path, blocking of individual transmission functions;
- inability to change gears, jamming of the mechanism - this problem does not arise very rarely and certainly requires a visit to a car service center, since the car cannot move independently.
The latter case will require delivering the car to the station on a tow truck or in tow with the clutch constantly depressed. If the second gear is jammed, an independent trip to the service station is possible. The main thing is to exercise extreme caution while driving, otherwise you can burn out the clutch.
Above we have listed the main symptoms of malfunctions that indicate the need to repair the gearbox. Having noticed them, you should contact a service station for repairs as soon as possible.
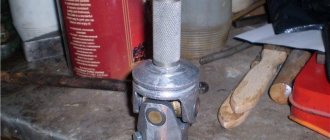
Dismantling the handle
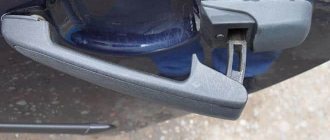
The gear shift lever housing on the handle side is held in place by special high-quality and long-lasting electrical tape. In principle, during assembly, if desired, it can be changed or reinforced with a plastic clamp. What are we doing:
- In the bottom panel, the casing is held in place by a plastic frame snapped into a groove along the perimeter. It won't be difficult to free him. You just need to pull the casing harder, and the frame itself should freely come out of the groove.
- Then we turn the casing inside out and unscrew the handle from the main lever.
- Now that we have the handle in our hands, we should remove the plastic decorative panel from it, on which there is a diagram of the gear arrangement. This can be done using a dull screwdriver or a table knife, the blade of which is rounded and not too sharp so as not to damage the socket. You can use a hard, sharpened piece of plastic. We insert it into the gap, pry up the panel and pull out its fastenings from the slots. We do the same with the lower part, applying some force. Now the handle is ready for re-upholstery.
Material selection
To restore the aesthetic appearance of the handle of a manual transmission or automatic transmission located in the passenger compartment, you will need to perform the process of re-stretching the product.
The following materials are used to cover the transmission handle:
- Genuine Leather;
- artificial leather;
- faux suede or Alcantara.
All of the above materials are characterized by high performance characteristics, so when choosing, they are often guided by aesthetic indicators. With intensive use, the coating will not break, and if you take care of the selector, this will increase its service life. Each material has properties and features that set it apart from others. Below we will analyze the characteristics of natural and artificial leather, as well as Alcantara, in order to understand what to make a cover for the gearbox lever of a car, no matter what kind of car we are talking about - Ford Focus, VAZ or Mercedes.
Genuine Leather
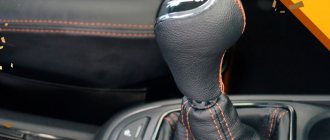
This material is high quality and expensive. Genuine leather is used for upholstery of car interior elements. If you cover the gear lever with this material, you will ensure an excellent appearance of the selector, and the car owner will get a pleasant feeling from contact with the device.
The main characteristic of leather is wear resistance. As a result of processing during the production of the material, it becomes more resistant to mechanical and chemical damage. The skin is characterized by resistance to ultraviolet rays. It will not fade in the summer sun. When choosing leather for upholstery, give preference to material with a thickness of 1.3 mm. If it is thicker, you will not be able to replicate the shape of the gear lever.
If desired, you can purchase perforated leather. This material differs from the traditional one by the presence of many small holes.
Perforated leather upholstery is characterized by:
- high elasticity;
- softness;
- as well as vapor tightness.
If you decide to choose this material, then choose it carefully. If there are too large holes in the area of the skin, dust and dirt will begin to accumulate in them. Because of this, the gear lever will have to be cleaned more often and thoroughly.
The price of leather is always higher than the cost of other materials. But its use is considered the best option in terms of quality and price ratio. The service life of the leather is long, it will be 7 years with careful use of the gearshift lever. In addition to the high cost, genuine leather also has disadvantages. For example, the chemical elements that are used to harden the material cause a serious allergic reaction in some drivers. In this case, it is better to give preference to eco-leather.
From Dmitry Zaikin's video you can learn how to make a new leather cover to cover an old gearbox lever.
Artificial leather (eco leather)
A special feature of eco-leather is that the material does not emit chemical elements harmful to the human body. It is considered a hypoallergenic fabric. Eco-leather will not deteriorate as a result of temperature changes. The fabric is characterized by high wear resistance and moisture resistance. Faux leather is not leatherette.
The difference between the materials is significant:
- Compound. Leatherette is produced on the basis of polyvinyl chloride. And artificial leather is made from cotton or synthetic fabrics with a polyurethane layer.
- Production technology. In the production of eco-leather, technology is used that allows the material to “breathe”, unlike dermantine.
In appearance, eco-leather does not differ from natural leather. It has the same relief and softness. The cost of the fabric is lower; many car owners choose this material to cover and restore the gearbox selector.
Alcantara
This is an artificial suede made from synthetics. It has a soft and velvety surface, and in terms of characteristics and properties is close to natural leather. The fabric is elastic and durable, characterized by high wear resistance. Alcantara does not fade when exposed to sunlight; it is difficult to burn through. If ash from a cigarette or a spark from a cigarette lighter gets on the fabric, it is not damaged, and its original appearance is not lost even after a long period of use.
The main advantage is Alcantara's ability to retain heat. If you get behind the wheel in the cold season, when negative temperatures prevail outside, you will not touch frozen skin, but warm fabric. The cost of Alcantara is low, it can easily be found on sale, and using this material for covering is much more convenient and easier than leather.
User Garik Silantos showed in his video how to tighten the transmission lever on a car.
Such minor tuning of the interior can be carried out both by the car enthusiast himself and in special workshops. If the car owner is not sure that he can handle it on his own, then he can turn to specialists who will do all the work quickly and efficiently.
Making a pattern
This is the most important step in re-tying the gearshift knob with your own hands. The parts must be cut to the ideal dimensions. And this is achieved by the accuracy of the pattern made. To do this you will need construction tape. The procedure in this case is as follows:
- We draw lines on the front and back of the handle dividing equal right and left sides.
- We completely cover the right half of the handle with pieces of tape, making sure that the edges of the tape fall exactly on the edges of the dividing lines and with an overlap of 3-5 mm in the places where the panel and the lower part of the handle will be located.
- Then carefully remove the tape. This will be the pattern for the leather on the right side of the handle. The left one will serve as a mirror image of the right one.
- Our original pattern has a convex relief. In order to make it flat, carefully use small scissors to cut its edges to such a depth that it becomes completely flat.
- We place the pattern on a piece of prepared leather and outline its outline. There are gaps in the places of the cuts; we fill them, smoothing out the overall contour. The leather for the right side of the handle is ready.
- We turn the pattern over and make a blank for the left half of the handle.
Stitching of cut parts
If you have a machine that can sew on leather, great. If not, the edges of the blanks will have to be sheathed by hand. You need to sew the edges with a simple shuttle stitch, which looks like a regular dotted line. The process includes the following stages:
- We draw straight lines at a distance of 2 mm from the edges of the right and left parts of the workpieces and at an equal distance (steps of no more than 3 mm).
- We make holes in the lines with an awl.
- Then we sew a stitch along the holes using nylon thread of the selected color.
- We make knots at the edges so that the seam does not unravel.
Gluing parts to the handle
Another important point in the process of reupholstering the gearshift knob with leather with your own hands. “Moment” we lubricate the handle completely on one side, we also lubricate the leather blank corresponding to this half on the back side and glue the leather to our half of the handle. It is glued strictly along the drawn dividing lines. Then we repeat the same with the other half.
The slouched edges on the side of the panel and below will puff up. It's okay, that's how it should be. We cut out small corners (cuts) in them, so that later it will be easier to bend these edges and glue them to the inside, on the side of which the panel with speed switching will be mounted, and from the bottom, where the decorative rim will be pressed against the handle.
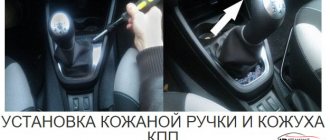
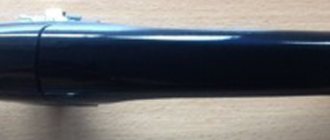
Assembling and installing the gearshift knob in place
The final stage of reupholstering the gearshift knob is inserting the panel, the lower part and installing the knob in its place. All this is done as during disassembly, only in reverse order. If everything is done correctly and in size, the appearance of your gear shift knob will become many times more impressive and aesthetically pleasing.
If you wish, you can watch the video, which clearly shows all the stages of reupholstery.
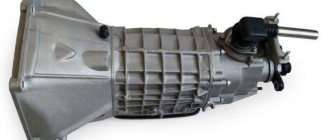
When repairing the gearbox linkage is impractical
Repairing the gearbox linkage may not lead to the desired effect. The node fails due to certain reasons, and they must be eliminated first. The best option would be to contact a service center where they will diagnose the entire transmission.
When carrying out independent repair work, the following faults will indicate that the part needs to be replaced:
- loose fastenings, play in all connections, impossibility of eliminating it using a repair kit;
- deformation of the metal elements of the mechanism, the presence of visible damage that cannot be repaired, improper functioning of the unit;
- the absence of certain elements that are not sold separately - in this case, no repair of the gearbox link will help correct the situation;
- lack of necessary fasteners, and, as a consequence, the impossibility of high-quality installation and configuration of the unit, the impossibility of fine-tuning the positions;
- development of the service life of the main elements of the mechanism - their functioning requires a very high-quality repair of the gearbox rocker with processing of metal parts or a complete replacement of the unit.
In these cases, replacement will be preferable to repairing the gearbox linkage. After this, gears will begin to shift normally, and travel will regain comfort; inconvenience when changing gears will be a thing of the past.