It's no secret that today most modern cars are equipped with security systems and alarms. One of the most popular manufacturers of security systems is the Starline company.
Practice shows that modern car alarms for Starline are full-fledged security systems that provide reliable protection of the car from theft. The alarm also gives a signal to the car owner if there is a mechanical impact on the surface of the car, which may be the harmful actions of intruders. Proper operation of the car security system is the key to safety. Modern starline alarms are reliable and multifunctional, however, sometimes they malfunction. The most common malfunctions in the operation of alarms are decreased or increased sensitivity, which is always accompanied by certain inconveniences.
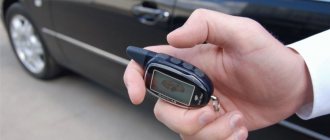
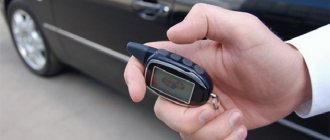
However, it also quite often happens that the alarm simply stops responding to commands from the car owner, which he sends through a special key fob. A person can park a car in a parking lot, turn on the alarm, and 10 minutes later discover that the security system no longer responds to commands. This situation always puts the car owner in an awkward position. So, let's find out what kind of alarm malfunctions there may be, and what to do in such a situation.
Why the alarm may not respond to commands from the key fob
There can be many reasons. Some of them are easy to fix, but others may require professional help. The main reasons for the lack of response of the starline security system to commands can be called:
- wear out of the battery in the key fob;
- presence of radio interference;
- lack of possibility of wave transmission;
- various problems;
- problems in synchronizing the security system with the control panel.
Next, we will consider in detail each of the possible reasons for the lack of response of the Starline security system to commands, and also talk about possible ways to solve the problem.
Car alarm management
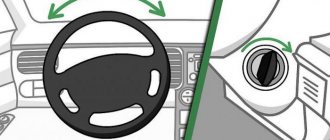
It is possible to control the car alarm after programming the control panel. Setting up and memorizing combinations of remote control buttons allows you to turn security modes on and off, and monitor StarLine A91 alarm sensors. Installation of some options is carried out by manipulating the key in the ignition switch of the car. Programmable options:
- Security switches on and off without sound notifications.
- The StarLine A91 alarm system returns to security mode if it is accidentally turned off.
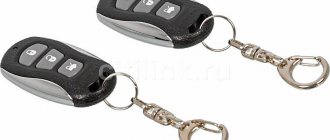
- Indication of the number of programmed key fobs, no more than 4 pieces.
- Automatic start of the car power unit.
The battery in the alarm key fob is dead
Wearing out the life of the battery that powers the key fob is the most common and easily solvable reason for the system not responding to commands. If the starline alarm does not respond to commands, you should first remember the last time the battery was replaced. If the key fob has a screen or LED indicator, you can easily determine the battery status by their brightness. In such a situation, the problem can be solved very easily. Simply replace the old battery with a new one. It is recommended to always take spare batteries with you when traveling. If you don’t have such a battery with you, you can try to take out the dead battery and knock it on a hard surface or rub it with your hands. If there is a residual charge in the battery, such manipulations will allow you to slightly recharge the battery. This may be enough to send one command. If you need to remove the car from the alarm system, then this will be quite enough.
Actions if there is no response to the key fob
A common mistake made by owners of modern alarm systems is to frequently press the key fob buttons when the alarm does not respond to them (for example, in a supermarket parking lot). The fact is that StarLine alarms perceive frequent messages that are not recognized as correct due to interference, as code grabber attempts, and block reception for a while: by trying to perform the same action several times, you are interfering with yourself.
The reason for the loss of response to the key fob is desynchronization of the “floating” code. This is what the Sher-Khan Logicar family of alarms are notorious for. But StarLine alarms do not have this drawback, since the dialog communication mechanism does not require the use of a “floating” code. Therefore, in 90% of cases in which the Starline key fob does not work, pressing the buttons means a malfunction.
It’s easier when your alarm system is configured with telematics capabilities: in previous generations, for this, a beacon was connected to the central unit in slave mode, now the GPS/GSM module is integrated into the central unit itself. To disarm the car in this case, use the mobile application (central button on the main control screen) or send an SMS with code 10 from the phone connected to the alarm as the main one to the SIM card number installed in the alarm.
Something else useful for you:
Video: How to turn off the alarm there is no connection with the key fob
If telematics is not installed in your alarm system, you can still disarm it without a key fob by entering an emergency PIN code. Please note that this function is configured initially (indicated by the “PIN CODE” icon on the screen of the main key fob).
For vehicles with a conventional ignition switch:
- open the door with the key;
- turn on the ignition;
- using the Valet button, enter the first digit of the PIN code by pressing it the appropriate number of times;
- turn off the ignition. If a single-digit code is specified in the settings, the alarm will be disarmed, otherwise repeat steps 3 and 4 for each digit of the code.
On cars with a “Start-Stop” button, another method is more convenient:
- Open the door with the key and do not close it.
- Turn on the ignition (by inserting, for example, the car key card into the slot on the console).
- Enter the first digit of the code by pressing the Valet button.
- Press and release the brake pedal or handbrake lever (when connecting the alarm via Can-bus there is no difference; when connecting via analogue, the reaction depends on the installation method, but one of the two options will work accurately).
- Repeat steps 3 and 4 for each subsequent digit.
We recommend setting the PIN code by changing the factory default “3”. To install the code you need:
- enter the service settings menu - disarm the car, press the Valet button five times and turn on the ignition;
- on the screen of the main key fob the clock will change to the AF indication;
- press button 3 for a long time (until a sound signal), then briefly;
- by pressing button 3, go to function 09 settings (in the factory setting it will be displayed on the screen as 09-1);
- by pressing button 1, set the desired value of the function - from one-digit (09-2) to three-digit (09-4) personal code;
- turn off the ignition to save the setting;
- Press the Valet button 4 times and turn on the ignition again - the alarm will sound 4 times, indicating the transition to the PIN code setting mode;
- confirm entry by pressing the service button once;
- in no more than 5 seconds, enter the first digit of the code, its value can be set in the range from 1 to 6 using the buttons of any key fob (1 short = 1, 2 short = 2, 3 short = 3, 1 long and short = 4, 2 long and short =5, 3 long and short =6);
- in this case, the indication on the key fob screen will change from PS—;
- If the code in step 5 is unambiguous, turn off the ignition. Otherwise, repeat steps 8 and 9 for the second and third digits of the code, while the indication on the key fob screen changes to PS3- (if the second digit is set to 3) and to PS35 (if the third digit is 5).
The best option for reliability, of course, is a three-digit code.
Video: How to attach a key fob to an alarm
Emerging radio interference
Radio interference is also a common reason why the Starline security system does not respond to commands. If the car or its owner is in an area of radio interference, then the alarm may most likely not respond to the command. Interference usually occurs near certain enterprises, secret facilities, and also near airports. Also, a large concentration of cars with security systems in one place can create strong radio interference. Such situations often arise in the parking lots of large shopping centers. Reducing the distance between the signal receiver and the key fob as much as possible can help solve the problem. If you bring the key fob as close as possible, the alarm may respond to the command. If such actions do not help, then all that remains is to tow the car to an area where there is no interference. Then there should be no other problems with the operation of the alarm, and you can safely open your car and start the engine.
Causes of alarm failure and their elimination
First, let's look at why the Starline A61, A91, A93 and other models with feedback do not work and what to do in such cases.
The battery in the alarm key fob is dead
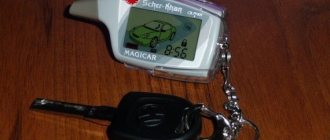
If the primary or secondary communicator stops working, the problem may be due to the battery inside being low. If the system's pager is equipped with a display or diode indicator, then the low battery can be determined by the brightness with which the light blinks. On the screen of modern system models there is a special icon that appears when the power supply is discharged. To solve the problem, the battery is replaced with a new one.
To avoid such a problem during your trip, we recommend carrying spare batteries in your car. If you don't have a spare battery, you can remove the old battery from the case and tap it on a hard surface. Alternatively, you can try rubbing it with your hands. If there is residual charge in the battery, these steps will slightly restore the functionality of the communicator.
Symptoms that will help determine the discharge:
- the car owner needs to press the buttons harder when sending commands;
- The communicator keys work every other time;
- the diode light on the pager body has become dimmer;
- A low battery indicator appeared on the communicator display.
The GO FASTRELIABLE channel talked about the independent procedure for replacing the battery in the Starline communicator.
The car is in a radio interference zone
If a car with a Starline A61, A91 or other model installed does not respond to communicator commands, the reason may be interference. When the vehicle enters an area of radio interference, the transmission of packet data between the key fob and the microprocessor module will be difficult. Most often, interference appears near factories and enterprises, airports and sensitive facilities. The cause of radio interference may be other vehicles equipped with powerful anti-theft systems. In particular, we are talking about places where such cars accumulate, for example, in parking lots near supermarkets and shopping centers.
To solve the problem, you need to minimize the distance between the communicator and the signal transceiver. If you bring the pager as close as possible to the antenna module, the alarm should respond to the command. If such manipulations do not help, then the only option is to tow the car to another place where there is no interference.
Insufficient voltage to operate the system
If the car’s battery is discharged and its charge has dropped to critical, the voltage parameter will become insufficient to carry out the alarm commands. This problem may be caused by a failure of the battery itself. Consumers often encounter such a malfunction during the cold season - at low temperatures the battery discharges faster.
To determine why there is low voltage in the car’s on-board network, you need to test the operation of the battery and generator device.
Wear and tear of the alarm system
The reason why the key fob does not see the signal is often due to wear and tear on the structural elements of the complex. As a result of prolonged use, the operating range of the system is reduced. The reason should be sought in the transceiver installed in the cabin on the windshield. If the antenna module was initially installed incorrectly, its radius will decrease faster. There should be no metal products or electronic devices near the transceiver in the cabin at a distance of 5 cm; their presence leads to interference.
The key fob does not sync with the car
A problem in pager synchronization can be understood by a properly working system and communicator. Typically, this problem occurs as a result of malfunctions in the software installed on the remote control. To turn off the alarm, you will have to open the car door locks with the key. The siren is then deactivated by entering emergency shutdown mode. To solve the problem, you need to perform the procedure of removing the pager from the memory of the microprocessor unit and re-register the device.
To reset and pair a new device, do the following (using the A91 model as an example):
- Turn the ignition key to the Off position. Find the Valet service key and click on it seven times.
- Turn the key in the lock to the ACC position to activate the ignition. The system siren will play seven beeps, this indicates that new communicators have entered the binding mode. Please note that when programming new pagers, information about old devices will be automatically deleted from the memory of the microprocessor unit.
- On the communicator body, find buttons numbered 2 and 3 (in other models, keys 1 and 2 may be used). Press them until the siren speaker plays one signal. The first communicator has been successfully programmed into the signaling memory.
- The previous point is repeated for all programmable communicators. If several pagers are linked, the interval between recording of each subsequent device should be no more than five seconds. After programming the communicator, the siren will emit a signal.
- Deactivate the ignition. Five flashes of light devices will indicate exiting the binding mode.
If the binding does not help, flashing the device can solve the problem. If the signaling device comes with a disk with a program, then you can program the communicator yourself. If it is missing, seek help from specialists.
The Auto Audio Center channel talked about self-binding of the Starline communicator.
Control unit problems
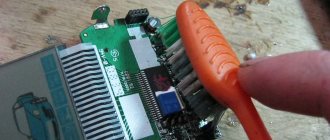
The microprocessor module is the brain of the anti-theft complex. Therefore, faults related to the control unit are considered one of the most serious problems. It is not always possible to eliminate them on your own. You need to open the device and check its board. If traces of dirt or moisture are visible on it, they must be removed with a brush or cotton swab. In modern complexes, this problem occurs quite rarely. Depending on the problem, you can try to solve the problem by flashing the microprocessor module.
Symptoms that indicate a device malfunction:
- The anti-theft system functions do not work correctly. They can work or turn off on their own.
- The microprocessor module responds to commands sent by the communicator with a delay.
- The alarm siren is activated for no reason.
Lack of wave transmission capability
Sometimes situations arise when certain conditions do not allow the signal to be transmitted from the key fob to the starline radio. This situation can also include a dead battery on the control panel, but this is far from the only reason for the inability to transmit waves.
If the car battery is almost dead, then there may not be enough voltage for the security system to receive a signal.
Also, sometimes the key fob can fail if you frequently press the command buttons outside the signal range. Repeated pressing of the function buttons may occur involuntarily when the key fob is in the owner's pocket. If the battery is dead, recharging is necessary to fix the problem, and the problem can be solved for a short time if you bring the key fob as close as possible to the receiver. If the key fob fails, then solving the problem will be much more difficult, since you will need to purchase and configure a new control panel. In some cases, specialists can simply fix the problem, but it is almost impossible to solve the problem yourself. This car can only be opened with a key.
Key fob diagnostics
If the described actions did not help and the alarm key fob does not work, then to determine the causes of the malfunction you will have to disassemble it. The procedure requires the use of a soldering iron with consumables, a tester and an oscilloscope.
Keychain design:
The pager case must be opened and a visual diagnosis of the board and its main components must be performed for damage and cracks. The reason may be poor-quality soldering of the elements. If there are traces of dirt and dust on the board, they must be removed using a regular construction or drawing brush
It is not recommended to treat the board with an alcohol solution or solvents, since this may damage the capacitor devices. If the diagnostics showed disconnection of the contact elements, they must be carefully soldered back. For soldering, a soldering iron with a thin tip should be used.
During the process, you need to be careful not to let tin get on other elements of the board. The voltage parameter on conductors and other components is checked using a multimeter. You need to make sure that the buttons and the LED light are in working condition.
Alexey Tretyakov showed how the procedure for checking the communicator and measuring the current consumption of the device is performed.
Using the tester, you need to diagnose the battery power consumption when you click on the buttons; the operating parameter should be no more than 10% of the total battery charge. When disassembling the device body, it is necessary to diagnose it for activation and response of the anti-theft complex when the keys are clicked.
If there is no connection between the key fob and the system, diagnostics of the capacitor tuning device is performed.
Using a dielectric screwdriver, this element can be rotated by pressing the button and the setting mode is activated. If, after turning the device 10 degrees, you do not notice the synchronization of the complex with the communicator, then the procedure is repeated. It is necessary to carry out the task only if you have skills in the field of electronics and electrical engineering. Otherwise, this may lead to breakdown of the anti-theft system.
Diagnostics of a microprocessor device:
- Use an oscilloscope to diagnose the device's power supply.
- Carry out diagnostics of the generator unit and make sure that the pulses are passing. Testing actions are performed on the pins of the microprocessor device.
- Make sure that a pulse is output from the communicator on one of the contacts of the block. Evaluate the correctness of the encoding of the transmitted packet data and check the frequency of signal transmission. This is required in order to verify the presence or absence of pulses.
- If there are signals, but there is no response, look for the reason in the communicator.
Alarm problems
Any malfunctions in the operation of the starline security system can significantly reduce the range of the signal, or provoke a complete lack of response to commands. This problem is a common cause of unexpected loss of communication with the security system through a key fob, the performance of which always decreases over time. The range of the signal from the key fob is gradually decreasing. This occurs due to wear and tear on the equipment. Also, failure to respond to a command can cause damage to the receiver antenna. If the alarm does not respond to commands at all, this may indicate that errors were made during the installation and configuration of the systems. In most cases, it is impossible to fix installation problems and errors yourself. The best way to solve the problem in such a situation is to contact the service center for professional repair services from qualified specialists.
Starline app doesn't work
The Starline mobile application is available for many alarm models, including E90 and A92. This application allows you to control many alarm functions remotely. But it happens that the phone does not see the car or does not trigger. As a rule, the reason is maintenance work on the server - over time, the system restores functionality. Also, to determine the problem, you need to send commands directly from the computer, and not from the phone, in order to understand whether the problem is the server or the application on the mobile.
Problems synchronizing the key fob with the security system
If the starline security system itself and the key fob are working properly, but the signal is not transmitted, this may indicate a failure in synchronizing the key fob with the signal receiver on the security system. As a rule, this occurs due to failures in the control panel program. In this case, you need to unlock the car with the key, after which the alarm can be turned off using the emergency shutdown function. Reprogramming the key fob will help solve the problem. This is quite easy to do. Manufacturers of security systems provide detailed instructions that describe the procedure for reprogramming the control panel. Also included in the security system kit you can often find a disk with software that makes it easy to carry out the reprogramming procedure. Car owners who are well versed in modern technologies can do this themselves, and if problems arise, they can contact specialists.
Setting the volume of siren confirmation signals
Starline A93 – basic alarm functions
To determine the sound volume of the Starline A93 alarm when controlling security functions, you will need:
- Make sure that the external siren control mode is active (configured via the central unit).
- Activate the main menu by pressing the setting key 5 times.
- After activating the ignition, find the SOUN section on the display (switching is done using buttons with a triangle symbol).
- Long and then short press the key located next to the button with the circle icon.
Automatic arming To enable this mode, use the cursor to activate the icon on the key fob display. With the doors closed, turn off the ignition, exit the vehicle and close all doors: vehicle
- 1 siren signal;
- 1 light signal.
10 seconds after all doors are closed, the security mode will automatically turn on: car
- 1 siren signal;
- 1 light signal;
- the door locks will close.
keychain
- 1 signal will sound;
- an indication of the armed mode will appear.
If one of the door limit switches is faulty (permanently closed), then automatic arming will not occur
(see “Checking the serviceability of limit switches”).
If the hood or trunk is open, then after the security system is armed, 4 siren signals and 4 light signals
.
This prevents not only car theft, but also battery theft.
- Automatic heating of the power plant.
You can program the motor to turn on at certain hours and heat it up to operating temperature. Additionally, you can assign interior heating. - Setting up service options. The owner of a Starline car alarm can prescribe the time for oil changes, scheduled repairs, etc.
Info
During operation, the screen will show how much time is left before a particular procedure.
- Turbo timer. A useful Starline option for owners of turbocharged cars. After a fast drive, some parts of the intake tract heat up to serious temperatures. Instant shutdown of the engine negatively affects the viability of the elements.
Channel activation occurs only automatically
.
Option 4:
unlock relay disabled This option disables the additional. channel number 8. The central locking control will be carried out through additional channel No. 5 or via the CAN interface or in an alternative way, for detailed information see
in the installation instructions. Type of equipment connected to additional channel No. 8, to be specified during installation of the complex.
Turbo timer mode*
For cars with turbocharging, a special mode is provided - the turbo timer mode, which allows you to maintain engine operation after turning off the ignition with the key for some time necessary to reduce the speed of rotation of the turbine.
To use this function, the complex must be connected to the engine starting circuits (contact car alarm installers).
Can't disarm car alarm
It happens that at first glance everything is working properly, but the security system does not show any signs of reaction to the command to turn off the alarm. There may also be no response to other commands, but often other functions work properly. Often the reason for the lack of response to commands lies not in the key fob, but in the car’s security system itself. This situation arises due to several reasons.
System malfunction in the control unit
Secret Valet button The software of the security system control unit may also experience malfunctions. In such a situation, as a rule, the security system does not show any signs of operability at all. If the alarm was turned on, it will be impossible to turn it off via the key fob. The only way out is to open the car with the key and try to use the emergency shutdown. Reflashing the control unit will help restore the functionality of the security system. This is much more difficult to do than reprogramming the control panel, so to solve the problem it is better to contact a specialized service center.
Malfunction in the electronics of the control unit
Malfunctions in the electronics of the security system control unit are the most serious problem, since such problems cannot be eliminated by repair. The only way to solve the problem is to completely replace the security system control unit, which is very expensive. However, there is good news. Such a malfunction occurs very rarely in modern security systems. There are several indicators that indicate an imminent breakdown of the control unit electronics:
- some functions of the security system suddenly disappear;
- failures occur in the system's response to commands;
- The siren turns on spontaneously.
Disabling the alarm
The key fob is lost or faulty, but you need to get into the car? But how to do this if it is under alarm? You need to disable the security system. There are several ways to do this. Whatever method you choose, you must disconnect the terminals from the battery.
- The “Valet” or “Valet” button can be located in different places. You should inquire about its location immediately after installing the security system. This button allows you to disable the system, after which the driver can safely get to the service center and solve the problem with the key fob.
- Emergency shutdown can occur in various scenarios, depending on what security system is installed in the car. For the most part, the driver’s actions come down to repeatedly switching the ignition key to different positions, after which it is necessary to quickly activate the service button a specified number of times.
- Disconnecting the system from power involves working with the wires. If this prospect does not scare you, then you will have to perform the following steps:
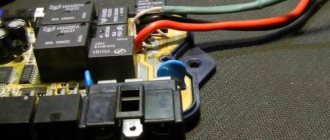
- under the torpedo we find the signaling unit;
- we pull out the wires and try to start the car.
Car engine lock
Sometimes it happens that the security system does not respond to the command to turn on the engine. This happens due to malfunctions in the engine blocking relay. In such a situation, it will be impossible to start the engine using any of the usual methods. However, car owners who have skills in working with car systems and also know the location of the locking relay can start the car by closing the corresponding contacts. Such manipulations will help start the engine in order to drive the car to a parking lot or to a workshop, where specialists will carry out a full repair of the engine blocking relay.
Thus, we have reviewed the most common Starline alarm malfunctions and tried to describe in detail the symptoms of each of them. Now any driver will not be surprised when problems arise, since they can easily be used to identify what the actual problem is and how to fix it.
In any case, do not despair if there are malfunctions in the operation of the car security system. As a rule, this problem can be solved quite easily and quickly, and serious problems occur only in rare cases.
Other reasons for the key fob not working
If the above actions do not have the desired effect, then all further measures involve carrying out repair work using a soldering iron, multimeter and oscilloscope.
- The key fob body is opened and its contents are carefully examined for microcracks and traces of low-quality soldering.
- Various dirt, wool, dust, and debris are removed with a soft brush. You cannot wipe microcircuits with alcohol or other solvent - this can lead to destruction of the capacitors.
- The loose contacts and parts are carefully soldered back into place.
- The voltage of conductors and other elements is checked with a multimeter. It is also advisable to check the functionality of the LED and buttons.
The multimeter also checks the battery power consumption when pressing a key - its value should not exceed 10% of the total battery charge.
When disassembling the key fob, it is advisable to check it for operation and for the system’s response to pressing buttons. If there is no connection, it is worth checking the tuning capacitor - there is a high probability that the reason lies there.
Using a dielectric screwdriver, the capacitor is rotated by 10 degrees while the key is pressed and the programming mode is turned on. If the system has not been synchronized, the action is repeated.
It is advisable to carry out the entire procedure described above only if you have at least minimal knowledge in electrical engineering. Otherwise, there is a high probability of complete failure of the car alarm system and the need for repair work.
The lack of response of the alarm system to key fob commands is not the worst failure. You can fix it on your own, the main thing is to correctly determine the cause of the malfunction.
Resetting settings on SCHER-KHAN alarm systems instructions and tips
SCHER-KHAN brand car alarms of all series are reliable and multifunctional security systems characterized by stable operation. But if used incorrectly or for a long time, or if the settings are set incorrectly, malfunctions may occur in the operation of the alarm system.
Automatic switching off and on of the security mode, disarming immediately after installation, no reaction to an impact, errors on the display, inability to start the engine - these are just a few common problems when using SCHER-KHAN. What to do if there are problems? It is recommended to perform a factory reset.
Resetting values for programmable functions from menu No. 1
SCHER-KHAN machine security systems differ in functionality, but not in control principle. Therefore, the instructions for resetting the settings will be the same for both the popular model Sherkhan Magikar 5 and for devices of earlier and later releases.
You need to do:
Press buttons (the purpose can be found in the instructions) I and II simultaneously. Hold them for at least 2 seconds. Wait for a short single sound and light signal. The device will perform them once. Sound and light signals make it clear that the user has successfully entered menu No. 1 of Sherkhan 7 or another SCHER-KHAN model. Hold button III for 0.5 seconds (short hold)
Carry out the procedure three times. Pay attention to short signals with light and sound from the device each time you press it. There definitely must be. Wait until the alarm emits three consecutive light and sound alarm signals.
The last point is performed after a short time of 7-15 seconds. They symbolize that the factory reset of functions from the programmable menu was successful.
Resetting values for programmable functions from menu No. 2
The principle of operation will be similar, only to enter menu No. 2 you need to hold down for at least 2 seconds. key fob buttons numbered I and IV. Performing this action will result in short alarms with light and sound. They confirm that the login was successful.
Next, reset the settings like this:
- Press the key fob button III for 0.5 seconds three times.
- Wait for a short emergency flash signal and siren.
- Wait for reset confirmation. This will happen after a short time. Confirmation will be a three-time siren sound and a three-time flash.
Display mounting in different ways
Let's say the new display is equipped with a flexible cable, as shown in the figure:
Then, under no circumstances tin the pads on the board. Anyone who tins copper will never connect a cable attached with hot-melt adhesive. In another version, when the display is equipped with copper leads, everything is simpler. The contact pads are tinned in order to solder the leads to them (shown in the video at the end of the review).
Before installation, make sure that your printed circuit board looks like the following figure:
When clearing paths, you can use a scalpel, but you can’t press too hard. The display cable is tried on in place, positioning it so that the stripes are above the tracks.
Next you will need to warm up the cable. To do this, the soldering iron tip is passed from one side of the substrate to the other.
Otherwise, the polymer from which the substrate is made will melt. It is allowed to use a soldering iron with a thermostat (power should not exceed 40 watts). It is also recommended to place paper under the sting, but not just any paper, but taken from a sheet of self-adhesive film.
The sequence is as follows: select the minimum temperature of the regulator, try to fix 2-3 outer tracks. It didn’t work, so they raise the temperature by 10 degrees, try again, and so on. Once installation is complete, install the battery and check that all indicators are lit. If this is not the case, try heating the cable from the display side, but remember that the glass may burst due to temperature changes.
The result of our efforts is shown in the figure (the substrate has melted a little).
It will be easy to connect the display to the key fob by connecting the parts with solder. Let us immediately note that this method is non-standard, and the result cannot be called durable. It’s just that copper leads have the property of springing, and after a while they will definitely fly off. This is what the display looks like with pins:
We will have to tin all the contact pads, and to solder the leads to them, we need to use brackets. Each bracket is made from winding wire, cleared of enamel.
Here is the sequence of installation steps:
- We clean and tinning all contact pads (soldering iron power should not exceed 40 watts);
- We solder a bracket to each pad;
- We try on the display, bite off the ends of the leads to the desired length (use regular side cutters);
- We perform soldering. It is recommended to solder the first and last pin first.
Note that during the tinning or soldering process, rosin remains on the board. This is not scary, since this material does not conduct current if we are talking about small voltages. In general, rosin residues cannot cause a short circuit, there is nothing to be afraid of.
Note that it is necessary to shape and shorten the leads before soldering, and not after it.
Otherwise you will reduce the longevity of the contact. Do not use soldering irons with too much power (more than 40 watts)! Otherwise, the foil begins to peel off. Before installation, you can practice on unnecessary parts. The contact pads are very thin and can be easily damaged. Remember this.
The result of all efforts looks like this:
Even if the picture is not very aesthetic, everything will work. After completing the installation, you do not need to check the strength of each of the contacts - it is enough that current flows through them. After installing the battery in the compartment, we check the functionality of the key fob. Then we perform the assembly.
Setting up the Starline car alarm key fob
- The ignition is turned on, the protective mode is turned off. This is the first step when setting up the StarLine key fob.
- The protective mode is activated by only 1 button, which is pressed 7 times successively and quickly.
- Successful communication between the components is indicated by a seven-time beep sound after the ignition is turned on.
- Buttons 2 and 3 are used simultaneously. They are held until the system receives a 1x signal.
- The ignition turns off. Blinking the turning lights five times will confirm the correctness of the actions. The alarm configuration for this function is completed.
Enabling auto alarm
Only a master can correctly configure Starline autostart. It uses setting a special PIN code to implement the function. The device memory saves all settings specified by the manufacturer. If additional autorun installation is necessary, the alarm setting is reset to its original state.
In a separate algorithm, actions are performed to prepare the system for launch:
- Maintaining a neutral position for the lever that controls the manual transmission.
- Removing the key from the lock after the engine has started running. The engine is left running.
- Starting the brake operation in manual mode.
- Close all doors along with the hood and trunk.
A convenient option is to enable autostart from the key fob, depending on the temperature and time indicator.
Setting the time
The issue is resolved by a not-so-complicated sequence of actions:
- Wait for two simultaneous sound signals to appear after pressing the third button. Then other signals will follow, there are also two of them. This means that you have finished entering the watch settings. At the next stage, two indicator lights turn on on the screen.
- The minutes are adjusted by pressing button 3 once. Buttons 1 and 2 are pressed respectively to increase or decrease the value.
- Activating the alarm function involves pressing button 3 next time. The hour value is adjusted by buttons 1 and 2.
- The minutes are set by repeatedly using button 3.
- The alarm is activated if button 3 is used again.
- In the future, the same button is responsible for the timer. Buttons 2 and 3 increase or decrease the available values.
- If nothing is pressed for 5 seconds, the alarm settings are simply closed.
Adjusting the volume of sound alerts
In this case, you will need a tool called VALET. First, turn off the ignition, press the button 5 times, and turn on the engine again. Then button 2 is pressed, followed by the appearance of SO UN.
When setting up, start by holding down button 3 for a few seconds, then press the button on the left. The display will show the exact number corresponding to the current volume level. The desired levels are adjusted by continuing the adjustment with the 3rd button. Then you can start using the StarLine alarm system.
Adjusting the sensitivity of the shock sensor
And here you need button 3. It is enough to hold it for a few seconds, then release the button and press it again. The sensitivity of the sensors is adjusted by buttons 2 and 3. The latter is pressed if it is necessary to save the results of the settings.
How to reset the key fob settings?
Sometimes you need to forget previous settings in order to restore the device to its factory state. And there is nothing complicated here if you follow this order:
- Turn on the ignition with the key in the lock.
- VALET from the Starline alarm must be pressed 9 or 10 times. The instructions for each specific model specify the exact number of times.
- The ignition is turned on and several beeps are heard.
- Another use of the Valet button before the signals are heard in the form of sound.
- Next comes button 1. After pressing it, wait for a sound signal, then confirm the action with resetting the settings.
- When the work is completed, the ignition is turned on again, with the turn signals blinking 5 times. The alarm panel is being rebuilt.
Disassembling the key fob and turning off the display
To diagnose and replace the key fob screen, you will need to disassemble the product:
- Open the back cover and remove the battery from the socket.
- Using a tool screwdriver, unscrew the small cross-head screw.
- Separate the housing halves, which are held in place by additional plastic latches. The parts are separated with a flat plastic spatula, which does not damage the surface of the housing of the Starline 91 alarm control panel.
- Remove 2 printed circuit boards with an installed LCD screen and a soldered antenna plug from the bottom of the case. Remove the rubber plate with the symbols of the buttons; if there are tears on the part, it is recommended to replace the element.
- Separate the top board together with the antenna, which is attached to the bottom using metal plugs.
The display is held on the printed plate by a cable and additional adhesive points. A screwdriver or tweezers are slipped under the glass panel, and then the glued assembly is separated. Then the owner carefully separates the cable from the contacts on the printed circuit board, and the parts are connected with a layer of special glue.