Almost every owner of an old car, domestic or foreign, prefers to repair it on their own. Including rebuilding the engine. In this regard, quite often it is necessary to grind valves in home-garage conditions. And many people ask a logical question about why this procedure is required and how to properly grind the valves.
We also recommend reading the article on how to replace oil seals (valve seals) yourself. From this article you will learn about available methods for replacing valve seals, as well as how to change valve stem seals with your own hands.
A little materiel
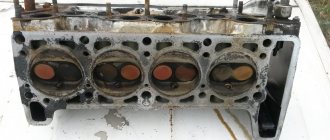
For those who are not in the know, it is worth explaining that the valves are located in the cylinder head. There are at least two valves for each cylinder (in most cars). One valve allows the fuel-air mixture to enter the cylinder (combustion chamber) from the intake manifold, and the other releases exhaust gases into the exhaust manifold.
Of course, the valves open one by one. The valves look like a nail. The head, which is also called a plate, is facing the inside of the cylinder. In the closed state, the valve head is in the seat and hermetically closes the combustion chamber, pressing the working chamfer against the seat.
We also recommend reading the article about the timing device. From this article you will learn about the purpose, operating principles and other features of the engine gas distribution mechanism.
We take a screwdriver in our hands
Since not everyone has the required amount of free time, patience and perseverance, folk craftsmen introduced another method using a screwdriver.
A drill is also often recommended, but its chuck has a significantly higher rotation speed, which may not have the best effect on the final result. So if you still decide on a drill, then you need to take a tool with the ability to adjust the speed and the reverse function. In this case, the valves can be ground in either through the combustion chambers or simply from above.
Why grind valves?
During operation, carbon deposits form on the valve plates, as well as on the seats. It prevents the intake and exhaust valve from sealing tightly. This is very important for normal engine operation. After all, after the fuel-air mixture has been drawn into the combustion chamber during the intake stroke, the piston compresses it, rising to its top dead center. The inlet and outlet valves must be closed. The stronger the compression ratio, the more efficient and economical the engine will be. Of course, if the intake valve is not seated tightly in the seat, maximum compression and efficient combustion of the mixture will no longer occur, with all the ensuing consequences.
As for the loose fit of the exhaust valve, in this case there will be not only a violation of the tightness during the compression stroke, but also a breakthrough of expanding gases from the combustion chamber after the charge is ignited. Hot gases melt the exhaust valve, the engine loses power, since some of the gases do not push the piston, but fly out into the exhaust. Such consequences are the answer to the question of what will happen if the valves are not ground in.
However, in order to correct the situation, there are no particular difficulties. More time and effort have to be spent on removing the cylinder head and the valves themselves. In addition, there is a high probability of not having to grind each of them.
Cylinder head grinding price
In many ways, the cost of such a procedure will depend on the chosen method and brand of engine. It is worth remembering that the more expensive the car and the larger the engine, the more expensive the procedure will be.
On a special machine, such a procedure will cost from 800 rubles per cylinder, manual work will be cheaper, about 500 rubles per cylinder. But it is worth remembering that if the work is not carried out by a professional, then when manually grinding the cylinder head, mistakes may be made. After a while you will need to repeat the procedure again.
Video of cylinder head grinding:
How to determine that a valve needs to be ground in
Typically, valves are ground in after an engine overhaul. Or, for example, after replacing the piston rings. So as not to take it apart a second time. The need for the procedure is checked on the removed cylinder head. It is installed on a flat surface with the valve plates facing up. Then kerosene is poured into the combustion chambers, and if there is none, then gasoline will do. The level is noted, after which the cylinder head is left in this position for twelve hours.
If the liquid has not left during this time, then everything is in order. If he leaves, it means that there is work to be done. To determine which of the two valves in the cylinder is leaking, the presence of moisture in the exhaust or intake manifold is a good help. You can check it in another way. The principle will be the same, but the difference is that the liquid (gasoline or kerosene) is poured into the collectors. The head stands on its side. Naturally, the leak is assessed from the side of the plates.
Preparation for sanding
For self-grinding, we will first need a set of feeler gauges and a metal ruler, with its help we will determine how strongly the cylinder head is bent and the degree of its unevenness. This is more of a method by eye, since only visually you can understand where and how much it costs to grind.
In addition to such unevenness, there may also be cracks and similar defects. This indicates that the engine overheated well and detonated. To identify such cracks, it is worth painting the cylinder head with slow-drying paint and wiping it off after a few minutes. Where the paint remains there will be a crack. It is advisable to use bright colors of paint. Unfortunately, only large cracks can be seen, but microcracks can only be seen with the help of special instruments.
In any case, no matter how bent the cylinder head is, the first thing you need to do before starting grinding is to check for both large and micro cracks.
Valve lapping
In order to grind the valves to the head at home, you will need a drill (preferably with reverse) and a special paste. To carry out this procedure, the valves will have to be dried out and removed. By the way, at the same time you can replace the valve stem seals, if necessary.
- Before work, it is recommended to degrease the valve and seat using a solvent. A small amount of lapping paste is evenly applied to the valve working face. It is very important to ensure that it does not get on the valve stem, because the paste is a strong abrasive (usually diamond). If damage remains on the rod, the oil seals will fail much faster and oil consumption will increase significantly. To prevent this, you can put a piece of felt on the rod.
The valve is installed in its place, and the rod is secured in the drill chuck. Most often, for convenience, this is done using a piece of hose (one end to the rod, the other to the cartridge). Some craftsmen clamp the rod directly into the chuck. Grinding is carried out by rotating at low speeds. In this case, the plate may be pressed against the saddle by something. For example, a thick elastic band. But in most cases they do without additional devices.
- Pressing occurs when the drill is pulled towards you. Rotation must be done both clockwise and in the opposite direction. Usually everything takes no more than two minutes. To understand that the process is complete, you need to know what a ground-in valve looks like. A characteristic matte strip a couple of millimeters wide is formed on its chamfer. By the way, exactly the same strip will be on the chamfer of the saddle. Sometimes after the described procedure, finishing treatment is carried out. It is no different from the lapping process, except that instead of lapping paste, GOI paste diluted with engine oil is used. Before applying, use a cloth to carefully remove the previous rubbing agent.
- You need to check the quality of the grinding not only using the strip mentioned above, but also by pouring kerosene or gasoline into the combustion chamber or into the collectors. Before assembling the cylinder head, all parts must be thoroughly washed with gasoline. After all, if during the work process the abrasive from the paste gets onto other surfaces, then the consequences can be very sad - diamond powder will cause defects.
You should also know in what cases valve lapping may not work. In the case where there are significant flaws (sinks) on the working chamfers or when the seats have been crookedly bored (cut), it will not be possible to grind the valves. The first sure sign of this is that the matte strip on the chamfer is uneven or completely intermittent. The solution here is simple, although not entirely pleasant - buying new parts. Although, you can try and sharpen them on a machine.
Nuances worth knowing about
To an experienced repairman, the tips below may seem unnecessary, but a novice repairman should definitely remember the following:
- It is better not to remove all rockers (cams on the valves) right away. It is necessary that each valve gets its own rocker back. While the engine is running, the camshaft cam and the corresponding rocker grind in and if they are “separated”, unpleasant clicks may appear when the valves operate, despite the fact that they have been properly adjusted before.
- And you also need to understand that each valve must return to its place. Changing them even after grinding in would not be the best idea.
- You can use various abrasive pastes in your work. You can start with the largest and end with the smallest. This will improve the results obtained.
- For a better fit, it is sometimes suggested to use machine oil at the finishing stage.
Valve grinding is carried out using various abrasive pastes
What lapping paste to use
Our grandfathers made their own rubbing agent. They collected dust under sandpaper with a diamond wheel, and then mixed it with oil. Today, thanks to the progress and development of trade, motorists have a decent selection in specialized stores. Therefore, for beginners, a logical question arises about how to grind the valves, what paste. There is no talk about price. Here everyone chooses at their own discretion and in accordance with their capabilities. It is much more important to decide on the grain size and composition.
An inexperienced car enthusiast should not use coarse pastes. An error in operation can lead to significant defects in the chamfers of the valve and seat, which will entail additional costs. For this reason, it is better to use medium-grained pastes for basic work and fine-grained ones for grinding.
Very often, two tubes are included in the kit, which makes the task easier for the buyer. In stores you often find FABO paste in stylized (valve-shaped) packaging. By the way, the name is an abbreviation and stands for Finishing Anti-Friction Non-Abrasive Treatment. This paste should be used as a finishing paste after the valve has been ground in using “Classic” or “Diamond” pastes, sold in the same packaging.
In addition to the above-mentioned paste, ABRO Grinding Paste GP-201 is on sale. In this case, there will be two options in one package: coarse-grained and fine-grained. It costs much less than FABO. In addition, this paste is suitable for removing rust from any metal surface, as well as for straightening cutting tools. In a word, this paste is multifunctional. You can get medium and fine paste in one package by purchasing Done Deal. The basis here is silicon carbide powder. It is also a universal product that will come in handy around the house. And if there is a possibility and need to work with chrome surfaces, then you should pay attention to PERMATEX paste. In any case, before purchasing, it is recommended to carefully study the instructions and only then make a choice.
Now let's answer the question of what to do when there is no pasta. Sometimes there are situations when you need to grind the valves if there is no paste. Well, in this case you will have to remember the old-fashioned methods, as already mentioned above, or diversify them a little. So, if there is no dust from the diamond wheel, then you will need the finest sandpaper. You need to remove the abrasive from it and mix it with motor oil or grease. GOI paste mixed with the same lubricants is used as a finishing paste. Of course, the quality of processing with such means will be much lower. Especially when there is no relevant experience.
Checking the quality of work performed
You can check how tightly the valves fit, as mentioned at the beginning, using kerosene. This is the most common method. The valves are assembled, springs are installed on them, then the head block is turned over so that the combustion chambers face up. After this, the cylinder head, where the ground-in valves need to be checked, is filled with kerosene. If after 10–15 minutes no leaks have occurred, then you can proceed to grinding in the next “clients”.
Using a vacuum tester will be no less reliable. The device is connected to the holes on the side of the intake and exhaust manifolds. If the pressure gauge readings are lower than required, it means that the seal of the valves is insufficient and you need to repeat their grinding.
There is also a method using a pencil. To do this, lines are drawn on the working edge of the valve seat along the entire circumference. The next step is to install the valve in its place, press it and turn it clockwise a couple of times and back. After this, we take out the valve and look at the marks made with a pencil. Everything is fine if the lines have disappeared and the surface has been painted over evenly. If there are any irregularities, grinding should be continued.
Visual comparison of lapped and unlapped valves
A short digression about lapping pastes
No matter how you grind the valves, you still need to understand that the car’s engine will still “bring them in.” You can spend a lot of time and effort achieving the ideal result, and after starting the engine (after a few hours), the tightness of the valves will become worse. Or you can do everything casually and quickly, and after a while the tightness of the valves will only improve.
As a result, it turns out that the engine has worked the valves to a certain “comfortable” state. As a result, there is an opinion that fiddling with different pastes and other finishing touches to achieve the ideal result is nothing more than a waste of time.
Timely and correctly performed valve grinding will ensure smooth and precise operation of the engine. During a major overhaul, this procedure is one of the mandatory ones. The task is not particularly difficult, in addition, you can always seek advice from more experienced comrades or masters.
Almost every owner of an old car, domestic or foreign, prefers to repair it on their own. Including rebuilding the engine. In this regard, quite often it is necessary to grind valves in home-garage conditions. And many people ask a logical question about why this procedure is required and how to properly grind the valves.
Read in this article
Cone for removing excavation
This tool is used to restore valve seats. To determine whether you need to use a roller cutter or can do without it, you should inspect the saddles. They can be covered with soot and shells, but if the chamfers have the correct conical shape, you can immediately proceed to lapping; otherwise, if the chamfers are rounded or have steps on them, you will need to give them the correct shape using a cutter.
Article on the topic: Econostat: a technological breakthrough in the efficiency of automobile engines
Since the shapes and sizes of the seats on different heads are different (for example, for the VAZ-2106 and VAZ-2109), you need to select the appropriate tool. Seats can be processed manually or, to save time, using a drill. To do this, the cutter is fixed in the chuck, like a regular drill, and under its influence the surface layer of metal is removed. The signal to stop removing the excavation is the appearance of a shiny, even circle, the shape corresponding to the valve plate.
In the video you can see how the saddles are processed with a rolling cutter.
Let's sum it up
So, as can be seen from all of the above, lapping is a responsible, labor-intensive procedure, but extremely necessary for good engine operation, not only after repair, but also after a mileage of over 60,000 kilometers. The only question that remains unclear is whether it is necessary to grind the valves on the new head.
Regarding this case, there are two options: if the head is completely new and was purchased fully equipped, then you don’t have to grind it in. In any case, experts say that this is not necessary. However, if the head was purchased separately from the valves, then grinding will be necessary. Again, in any case, before installing it, the tightness of the fit of the plates can always be checked in a well-known way, that is, by pouring gasoline or kerosene into the cylinder head or manifolds.
