Whether you like it or not, using Renault Logan on our roads will sooner or later lead you to the need to replace the ball joints on your car. Moreover, the more aggressive the driving style and the worse the quality of the roads, the faster this moment comes. “I went to a car service center and changed it, that’s it!” – perhaps, you will say, and you will be right in your own way. However, in this seemingly simple matter of replacement, there are several important nuances that you should know about in order to insure yourself against troubles and unreasonable costs. But let's talk about everything in order.
Purpose and design of Renault Logan ball joints
As the name itself suggests, a ball joint provides the steered wheel with a fulcrum and the ability to rotate it in a horizontal plane. Since the front suspension of Renault Logan, like most modern cars, is independent, the suspension arms are connected to the front wheel hubs by means of ball joints and steering knuckles (picture below).
Connection of the front suspension arm and steering knuckle Renault Logan
A ball joint is essentially a joint that consists of 4 main components:
- Solid forged body.
- Ball pin made of special grade steel. This allows you to achieve maximum strength of the product.
- Ball pin insert made of a special polymer material that reduces friction and wear of the contacting surfaces of the joint.
- Protective casing (boot) made of special elastic and temperature-resistant rubber.
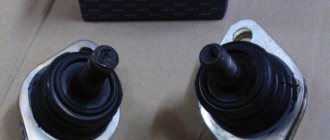
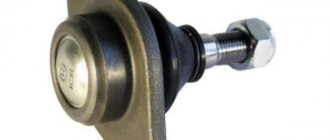
This is what the assembled Renault Logan ball joint looks like
When assembled, the ball joint is pressed into the hole in the suspension arm and is additionally secured with a retaining ring. The finger is fixed in the steering knuckle.
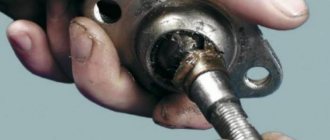
Fastening the Renault Logan ball joint in the steering knuckle
Removing the ball
So, you are convinced that the support has come to an end, and now you should change it. By the way, this is done not only in the event of a malfunction of this structural element. When repairing the hub, you will also have to remove the ball joint, otherwise it will not be possible to dismantle the steering knuckle. Before starting work, you need to treat the nut with penetrating lubricant. This will make disassembly much easier. We prepare the car. They put it on the handbrake and install wheel chocks. The car is jacked up and measures are taken to prevent it from falling. Remove the wheel.
How to understand that the time for replacement has come: diagnostics
- if, while driving on an uneven road at low speed, a knocking sound is heard in the area of the front wheels;
- if you hear a creaking sound from the front of the car when turning the steering wheel;
- if the car moves unstably along a straight path.
- When inspecting the front wheels, uneven tire wear was discovered;
- if you grab the suspended front wheel from above and below, and then swing it in a vertical plane, you will feel a play, confirming the presence of a gap in the hinge;
- During an external inspection of the ball joint itself, cracks or ruptures of the boot were found, which means the service life has expired.
Indirect signs indicating possible wear of the ball are detected mechanical damage, deformation or failure of other components of the Renault Logan front suspension. This is especially true for checking levers, steering tips, stabilizer bars, as well as silent blocks, rubber seals, bushings, and anthers.
If the part is damaged, the balls must be replaced
On the one hand, if you lose sight of this, you will only speed up the “death” of the joint, and on the other hand, the presence of extraneous noise in the front suspension that is not related to the ball joint may push you to replace a still quite “healthy” part.
Another indirect indicator of the degree of ball wear is the total mileage of the car. Despite the fact that its declared safety margin is always more than 100 thousand km, we need to make allowances for our reality and boldly divide this figure by two. Thus, the answer to the question of how long the part lasts is: around 50 thousand mileage you need to be ready to change the ball joints.
Restoration of support
There are 2 malfunctions of this design element. Most often, the lubricant present in the housing is used up. In this case, you can easily restore the functionality of the ball joint. For this, a special syringe is used, with its help a new portion of lubricant is added to the body.
Graphite lubricant is best suited for this, but you can use another one with similar performance. But, do not forget that the service life of the restored part is somewhat shorter. If there is a lot of wear, then this method will not help. The part will have to be replaced.
Conclusion
. Domestic roads are not conducive to long suspension life. Therefore, the chassis has to be repaired quite often. Because of this, the question often arises of how to remove a ball joint without a puller. It's actually quite simple. This doesn't require a lot of effort. The tools used are a pry bar and a hammer. Removing the ball without a special tool does not negatively affect the suspension.
Tools for work
While working we used some tool:
- hammer,
- 2 open-end wrenches, sizes “18” and “16”,
- socket wrench "30"
- flat screwdriver.
A puller would be a good help, but not everyone has one in stock.
An example of a homemade puller
Replacement for VAZ 2109, 2110, 2114
Next, let's look at how to replace the ball joint on more modern models - VAZ 2109, 2110, 2114.
Structurally, the suspension in them is similar, and its design uses only one support - on the lower arm.
To carry out the operation you will need:
- Open-end and spanner wrenches (required for 13, 14, 17, 19);
- Puller for supports;
- Mount;
- Hammer;
- WD-40.
The sequence of work is as follows:
The car is placed in the garage, on the side on which this element will be changed, it is jacked up and the wheel is removed. For ease of access, you can turn the steering wheel in the desired direction.
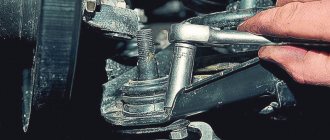
Use an open-end wrench to unscrew the pin nut. You should also immediately unscrew the bolts securing the support to the lever.
Use a puller to press out the finger.
Then use a pry bar to press the lever down to release the pin and remove the support.
The new support is put in place and everything is put back together.
If there is no puller, then the finger can be pressed out. To do this, a pry bar is installed between the hub and the lever and a force is created to push the lever down.
In this case, at the end of the lever, where the mounting hole for the finger is made, sharp blows are applied with a hammer until the finger comes out.
As stated earlier, before installing a new element, it is recommended to put grease in the boot, as well as lubricate the bolts and nuts.
How to replace: step-by-step guide
The process of replacing ball joints occurs with the front wheels of the car suspended. It is most convenient to perform this work on a lift in a car repair shop.
There are two main ways to replace a ball joint:
- Replacement of the front suspension arm assembly,
- Replace only the damaged ball joint.
If the front suspension arms of your car are not damaged, and the rubber bushings and silent blocks do not need to be replaced, and besides, you have no desire to overpay, you can absolutely safely change only the ball joints. Therefore, we will further consider the second option.
- After we have removed the front wheel from the side we need, we remove the caliper.
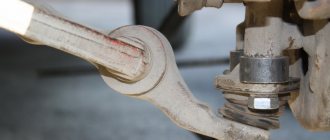
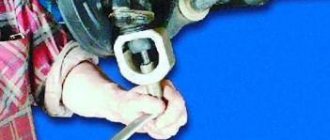
Pressing out the ball joint
It should be noted that if you nevertheless find any defects or damage on the front suspension arm itself, then it is necessary to replace it along with the ball joint.
How to change ball joints on a Renault Logan: video
I would like to draw your attention to one more thing. After replacing the ball joints, make sure that the tabs on the lock washer, which fits onto the ball joint nut and are bent onto the knuckle, are bent. If this is not done, then over time the nut may unscrew, and this is fraught with the risk that the ball pin may pop out during operation of the car. And at the most inopportune moment. We need to keep an eye on this.
Replacing the ball joint (with removing the lever) is the most convenient way to replace an obsolete part. Although at first glance the repair process does not present any particular difficulties, it has a number of nuances that, if not followed, can lead to loss of control and an accident. Let's look at how to replace a ball joint from a dismantled lever with your own hands.
Signs of a bad ball joint
The ball joint is a mandatory element of any suspension. It connects the wheel hub to the support arm. The part is a finger installed in a metal housing. Inside there is a lubricant that ensures a long life for the moving mechanisms, and outside the entire structure is protected by a rubber boot.
It is this that is the weak point of the part. It protects internal elements from dust and moisture, but if it breaks and substances penetrate inside the structure, replacement is inevitable. Such a ball will last no more than 2-3 thousand km.
The service life of the ball joint is individual for each vehicle. But on average this figure ranges from 60 to 90 thousand km. Even if the suspension does not make suspicious sounds and the boots are in order, it is better not to push your luck, but to replace the part according to the service life of your car. The ball joint ensures safe driving. If it jams or flies out of its seat, the wheel will turn to the side, regardless of the position of the steering wheel. Therefore, do not neglect precautions.
A part may fail before the time specified by the manufacturer. This will be due to an unpleasant sound when turning the wheel and overcoming bumps in the road. But since many suspension parts produce characteristic sounds in similar situations, you should make sure that the problem lies in the ball joint.
To do this, remove the wheel and install a pipe or pry bar between the steering knuckle and the suspension arm. Try applying light pressure on the lever. If you notice play, the support is faulty. Check the boot. If there is even minor damage or traces of grease on it, replacing the ball joint is inevitable.
Useful tips
As practice shows, restoring ball joints and other suspension components using the methods discussed above is a solution that should be used only in extreme cases.
In other words, it is necessary to restore balls or ends only when, for one reason or another, it is not possible to immediately replace the faulty part with a new one.
However, in this case, the opportunity to save money through repairs is not a plus. It doesn’t matter which car has problems (the ball parts of a premium car require replacement or the ball parts of a VAZ 2107 have failed), it is better to immediately look towards new original parts or high-quality analogues.
We also recommend reading the article about what a silent block is in a car suspension. From this article you will learn about the design and purpose of silent blocks, the main symptoms of their malfunctions and the replacement of these parts if necessary.
The reason is that any repair is initially working with a faulty part and there is no warranty. It is also necessary to separately take into account that ball joints experience heavy loads, and safety on the road directly depends on their structural condition.
It is quite logical that no repair can completely restore the performance and reliability of a part compared to a new unit of the same quality.
Symptoms and causes of element wear
While driving, a worn ball joint manifests itself as follows:
- overcoming small bumps at medium or high speed, you will hear a dull knocking sound coming from the front suspension;
- with average wear, a knock may be heard on the steering wheel;
- In heavily worn bearings, the ball begins to wedge, causing a creaking sound when turning the steering wheel.
If you find one of these signs, you should contact a service station for diagnostics or check the functionality of the parts yourself and without a lift. The service life of ball joints on cars made in Russia, China and Korea is in the range of 20-50 thousand km. Higher quality parts of European and Japanese foreign cars can last up to 150 thousand kilometers. It is necessary to focus on these intervals when troubleshooting .
Contrary to popular belief, the behavior of a car with worn joints when driving on a flat road changes little. The deviation from a straight line and the lateral abrasion of the rubber are so small that an inexperienced driver will not notice the changes, unless the ball joint becomes completely loose. A clear sign is a distinct knocking sound.
Accelerated wear of joints occurs for the following reasons:
- Driving fast on bad roads. Due to constant shock loads and vibration, the plastic bushings of the elements break and the ball pin begins to dangle.
- Cracks and breakthroughs of anthers. Through them, road dirt gets between the rubbing parts - the ball and the plastic bushing. The latter is inferior in hardness to metal, so it wears out faster.
- Constant overload of the vehicle, causing the supports to experience increased load.
Torn boots are one of the main reasons for premature failure of ball joints. You will maximize their service life if you notice defects in the protective covers in time and replace them.
The role of support in the suspension and the consequences of failure
The part is a ball pin with a thread at the end, enclosed inside a metal housing. So that it can rotate, a sleeve made of hard plastic (usually fluoroplastic) is installed between the ball and the body. The pin is screwed with a nut to the steering knuckle of the wheel hub, and the part itself is bolted to the suspension arm. To prevent dirt from getting inside the hinge, it is protected on the open side with a rubber or silicone boot.
Note: in some car models, the ball joints are integral with the levers and are also replaced together.
The task of the element is to provide a hinged attachment of the hub to the lever so that it can rotate . That is, the support bears the load from the weight of the car, impacts from the wheel and the impact of friction when turning. Now it becomes clear what the risk of malfunctioning this important part is. First of all, the plastic sleeve wears out, causing the ball to begin to dangle inside the body. If measures are not taken, then on a strong bump the ball pin will pop out of the body, and the wheel will come off along with the hub.
Despite the fact that after separation the ball hub is held on a stand or on a second lever, the wheel becomes uncontrollable. The consequences are unpredictable and depend on the speed of movement at the time of the breakdown. That is why it is important to monitor the condition of these elements and respond in a timely manner to extraneous sounds coming from the chassis. If the first signs of a malfunction of the ball joint appear, it is advisable to check it and clarify the diagnosis in order to replace it with a new one in time.
